As reported on the forum, Windows users encounter the following error message when trying to install a new operating system or upgrade the current OS.
The Windows could not prepare the computer to boot into the next phase of installation. To install Windows, restart the installation.
Noticeably, this error frequently happens to Windows 10 in UEFI BIOS mode, though the time this message shows up may vary. Sometimes, when users install the OS from a bootable USB drive, everything goes perfectly fine till the literal finish of the last installation. In other cases, users find it unable to copy the Windows installer in the first place.
To continue and complete the installation, you have to fix this error. Luckily, this post gathers all possible causes and working solutions on how to solve Windows could not prepare the computer to boot in Windows 11/10/7.
Want to clean reinstall Windows 10? Get the installer from: Download Windows 10 ISO
Why cannot install Windows
Why can't your Windows prepare the computer to boot into the next phase of installation? Based on user reports and feedback, below are some possible reasons that trigger your Windows to fail the installation.
Too many extra devices are connected during the installation process. This is verified to result in some BIOS versions malfunctioning. By removing non-essential hardware, the BIOS firmware is able to perform the start-up procedure as usual.
The installation media is not properly set up. Given that many users resort to an external bootable USB drive to install the new OS, it's proven valid that improperly created installation media will cause the Windows could not prepare the computer to boot issue.
BIOS-related issues. BIOS is the firmware that checks your system devices and loads the operating system. It plays a vital role in the Windows boot up procedure. The following three issues can all cause the Windows could not prepare the computer to boot issue.
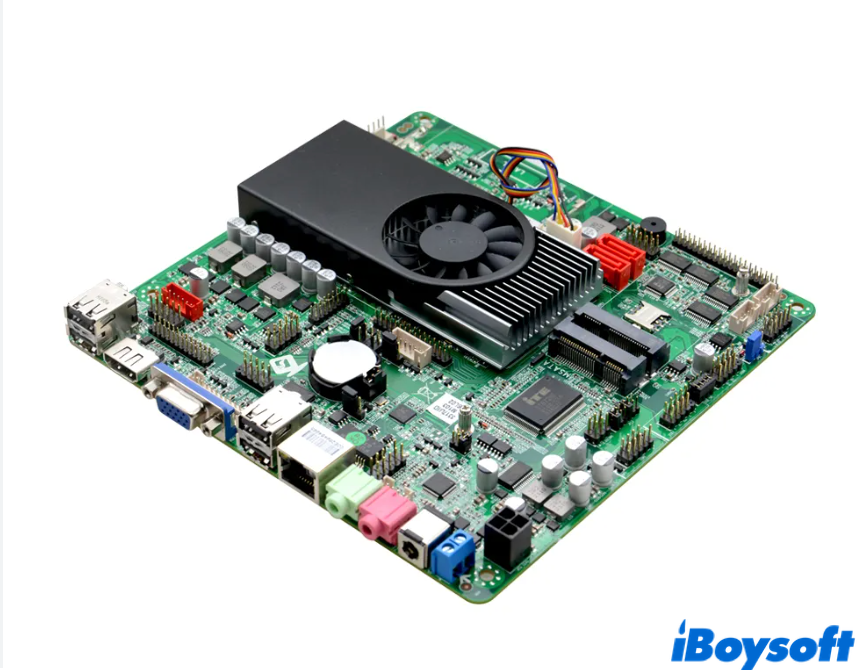
- Incompatible BIOS version that fails to work with certain installers. This issue mainly happens to computers with smaller motherboards, say, mini PCs. The BIOS version that these smaller motherboards feature does not support Windows 7 and earlier.
- Outdated BIOS versions. An outdated BIOS is likely to cause compatibility and security issues between the OS and your hardware.
- Misconfigured BIOS settings. Due to a failed BIOS upgrade, virus infection, or file corruption, the improperly configured BIOS is unable to boot up your PC.
Corrupted setup files or software. If the system files in your operating system are corrupted, consequently, your PC can't install a complete and safe operating system and shows the Windows could not prepare the computer to boot error.
Fixes: Windows could not prepare the computer to boot
You'll find multiple methods to troubleshoot the Windows could not prepare the computer to boot issue, ranging from the hardware level to software fixes. Try them one by one to fix the installation error in Windows 11/10/7.
Additionally, you can initiate a clean installation to resolve the issue. Here's the ISO file you may need for a clean install:
Download Windows 10 Home ISO
Download Windows 10 Pro ISO
Unplug non-essential hardware equipment
Based on user experience, the installation error message shows up when a lot of external devices connected to the computer. Heavy-loaded hardware is likely to trigger a bugged BIOS and therefore makes OS installation unsuccessful. In this case, removing all extra peripherals is proven to be the most helpful method.
By disconnecting all unnecessary devices, including external USB drives, USB adapters, SD cards, extra HDDs or SSDs, CDs, and any other peripherals that are not needed for the installation, your computer is able to run with minimum hardware. Now, restart your computer and go over the installation process again. Hopefully, you won't see the Windows could not prepare the computer to boot error again.
Is it working? Share this method with more people!
Fix outdated, incompatible, and improperly configured BIOS
Given the status of your BIOS, there are multiple approaches to fix this firmware-related error and help you get rid of the Windows installation failure.
Check BIOS compatibility
Due to the smaller size of the motherboard, it's reported a lot that many recent mini PCs are only able to carry out Windows 8.1 or later. To verify whether your BIOS supports the OS you want to install, call the manufacturers or search for online help on their official websites.
If there's a compatibility issue between the BIOS and the OS, or the BIOS is improperly set up, follow the method below to upgrade BIOS on Windows 11.
Upgrade outdated BIOS versions
BIOS is not a one-for-all program. You should find the correct BIOS version that's compatible with your PC model and specific system. Here, we'll take Windows PC for example, and show you how to update BIOS on Windows 11 to the latest version.
Step 1. Verify the current BIOS version.
- Press Windows + R key shortcuts together. In the prompt window, type in msinfo32 and hit the return key.
- In the System Information window, scroll down to find the BIOS Version/Date section.
- Copy and save the information in another location.
Step 2. Find the serial number of your PC
- In the Start menu, type in cmd to open the Command Prompt. Please select the first option, Open.
- Enter the following command prompts and press Enter.
- wmic baseboard, get product, manufacturer, version, serial number,
- Similarly, note down the serial number.
Step 3. Download and update to the corresponding BIOS version
As mentioned earlier, the BIOS version varies from PC to PC. Therefore, you should first go to the official support center of your computer, say, Asus, HP, and Lenovo. Then search for your motherboard's model and choose the current OS. After that, find the latest BIOS version of your computer and download it for use.
When finish the BIOS update process, restart your Windows. Hopefully, you won't see the Windows could not prepare the computer to boot error again.
Please share this article with more people!
Configure installation media properly
A misconfigured installation media, say, a bootable USB, can trigger various issues during the installation process, including the Windows could not prepare the computer to boot error. To avoid this situation, the easiest way is to reset your installation file on another new device.
Luckily, we have a delicate guide on how to free install Windows from a bootable USB that includes the configuration process. You may refer to the article below for detailed tutorials.

How to Free Install the Windows from USB?(with Pictures)
This article is going to tell you how to free install a new Windows system (for example, Windows 10) with a bootable external USB drive. Also, it shares problems that may show up during the whole installation process, and how to deal with them. Read more >>
Set up correct partition style based on the BIOS mode
In general, there are two BIOS modes, Legacy BIOS and UEFI BIOS. Since different BIOS mode works the most with particular drive partition style, for example, GPT for UEFI BIOS and MBR for Legacy BIOS, it's advised to set up a correct partition style on your installation media before starting the installation process.
Step 1. Boot up your Windows via the installation media.
Step 2. When you enter the setup window, press Shift + F10 keys to enter the Command Prompt panel.
Step 3. Enter the following commands by order. Hit Enter after each command line.
diskpart
list disk
select disk X
Note: Replace X with the actual number of your bootable drive.
list volume
select volume X
Note: Replace X with the volume that contains the OS file.
delete volume
convert gpt
Note: Only do this when the partition style is MBR. Also, converting the partition style will wipe out the entire drive.
create partition primary size=100
Note: This command aims to create a system volume.
create partition primary
Note: This command aims to create a boot up partition.
list partition
select partition X
Note: Replace X with the number assigned to your system volume.
active
list volume
select volume X
Note: Replace X with the volume where you want to install the Windows OS.
assign letter=C
format quick
Wait for the format process to be done. Then type in exit to quit Command Prompt.
Step 4. Go back to the setup window to continue the installation process. This time, the Windows could not prepare the computer to boot error should not occur.
Delete all partitions in the installation media
If you still get the error prompt after trying all means of solutions, deleting all partitions might be your last resort, though it will erase all your data for sure. Therefore, it's strongly suggested to create a Windows System Image backup in case of unexpected data loss. Then you can proceed with the following steps.
Step 1. Boot up your computer with the installation media by force.
Step 2. In the Windows setup screen, choose every current partition on your installation device and click on the Delete button below.
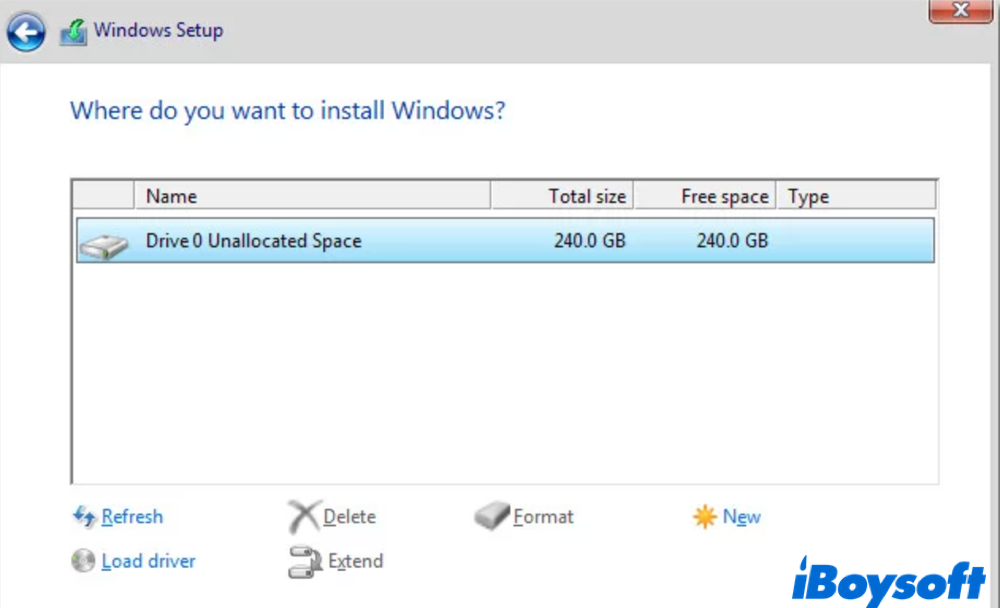
Step 3. Create new partitions from the unallocated space.
Step 4. Start over the Windows installation procedure as usual.
You should successfully fix the Windows could not prepare the computer to boot issue now.
Is this post helpful? Why not share it with others?
Conclusion
This post elaborates on how to fix the Windows could not prepare the computer to boot issue with all-rounded solutions. Removing all extra hardware peripherals is proven to be the most useful one in most cases. If it doesn't solve your issue, try other solutions in the post. Don't forget to leave a comment and share your thoughts with us!
FAQs about Windows could not prepare the computer to boot
- QHow to solve Windows could not prepare the computer to boot into the next phase of installation?
-
A
The most effective solution to solve the Windows could not prepare the computer to boot issue is to disconnect all unnecessary hardware connections. Keep only the essential ones and try to install Windows again.
- QHow do I fix my PC when Windows 10 won't boot after update?
-
A
One quick fix to solve the Windows 10 won't boot after update error is to perform System Restore in Safe Mode. Here’s how:
1. Start your computer and press F8 immediately to enter the Advanced Boot Options. Choose Safe Mode from the available options.
2. Search for System Restore and click on it from the list.
3. Follow the default restore option. Or, you can manually opt for another one. Select Finish to apply the operation.
4. Restart your Windows 10, it should boot up normally now.
- QWhy is Windows installation stuck on getting ready?
-
A
Corrupted Windows installation files are the major culprit that leads your Windows stuck on getting ready.