The USB port slow issue sounds familiar if you frequently transfer files from your Mac to Linux, Windows, or hard drives and vice versa. Generally, the slow USB port prolongs file transfers unlimitedly, which extremely delays the Mac's work procedure and drives the user nuts.
Luckily, this post covers various slow USB port issues and provides related solutions to get file transfer working normally. Let's get started!
Why is my USB port slow when transferring files?
The USB port being slow is not an odd thing that often jumps out when you transfer a bulk of files through the drive and computers. It takes hours to days to move the files from the source drive to the destination.
Although the draggy transfer process comes up in the form of a slow USB port, there are sorts of culprits that can be blamed for this issue:
- A problematic USB port lowers the speed, including reading and writing data speed.
- Spotlight Search index trouble leads to the USB port slow problems, for it spends too much time indexing the files on the connected drive and Mac drive.
- The incompatible file system of the external drive slows down Mac's speed in data reading and writing, which misguides you to attribute it to the USB port running slow.
- The USB ports not working also has an impact on the transferring files speed, even you can find the transfer progress goes 0% after a long time.
- Some tiny errors like bad sectors in the USB drive set barriers for the USB port, for instance, the USB port works slowly.
Getting the final answers to the question "Why is my USB port slow", now we can concentrate on how to make the USB port normal so that file transfer proceeds smoothly.
Share this article to help more people fix the USB port running slow issue!
How to fix my USB port are slow problems on Mac?
Provided that more than one reason can result in a slow USB port, the final reasons must be various. You can try them from simple to professional until the trouble is fixed in the end.
Change the slow USB port to fit the fast USB drive
The transferring and reading speeds are determined by the USB port. When you insert a fast USB drive into the slow port, the speed goes down for sure.
For example, if you plug a USB 3.0 drive into a USB 2.0 port, the maximum transferring speed is limited to 480Mbps, which is 10 times slower than inserting it into a USB 3.0 port.
Therefore, dealing with the USB port works slowly when transferring files, trying a fast USB port is the first thing.
Check the USB port and cable on the Mac
Frankly speaking, the USB port not working is more like a software or cable issue, instead of the actual hardware failure.
Firstly, you can check if the port is bad by inserting your external drive into other ports of Mac, then test if its transfer speed is normal.
Or, check the cable condition. The easiest way is to switch to another cable, and then try the cable with the same drive to see if the cable works well. If it does, then there is a problem with your cable. If it doesn't, read on for mo solutions.
Disable the Spotlight Search for the USB drive
The Spotlight Search is a wonderful helper that shows every file, folder, app, extension, and package's location and launches it in seconds.
However, this feature may lead to the USB port's slow connection, especially when you get a bulk of files to index. In this scenario, you can stop the Spotlight Search index function on the external drive.
Here is how to stop the Spotlight Search function to improve the USB port read speed:
- Click the Apple menu and select System Preferences in the dropdown menu.
- Locate Spotlight and launch it in the home window.
- Choose the Privacy tab and hit the + button.
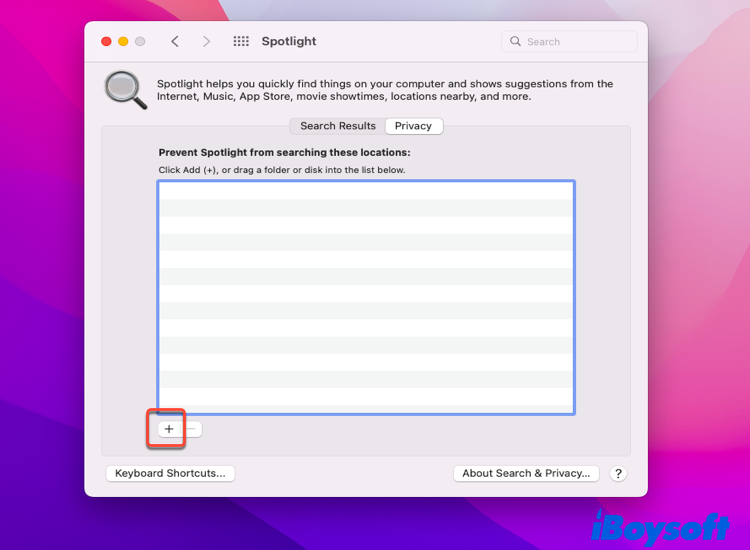
- Add the external drive that need not be searched.
Since the Spotlight stops the feature on the external drive, you can check if the USB works slow still. If it does, try the following additional approaches.
Convert the external drive's file system to APFS
The non-APFS file system drive obviously takes macOS more time to detect, mount, and recognize, which misleads you to ascribe it to the USB port running slow. Here, converting the drive's file system to APFS is worth a try.
Designed for Mac, APFS enables the Mac to read and transfer with fast and quick speed. So, if you want to apply your drive on a Mac, the APFS file system is an excellent choice.
Significantly, before converting the drive's file system, backing up all the data and files securely on the drive is a priority, because the converting operation is going to erase all data on the drive.
After completing the backup, you can convert the file system of the external drive.
- Connect your external drive to the Mac and launch Disk Utility then.
- Click the View tab in the main window and select the Show All Devices option.
- Select your external drive from the left bar of the Disk Utility window.
- Click the Erase button in the home window.
- Fill in your drive's name and select APFS in the Format box.
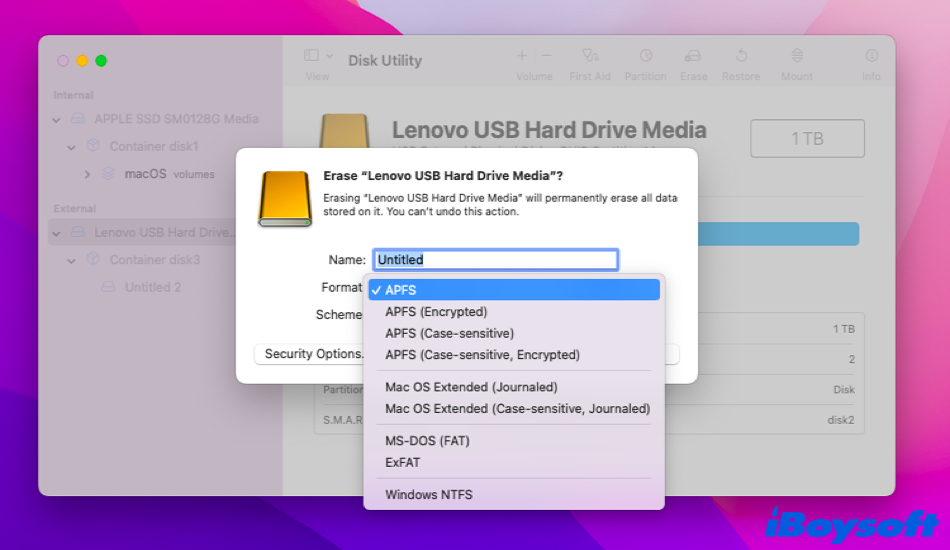
- Choose GUID Partition Map in the Scheme box, then hit the Erase button to confirm your actions.
- When the erasing operation ends, hit Done, and you will have an APFS-formatted drive.
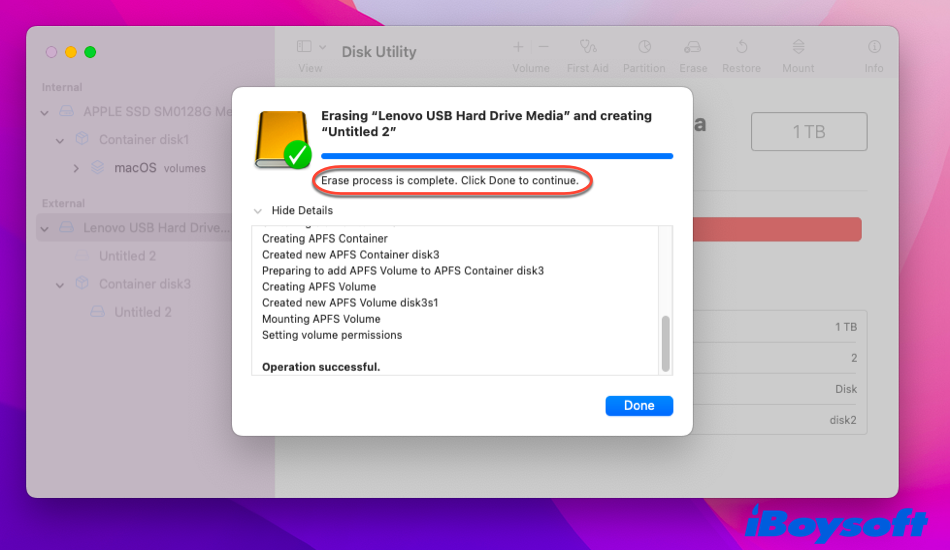
With the compatible APFS file system, Mac can recognize this external drive with fabulous speed, let alone transfer files and data. The USB port slow problems are readily solved then.
During the converting process, you may encounter the convert to APFS option is not available or greyed out problems. Don't worry, this problem can be fixed easily.
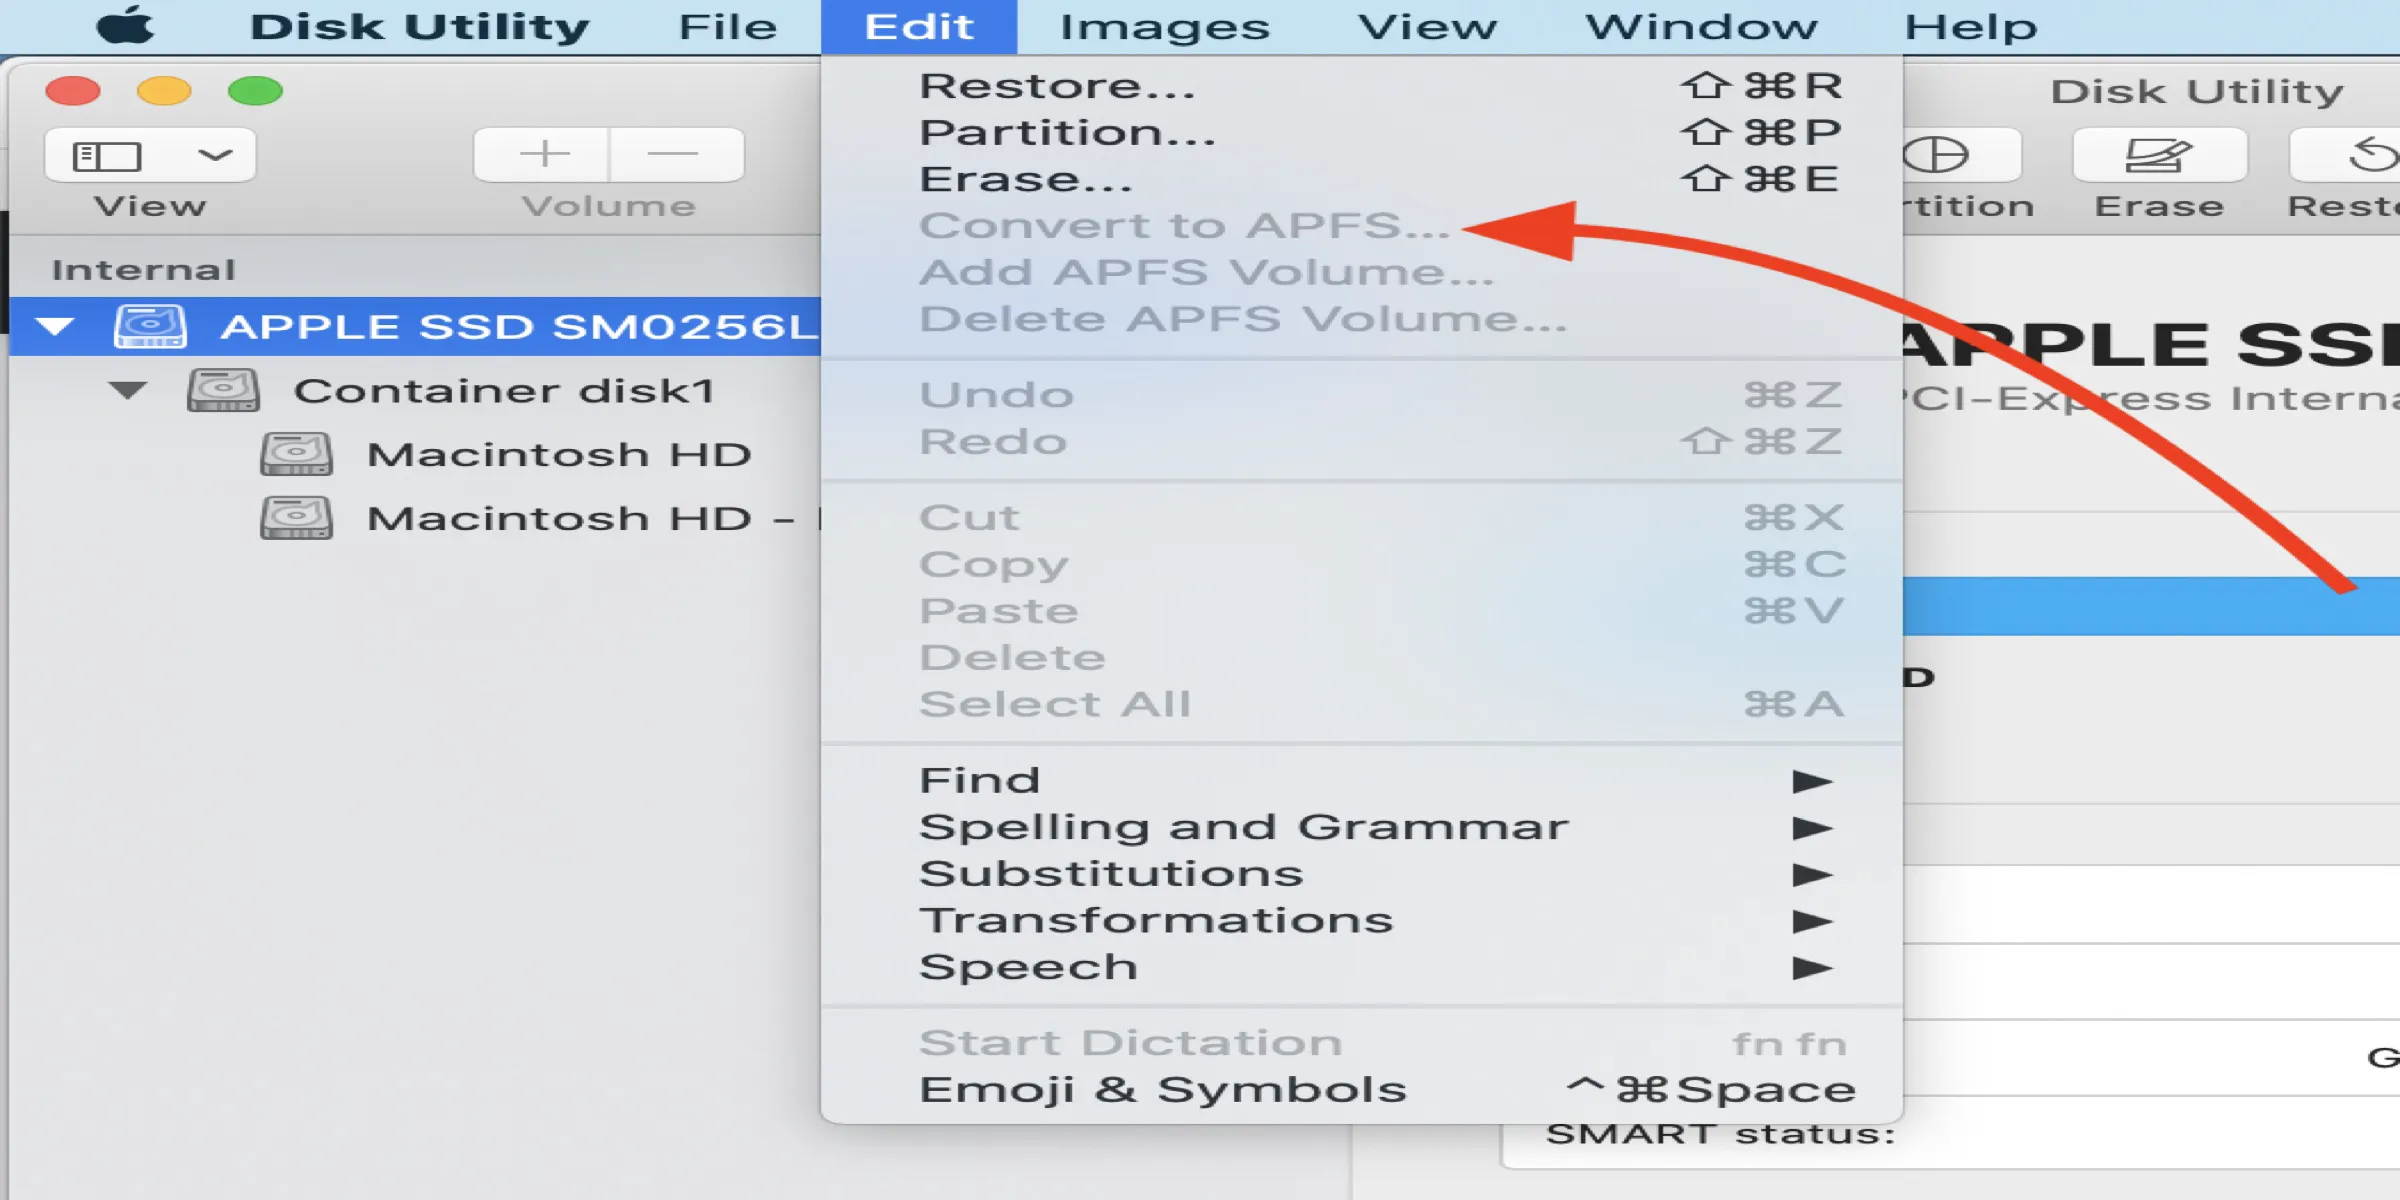
Convert to APFS Option is not Available or Greyed Out in macOS
Can't convert your HDD/SSD/USB drives to APFS on macOS because the Convert to APFS option is not available or is greyed out in Disk Utility? Read more >>
Clone the drive for file transfer via iBoysoft DiskGeeker
If you have enough of the slow file transfer, you can try iBoysoft DiskGeeker to clone the whole hard drive for file transfer in a fast and stable manner.
Before cloning, please prepare an empty drive, which should have a larger capacity than your corrupted drive or at least the same.
Running the clone function of iBoysoft DiskGeeker is easy, you can have an eye over it:
- Download iBoysoft DiskGeeker and install it on Mac.
- Insert your corrupted drive into your Mac device.
- Open iBoysoft DiskGeeker and select the source disk (the entire disk you want to back up files from) at the left sidebar of the iBoysoft DiskGeeker window.
- Click "Clone" from the right toolbar.
- Choose a destination drive from the pop-up list and click startClone. A prompt will warn you to make a backup of the destination disk because cloning the disk will overwrite all data on it. If you click OK, the clone starts.
The cloning process can't be terminated once it begins. If the process is terminated accidentally, the disk cloning will resume automatically when the two disks are connected to your Mac again.
Verdict
The USB port transferring slowly is usual when you perform some data transfer task, for example, moving Home Folder to an external hard drive. You can figure out the reasons that cause the USB port to run slow in this article, meanwhile, you can try the approaches provided to fix the tough problem.
Moreover, a versatile software iBoysoft DiskGeeker can help you clone the drive for complete file transfer without effort. If you're interested in it, try it now!
Share this article to help more people who encounter this problem!
FAQ about USB port slow problems on Mac
- QWhy is my USB port slow?
-
A
The USB port slow problems may be caused by kinds of factors, including inserting a fast USB drive to the slow USB port, unstable power supply in the USB port, or a faulty USB cable. All mentioned factors can lead to your USB port running slowly. Besides, the USB port slow connection also occurs when the external drive is corrupted, or your external drive's file system cannot be recognized by Mac.
- QCan I clone an external disk to the Mac startup disk with iBoysoft DiskGeeker?
-
A
No, you can't. By default, the disk clone will overwrite all data on the destination disk. But the startup disk contains the operating system and can't be overwritten. So, you can't take the Mac startup disk as the destination disk to clone an external disk to.
