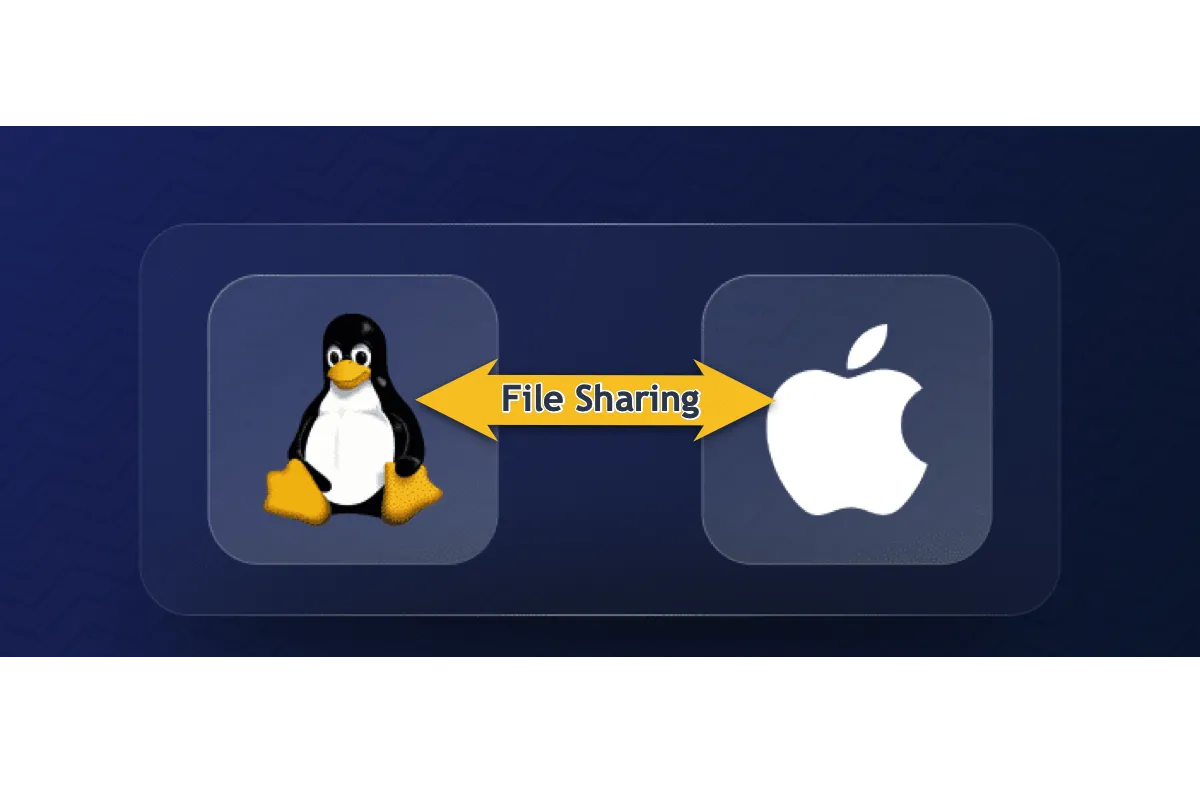
Different vendors or developers release sorts of operating systems that are often incompatible with each other, such as the most widely used macOS, Linux distributions, and Windows. However, it becomes a trouble when you get two devices with different operating systems installed and you desire to share files between them.
This post is gonna tell you how to share files between Linux and Mac with step-by-step guidelines. If you're interested in the tricks, begin reading right now!
Mac and Linux brief
In terms of technology, macOS is built based on March Kernel and UNIX-derived-BSD. Steve Jobs created macOS while working for NeXT Computer Company, and he later brought this famous operating system to Apple Computer, where he hit the ball and achieved great success with macOS.
However, Linux is a free, open-source successor to Unix. Linux is not a complete operating system for consumers since it lacks a user interface and just has a command line; therefore, components such as desktop environments are required to create a contact operating system.
Being free and open-source is in vain to mend the incompatibility between macOS and Linux, so you cannot transfer files between a Mac and Linux directly.
Many thanks if you'd like to share this post with more people!
How to share files between Linux and Mac using SMB and Samba?
The SMB, as well as the Server Message Block protocol, is widely used in sharing files and network resources, which ensures a smooth connection and communication between macOS and Linux under the local network. While the Samba is used on Linux for the file-sharing purposes, where you need to install it on the Linux distributions first. Let's see how to share files between Linux and Mac in detail:
Share files from a Mac to a Linux
Step 1: Prepare Mac and Linux for file sharing
Before the file sharing, some preparations need to be done:
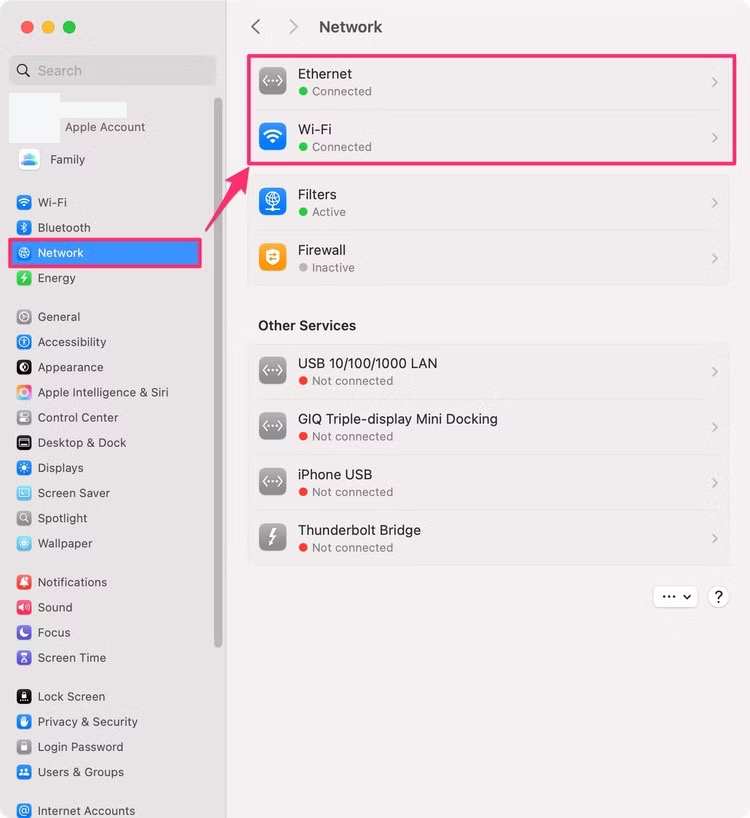
1. Check the network connection
You have to check the internet connection of both Linux and Mac machines and ensure they are on the same network, or file sharing might fail.
On Mac: Go to System Settings > Network > check the Ethernet or Wi-Fi is good with a green sign.
On Linux: Open the terminal and run the "ip addr" command and see if the internet goes well.
ip addr
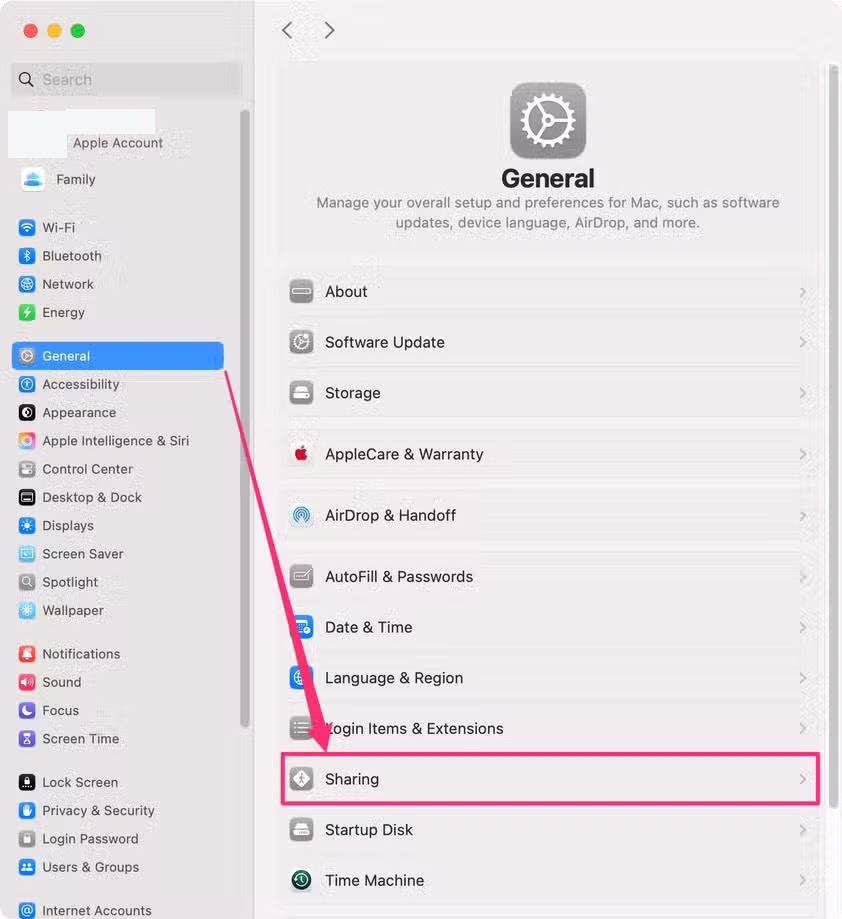
2. Set up File Sharing on Mac
File Sharing is a feature used to share files and folders on your Mac, such as personal and private documents, videos, images, etc. with the allowed users or groups who are also on the same network. You can set it up to allow Linux to access the files on your Mac. Here is how to enable File Sharing on Mac:
- Apple Menu > System Settings > General > Sharing.
- Turn on the File Sharing and click the icon next to it to enter the Shared Folders window.

- When you're in the Shared Folders window, make sure the File Sharing is in the On state, and click the Options button for further modification.
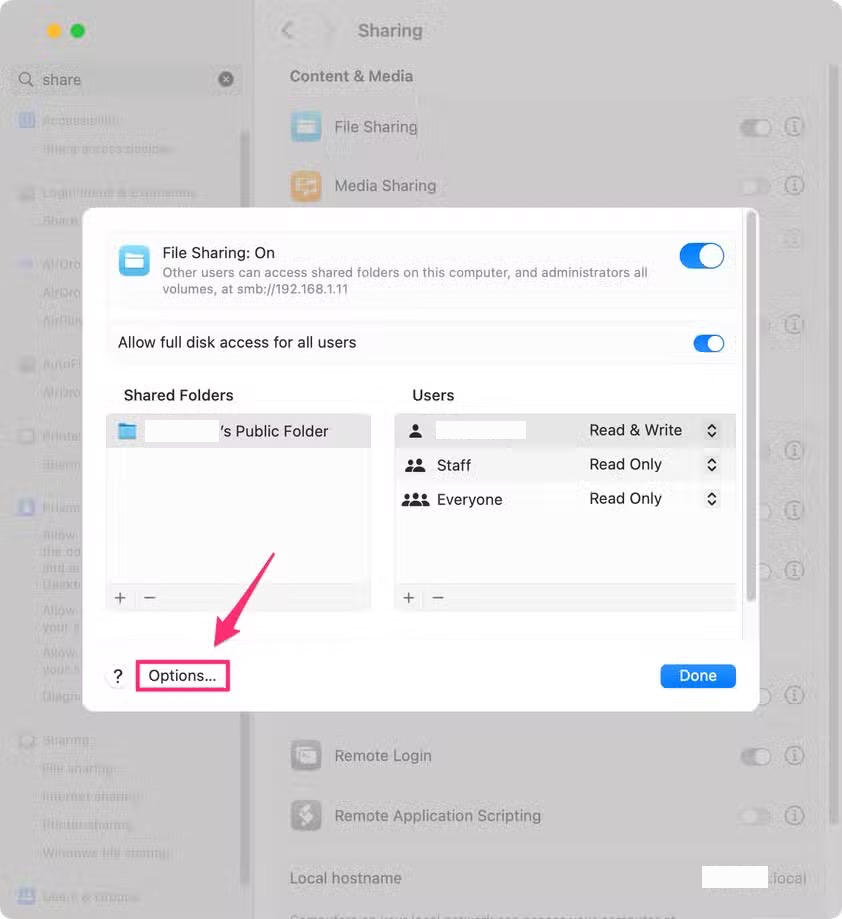
- Ensure the Share files and folders using SMB option is enabled and the account for File Sharing is checked. Then click Done to back to the Shared Folders window.

- You can proceed with more configuration changes in the Shared Folders window.
- To add a new shared folder, click the "+" button below the Shared Folder section, select the folder, and tap on "Open".
- To change the access permission, select a folder, then select a user and change the permissions ("Read Only" for reading or "Read & Write" for editing).
- To add or remove users, click the "+" or "–" buttons at the bottom of the Users section, and then the user will be added or removed from the list.
Step 2: Access the macOS Shared Folders on Linux
With all preparations done, now you can access the Mac Shared Folders on Linux. Follow the steps below to open the files on the host Mac device:
- Open the file manager on Linux, select the Network from the left sidebar, and then control-click the Mac that is sharing files.
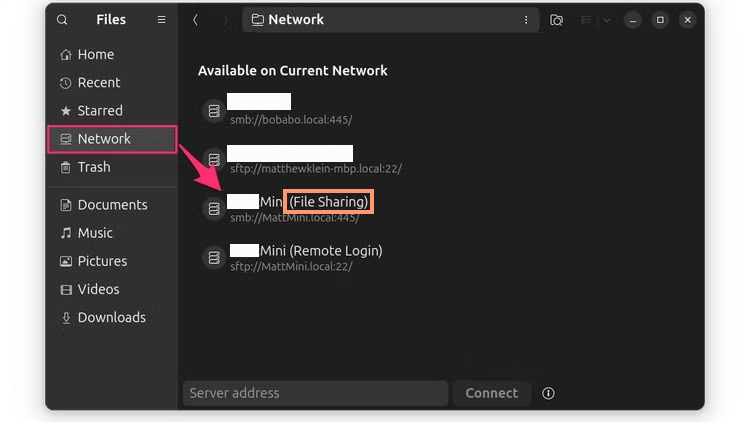
- When you get in the Mac that shares files, you can see some shared files or folders lying in the main window.
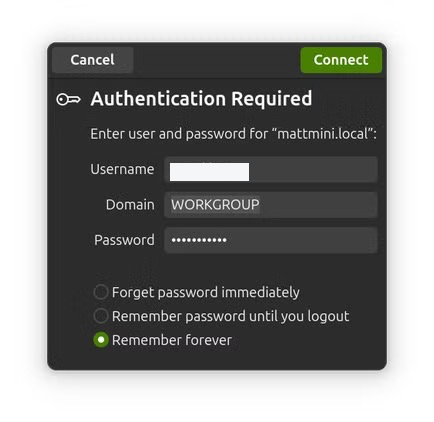
- You need to input the username and password of the shared Mac, then you can access the shared folders or files on Mac with ease!
Share files from Linux to a Mac
Sharing files from Linux to a Mac needs the assistance of terminal. You need to execute commands to install Samba on the Linux distributions, add yourself as a Samba user, create a Samba configuration file, and then add the files or folders for sharing.
Step 1: Install Samba on Linux
To install Samba on Linux, open terminal and execute the following commands based on the distribution you're running:
Ubuntu distribution:
sudo apt update
sudo apt install samba
Fedora distribution:
sudo dnf install samba
Arch distribution:
sudo pacman -S samba
Step 2: Add Samba users and shares on Linux
1. To add yourself as a Samba user, please copy and paste the following command line in the terminal window:sudo smbpasswd -a <USERNAME>
2. Then, create a new smb.conf file with the command line below:sudo cp /etc/samba/smb.conf /etc/samba/smb.conf.baksudo vim /etc/samba/smb.conf
3. Copy the following smb.conf into the new file and save it well:
- [global]
workgroup = WORKGROUP
server string = %h server (Samba)
log file = /var/log/samba/log.%m
max log size = 1000
server role = standalone server
usershare path = /var/lib/samba/usershares
usershare allow guests = yes
[homes]
comment = Home Directories
browseable = no
read only = no
create mask = 0700
directory mask = 0700
4. Restart Samba to ensure the smb.conf changes are valid.sudo systemctl restart smbd
5. Activate the configuration you made with the command below.
testparm
Step 3: Access Linux Shared Folders on macOS
Since Samba is installed and the Samba user is created, you can now successfully access the shared folders of Linux on Mac.
1. Open Mac Finder and select Network from the left sidebar.
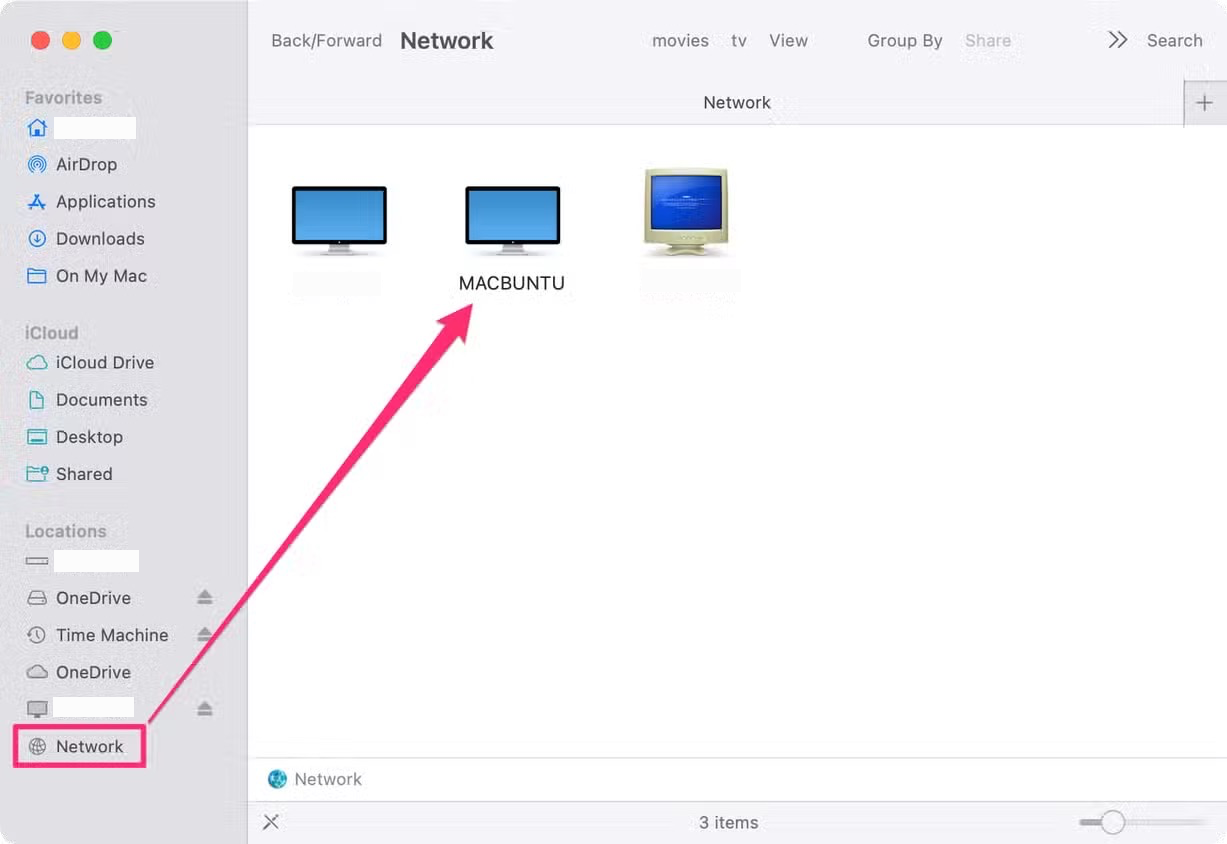
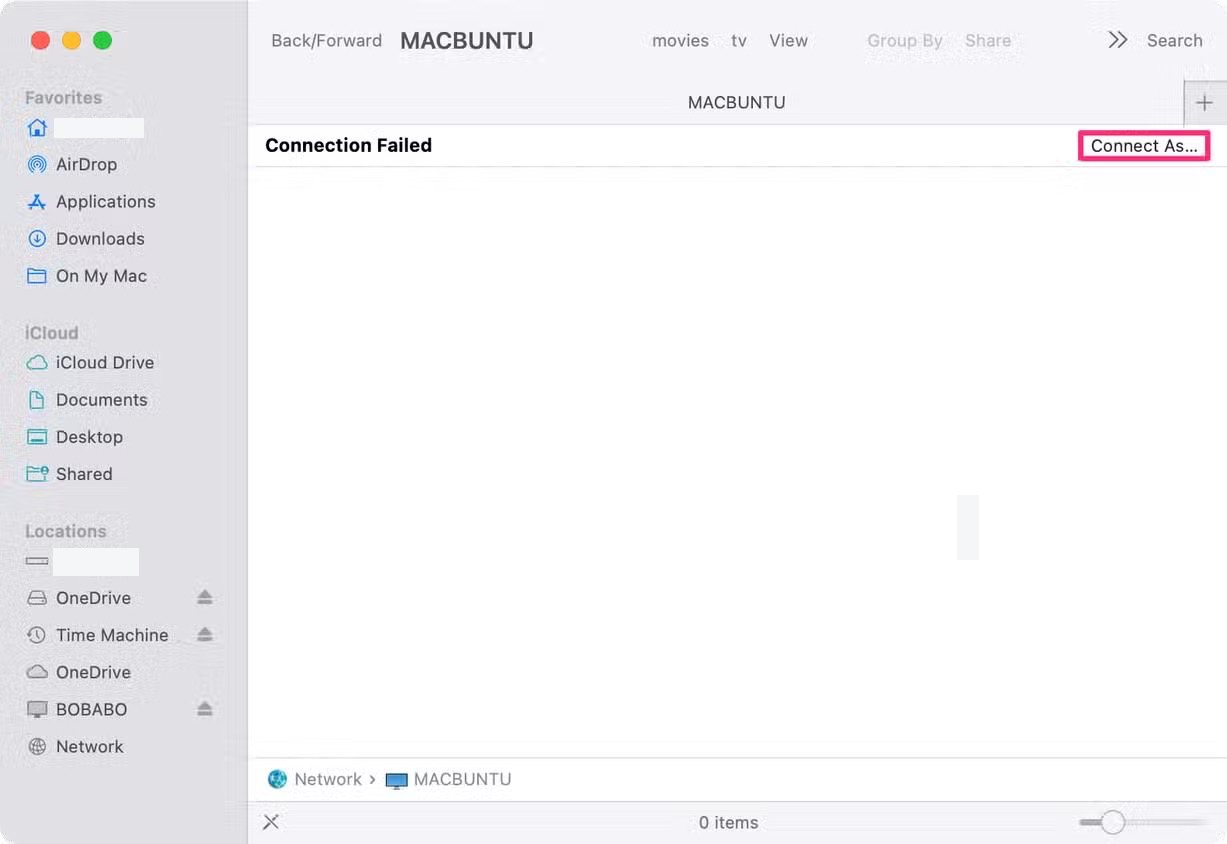
2. When you're in the Network window, open the Linux machine while it notifies you the connection is failed.
3. Select Connect As on the right corner of the Network window.
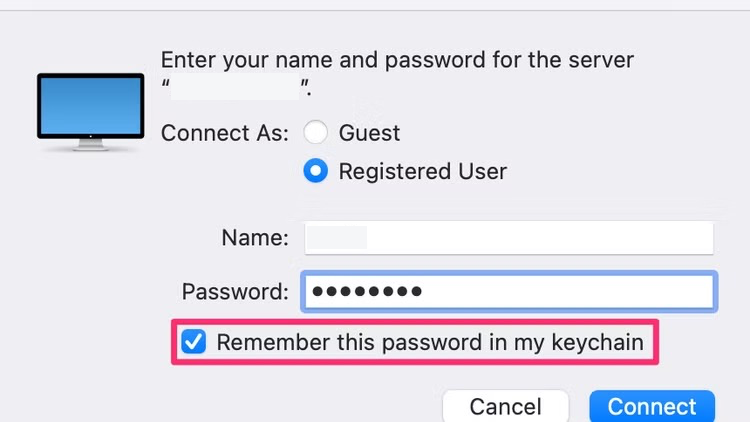
4. Enter the Samba username and password, and then you can see the homes folder and other shared folders on the Linux device.
If you find this post useful, please share it with more people on your social platform!