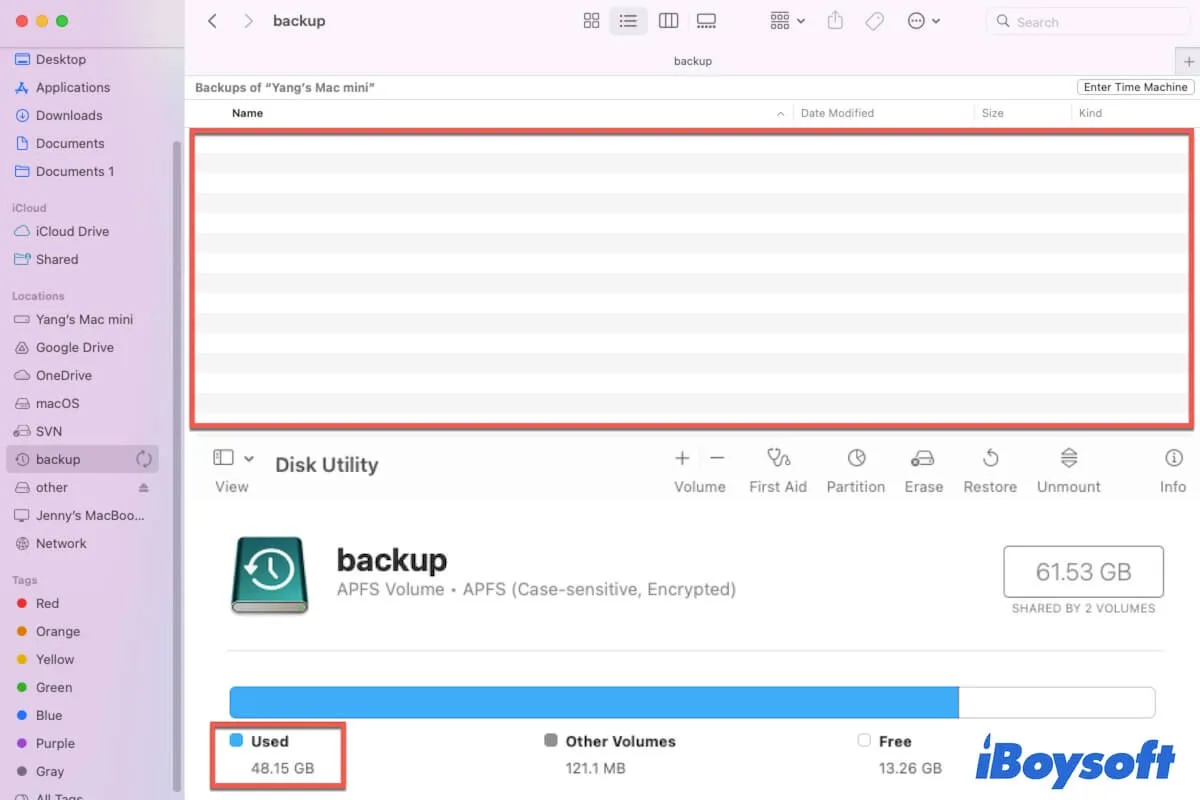
You prepare to access files stored on your Time Machine drive from Finder but see nothing on the drive. Then you go to Disk Utility to check the disk, it shows that xx GB of storage space is used on the Time Machine backup drive.
It is so weird. Why is your Time Machine drive full but showing empty? How can you access the files on the backup drive?
Don't be worried about this issue. This post will help you identify the causes of this trouble and find the invisible backups stored on the Time Machine drive.
Time Machine disk is full but empty in Finder? Try these ways:
- Reconnect the drive to your Mac
- Restart your Mac
- Press Command + Shift + . to show hidden files
- Run First Aid to check the Time Machine drive
- Update Mac
- Reformat the Time Machine drive
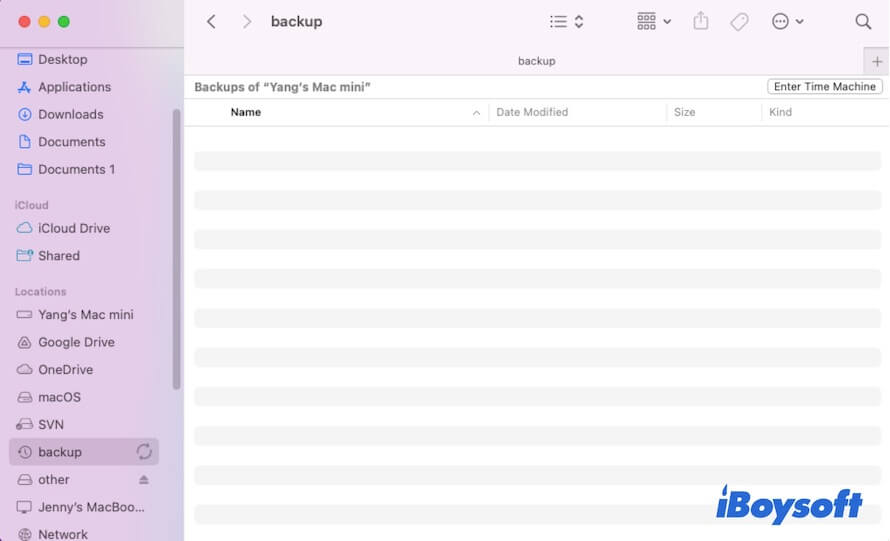
Share these tested ways with more people.
Why is the Time Machine full but showing empty?
Clear reasons are the basis for solving problems. So, before taking on the workarounds to fix the Time Machine drive that is full but showing empty, we need to confirm the reasons first.
The content on the backup disk is not showing up can be a result of various causes. Here are the most common ones:
- Unstable connection, especially if the Time Machine backup drive is a network drive.
- System bugs.
- Data on the disk is mistakenly hidden.
- The Time Machine drive has errors.
Go to tell others the reasons why Time Machine has content but shows empty.
Time Machine drive is full but showing empty, what to do?
Since diverse causes can lead to the Time Machine drive being full but showing empty, the ways to fix the disk and show the files on it are not unique.
Before starting, you can try all the possible methods to open the Time Machine drive, such as directly double-clicking it from the desktop, accessing it from the Finder sidebar, using Spotlight Search to open it, etc.
If all these ways to open the disk still can't make the files on it visible, you can follow the fixes below one by one until your Time Machine backup drive becomes normal.
Reconnect the drive to your Mac
When an external hard drive is full but shows no files on the Mac, the first thing is to check the connection.
If your Time Machine disk isn't connected to your Mac correctly and tightly, or the USB port on your Mac or the USB cable has some errors, macOS will fail to establish communication with the drive stably and smoothly. That will cause the system to fail to show contents on the drive properly.
Therefore, ensure your Time Machine disk is tightly plugged into the port on your Mac. You can eject it and then try to connect it to your Mac again. If you use a USB hub, reconnect it to the USB hub and disconnect other unnecessary devices.
If your Time Machine backup disk is a network drive, ensure both the disk and your Mac are connected to the same network well and the network is stable.
Restart your Mac
System bugs can also make the backups on the Time Machine drive won't show up. You can simply reboot your Mac to get rid of the temporary errors in macOS. Then, you can access the Time Machine disk and check the files on it.
Press Command + Shift + . to show hidden files
Possibly, you have accidentally hidden the files on the Time Machine drive, misleading you to think the Time Machine drive not showing backups.
Open the drive in Finder and try to press down the Command + Shift + . (the period key) combination to show hidden files on it. Then, you can browse them.
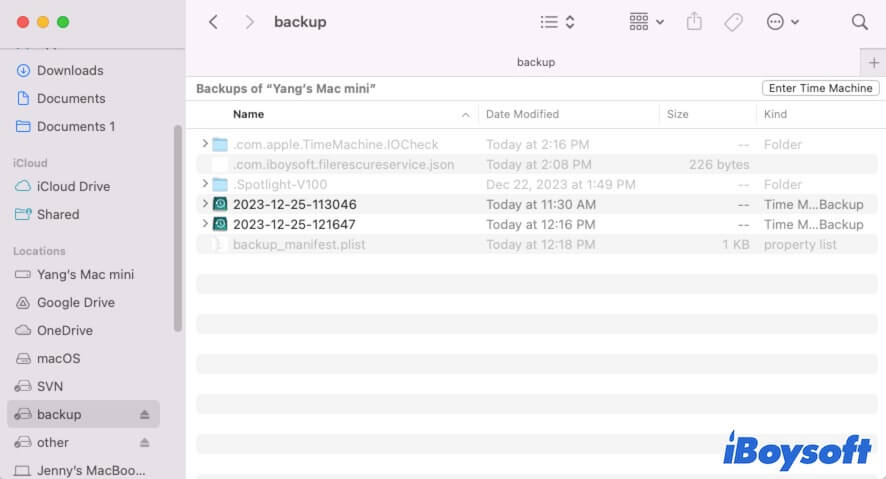
If no hidden files pop up, step to the next solution.
Run First Aid to check the Time Machine drive
The errors on the Time Machine drive may prevent the data from showing up. To check whether the hard drive contains errors or not, you can run Disk Utility First Aid.
Before running First Aid, you need to stop writing to the Time Machine drive so that First Aid can lock it for checking. Simply click the Time Machine icon at the upper right corner and choose Skip This Backup.
- Go to the Launchpad > Other > Disk Utility.
- Select the Time Machine volume from the left sidebar.
- Click First Aid > Run.
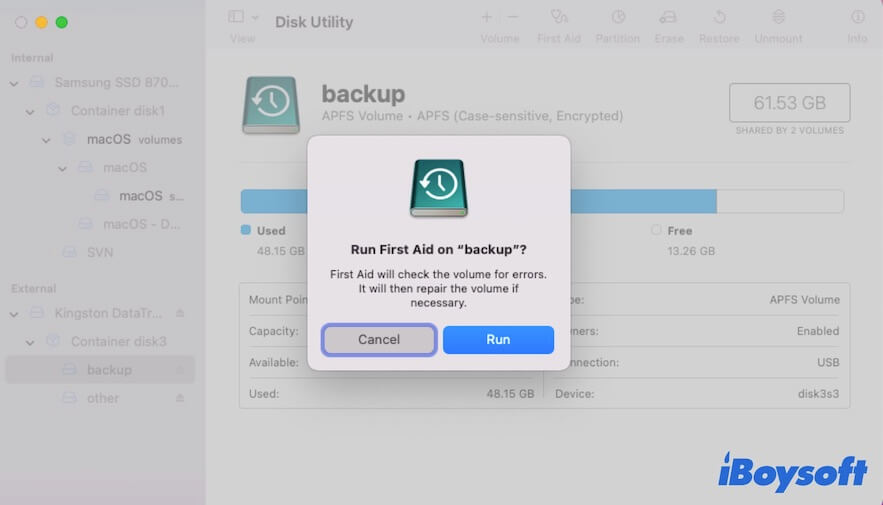
- Wait for First Aid to finish checking and repairing.
If Disk Utility First Aid fails to fix the Time Machine drive and the disk still shows full but is empty, use iBoysoft DiskGeeker's First Aid to help you check and repair the drive.
iBoysoft DiskGeeker is a disk management tool that is designed with a disk-checking functionality - First Aid. When macOS built-in First Aid fails to help you fix the problematic drive, you can use it to do more thorough disk checking and repairing.
- Download, install, and open iBoysoft DiskGeeker.
- Select the Time Machine drive from the left sidebar.
- Click First Aid on the right toolbar.
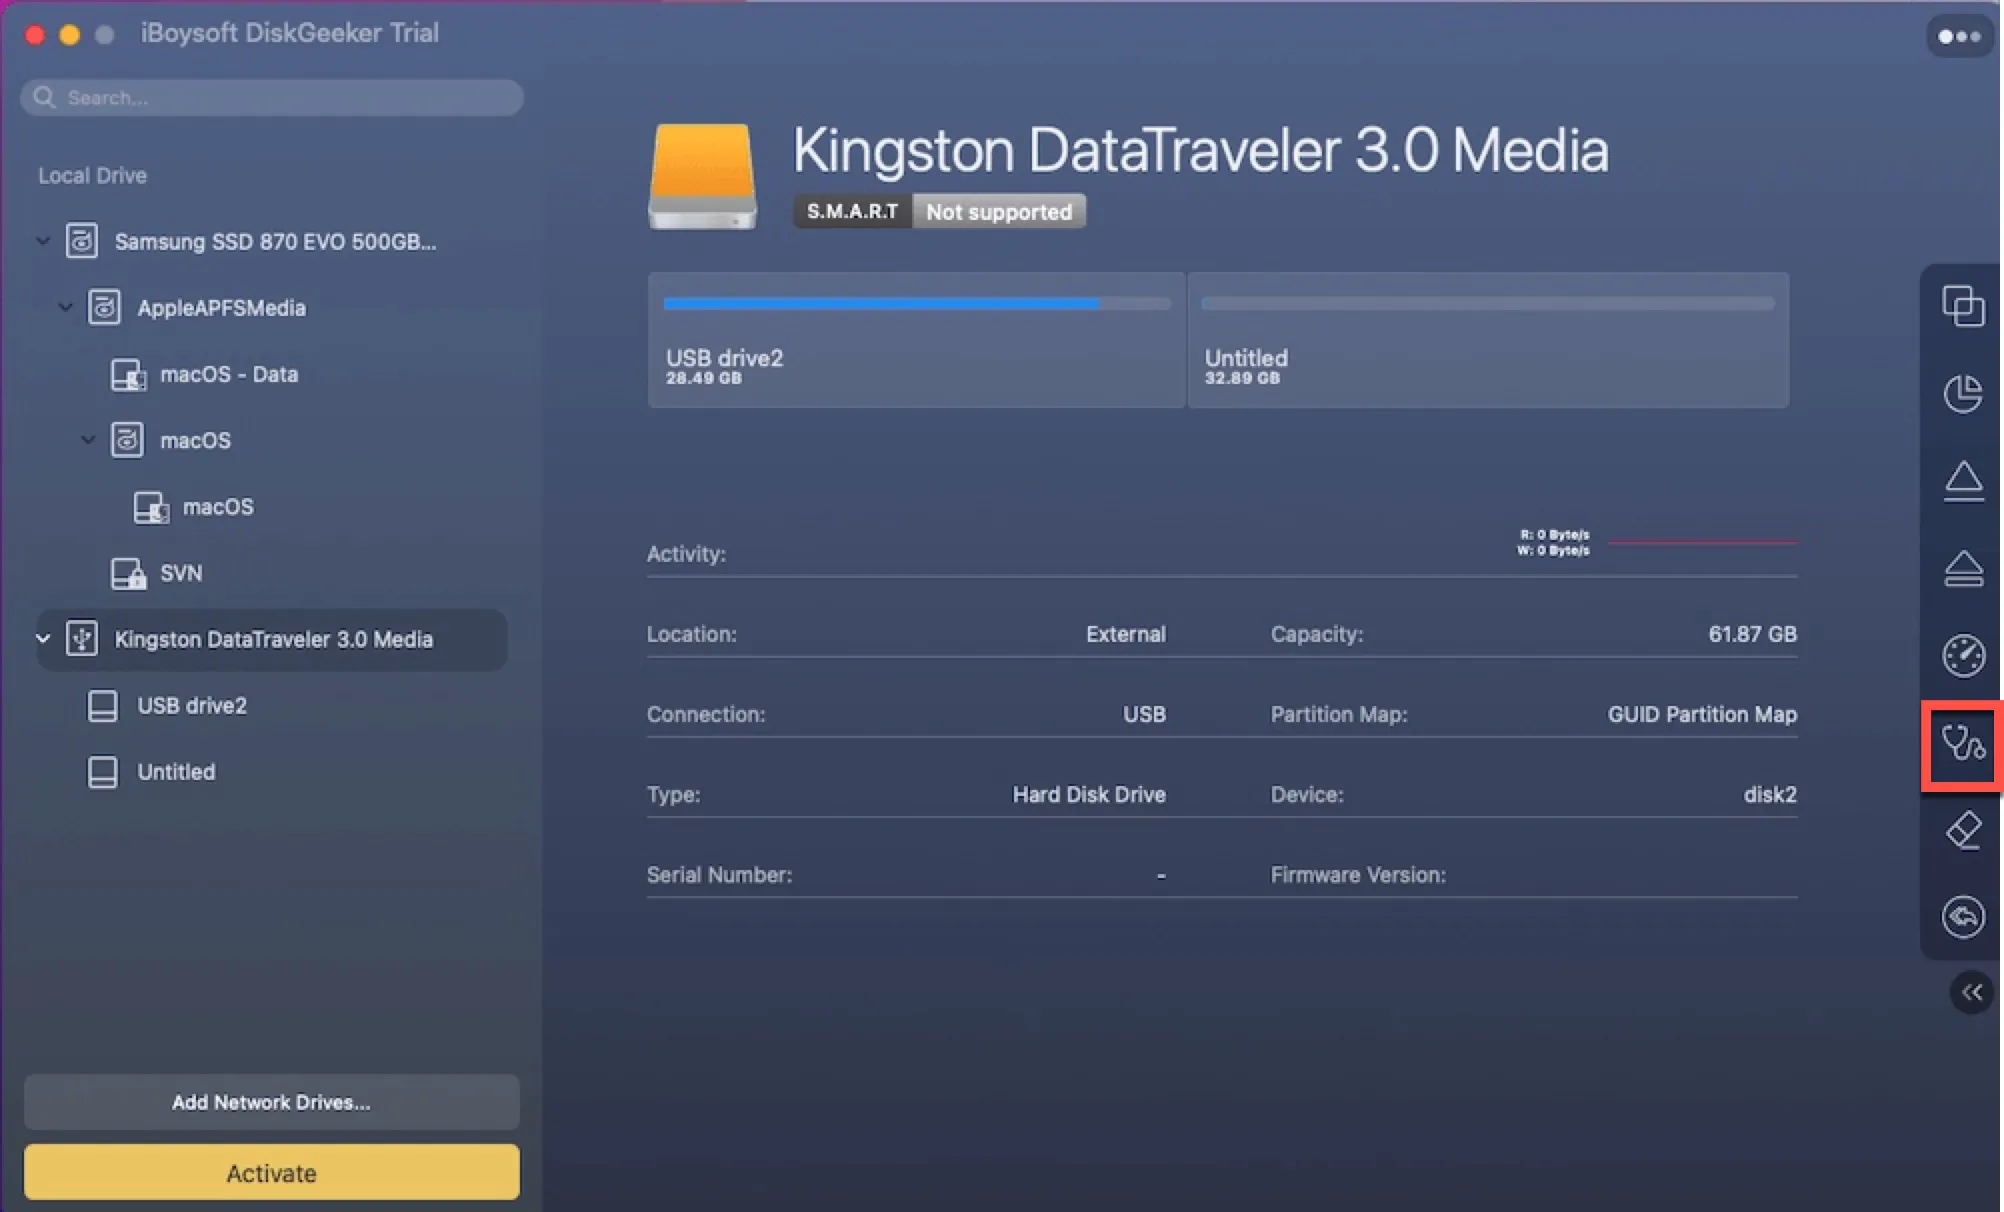
- Wait for the process to complete.
Update Mac
Some users encounter the Time Machine Drive that is full but showing empty after upgrading macOS, especially updating to macOS 11.6. So, bugs in the current system can't be excluded from causing this issue. You can check the available minor updates of the current system and update your Mac.
Reformat the Time Machine drive
If even running First Aid still can't resolve the Time Machine drive that is full but showing empty, you have no other choice but to enable the disk to work properly except to reformat it.
However, reformatting the corrupted Time Machine volume requires erasing all backups on it. If you need these backups, you can use a data recovery tool to get files off the backup volume before erasure.
iBoysoft Data Recovery is your primary choice. This data recovery program is easy to operate and has a high data recovery rate. It supports recovering data from corrupted, inaccessible, and even unmountable external hard drives, USB flash drives, SD cards, and other storage devices. With it, you can quickly get back backups on the empty Time Machine disk.
How to recover data from the corrupted Time Machine drive with iBoysoft Data Recovery:
- Download, install, and open iBoysoft Data Recovery on your Mac.
- Select the Time Machine drive and click Search for Lost Data.
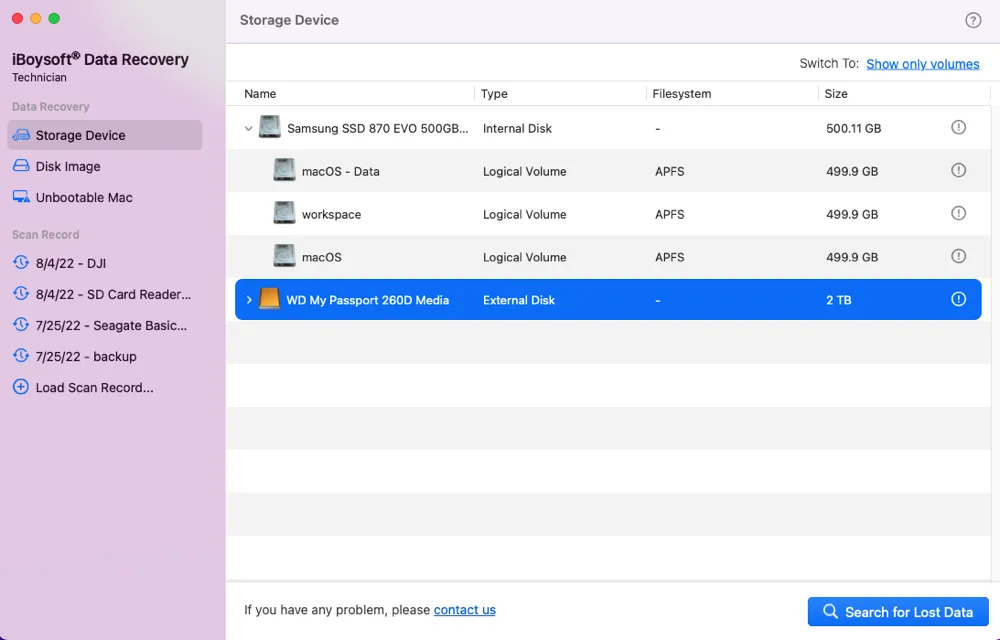
- After scanning, browse the scanning results and preview your wanted files, especially those you've backed up to the disk but deleted from your Mac.
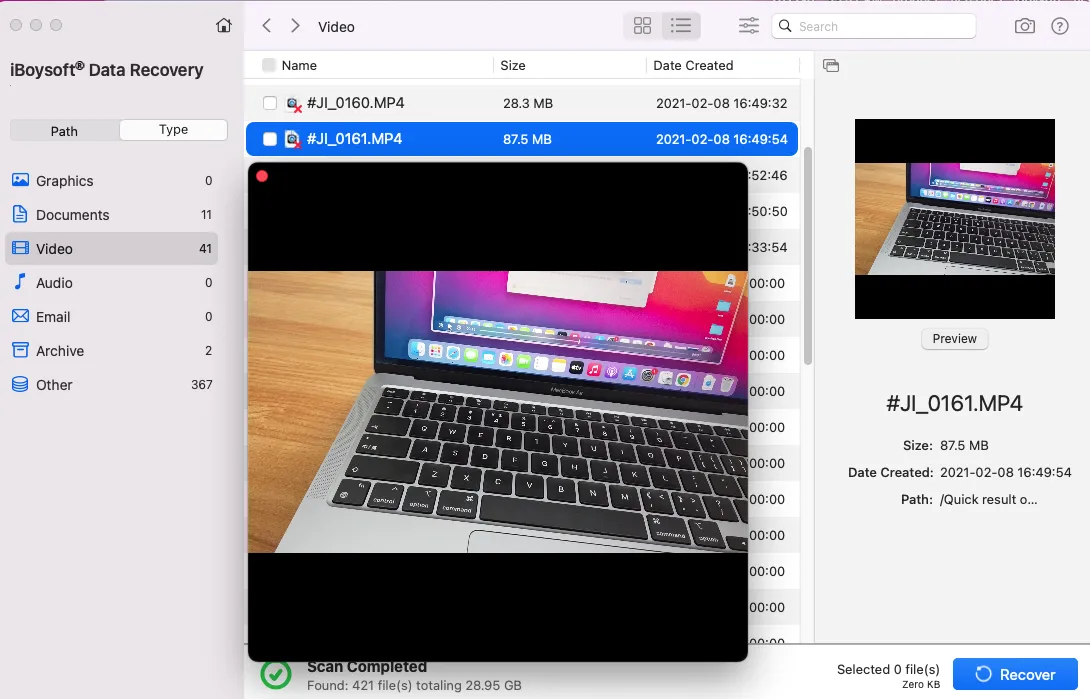
- Select the files you want and click Recover to save them to a different destination.
If this post helps you show the invisible content on the Time Machine backup drive, share it to help more Mac users.
