Kinds of picture format appearing on macOS refer to different storage formats and unique encoding methods. Sometimes, you may need to convert an image to another format as you share files with people who use computers with other operating systems or you want to open files in apps that don't read all file types.
Making an image-converting folder saves time and effort spent by repetitive photo format conversion every day. This post offers you three choices to complete the image-converting folder creation work: iBoysoft MagicMenu and the Automator application. Ways to convert images to a new file format using Preview is also included.
Each one comes with specific step guidelines in this tutorial and getting stuck in the process is impossible here.
How to make an image-converting folder on macOS?
Both one third-party software and two native Mac utilities are included in this post, and each of them will be expounded with detail. You can choose one to complete the pesky photo file format change as you wish.
Method 1: Make an image-converting folder on macOS via iBoysoft MagicMenu
The first method you are going to know is iBoysoft MagicMenu, which is a right-click enhancer that makes your daily business more effective. Besides, it is an easy-to-operate and powerful image converter that allows you to convert various formats of images to PNG, JPG, or WEBP fast and stably. It is designed with advanced options for your customizable image conversion.
Unlike online image converters that consume time to load up the web pages and are vulnerable, the Apple-trusted iBoysoft Mac image converter program allows you to right-click to convert images in a quick way. And no one but you have access to your files.
More importantly, it is able to convert a batch of photos into different file formats in a straightforward manner. Just keep reading to know how to utilize iBoysoft MagicMenu to convert a folder of photos to another file format on your Mac.
Free install iBoysoft MagicMenu and the ImageConvert extension on your device:
Step 1: Free download and install iBoysoft MagicMenu on your macOS machine.
Step 2: Free download the ImageConvert extension onto your Mac and open the Downloads folder in Finder, unzip the ImageConvert installer file, and then double-click the decompressed extension.
Step 3: On the popup confirmation window, click Yes to install the ImageConvert extension to iBoysoft MagicMenu.
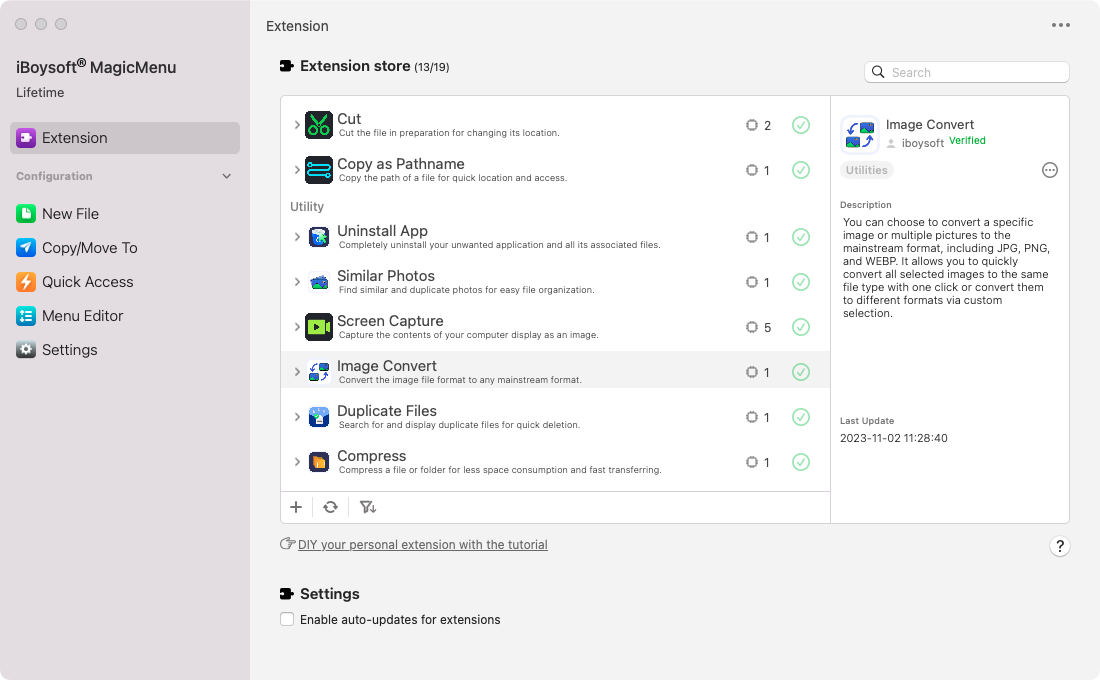
Step 4: On the MagicMenu main interface, click on the Extension tab on the left sidebar, you can see the ImageConvert extension is added and enabled in iBoysoft MagicMenu.
Start to convert a folder of pictures into another file format with iBoysoft MagicMenu:
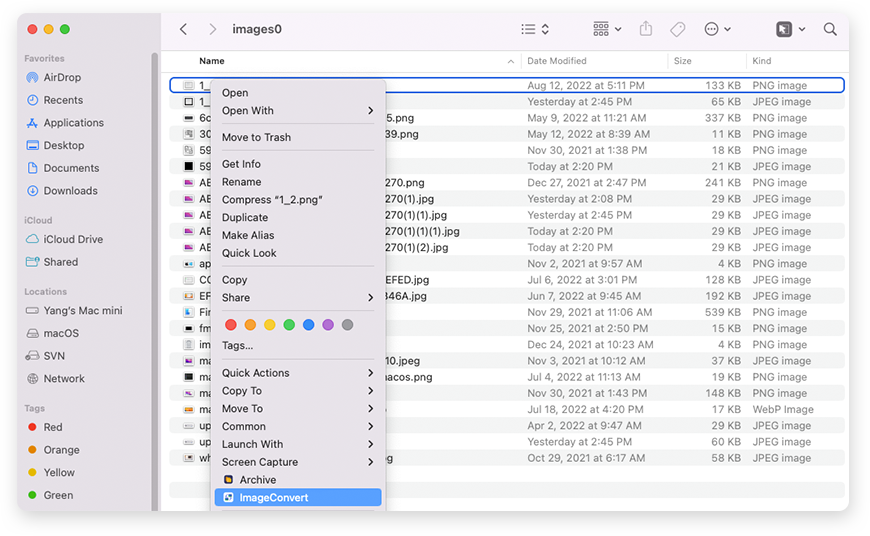
Step 1: Open iBoysoft MagicMenu, select the target picture that you want to convert in Finder, and right-click on it.
Step 2: Choose ImageConvert from the context menu.
Step 3: Select an output file format. If you want to add pictures, click the top Add file button to add them.
To batch-convert images to the same format, you can tick the Convert all file types to option and then choose a desired format for these pictures from the drop-down box on the side.

To batch-convert pictures to different formats, deselect the Convert all file types to option and ensure the File Name box is ticked. Then, choose the file format from the back box of each picture.
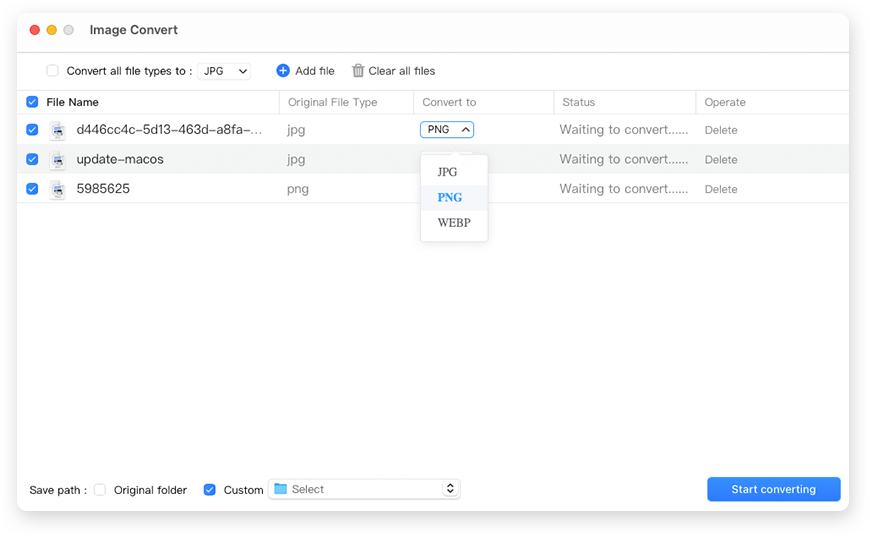
Step 4: Choose a location to save the converted files. You can save them to the original path by ticking the bottom Original folder box. Or, you can choose a different location with the Custom option.
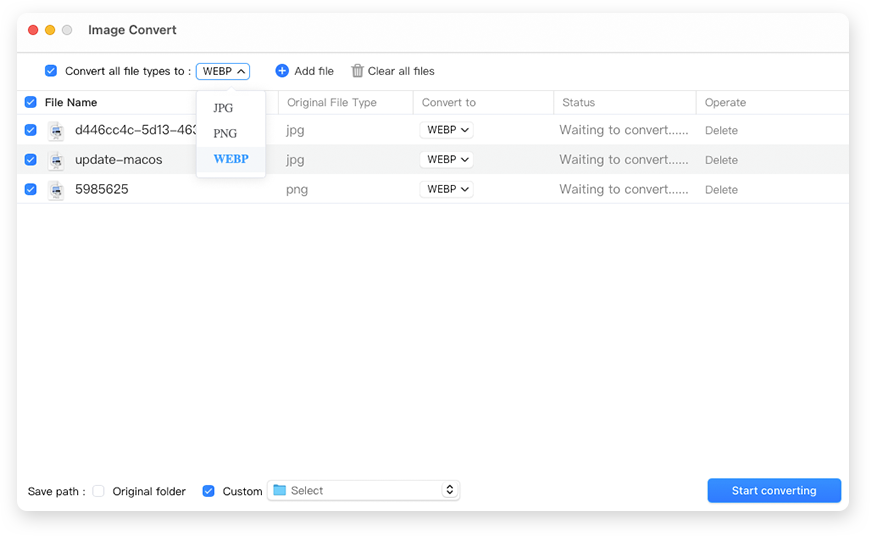
Step 5: Click Start converting and wait until the process is finished.

With iBoysoft MagicMenu at hand, you can convert sorts of photos to more than one file format each time. While you have to make more than one image-converting folder to perform the trifling photo format conversions.
Method 2: Make an image-converting folder on macOS via Automator
Automator is a versatile application that helps you to finish kinds of business, for example, you can create a workflow to schedule an email on Mac and create quick actions in Finder with it.
This post tells you how to make an-image converting folder via the Automator app on your device:
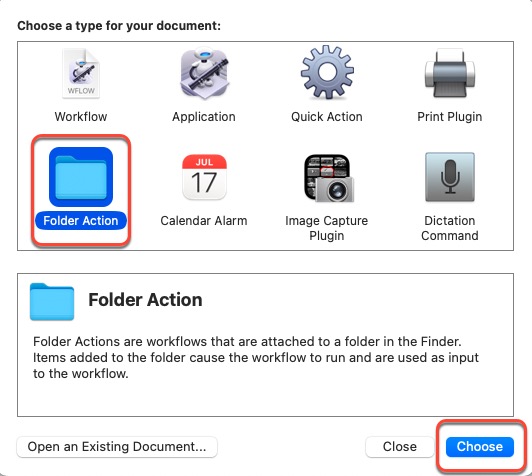
- Launch Automator on your computer and choose New Document.
- Select Folder Action to proceed.
- In the right menubar, click the box next to Folder Action receives files and folders added to, and then select Other.
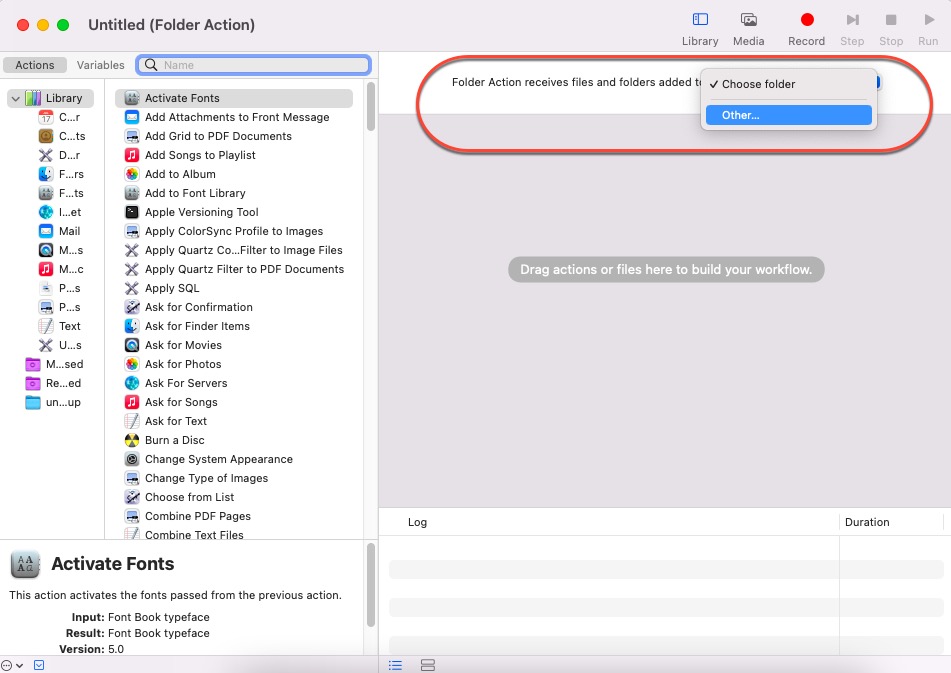
- Select the folder want to convert. Let's choose the Downloads folder as an example here.
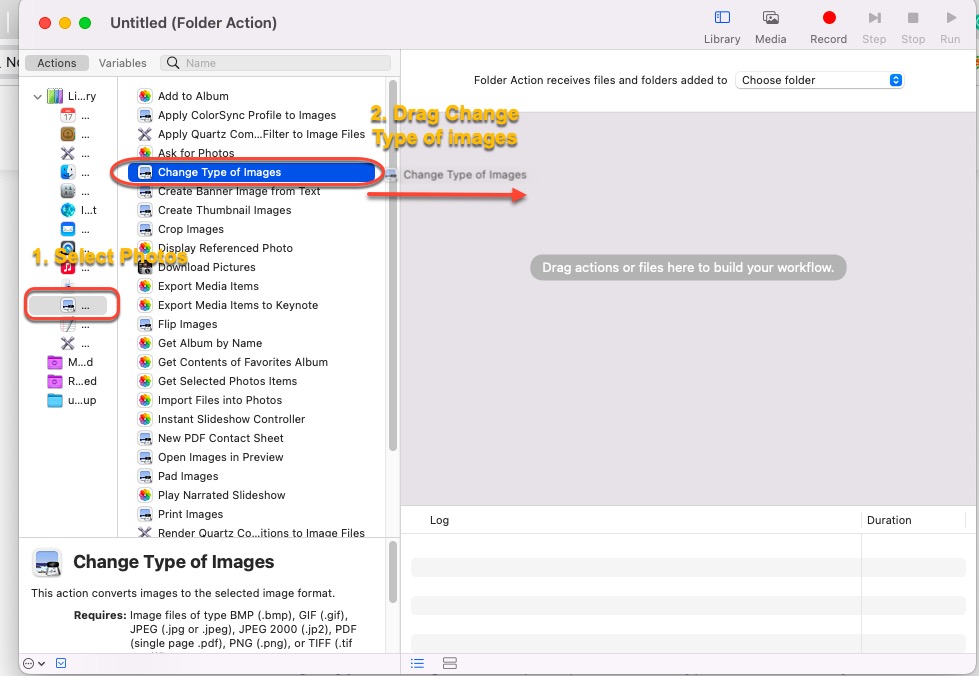
- Select Photos from the Library menu bar.
- Then drag Change Type of Images to the workflow area.
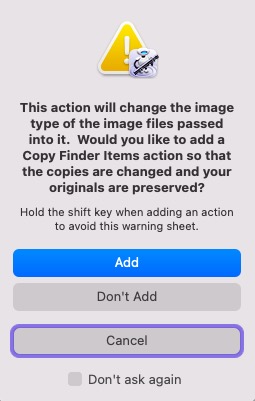
- You'll be prompted by a new window. If you want your action to convert copies of images placed in the folder and preserve the originals, select Add. If you want it to convert the original images, select Don't Add.
- In the Change Type of Images action panel, choose the type of format that you want images to be converted to.
- Select File and then tap on Save to keep the converted files well on your device. Or you can press the Command + S keys together, rename the files, and then click Save.
The final word
The native Preview app is also able to convert images to another file format. All you need to do is launch the Preview app > open a file you want to convert > choose File on the top menu bar of the computer > select Export > click the Format pop-up menu and choose a file type > type a new file name and choose a new location for file saving > click Save.
But it cannot convert a batch of images into another file format, so you'd better make use of the two methods aforementioned.
Why not share this article to help more people save time and effort?
FAQ about making an image-converting folder on macOS
- QHow do I batch-convert photos on a Mac?
-
A
You can create a workflow in Automator and use iBoysoft MagicMenu to complete this task, and both ways are effective and simple.
- QHow do I convert a JPEG to a PNG on a Mac with Mac local software?
-
A
You can use the local Preview app on your Mac computer to convert a JPEG to a PNG:
1. Open your JPG file in the Preview app.
2. Click File – Export.
3. Choose a file name and location to save the converted PNG file.
4. In the Format menu, select PNG. Then hit Save.
- QWhat is the easiest way to convert a JPEG to a PNG?
-
A
The easiest way to convert a JPEG to a PNG is using iBoysoft MagicMenu. You just need to download it and add the ImageConvert extension on your device, then you can launch it to convert a batch of files to a new file format simultaneously.