Have you repeated some routine work every day such as browsing the same websites, sending emails to your clients, and so forth? If the answer is YES, then you can not miss the Automator, Mac's built-in tool. It can increase the speed of things you do on any kind of regular basis and thus give a boost to your productivity. Now, let's explore more of it.
What is Mac Automator
Automator, an app on Mac, was first released with Mac OS X Tiger and is available on later versions. The icon of the Automator features a robot. Therefore, you may guess that the Automator app can do something just like a robot, almost right! However, you don't need to write code in Automator to let it perform tasks, just need some easy steps to create workflows.
By creating workflows, the Automator automates repetitive tasks in batches on your Mac via point-and-click or drag-and-drop. It saves you time and effort. Such a workflow can have only one action or a set of actions with the integration of multiple applications, both the apps come with the Mac and some third-party software such as Microsoft Office, Adobe Photoshop, or Pixelmator.
What can you do with Mac Automator?
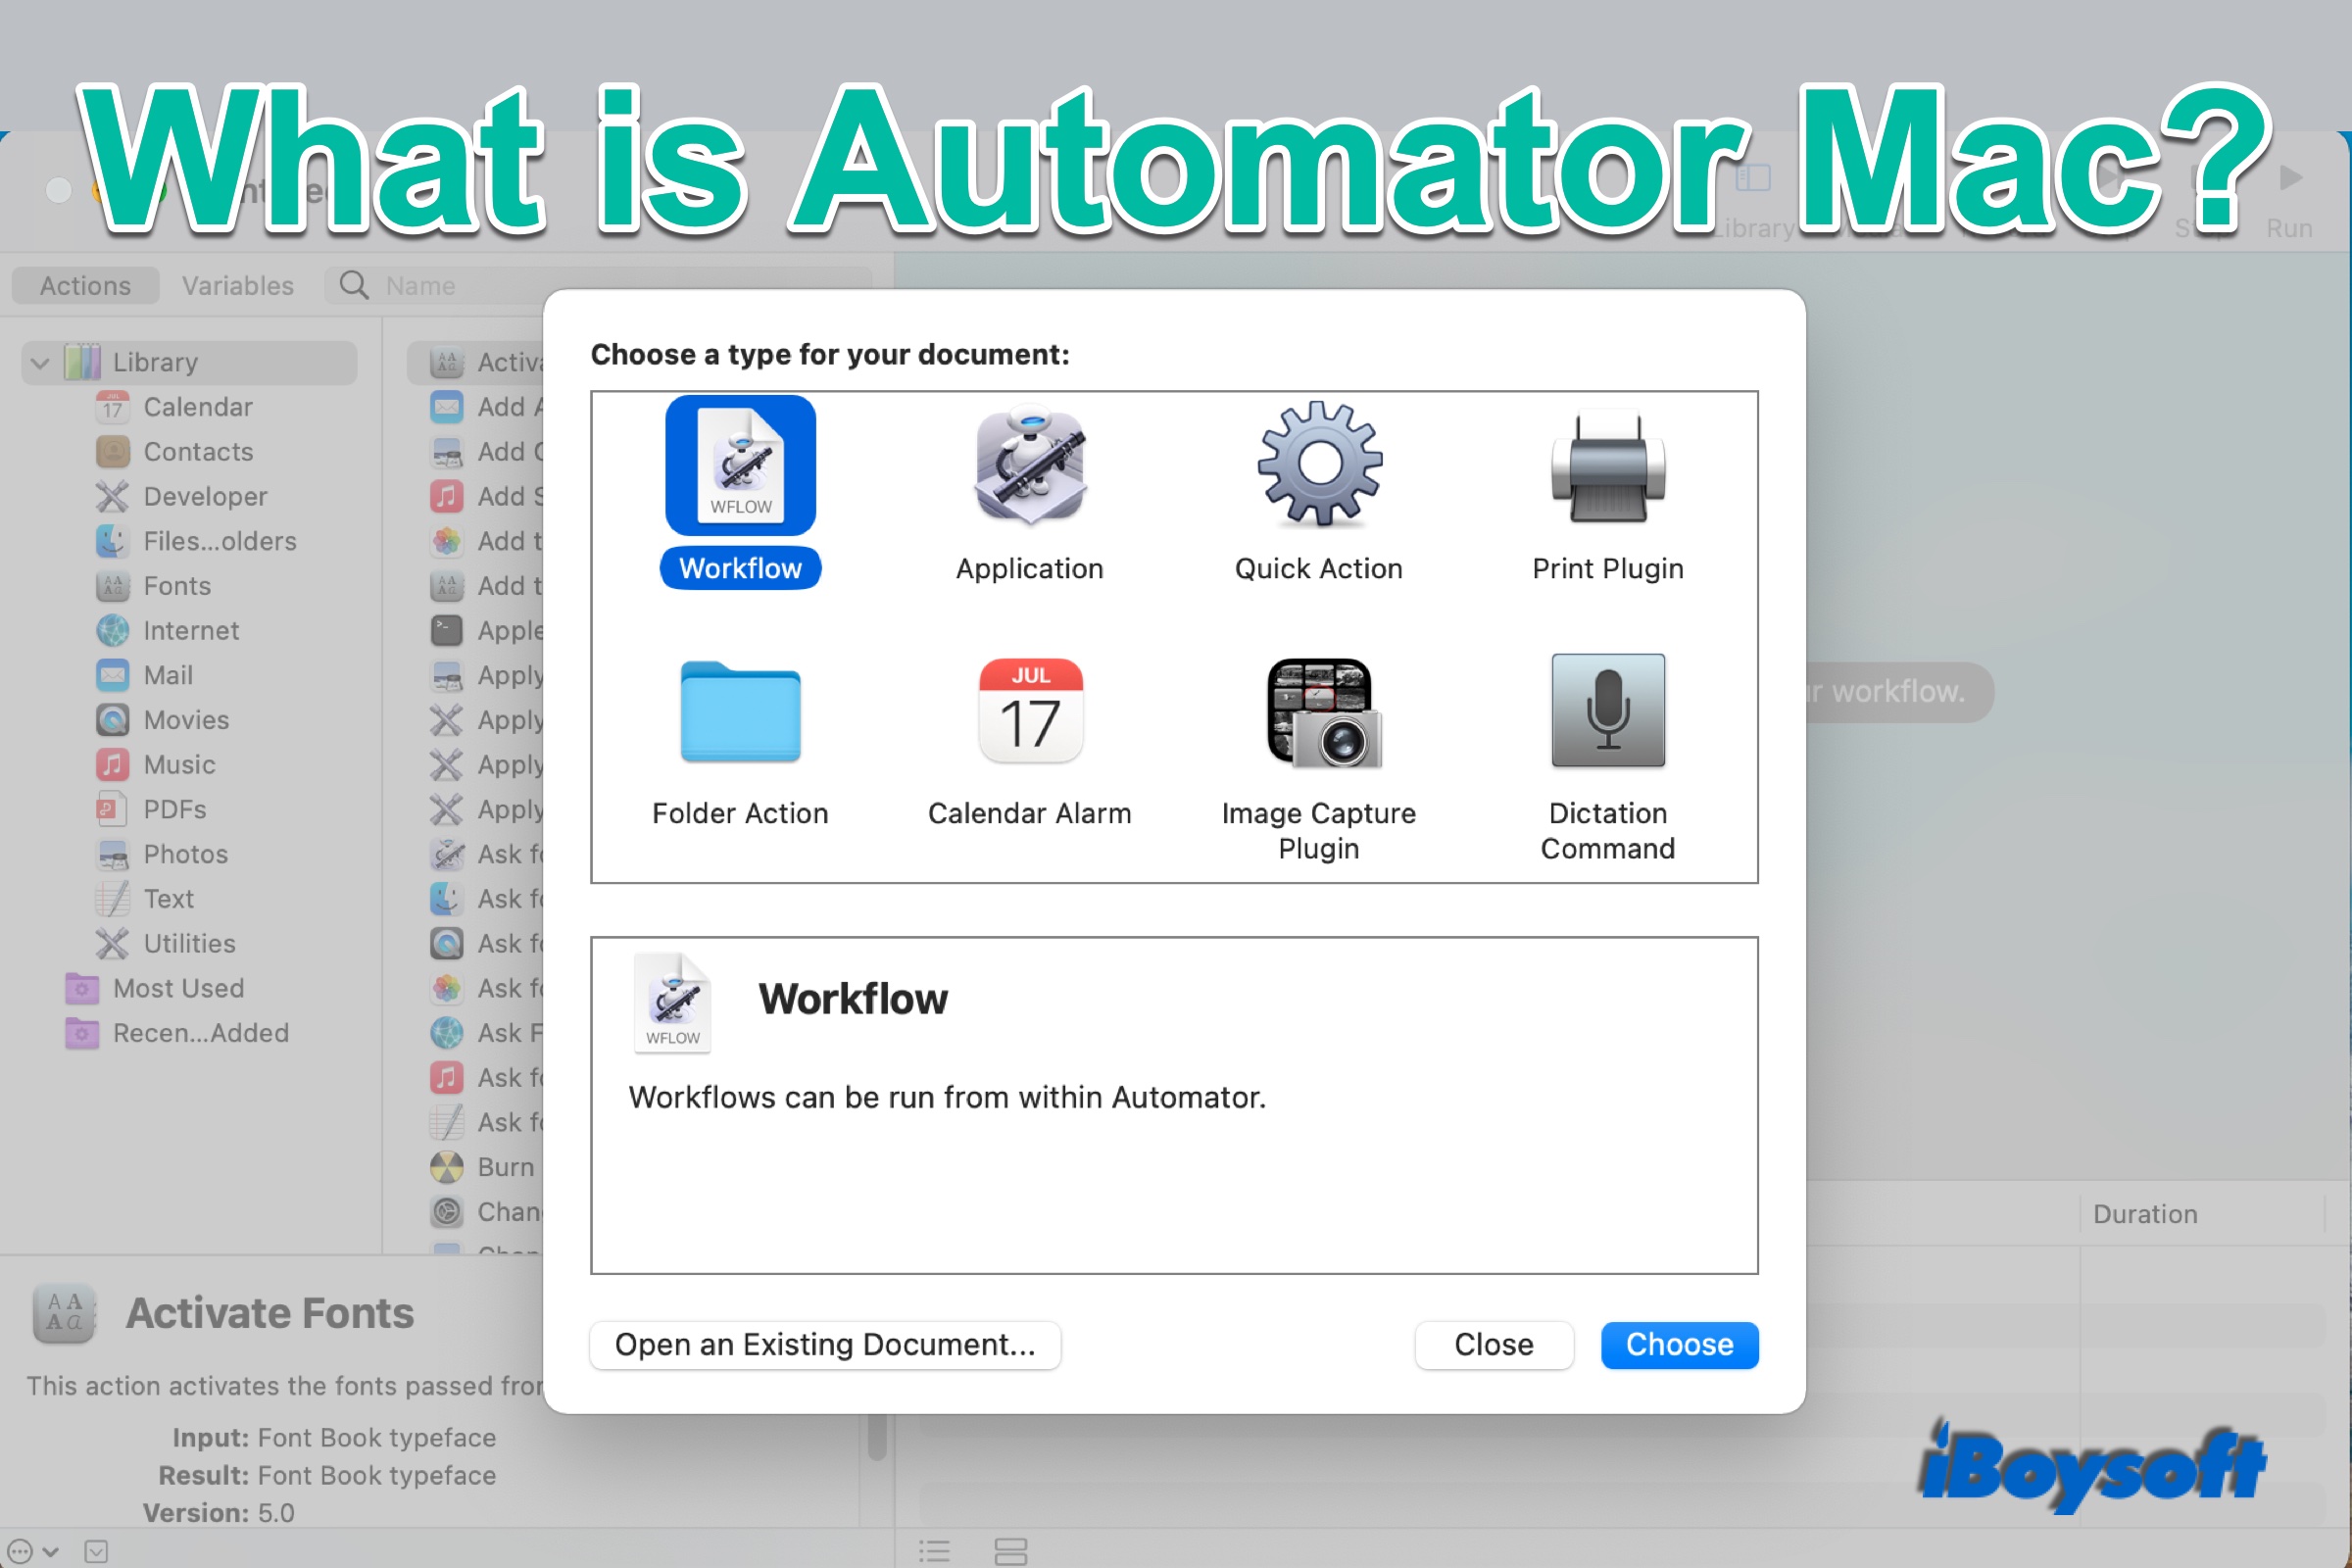
You can access the Automator with Command + Space bar and search Automator in Spotlight. Then you need to choose New Document to get into the Automator app. Here, it will ask you to choose a type for your document to continue, including 8 types:

- Workflow: workflows running within the Automator app.
- Application: workflows running independently of Automator. Some of them can even work by dragging and dropping a file onto them.
- Quick Action: workflows that may be added to Finder, Touch Bar, and the Services menu. It can launch from a contextual menu by control-click a file.
- Print Plugin: a workflow that is available in the print dialogue.
- Folder Action: workflows that are attached to a folder in the Finder
- Calendar Alarm: workflows triggered by an event in the Calendar to avoid forgetting important things.
- Image Capture Plugin: workflows available in Image Capture.
- Dictation Command: a workflow that runs when triggered by dictation.
After you choose a type, you will get into the main interface to create workflows. On the left side, you will see two tabs on the top: Actions contains a Library with hundreds of built-in actions, most used actions, and recently added actions; Variables is a named container that is used to temporarily store information to use when needed.
With Automator, you can create your workflows to automatically create a new file on Mac, filter Finder items, batch rename files, resize images, convert image file formats(convert HEIC to JPG), convert PDF to Word, create birthday greetings for your families, etc.
How to create a workflow in Automator on Mac
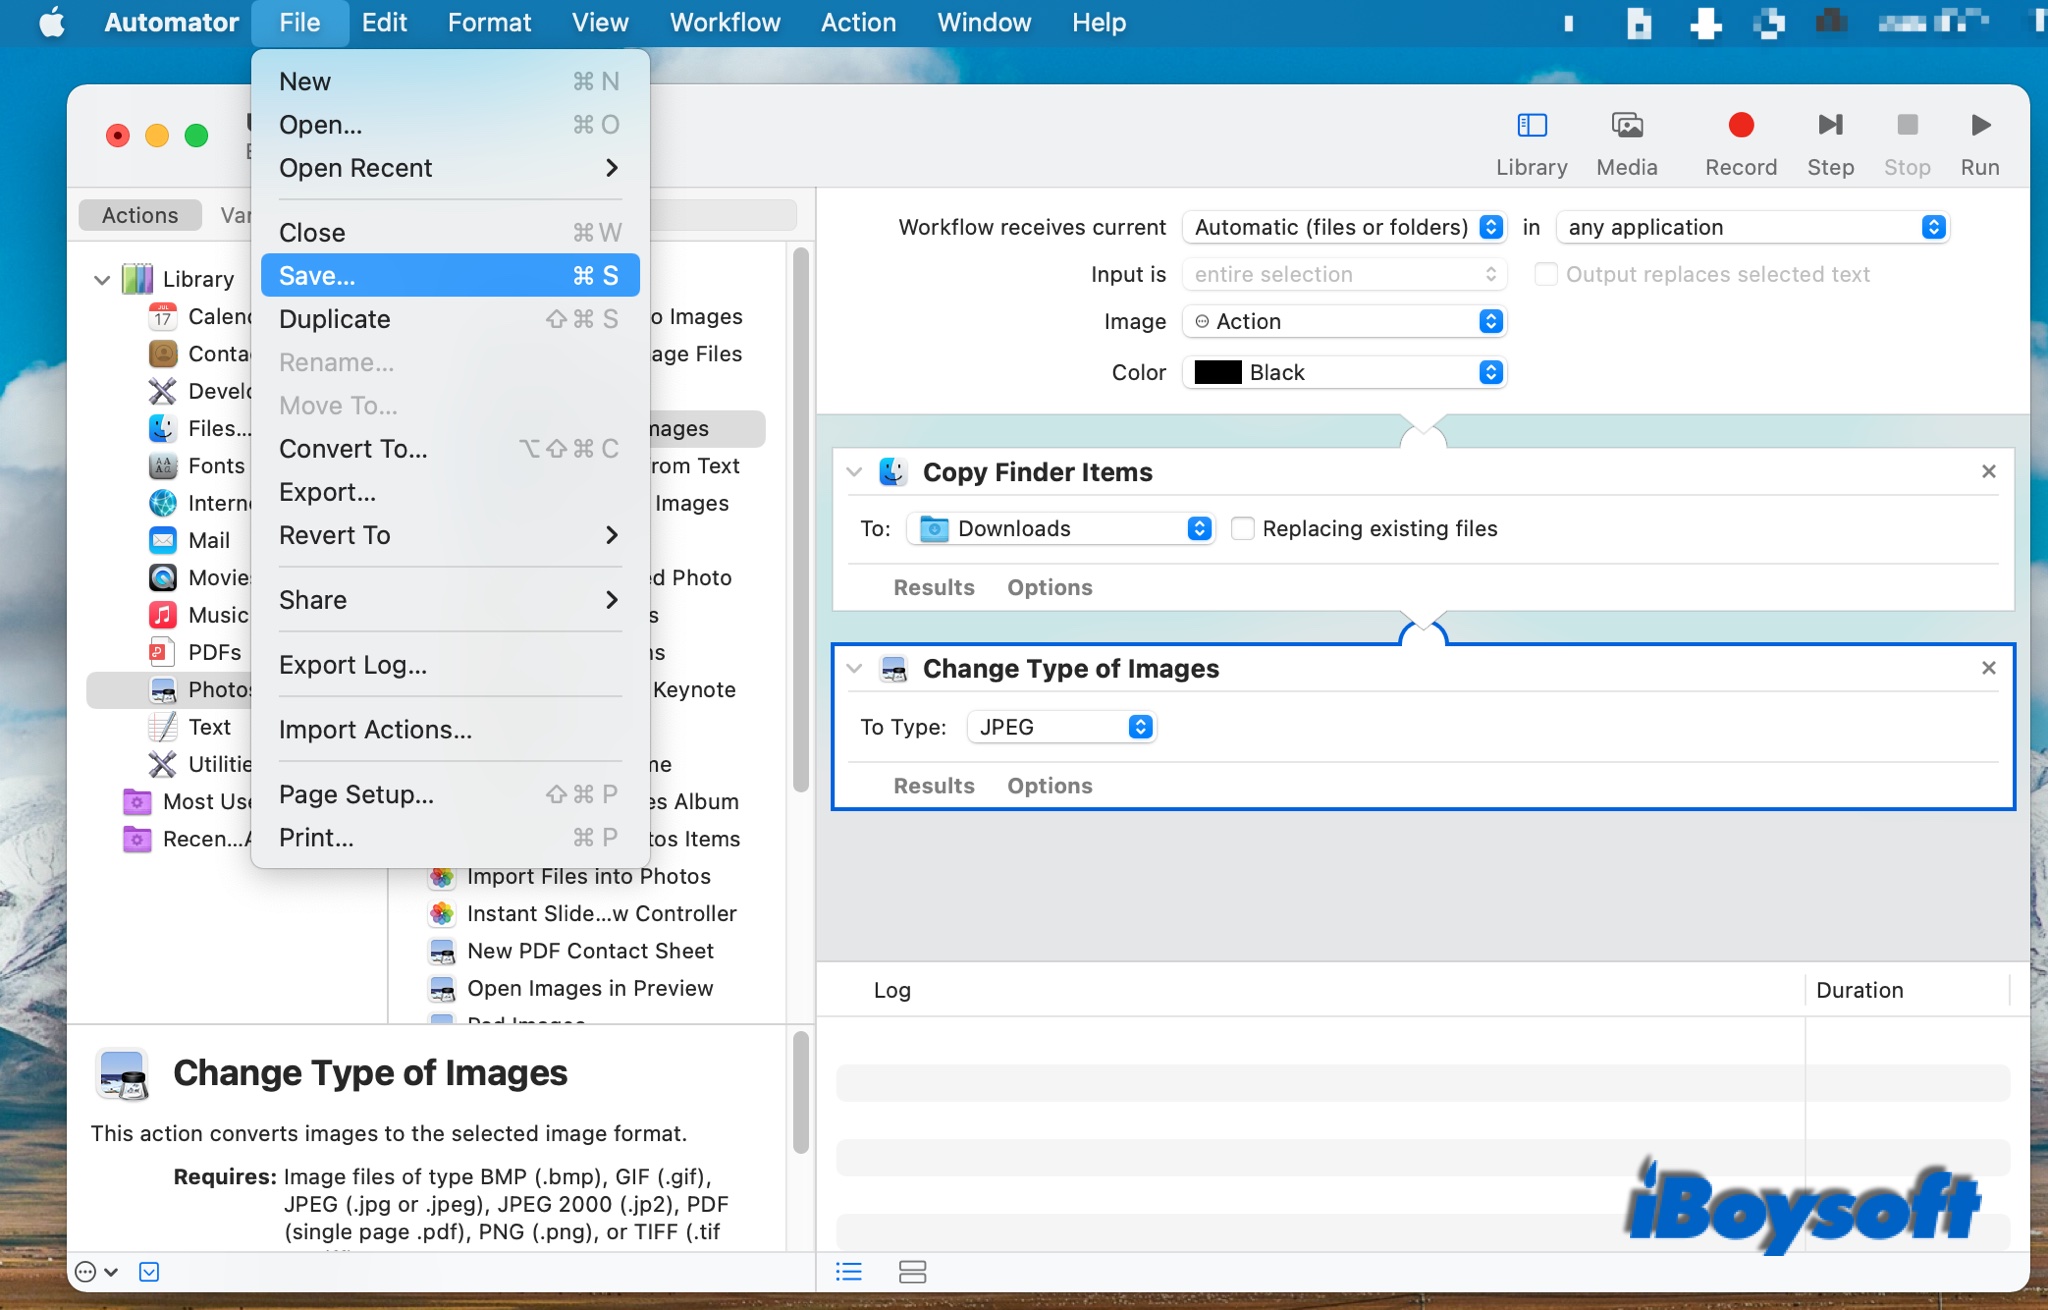
To automate your repetitive tasks on Mac, you need to know how to create workflows in Automator. Here's a detailed tutorial, taking creating a quick action to convert image format as an example.
- Open Finder > Application > Automator, double-click to launch it.
- Choose a type for your workflow, here we choose Quick Action.
- Click on the Choose button.
- Choose File & Folders in the first column under Library.
- Select Copy Finder Items in the second column.
- Drag and drop Finder Items to the third column, or double-click to add it.
- Choose Photos in the first column.
- Select Change Type of Images in the second column.
- Drag and drop Change Type of Images to the third column.
- Choose the Downloads folder under Copy Finder Items in the third column.
- Select JPEG format under Change Type of Images in the third column.
- Select File on the top menu bar, then choose Save.
- Name your workflow on the pop-up box, eg: convert image to JEPG.
- Click Save.
The next time you want to use this workflow, you can find it in Actions > Recently Added in the first column.
Final Words
Although Apple introduced Automator since Mac OS X Tiger, many Mac users are unfamiliar with this tool, and nearly use this app to automate tasks. Automator is the most under-used app on Mac, after you learn what it is and how to create workflows in Automator, it will give a boost to your productivity.
Besides, Apple released Shortcuts, a feature applied in iOS and iPadOS, with macOS Monterey. It is said that Shortcuts will replace Automator, and they are simultaneously supported now.