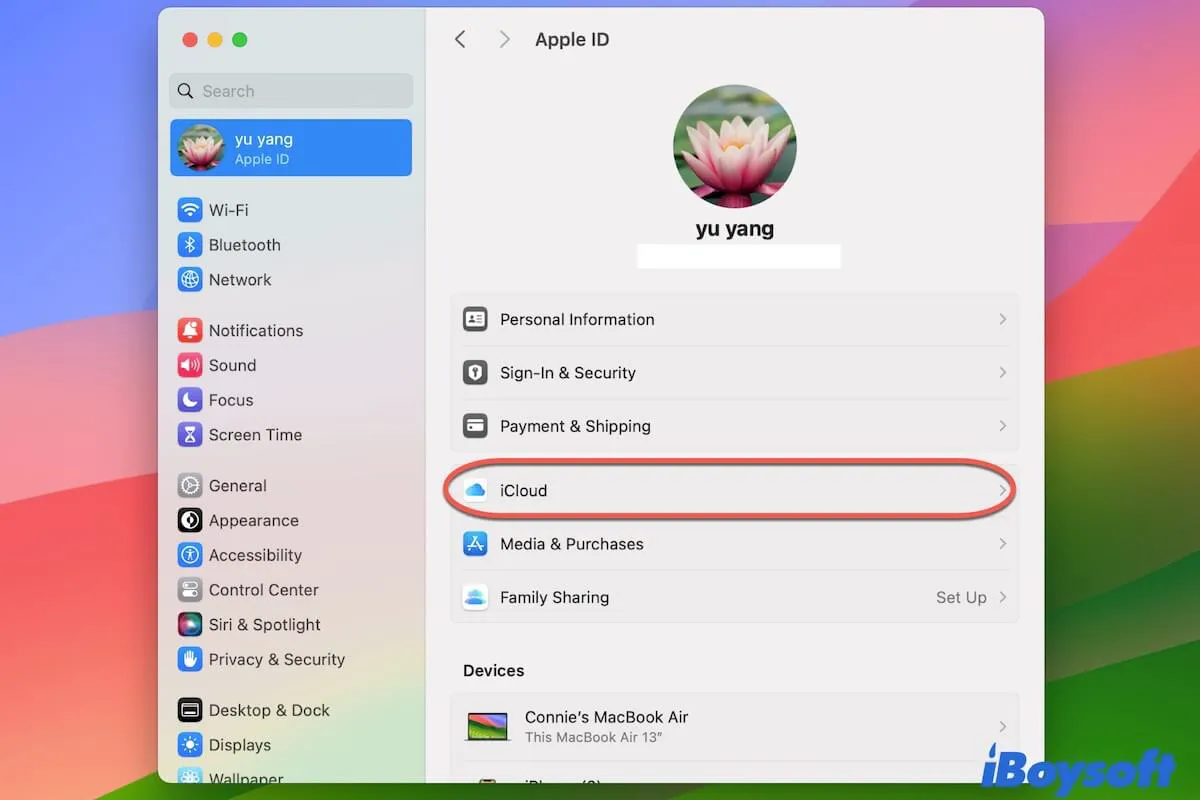
New macOS, which contains multiple new features, drives you to experience it, but it is not as perfect as we expect. There are some issues with the new macOS; typically, iCloud does not work properly.
Below is a real case from the Apple Community:
After upgrading to macOS, I tried to open iCloud. It asked me to allow iCloud in the System Settings. However, I failed to turn on iCloud in Settings. I no longer access the documents stored on iCloud after upgrading macOS.
If your iCloud doesn't work on Mac, including iCloud not syncing, loading, connection, etc. problems, please read this post carefully. This post is right to help you out with the misbehaved iCloud on macOS 14 in specialty. All the possible scenarios you may be in are considered.
iCloud not working, loading, syncing on Mac, what to do?
Although iCloud is not working on macOS Tahoe, Sequoia, or Sonoma is a common issue; the specific circumstance varies. Here are the situations you may encounter.
- iCloud fails to load after a new macOS install.
- iCloud Drive is empty.
- Can access iCloud, but cannot access the files stored in it.
- iCloud won't sync files on Mac.
- iCloud doesn't work with the Notes app.
- iCloud wouldn't connect to drive, Notes, Photos, Messenger, etc.
- iCloud files could not be offloaded from storage.
In this part, you can get a series of workarounds to fix the iCloud that doesn't on macOS. Since different ways apply to different situations, choose those that are suitable for your case.
Fix 1: Sign in to iCloud
If you fail to access iCloud from the desktop or find a blank iCloud Drive in Finder, go to check if you've signed in to iCloud in System Settings first.
To sign in to iCloud, you need to:
- Click on the Apple menu > System Settings.
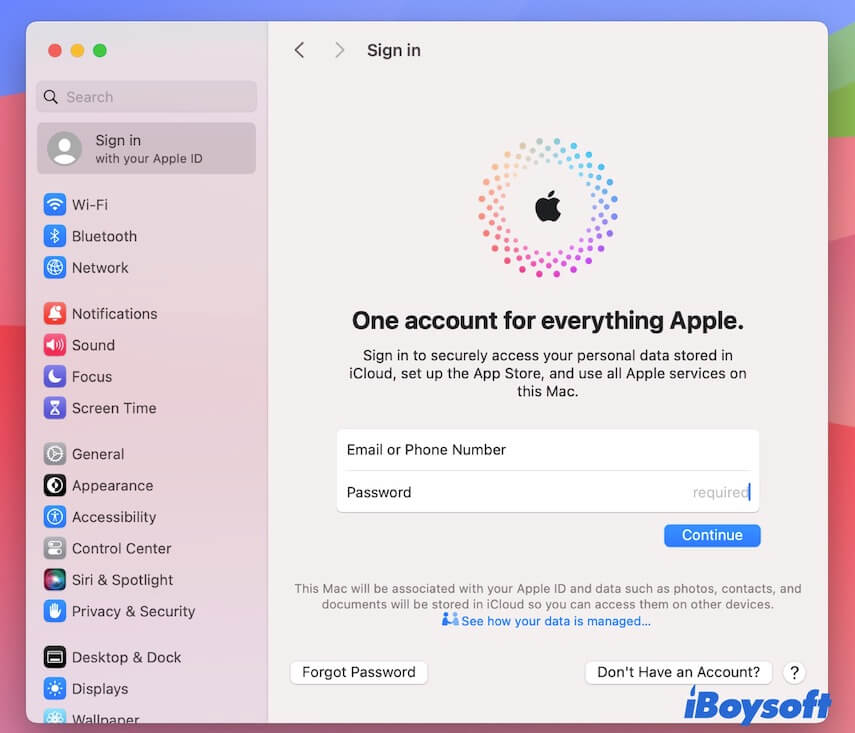
- Click on Sign in (Apple ID) on the sidebar.
- Enter your email or phone number and password, and click Continue.
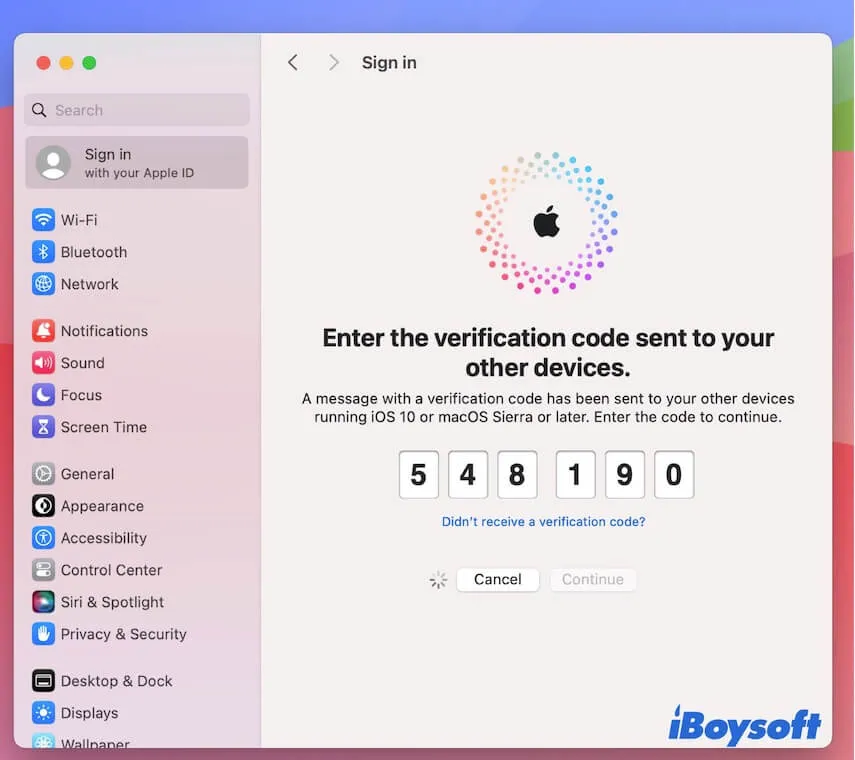
- Enter the verification code that is sent to another device. (Optional)
- Enter your Mac password.
- Enter the passcode you use to unlock the iPhone. (Optional)
Note: If you see a blank panel after clicking Sign in in System Settings, jump to Fix 3 to start fixing your problem.
Fix 2: Customize the iCloud settings
If you find that iCloud won't sync certain files on your Mac or won't sync the Notes app or others, you can reset your iCloud settings.
- Go to the Apple menu > System Settings > Apple ID > iCloud.
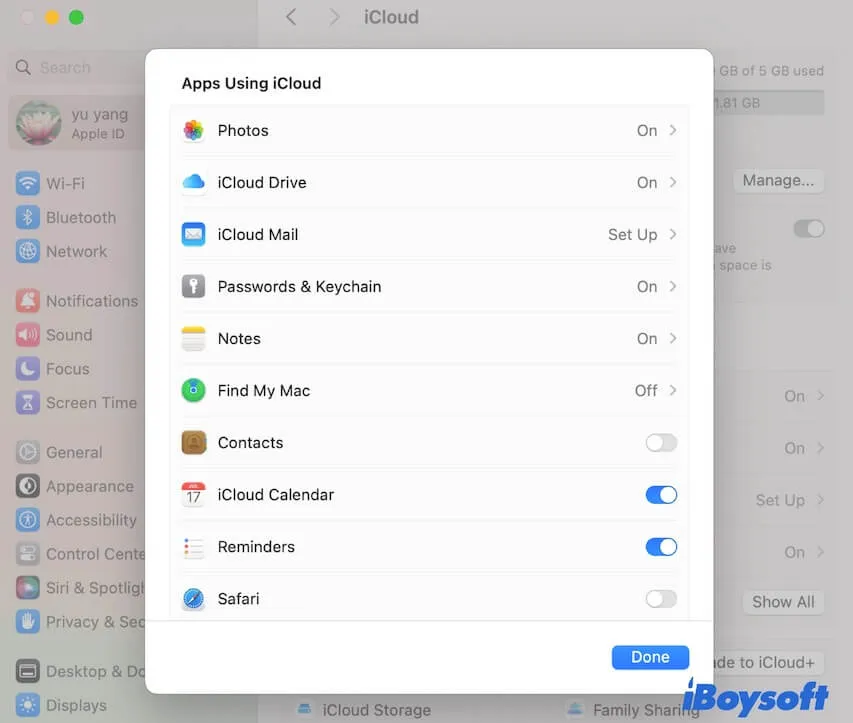
- In the Apps Using iCloud section, click Show All.
- Check if the app you want iCloud to sync is on. If not, turn it on. If it has already been enabled but is not being synced, disable it and then on again.
Fix 3: Use the search box of System Settings to open iCloud
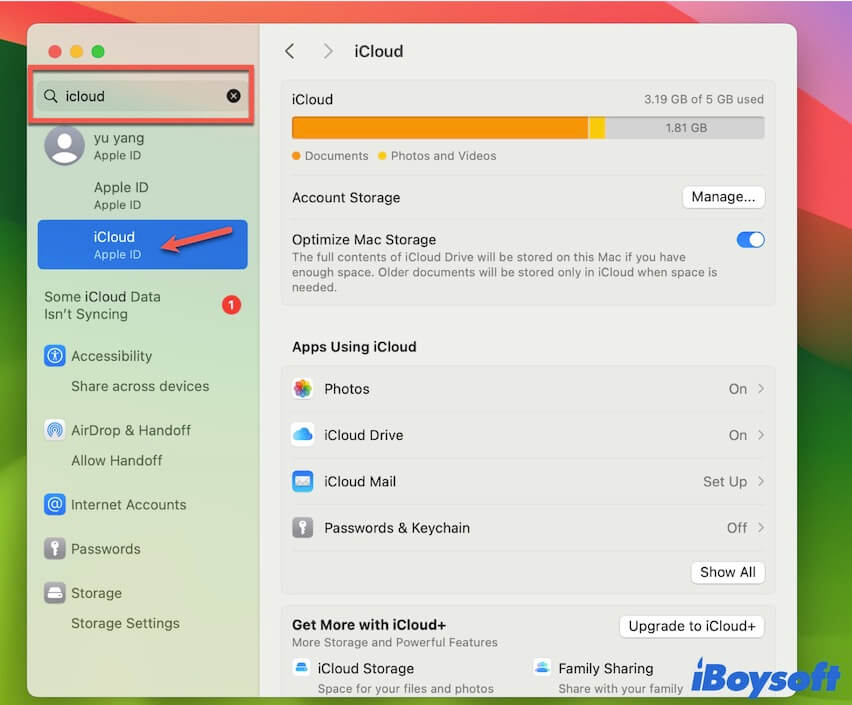
If you click Apple ID from the sidebar of System Settings, only to find that the Apple ID shows blank, you have no access to iCloud settings to make changes.
You have another way to access iCloud settings. Simply search for iCloud from the search box of System Settings. Next, click iCloud from the search results.
Fix 4: Log out of your Apple ID and then log in again
As iCloud is bundled with Apple ID, errors in Apple ID will also lead to iCloud not working on your Mac. If iCloud won't load in System Settings after signing in to your Mac, you can try logging out of your Apple ID and then logging in again.
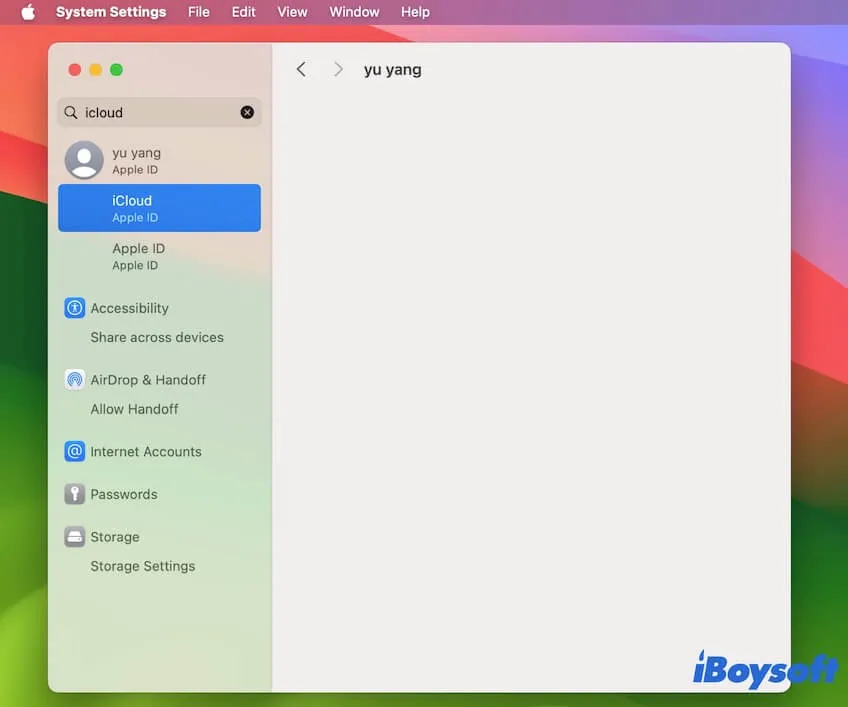
- Enter Apple ID into the search box of System Settings and click it in the search results below to open Apple ID.
- Scroll down the Apple ID window to click Sign Out in the lower left corner.
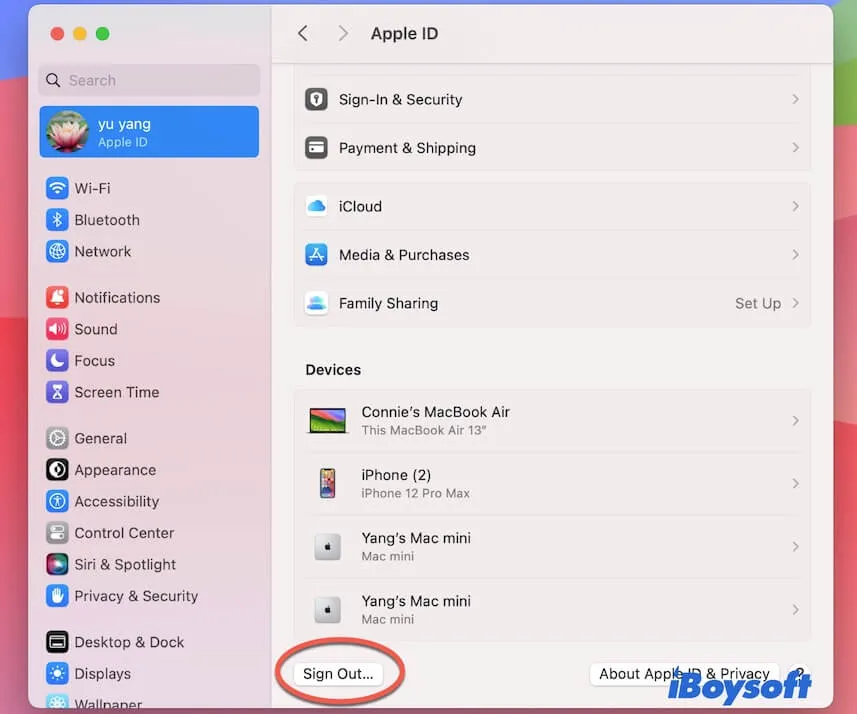
- After your Apple ID is completely signed out, click Sign in (Apple ID) on the left sidebar and follow the on-screen guide to log in to your Apple ID again.
Fix 5: Create a new profile with the same permissions on your Mac
Let alone use iCloud, you can't even sign in or out of Apple ID, or you get the message saying "Extension process Apple ID(10836) exited" while signing in to Apple ID. The misbehaved iCloud may be due to an issue on Apple's end. Apple's senior tech indicates iCloud with some user profiles is not syncing with the system update.
However, there is still a trick for you. You can create a new profile with the same permissions, and then log into your Mac with this profile and use your Apple ID to sign into your iCloud.
Here's how to create a new profile with the same permissions (like Admin) on your Mac:
- Go to System Settings.
- Scroll down the sidebar to select Users & Groups.
- Click the Add User button and enter your admin password if asked.
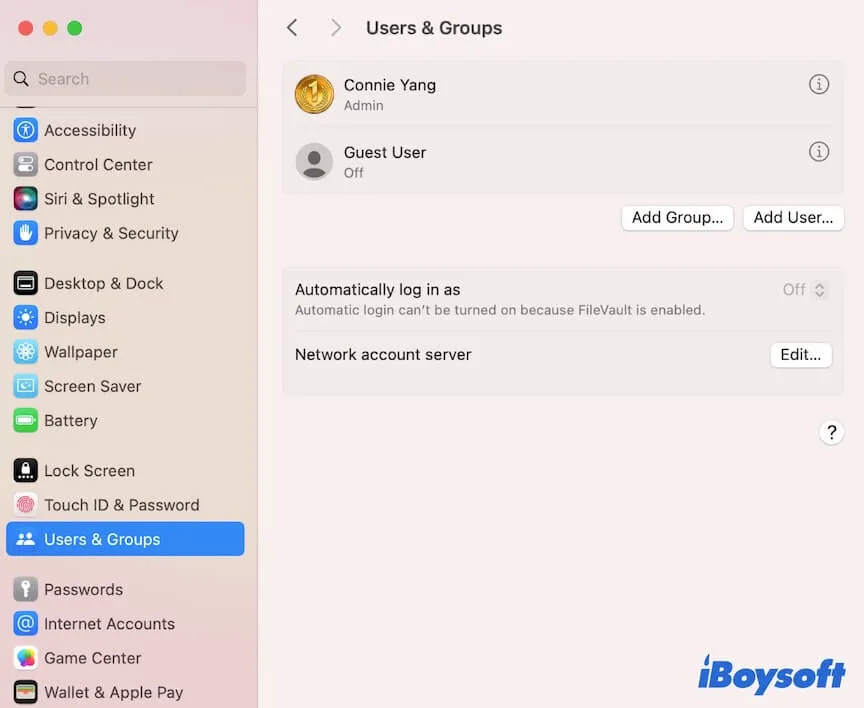
- On the pop-up new user edition window, select the New User type that is the same as yours.
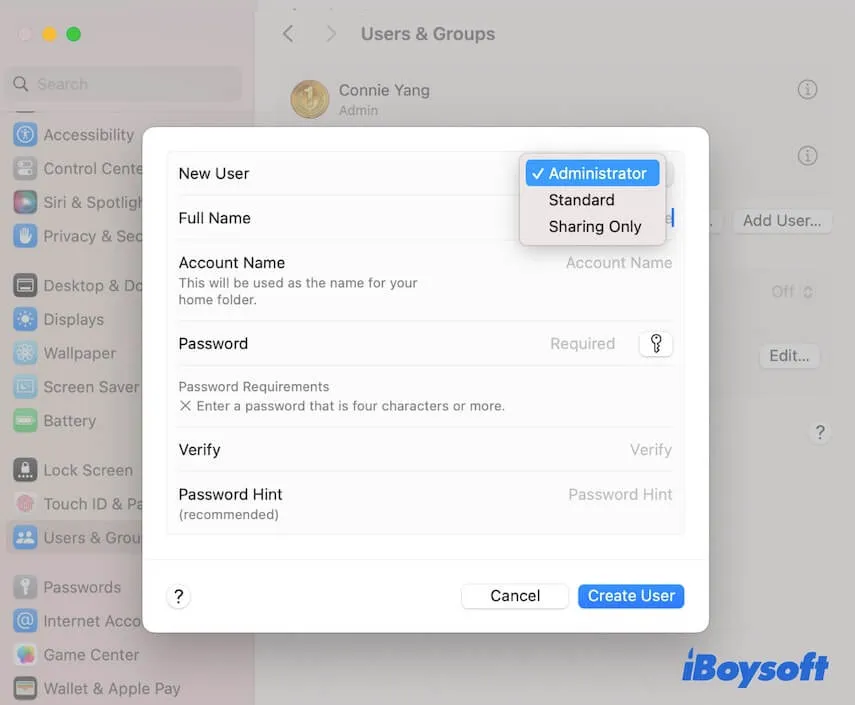
- Enter other information and click Create User.
- Click the Apple menu > Log Out (your user name).
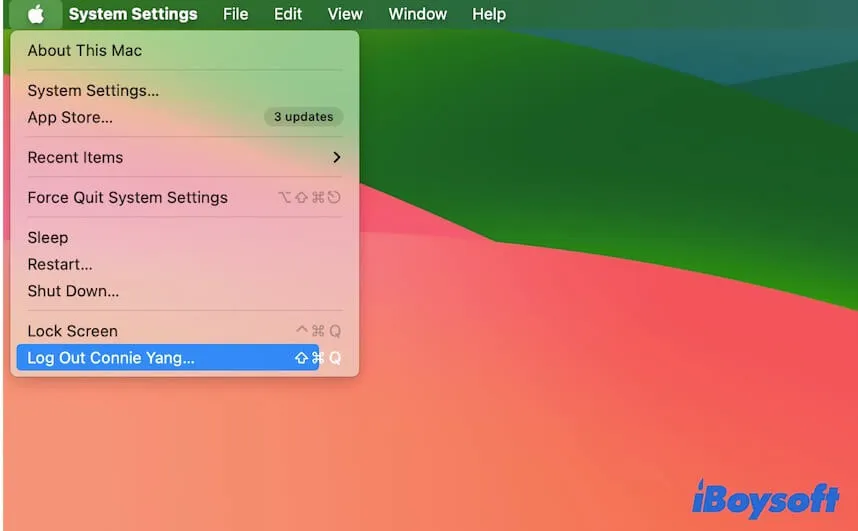
- Enter the new username and password to log into your Mac again.
- Navigate to System Settings and sign in to iCloud with your Apple ID.
Fix 6: Turn off your network connection, and then on
iCloud allows you to store data in an off-site location for remote access via the Internet. Thus, if your Internet connection is poor or unstable, you cannot connect to iCloud on your Mac. Consequently, fail to access files in iCloud Drive and data in apps that you enabled in iCloud.
To fix that, you can check the status of your internet connection, turn off your network connection, and then on.
Fix 7: Start up your Mac in Safe Mode
iCloud sync and load problems on Mac may be due to software conflicts, as some of your installed third-party apps may not have been upgraded to support the new system.
To verify that, you can boot up your Mac to Safe Mode. Safe Mode only loads the minimum and necessary startup items to start up the Mac while isolating all third-party programs from working.
If iCloud performs well in Safe Mode, it means that third-party apps block its normal work. You can check the version of the third-party apps on your Mac and uninstall those whose latest version is earlier than the date of the new macOS release.
Fix 8: Update Mac
If all the ways are of no use, iCloud doesn't work on macOS Sonoma, Sequoia, or Tahoe is probably due to a bug in the system. You can update your Mac to the latest minor version of the current macOS. Minor update always comes up with bug patches to the current major version and work to improve the built-in features on the Mac.
If the above solutions are workable, please share them with more people.
Best alternative to back up files on your Mac
iCloud is problematic in macOS and is not stable as well. Storing data on Cloud storage via the internet is not as secure as you think; it may experience virus attacks. So, why not change it to the best alternative?
iBoysoft DiskGeeker is your best choice to back up files on your Mac. This disk management tool contains the File Keeper feature that allows you to back up and sync files on your Macintosh HD. You can set it to back up files on your Mac hourly, daily, weekly, or monthly.
Different from Time Machine backup, which requires an external hard drive, iBoysoft DiskGeeker helps you sync files to your Mac. When accidental data loss happens, you can load the backups from this tool to proceed with data restoration.
Here's how:
- Free download, install, and open iBoysoft DiskGeeker on your Mac.
- Select Macintosh HD - Data (macOS - Data) from the left sidebar and then click File Keeper on the right toolbar.
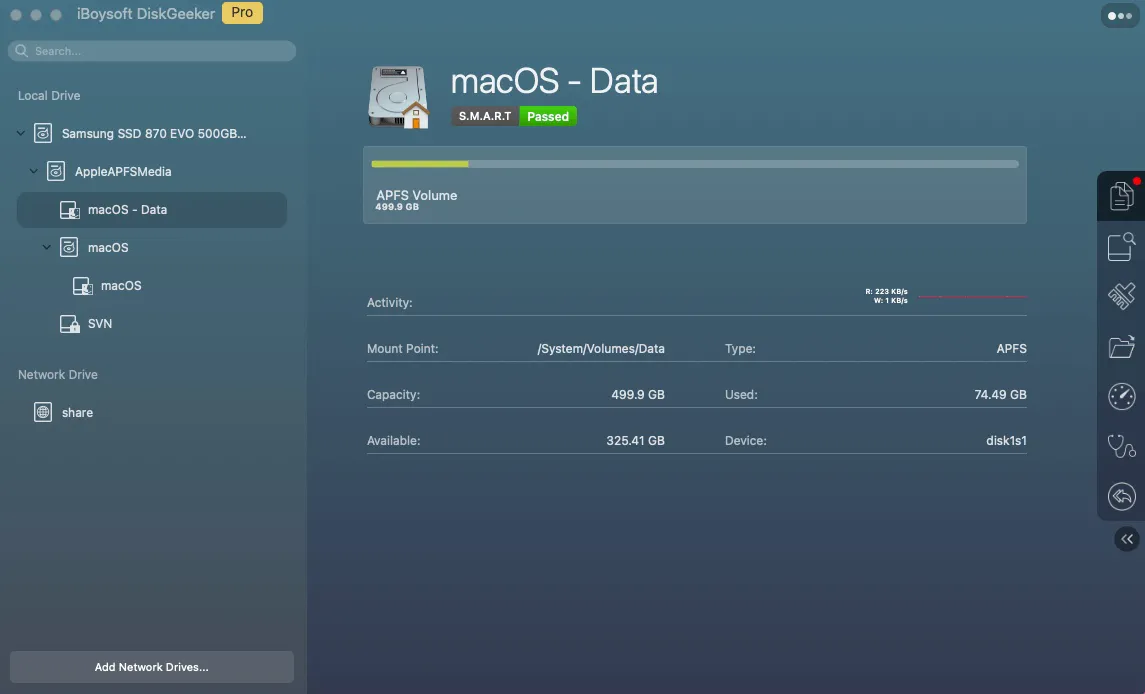
- Click Turn On on the pop-up. File Keeper now automatically starts up to back up the target Macintosh HD - Data volume ( the startup volume that is used to store all your user data).
If you want to reset the backup settings, you can click the gear icon > Options to access the backup preferences pane.
Why doesn't iCloud work on Mac?
Many users say that the unworkable iCloud on a Mac is due to the bugs in the system, as this problem occurs after upgrading to macOS 14.
It can't be denied that the iCloud not loading issue is related to the system issues, but not only be attributed to those. Your improper settings, poor or unstable network, and interference from third-party applications are all possible causes.
If you think this post is helpful, go tell more Mac users.
