Backing up files/folders and the OS is necessary so that you can restore the data when unexpected data corruption, hard disk drive failure, or malware infection occurs. Windows has some in-built options for users to backing up data, and Backup and Restore is one of them.
Windows Backup and Restore: What is it?
Backup and Restore(formerly Backup and Restore Center) is released in Windows Vista and Windows 7. It provides two ways to back up the Windows: file and folder backup, and system image.
File and folder backup allows you to back up all your individual files and folders saved to ZIP files, and system image is a block-by-block disk image of the operating system, kept in a VHD file. Both methods support incremental backups. And you can restore the files/folders and OS with Backup and Restore when necessary.
Although Microsoft deprecated Backup and Restore in Windows 8.0, and replaced it by the File History feature, it is available on all versions of Windows released thereafter. Hence, you can use Backup and Restore on Windows 7, 10, and 11. Despite a few modifications over the years, it still employs old technology.
Windows Backup and Restore: How to backup and restore files/folders?
If you want to use the Backup and Restore feature to back up the individual files and folders, you can follow the steps below to set up the backup including the backup location, backup contents, and the schedule, etc.
Steps to set up file and folder backup:
- Enter Control Panel in the search box on your taskbar, and tap on Control Panel.
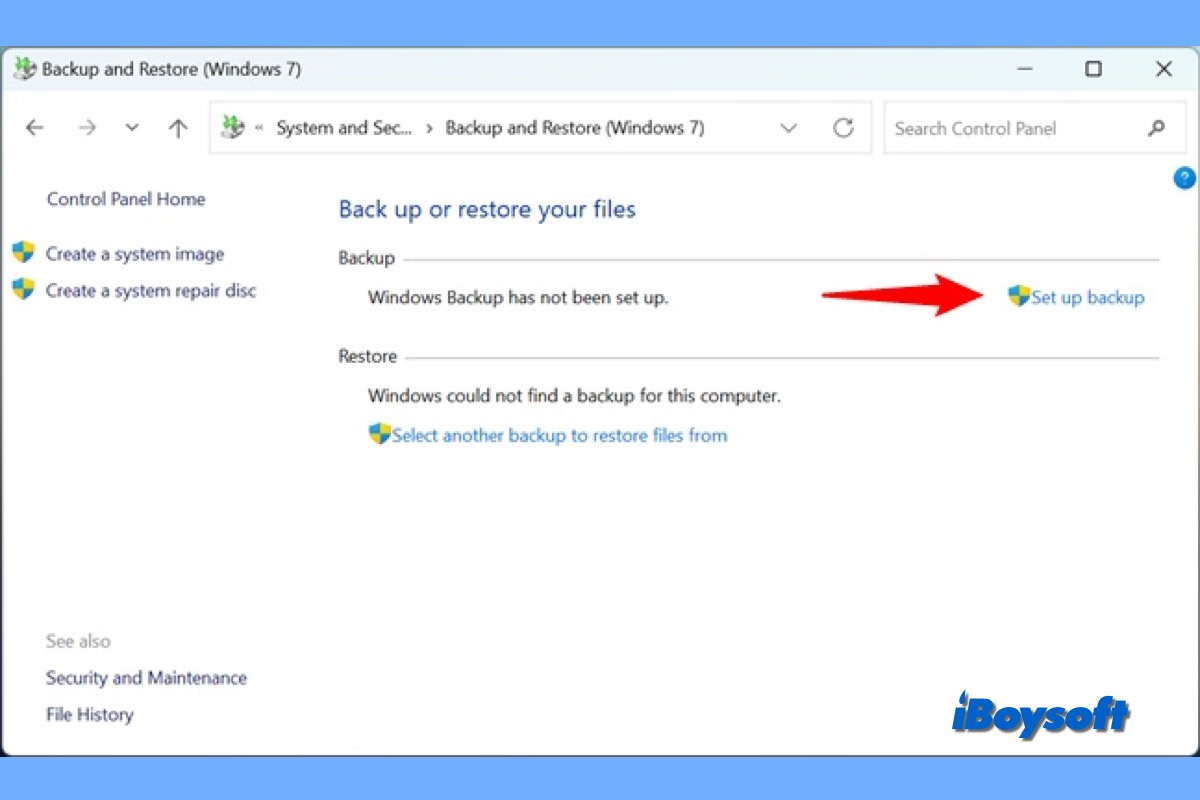
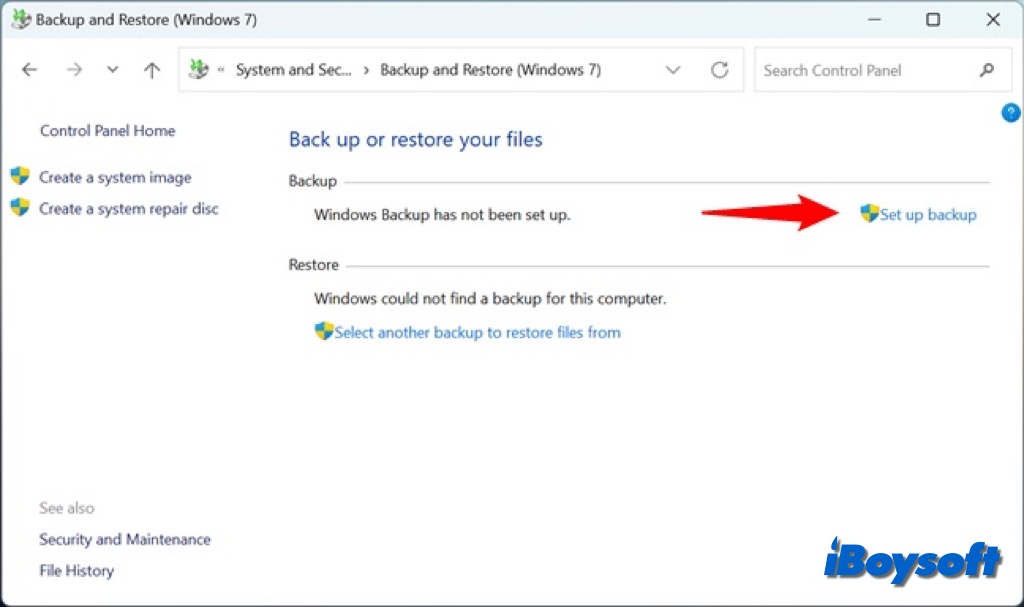
- In the System and Security section, tap Backup and Restore(Windows 7).
- When you see the Back up or restore your files window, click Set up backup.
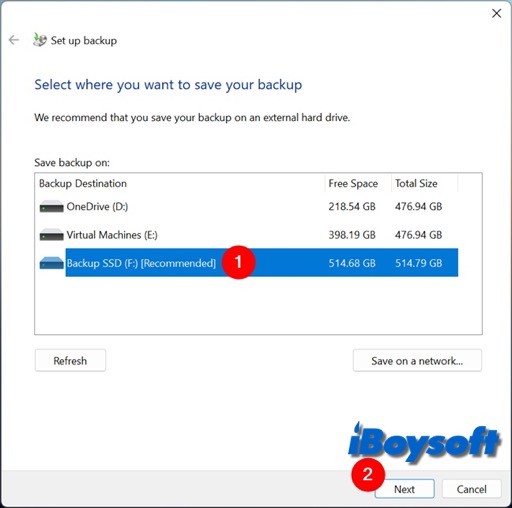
- Select a location to save the backup, if you want to save it in a network location, tap the Save on a network button, then follow the on-screen guide.
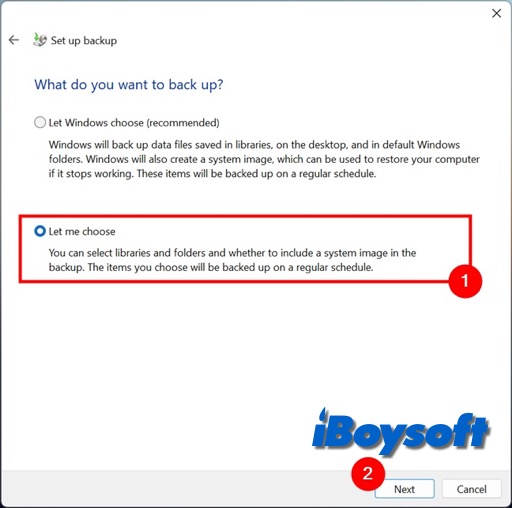
- Click Next after selecting where to save the backup, then choose what to backup: Let Windows choose (recommended) and Let me choose. Here, select the second option.
- Tick the box of the items that you want to back up and tap Next.
- It will ask to review your backup settings, ensure have select the desired backup location and included all the data you want to back up.
- Tap Change schedule if you want to modify or disable the schedule.
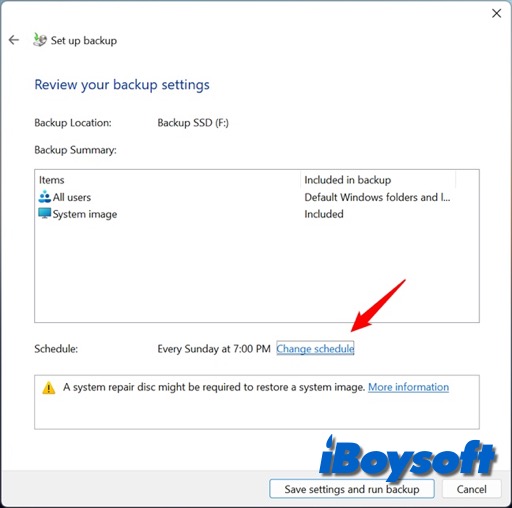
- Click Ok to confirm the schedule change and click Save settings and run backup.
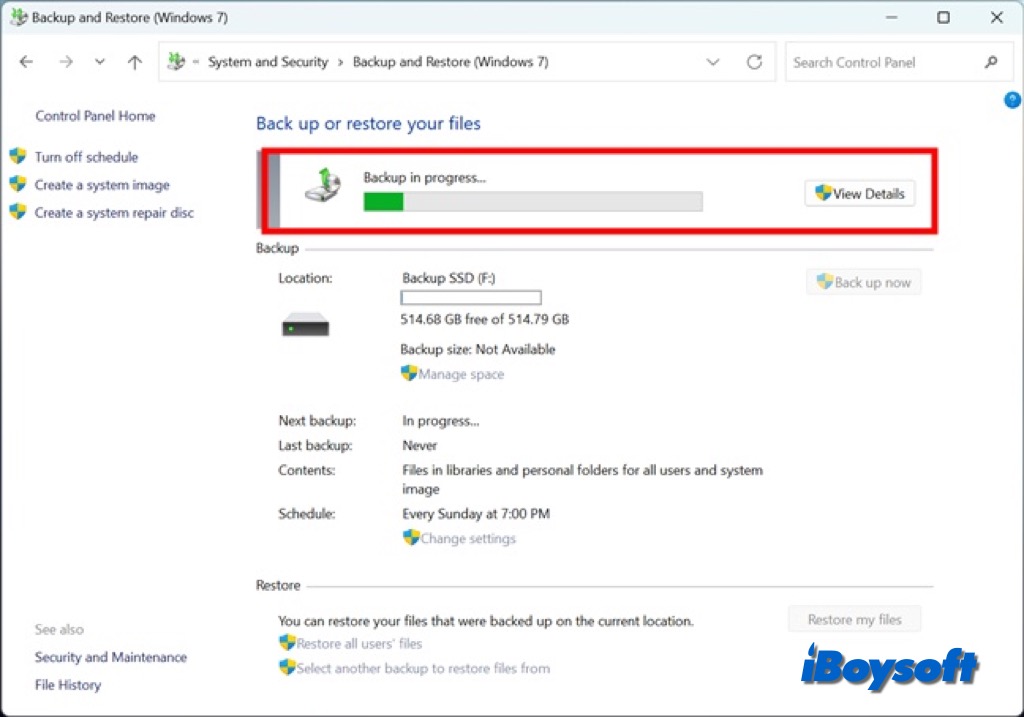
- Then it backs to the Backup and Restore (Windows 7) page and displaying the backup progress.
Steps to restore files from Windows backup:
- Press Windows Key + S and type Backup settings, and click tap the first result.
- Click Go to Backup and Restore (Windows 7) under "Looking for an older backup?"
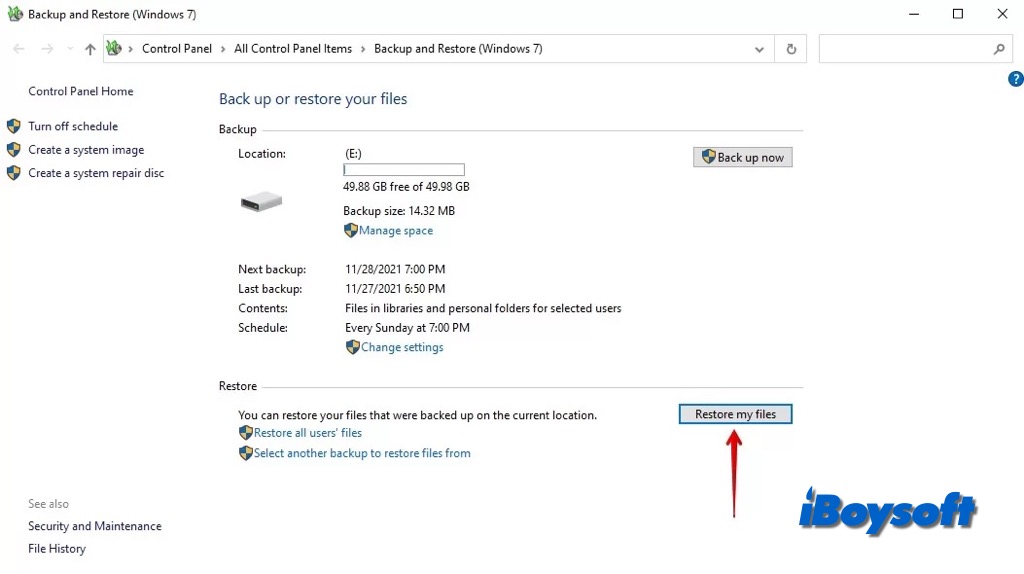
- Click Restore my files in the Restore section.
- Click Browse for files and select the files you want to restore.
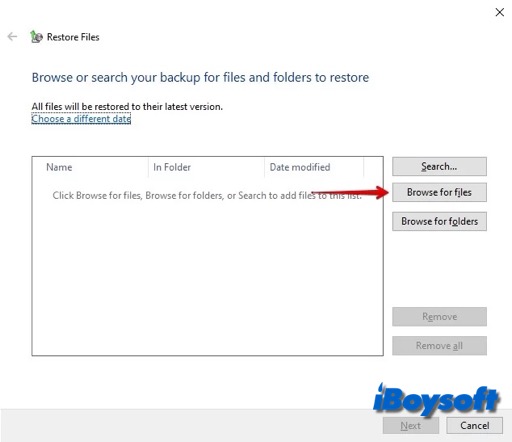
- By default, it will be restored to the original location, you can also select a desired location.
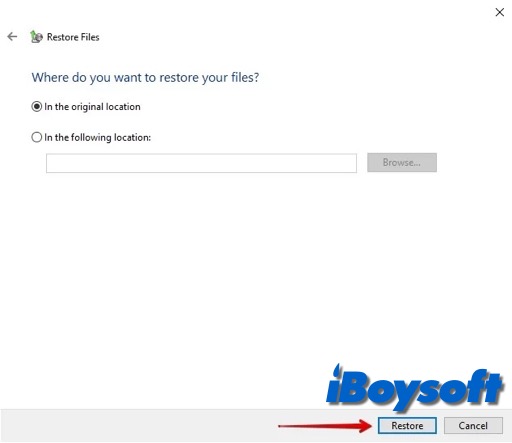
- Then click Restore.
Windows Backup and Restore: Create a System Image & restore from it?
The biggest highlight of Backup and Restore(Windows 7) is that it enables Windows users to create an image clone of the operating system, making an identical copy of all the drivers needed to run Windows and personal files.
Steps to create a System Image:
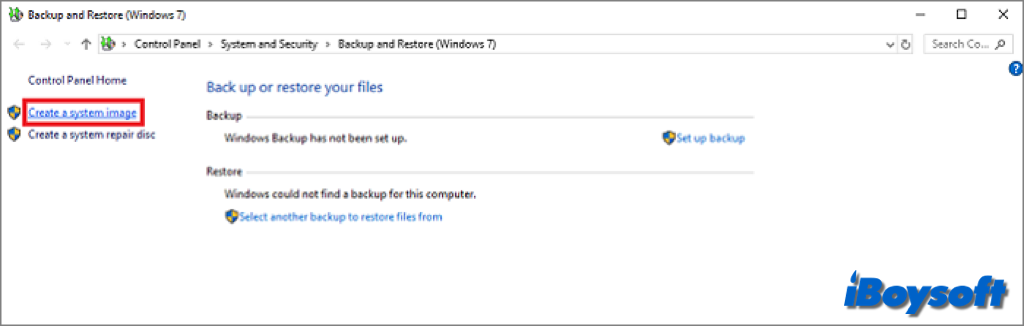
- Open Control Panel and access Backup and Restore(Windows 7).
- On the left side of the window, click Create a system image.
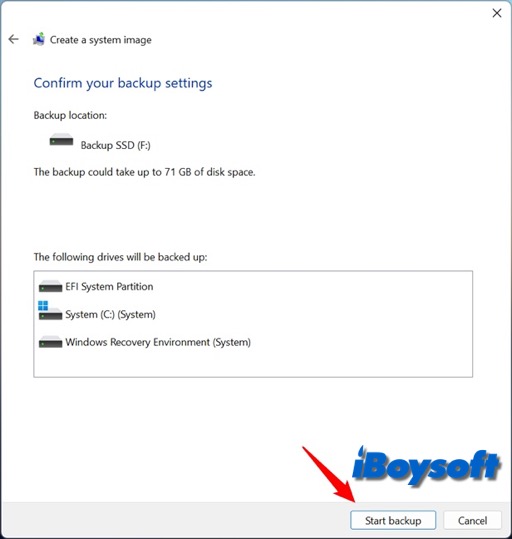
- Select the target hard disk, DVD, or network location to save the backup, and click Next.
- Choose the drives you want to include in the backup and click Next.
- Confirm the backup settings and click Start backup to begin the operation.
- Wait for the progress to be done, if you change the mind, you can click the Stop backup button.
- Then tap Close.
Steps to restore with a system image backup:
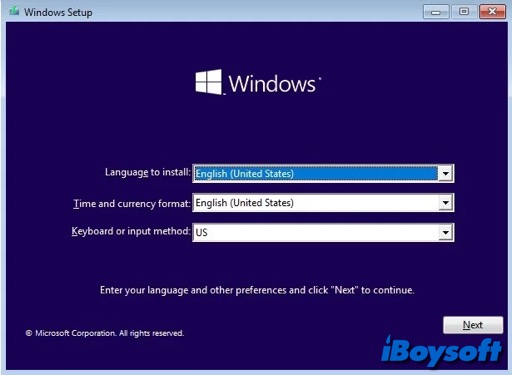
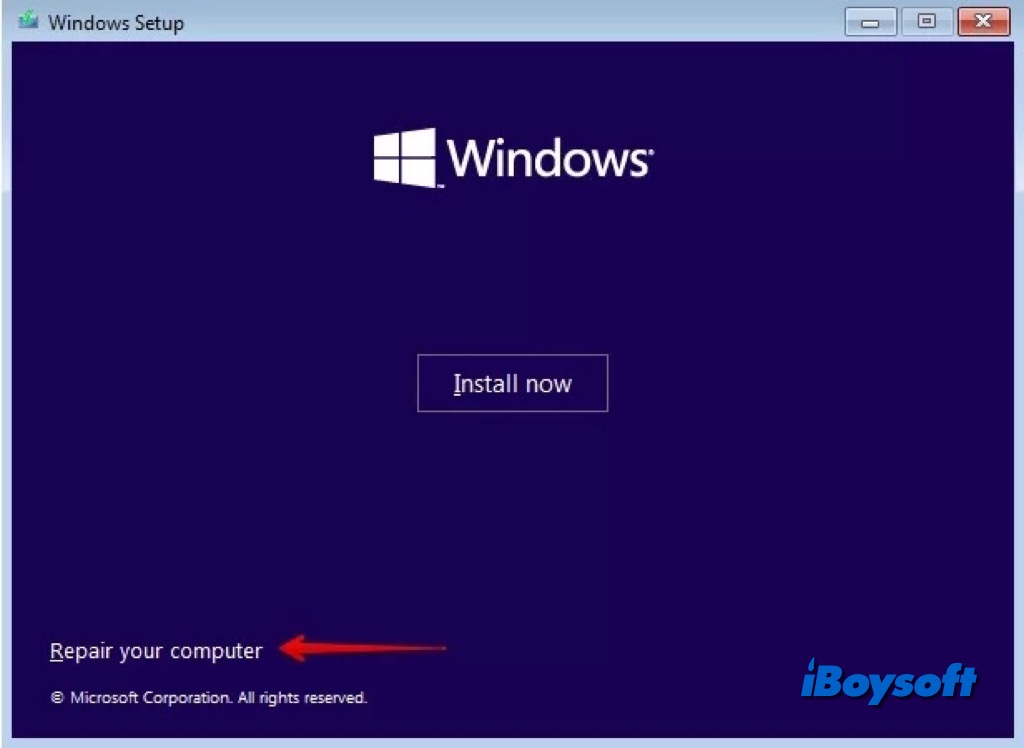
- Boot into the Windows pre-install environment and click Next.
- Select Repair your computer on the bottom.
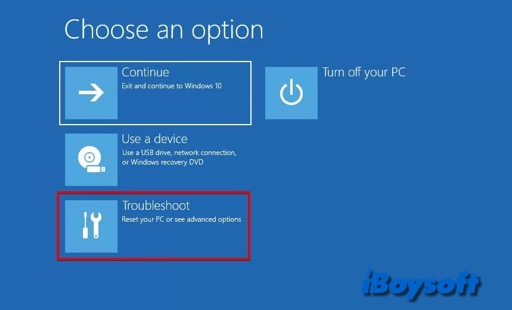
- Click Troubleshoot.
- Then select System Image Recovery.
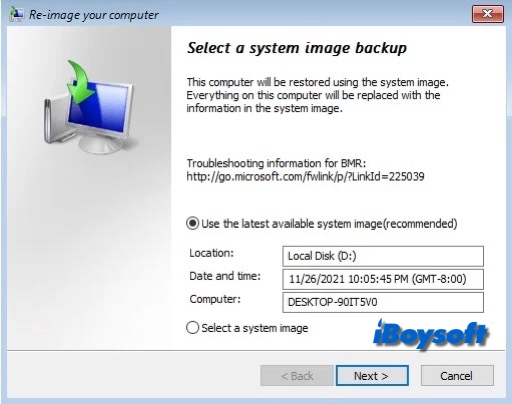
- Select your system image manually or just click Next.
- Choose whether you want to format and repartition your drive. Click Next.

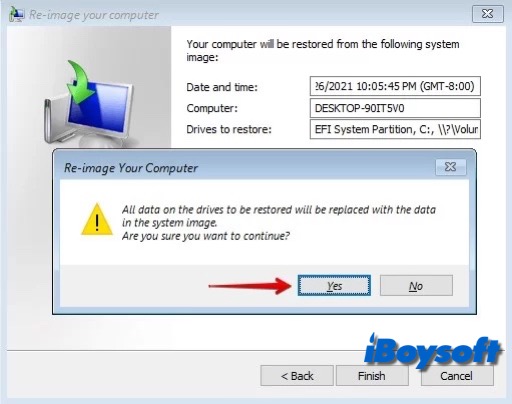
- Click Finish.
- Click Yes to confirm the operation and start it.
Share this post about the Backup and Restore(Windows 7) feature!