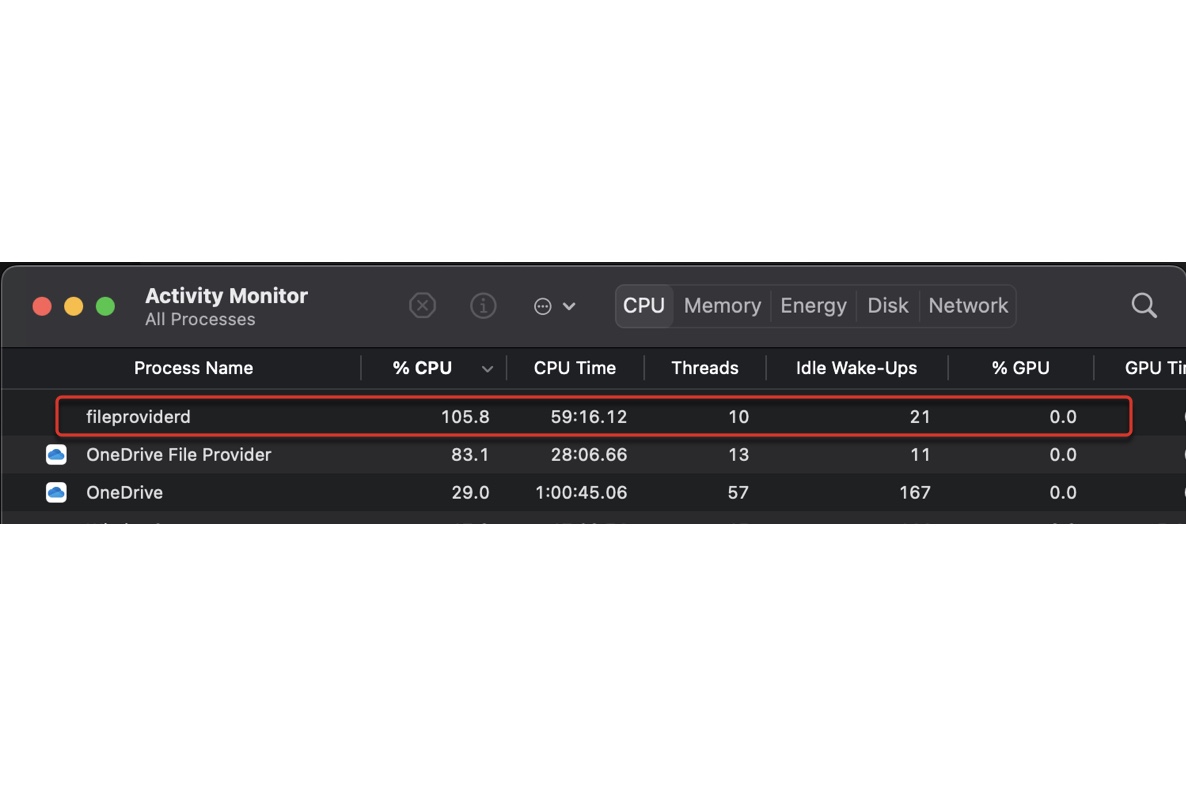
You may have noticed your Mac slowing down, making loud fan noise, draining battery fast, or having constant app crashes and freezing when you found the fileproviderd process overloading your Mac's CPU. If you're wondering what the process is and how to stop it from using up your Mac's resources, this article got you covered.
What is fileproviderd on Mac?
The fileproviderd process on Mac is a daemon that manages cloud-based file providers, such as OneDrive, Google Drive, Dropbox, Box, iCloud, Office 365, and Adobe InDesign. It runs in the background but can be found in Activity Monitor. Fileproviderd is responsible for tracking files stored in the cloud and providing access to them from the corresponding application.
For instance, when you open a cloud-based file provider application like Google Drive, it's the fileproviderd process that's making files in the cloud available to the app, allowing you to edit them and save them back to the cloud.
However, when the fileproviderd process encounters a problem, such as being unable to locate or sync a file, you may see an NSFileProviderInternalErrorDomain error 12. Restarting the process or resolving sync issues often helps fix the error.
Click the button below to share the information.
How to fix fileproviderd high CPU usage?
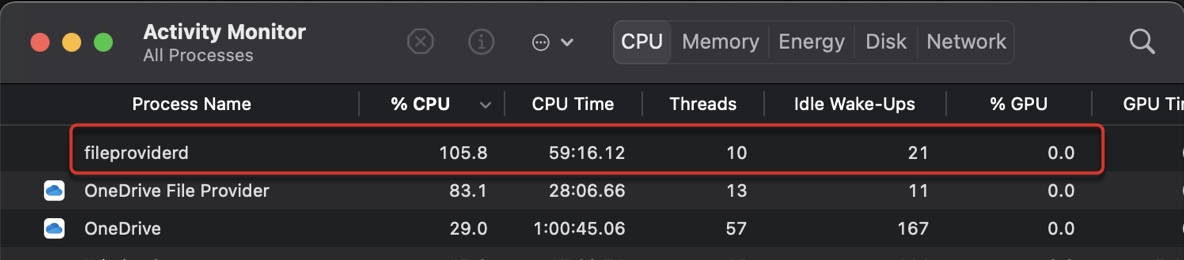
Sometimes, fileproviderd may spike your CPU usage at close to 100% or even more. If it's affecting your Mac's performance, follow the solutions below to fix the fileproviderd high CPU usage issue.
Solution 1: Remove unused or stale file provider domain
When fileproviderd is using a lot of CPU, there are usually file providers using its services. To find out which file provider is actively running the process, follow the steps below:
Note: You must be an administrator to use the following command. If you're not, use sudo before the command (e.g., sudo fileproviderctl domain list) and enter the administrator password when being prompted. Note that the password won't show up on your screen.
- Open Terminal from the Utilities folder.
- Copy and paste the following command and hit Enter to run it.fileproviderctl domain list
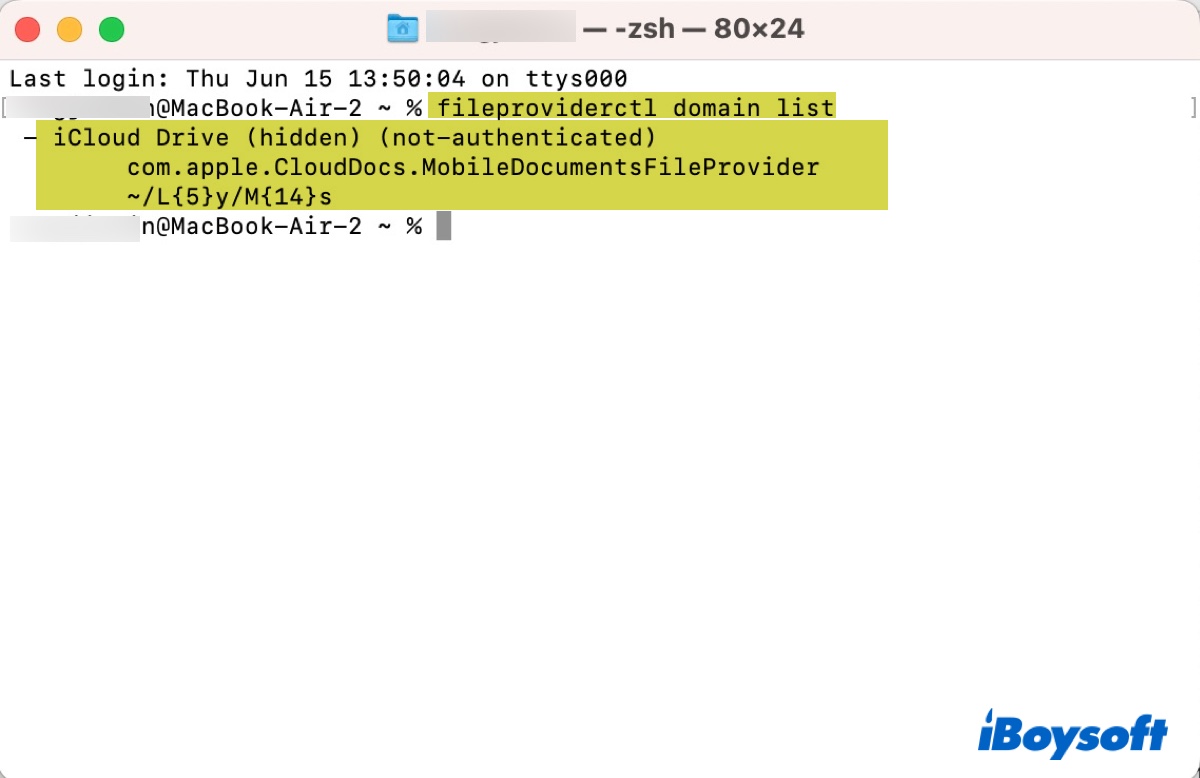
Terminal should return a list of file provider domains that are currently installed on your Mac. Those listed as hidden and not-authenticated are stale file providers no longer used by any applications. You can remove them with the following command:
fileproviderctl domain remove <stale file provider name from above list command>
Remember to replace <stale driver name from above list command> with the stale provider in your case. E.g, fileproviderctl domain remove com.apple.CloudDocs.MobileDocumentsFileProvider
Solution 2: Disable iCloud Drive
If iCloud is the culprit behind the issue of fileproviderd overloading CPU, try disabling iCloud drive with the following steps to fix the problem.
- Open Activity Monitor from the Applications/Utilities folder.
- Force quit the fileproviderd, iCloudDrive, and cloud process by selecting one of them, clicking the x icon, and selecting "Force Quit."
- Open System Preferences/Settings > Apple ID > iCloud.
- Disable "Optimize Mac Storage."

- Turn off "iCloud Drive."
Solution 3: Close and update the troublesome file provider
If you notice fileproviderd starting to consume excessive CPU after a specific file provider is open, such as Dropbox, try quitting the app. If the problem recurs after reopening the app, check if the app is up to date. If it isn't, update the app.
Solution 4: Stop Spotlight from indexing the app
Preventing Spotlight from indexing the problematic cloud-based file provider may also be helpful in stopping fileproviderd from hogging up your Mac's CPU. Take the following steps:
- Press Command + Space bar and type in Spotlight.
- Click Siri & Spotlight.
- Click Spotlight Privacy.
- Open the Applications folder in Finder.
- Drag and drop the offending app to the Spotlight exclusion list.
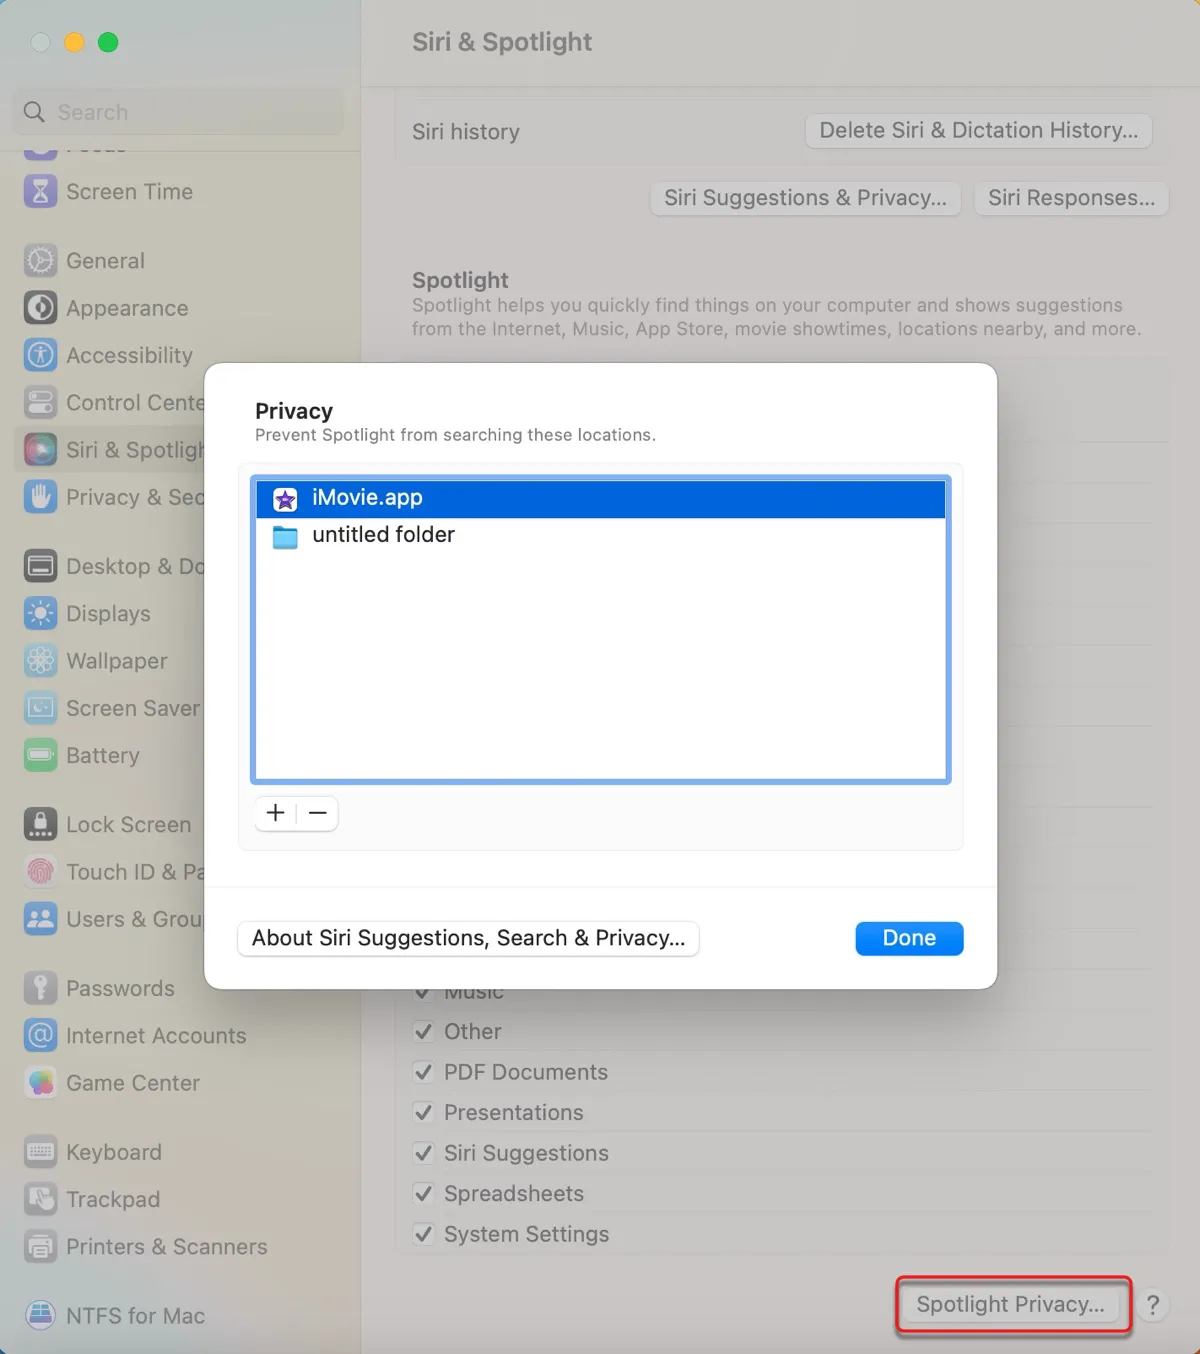
- Click Done.
Solution 5: Uninstall the file provider
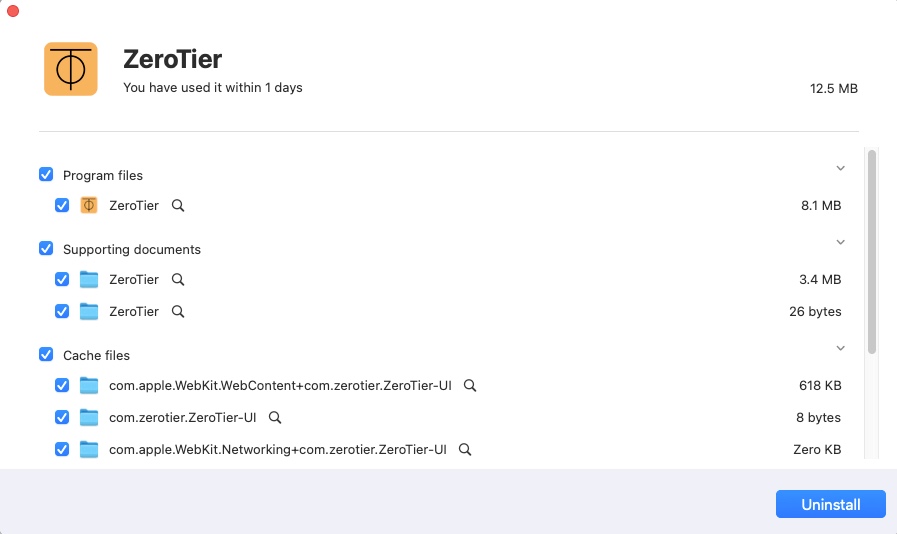
If fileproviderd continues to cause high CPU usage, you can uninstall the file provider on your Mac. Note that dragging and dropping the app to Trash won't delete all files related to it and may not resolve the problem. It's recommended to use an uninstaller to fully remove the app and its leftovers.
You can use iBoysoft MagicMenu to completely uninstall the app. It's a versatile utility that extends the functions of Finder's context menu. With it, you can simply right-click the app in your Applications folder and click Uninstall to get rid of it. It'll find files generated by the app and help you delete them.
After the app is uninstalled, run the commands in Solution 1 again to remove the unused file provider domain.
Solution 6: Reset OneDrive
Some users complaining about OneDrive rendering fileproviderd using abnormally high CPU were able to resolve the issue by resetting the app. If OneDrive is also where the problem lies in your case, follow the official guide to reset OneDrive.
Solution 7: Delete the FileProvider folder
What else you can try is to delete the FileProvider folder, which resets all of the cloud file providers. You need to re-enable them and re-sync your files to use them again.
- Open Finder and click Go > Go to Folder.
- Type in ~/Library/Application Support and press the Enter key.
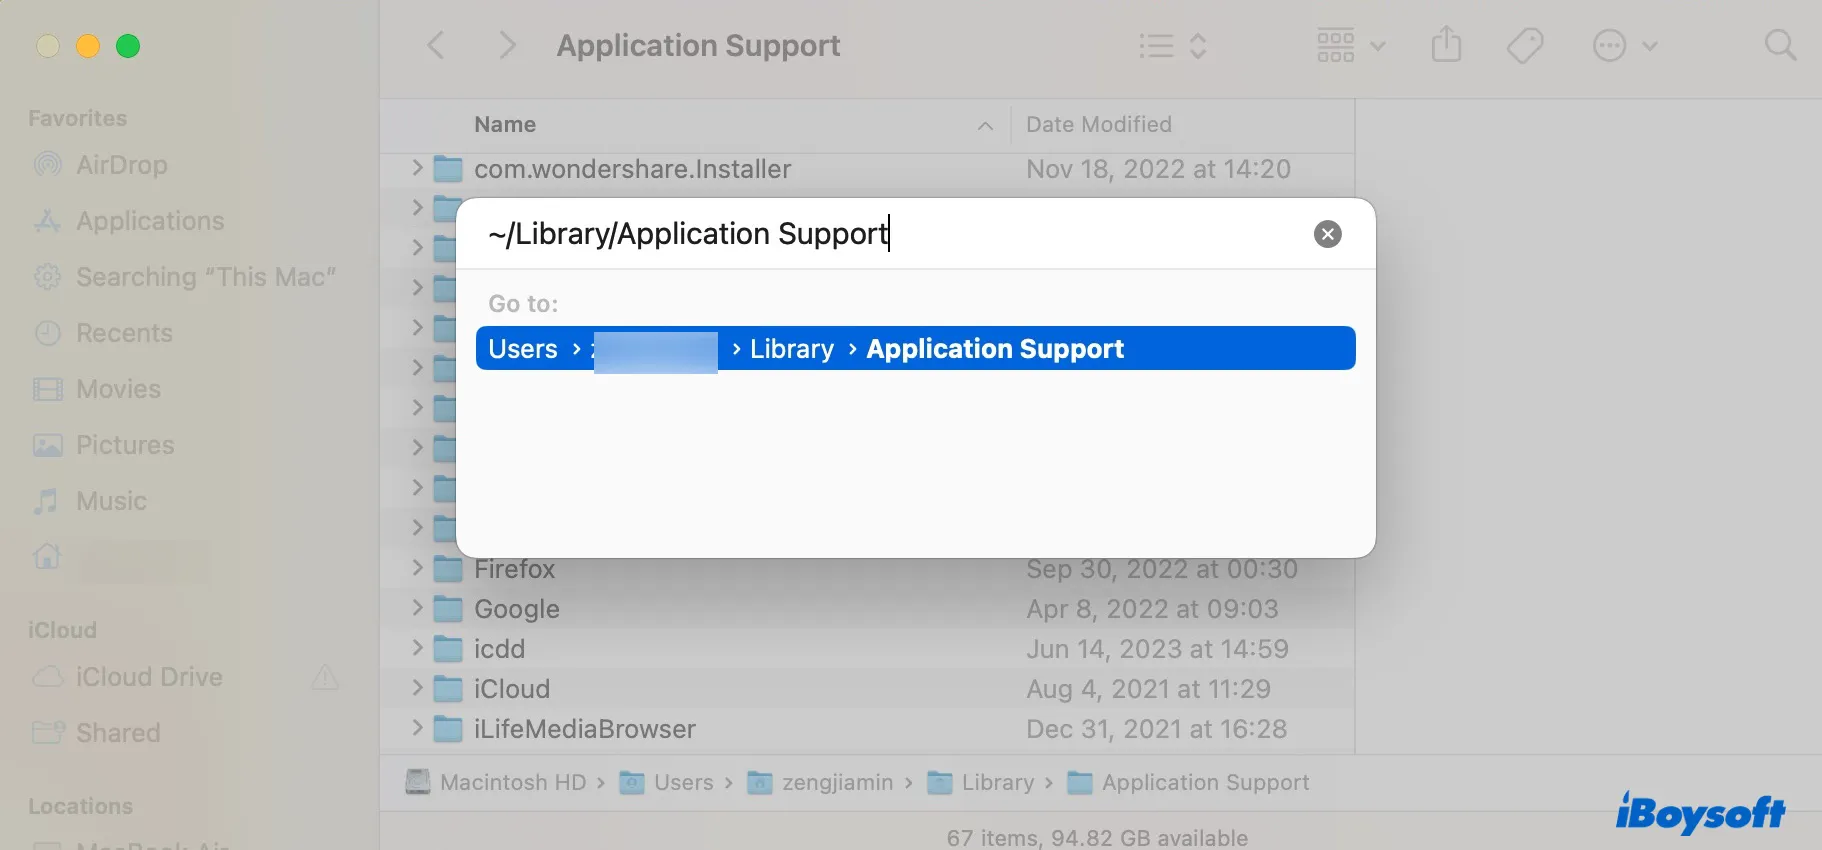
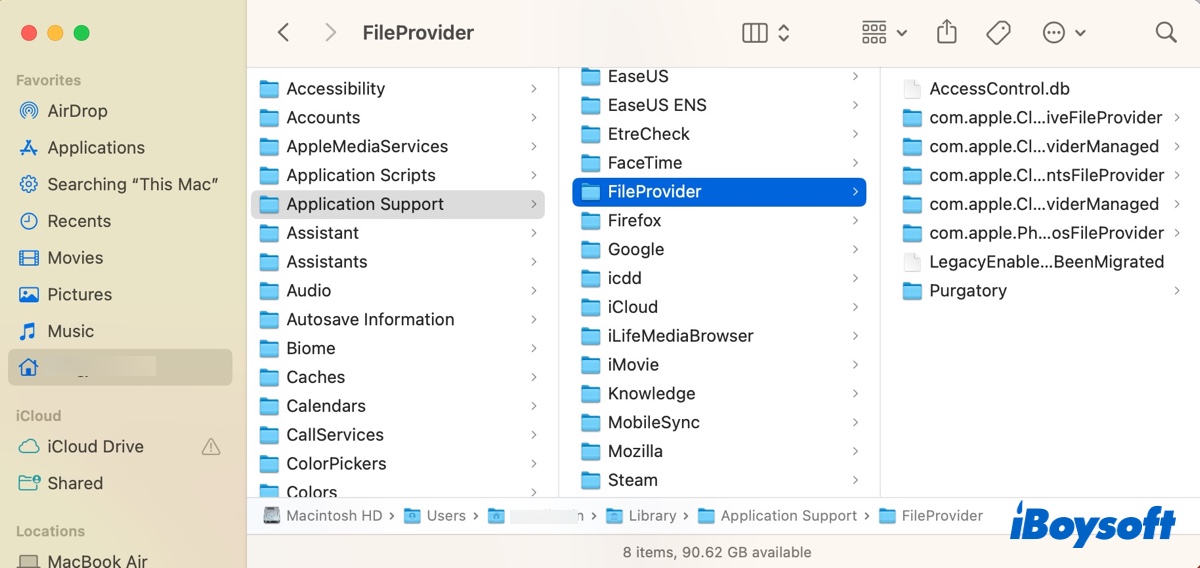
- Copy your FileProvider folder to a different location just in case.
- Delete the FileProvider folder and empty the Trash.
- Restart your Mac.
Solution 8: Disable fileproviderd on Mac
If nothing works, try the following command to disable fileproviderd on Mac. Note that disabling firleproviderd may prevent you from accessing files stored in the cloud and using cloud services like iCloud Drive or Google Drive.
- Launch Terminal.
- Copy and paste the following command and hit Enter.sudo launchctl unload -w /System/Library/LaunchDaemons/com.apple.fileproviderd.plist
- Enter your administrator password and hit Enter. (The password should echo to the screen.)
To reenable fileproviderd on Mac, run the following command in Terminal:
sudo launchctl load -w /System/Library/LaunchDaemons/com.apple.fileproviderd.plist
Hopefully, you have stopped fileproviderd from using 100% or more of CPU on your Mac. Share this article if you find it helpful!