The Terminal may not normally be the first thing you think of when operating a disk, but it can give you more options and control over your disk. Terminal is a good option when the Disk Utility doesn't meet your needs.
We know that you may erase a disk using Terminal because it provides more custom options and parameters that allow you to precisely define file system types, partitioning schemes, and so on, which may not be available or easily accessible in Disk Utility.
Of course, you may want to format a disk using Terminal because Disk Utility won't let you erase hard drives. If you are confused about how to format a disk using Terminal Mac, then read on, we provide a guide that can help you to erase the disk using Terminal on Mac.
How to erase a disk using Terminal?
Step 1. Open Terminal
You can open Terminal by navigating to Launchpad → Other → Terminal, or use Spotlight by pressing Command + Space, typing "Terminal," and pressing Enter.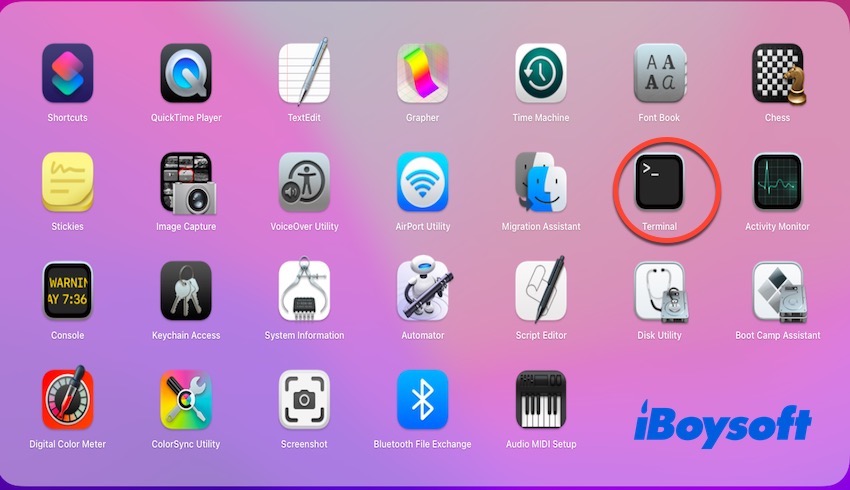
Step 2. List all disks
Type in the diskutil list command and press Enter. This command will display a list of all connected disks and partitions.
diskutil list 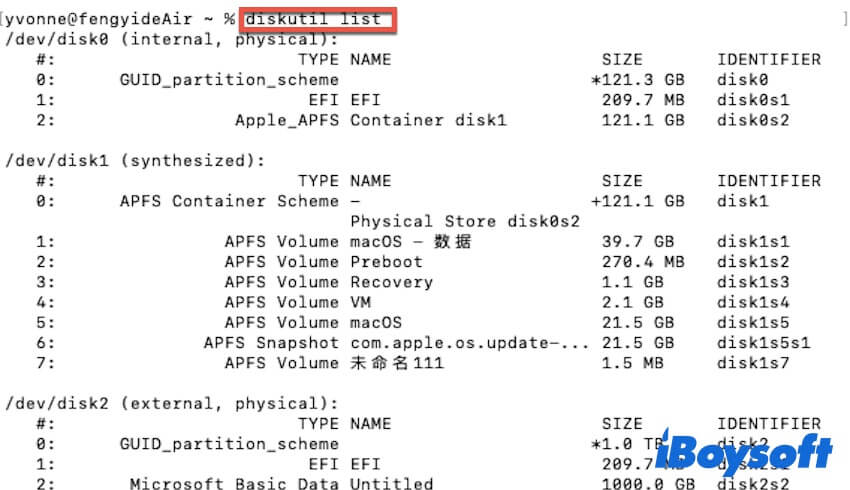
Step 3. Find the disk identifier
Review the list of disks to identify what you want to erase (such as /dev/disk1). In this step, we want to remind you that you have selected the correct disk as this process will erase all data on it.
Step 4. Erase the disk
Enter the following command in Terminal to erase the disk:
diskutil eraseDisk FILESYSTEM DISK_NAME DISK_IDENTIFIER 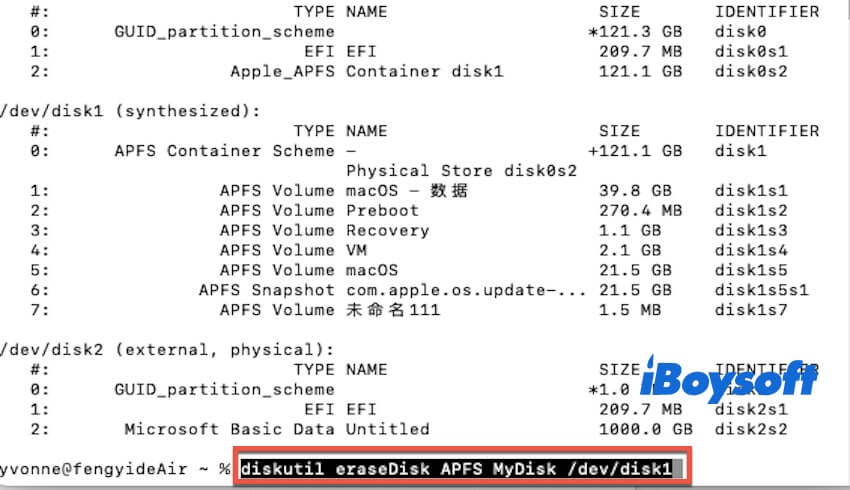
You should replace the DISK_NAME with the name you wish to give to your disk. Additionally, you should replace the FILESYSTEM with the file system format for the disk (such as APFS, HFS+, ExFAT), and replace DISK_IDENTIFIER with the device identifier of your disk. We list an example as follows.
diskutil eraseDisk APFS MyDisk /dev/disk1
This command will erase all data on the disk, format it with the specified file system, and rename it.
Step 5. Verify the erase and close Terminal
Once the erase is complete, you can verify the success of the operation by entering the following command we list.
diskutil list
With the disk listed, you can verify whether the current disk appears with the new name and file system that you specified. If the erase succeeds, you can close the Terminal by typing exit or simply closing the Terminal window.
Share this article if you find it helpful.
How to force erase a disk Mac Terminal?
The Force Erase command is used when common erasure cannot be successfully performed or when erasure must be performed forcibly, bypassing system protection and error messages.
It provides a method to ensure that the disk can be handled in case of special problems, and you can force the disk to erase when normal erasing with Terminal is unsuccessful. Follow us to learn how to force erase a disk using Mac Terminal.
When you hear the word force, you might think that the operation is complicated. Don't worry, you only need to change the command of Step 4 above to achieve the purpose of force-erasing a disk. We list the command in the following. (When entering the command, replace Disk FILESYSTEM, DISK_NAME, and DISK_IDENTIFIER -force.)
sudo diskutil eraseDisk FILESYSTEM DISK_NAME DISK_IDENTIFIER -force
Why can't you erase a disk with Terminal?
Although Terminal has more extensive functions than Disk Utility, failure to erase disks may occur when Terminal is used. We have listed the following common cases, if you cannot successfully erase the disk using Terminal on Mac, follow us.
Case 1. Your disk is in use or occupied
If your disk or a partition on the disk is being used by the system or an application, the disk cannot be erased. If you do need to erase a disk that is in use, you can uninstall the disk using the command we list as follows.
diskutil unmountDisk DISK_IDENTIFIER
Remember to replace the DISK_IDENTIFIER with the target disk's identifier (e.g. /dev/disk1), and after uninstalling, you can try eraseDisk erasure with the diskutil eraseDisk command.
Case 2. The file system or partition table is damaged
If the file system or partition table of your disk is corrupted, the system will not recognize the disk structure properly and will not be able to perform an erase operation. In this case, you can try to repair the disk structure with the diskutil repairDisk or fsck command. If the fix fails, you can consider Force Erase.
Case 3. Your disk is encrypted or protected
When your disk is encrypted or protected, you can erase the disk in Terminal by following these steps. It is important to note that you need to unlock or decrypt the disk before erasing it.
If the disk is encrypted with APFS, you can use the following command to unlock the disk (Remember the replacement of DISK_IDENTIFIER and PASSWORD).
diskutil apfs unlockVolume DISK_IDENTIFIER -passphrase PASSWORD
If the disk is encrypted by FileVault, you can unlock the disk by entering the following command in Terminal. (DISK_IDENTIFIER is the disk identifier, and PASSWORD is the unlock password.)
diskutil corestorage unlockVolume DISK_IDENTIFIER -passphrase PASSWORD
After unlocking or decrypting the disk, you can use the diskutil eraseDisk command to erase the disk. In this case, you can only unlock and erase the encrypted disk if you know the unlock password.
If you find this article informative, share it with others.