The photos and videos take up a large amount of storage space on your Mac hard drive. Thus, you want to delete them to free up more space and optimize your Mac.
However, you worry that the deletion on your Mac will also remove these files on iCloud as you've synced your Mac Photos app to the iCloud storage.
So, how to delete photos only from your Mac but not iCloud? Don't worry. This post will guide you. It offers stepwise workarounds to remove photos from your MacBook without deleting them from iCloud. Also, it tells you some tips to organize files on your Mac and free up more storage space.
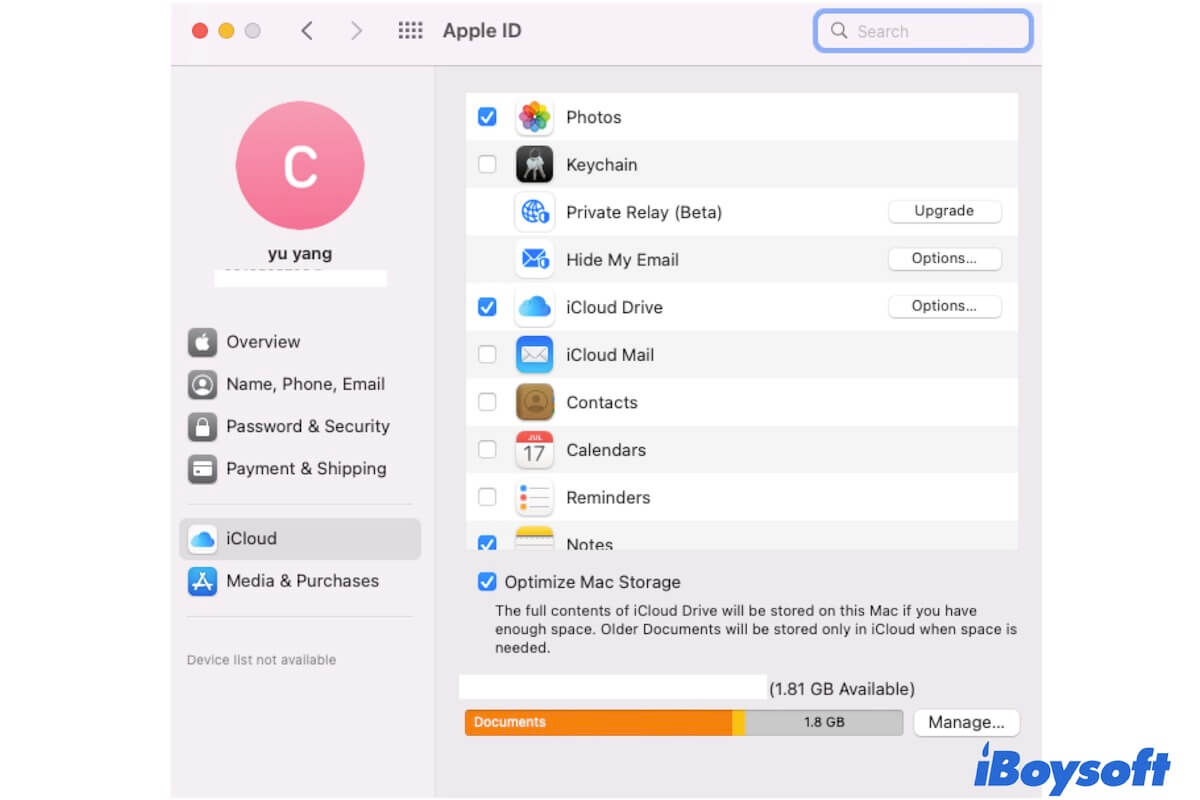
Will deleting photos from Mac delete from iCloud?
Yes. If you've set iCloud to sync the Photos app on your Mac, the pictures on the iCloud storage will be removed on the heel of your image deletion on your Mac.
So, you are not suggested to directly delete photos from your Mac when iCloud photo syncing is on.
How to delete photos from Mac but not iCloud?
Here are two ways for you to delete all photos from your MacBook without deleting them from iCloud. One is a temporary way while the other goes on for a long.
Disable Photos syncing in iCloud and then delete them on Mac
If you allow iCloud to sync the Photos app on your Mac, all your images on the iCloud storage will be removed as long as you delete them from your MacBook.
Thus, to delete photos from your Mac but not iCloud, you can stop iCloud from syncing your photos on your Mac and then remove them on your Mac.
However, this is a temporary way if you will use iCloud to sync the Photos app on your Mac in the future. At that time, all the deleted photos will also be removed from your iCloud.
If you are sure that you won't sync Mac Photos to iCloud anymore, you can follow the steps to delete photos from your Mac but keep them in iCloud:
- Click the Apple menu > System Preferences (or System Settings on macOS Ventura or later) > Apple ID.
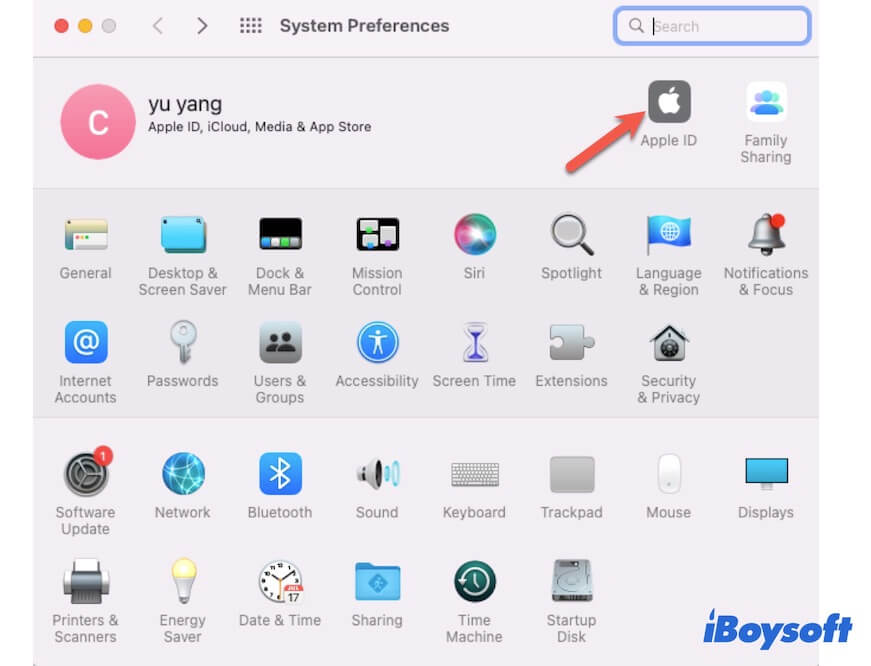
- Select iCloud from the left sidebar.
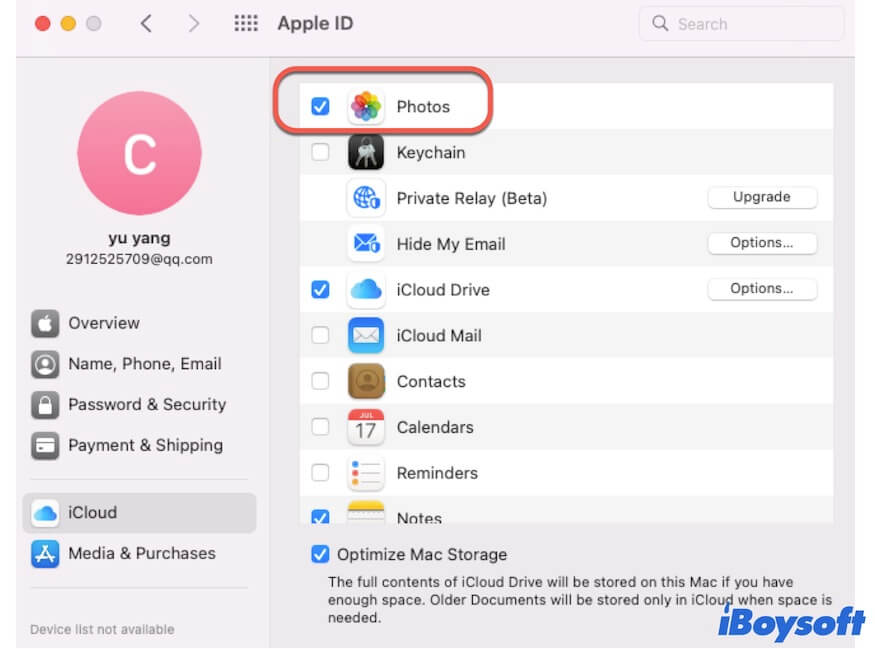
- Uncheck the box next to "Photos" from the list to block changes in the Photos app being uploaded to your iCloud storage.
- Open the Photos app from the Dock or Finder Applications folder.
- Select "Library" and drag your cursor to select all photos and videos you want to delete and then move them to Trash.
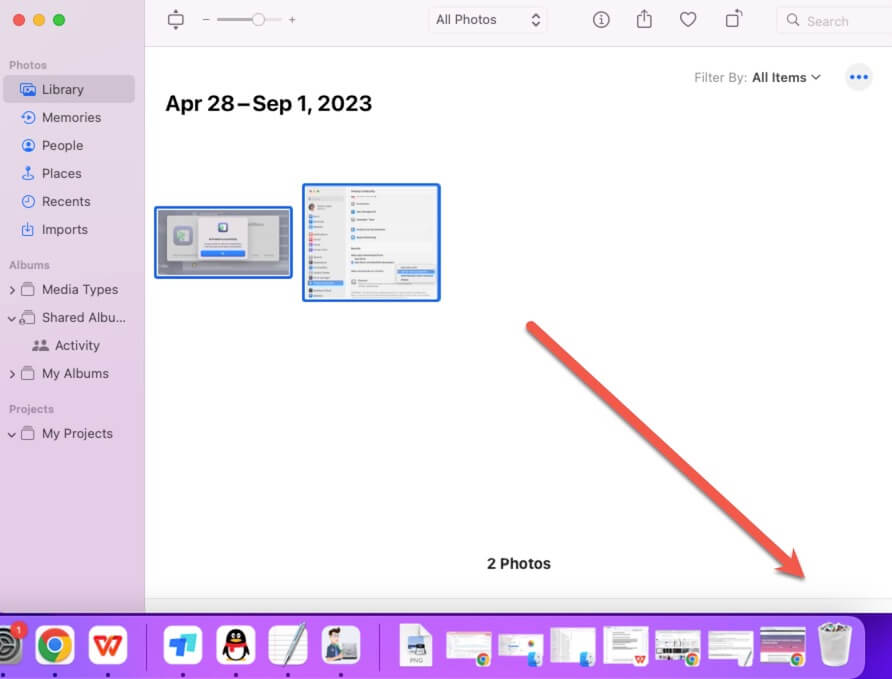
- Open "Trash" and then empty the deleted images there to permanently clear up them from your Mac.
Move photos to an external hard drive
Since you want to delete photos from your MacBook but not iCloud, it shows these images are essential for you. So, why not move them to an external hard drive?
You can prepare an external hard drive specially for photo storage. Then, you can clean up the photos and videos that consume much space on your MacBook with ease.
Here's how:
- Connect an external hard drive to your Mac.
- Open "Photos" from the Dock or Finder.
- Select all the photos in the Photos Library and move them to your external hard drive. You can create a folder on the external drive specially for these pictures.
Now, you free up much space on the Macintosh HD and your Mac will run faster.
Share the above methods for deleting photos from a Mac but not iCloud to help more Mac users.
How to free up more storage space on your Mac?
Perhaps the reason why you want to delete photos from your MacBook is that the device runs slowly, an error message saying "Your disk is almost full" pops up, or you just want to tidy up files on your Mac.
In fact, apart from removing the photos and videos, you can also try these tricks to free up more storage space on your Mac.
- Empty Trash in routine.
- Delete unwanted downloads.
- Delete duplicate files on your Mac.
- Uninstall useless apps and their leftovers.
But manually cleaning up your Mac is not an easy job and will cost you a lot of time. And as junk files are scattered on every corner of your Mac, it is hard to find them all. You can use a professional Mac cleaner to help you.
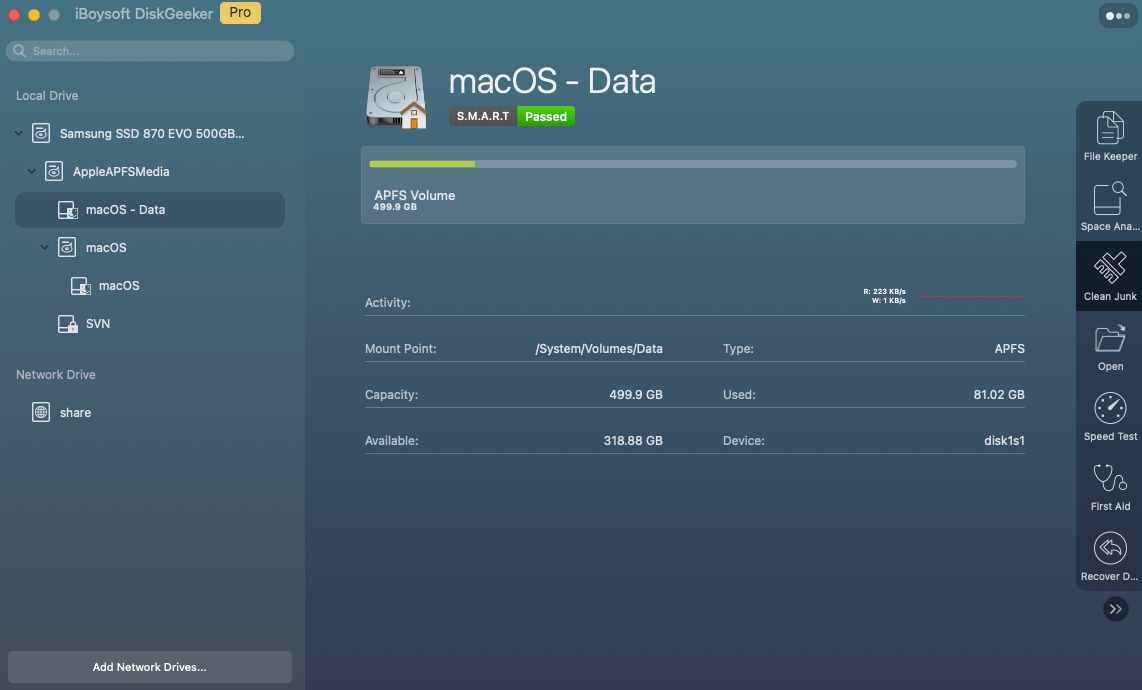
iBoysoft DiskGeeker is a multifunctional and easy-to-operate disk management tool that supports scanning and deleting junk files on your Mac hard drive. It can help you remove useless and unwanted files within a few seconds.
Here's how to use it:
- Free download, install, and open iBoysoft DiskGeeker on your Mac.
- Select the startup volume (Macintosh HD - Data or macOS - Data) on the app's interface and click "Clean Junk" on the right toolbar.
- Once the scanning process completes, check and select the junk files that you want to remove.
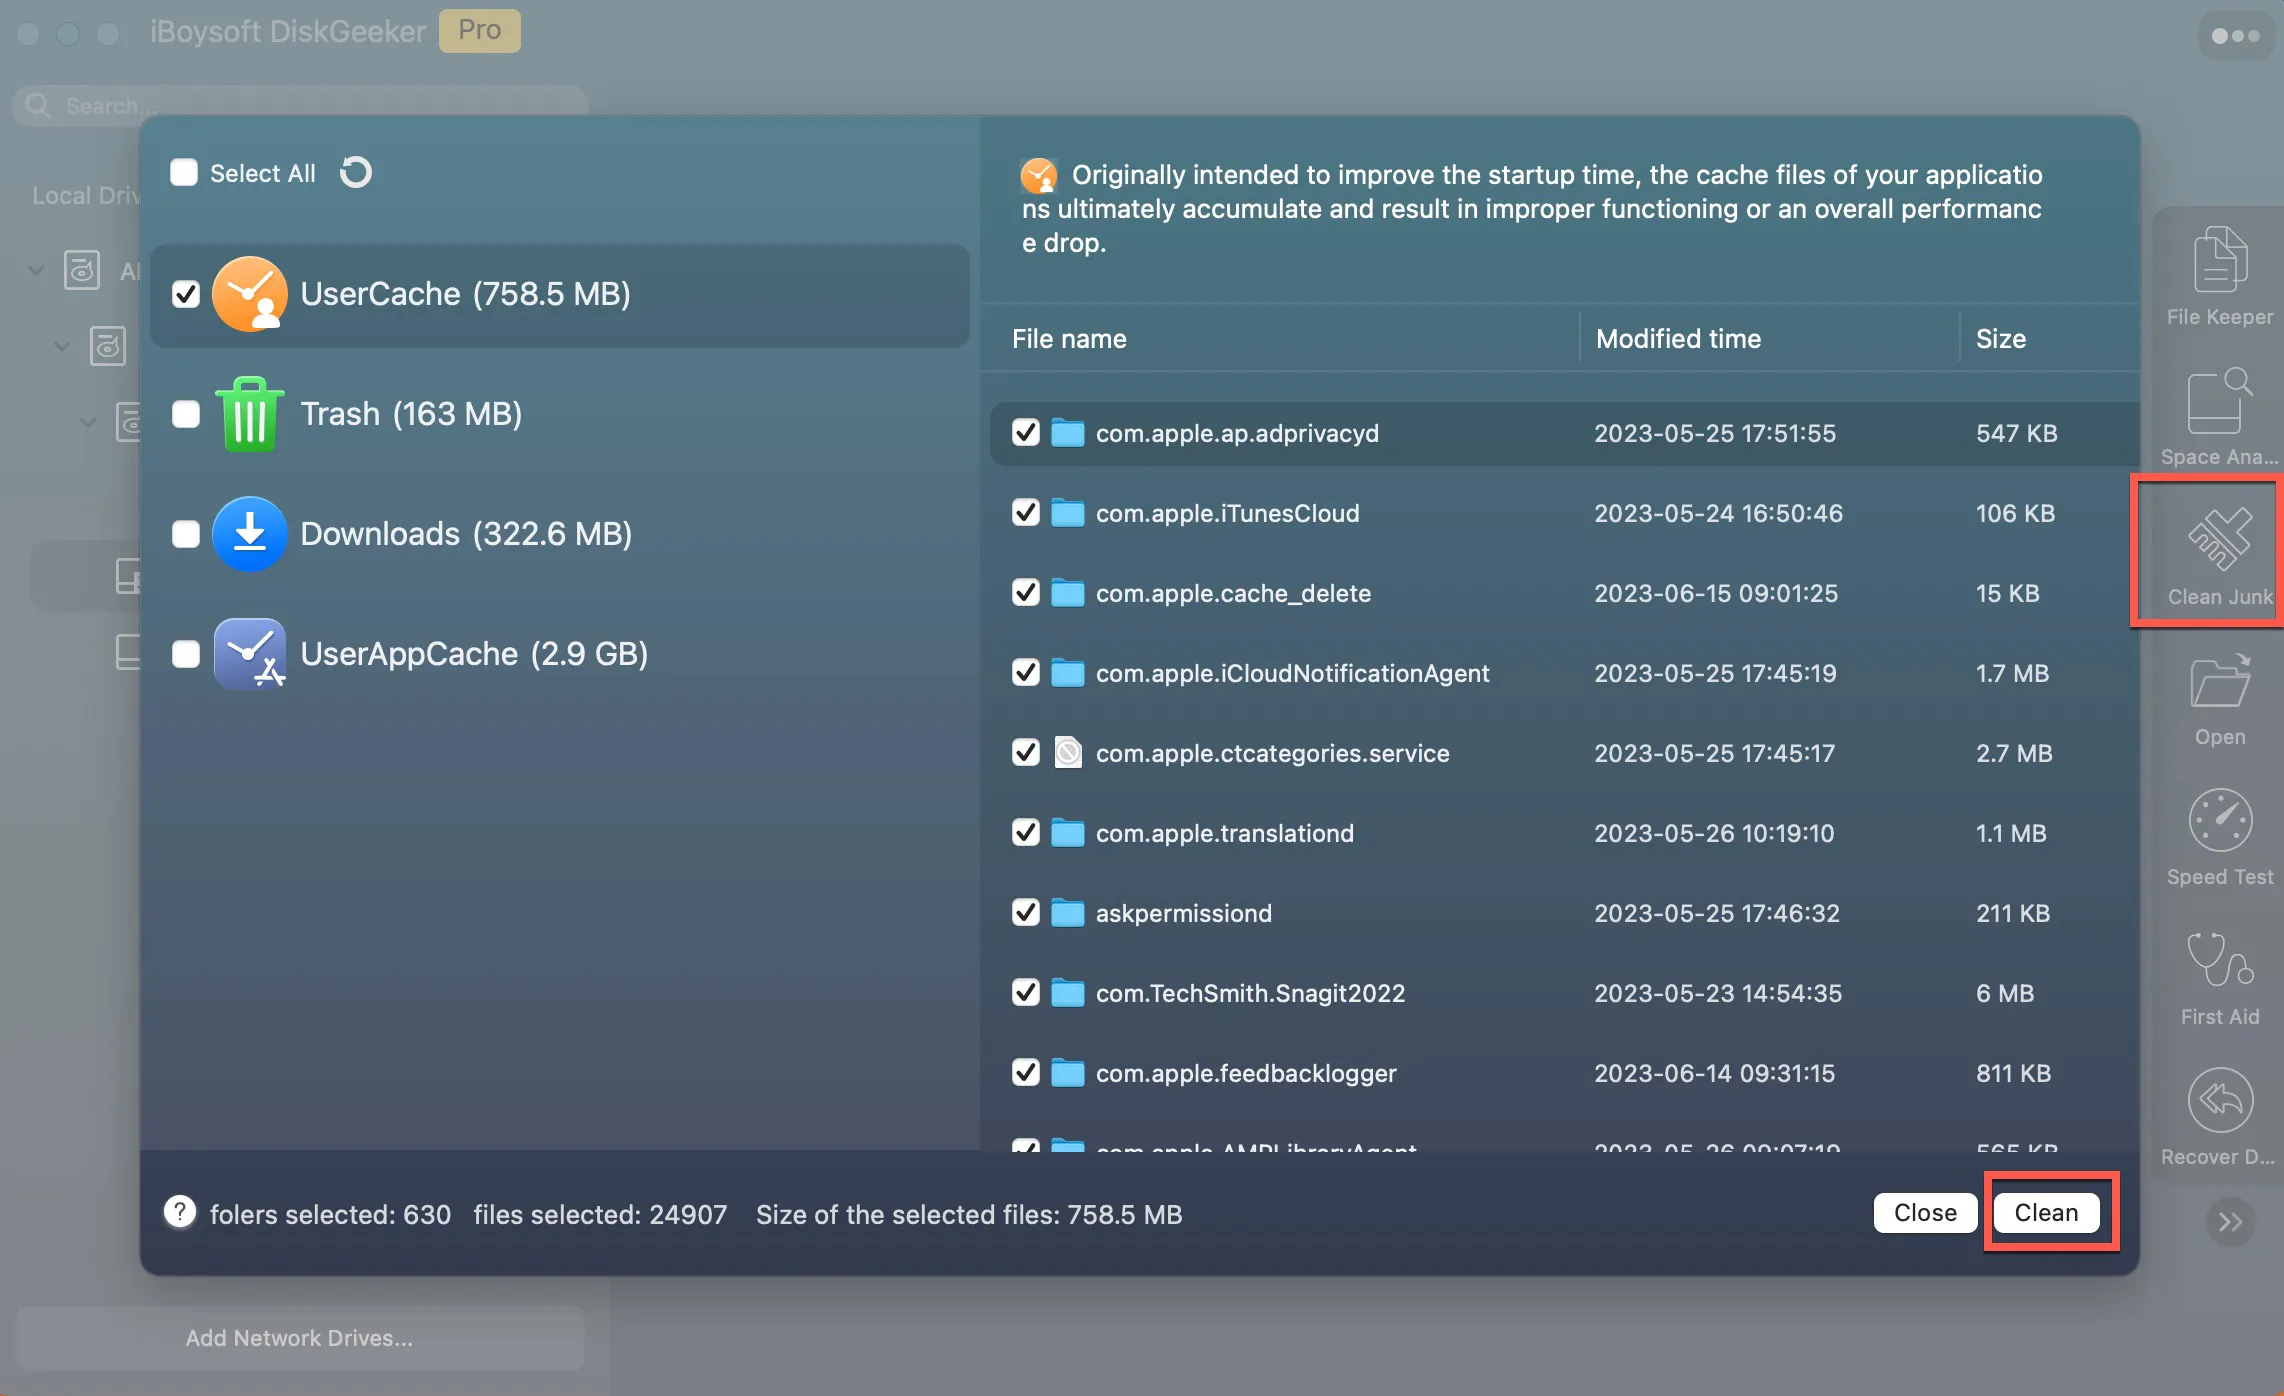
- Click "Clean" to delete them from your Mac.
Share these tips about how to optimize your Mac with more people.
FAQs about how to delete photos from Mac but not iCloud
- QWhy are photos taking up space on Mac when I have iCloud?
-
A
iCloud is a cloud storage service that helps you back up files on your Mac. When you turn on iCloud, it starts to sync files like photos on your Mac rather than moving them to the cloud storage. The photos and other files are still stored on your Mac. So, you find the photos take up space on your Mac even if you enabled iCloud.
- QWill deleting photos from Mac delete from iPhone?
-
A
Yes. If you delete photos on your Mac, they will disappear from the iCloud storage as well. Then, you can't see them from the iCloud service on your iPhone.