
The huge amount of cluttered files on your Mac disturbs you a lot. It's time to mess up your files. Organizing files and folders on your Mac can make your Mac looks neat and clean and consequently, help you find a specific file easier and faster.
If you want to learn how to organize files on a Mac, you are in the right place. This guide is here to show you different tricks to mess up the numerous scattered files on your Mac orderly.
Best practices to organize files and folders on a Mac
| Ways | Applicable scenarios |
| Delete duplicate files | Your Mac has folders containing similar or the same documents, images, and others. |
| Utilize the macOS Reduce Clutter option | Your Finder or Desktop is scattered with different types of files. |
| Merge similar folders | There are folders with the same or similar name and contain similar content on your Mac. |
| Add important folders to your right-click menu | It is suitable for you who are used to using the right-click menu. |
| Add frequently-used folders to the Finder sidebar | It is applicable for you who like to work with Finder. |
| Sort files into groups with context menu options | It is convenient for organizing and finding files in a folder or on the desktop. |
| Group files with tags | Label a specific file in a folder or on the desktop. |
| Use stacks to auto-organize files on the desktop | Organize files and other items on the desktop. |
| Clean up your desktop in structure | List items on the desktop in order for quick location. |
| Use Smart folders | Group files based on set criteria. |
| Create a folder for each project | Tidy up the countless files in the Documents, Downloads, or Desktop folder. |
| Clean up the Downloads folder | Make the file organization on Mac easier. |
iBoysoft MagicMenu can not only allow you to right-click to quickly access a target folder but also delete duplicate files and similar photos on the specific folder. Try it now!
Share the best ways to organize files on a Mac.
How to organize files on a Mac/MacBook?
There are many tricks to tidy up files on your Mac. You can combine them to make your Mac well-organized.
But before you get down to organizing files on your MacBook Air or another model, these basic rules you should learn to avoid files on your Mac being disordered in the future:
- Name your files meaningfully, such as naming them by date, type, use, etc.
- Create a folder when you start a project to store the related files.
- Don't duplicate the same files into different locations on your Mac.
- Don't put unnecessary files and folders onto the Desktop.
- Have a habit to remove the old file after you've created a modified one.
1. Delete duplicate files
Your computers are inevitably stored duplicate or similar files, which increases the difficulty to locate the target file at crucial times. And duplicate files on your Mac will also make the file organization tougher. So, it is necessary to remove the duplicates from your Mac in priority.
But it is hard to find duplicates manually. Luckily, you can use iBoysoft MagicMenu. This powerful right-click enhancer can not only support scanning the duplicate files in the target folder but also comparing similar photos in the selected folder.
You can free download iBoysoft MagicMenu to find out and clean up the duplicate files or similar photos on your Mac:
- Free download and install iBoysoft MagicMenu on your Mac.
- Right-click the target folder like the Documents folder and then select "Duplicate Files" or "Similar Photos."
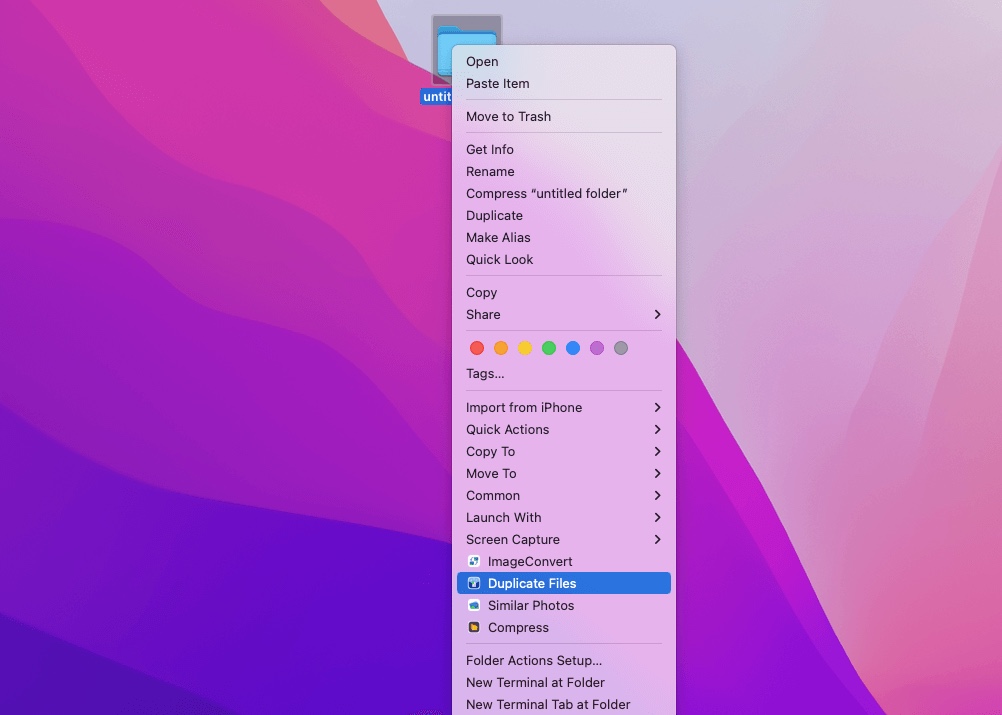
- Look through the scanning results and delete the listed duplicates.
2. Utilize the macOS Reduce Clutter option
Apple has designed a tool called Reduce Clutter in macOS. It works to sort all of the files on your Mac in a convenient for useless file cleaning. You can use it to clear up the unnecessary files on your Mac before sorting the countless files.
Here's how:
- Click the Apple menu > About This Mac.
- Select the Storage tab > Manage.
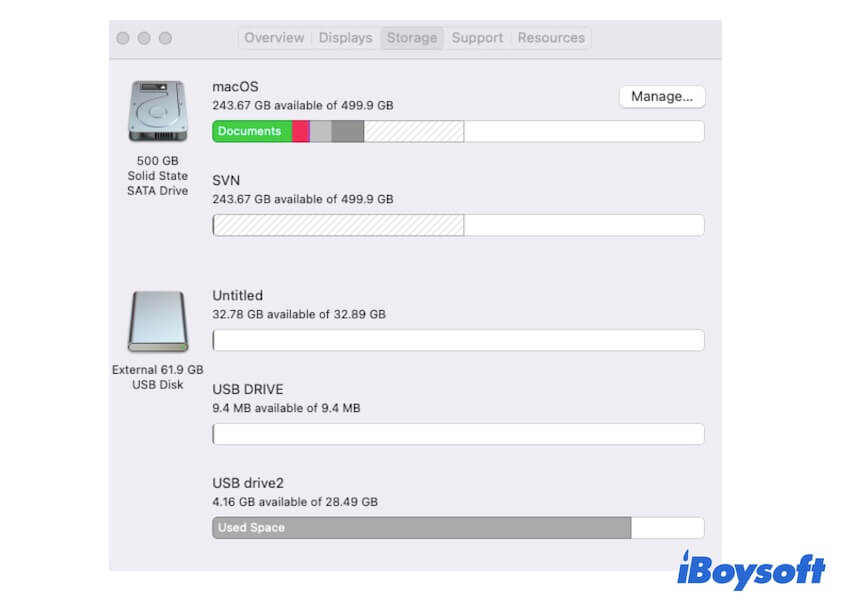
- In the Recommendations section, click Review Files next to Reduce Clutter.
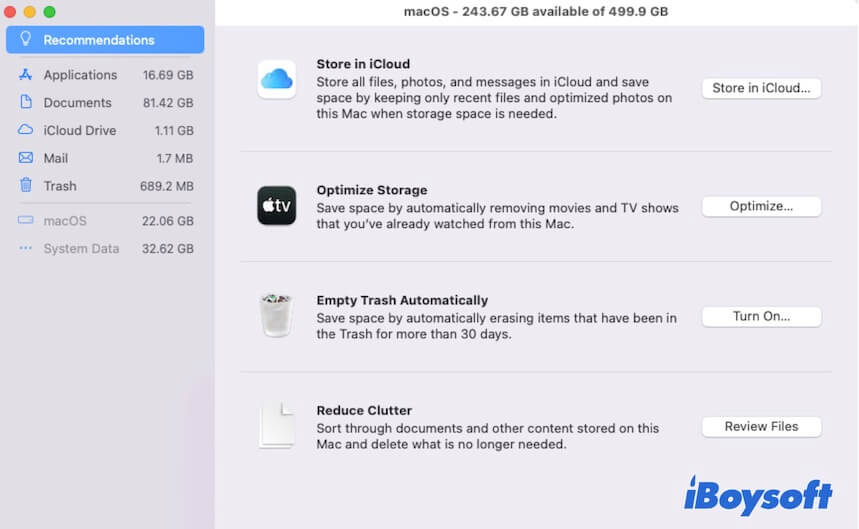
- Check the files in each category and delete the useless ones.
3. Merge similar folders
Folders with the same name and containing similar content scattered around your Mac mislead you to locate the target one when in need. To organize these similar folders, the best and quickest solution is to merge them.
But merging folders is not as simple as using one to replace the other. That may cause data to be overwritten. If you are unfamiliar with how to merge two similar folders on your Mac, follow these steps:
- Open Terminal.
- Enter ditto and press the space key.
- Drag and drop the source folder into the Terminal window first. Then, drag and drop the destination folder into it as well.

- Press Return.
Files that are in the source folder but not in the destination folder are all copied to the destination folder. Then, you can delete the source folder.
4. Add important folders to your right-click menu
You may put many commonly-used documents and folders on your Desktop for quick access, leading to your desktop clutter.
In fact, you can use iBoysoft MagicMenu, an advanced right-click enhancer, to add your favorite folders, documents, apps, browsers, disks, partitions, or web page links onto your right-click menu. Then, when you need to access any of them, just right-click to quickly open them.
To do that, go to:
- Free download, install, open, and activate iBoysoft MagicMenu on your Mac.
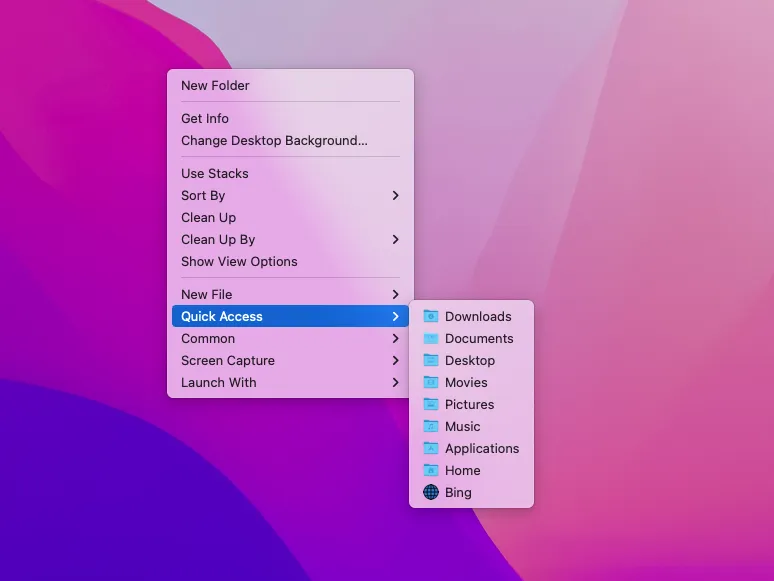
- Click "Quick Access" > "Add."
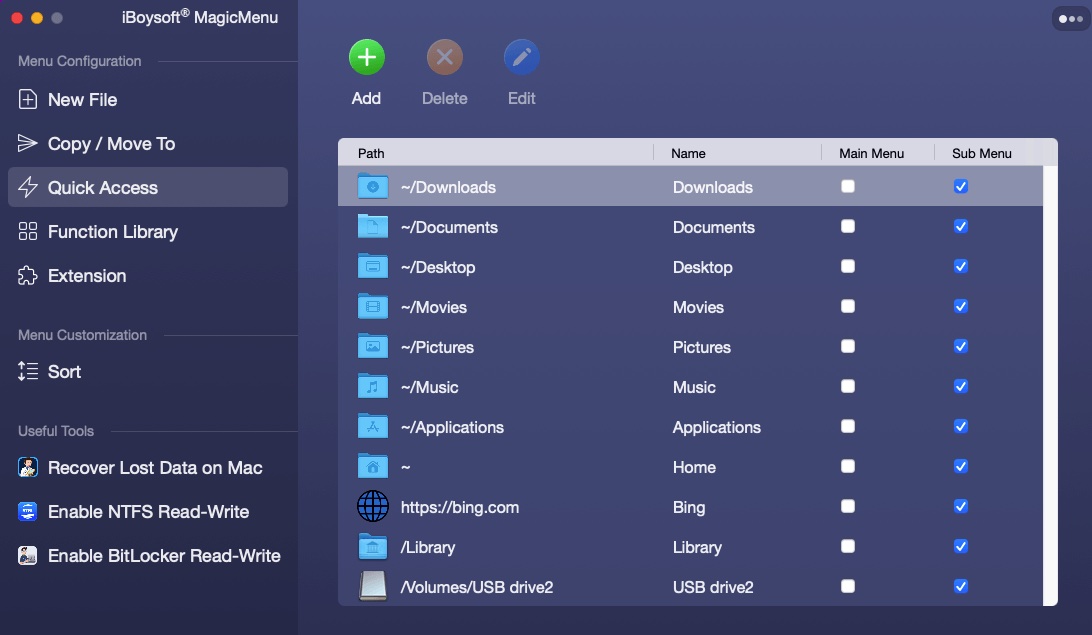
- Browse the folders, apps, disks, etc. on your Mac to add your wanted ones. To add a web link, copy it from the browser to the path box. The name box is always automatically filled. Or you can manually change it.
Then, when you right-click the blank place on your desktop or in Finder and select "Quick Access," you can quickly open the target item you added to your context menu.
Why not tell your followers this wonderful tool for organizing folders on Mac?
5. Add frequently-used folders to the Finder sidebar
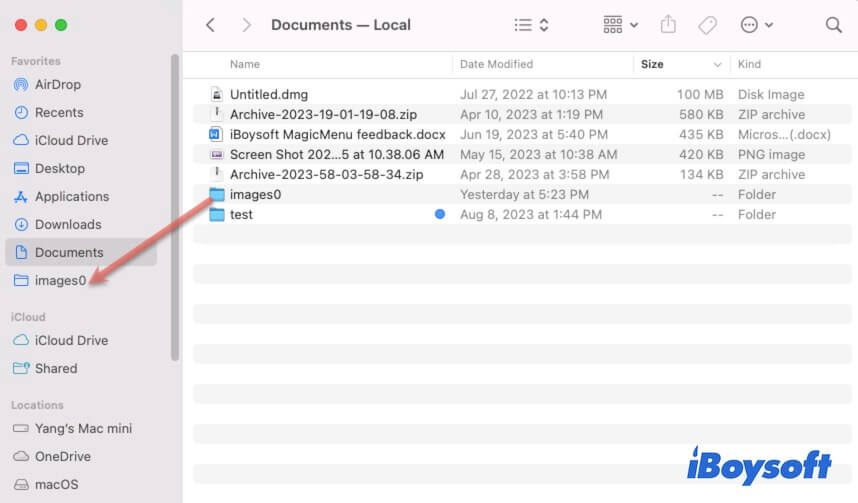
If you are used to using Finder, you can also add your favorite folders or subfolders to the Finder sidebar. That saves you a lot of time to look through the subfolders in certain folders.
To add a folder or subfolder to the Finder sidebar, you need:
- Open Finder.
- Find the folder you want to list on the Finder sidebar.
- Drag the target folder to your Finder sidebar.
6. Sort files into groups with context menu options
The right-click menu contains some options that are specially for organizing folders on your Mac.
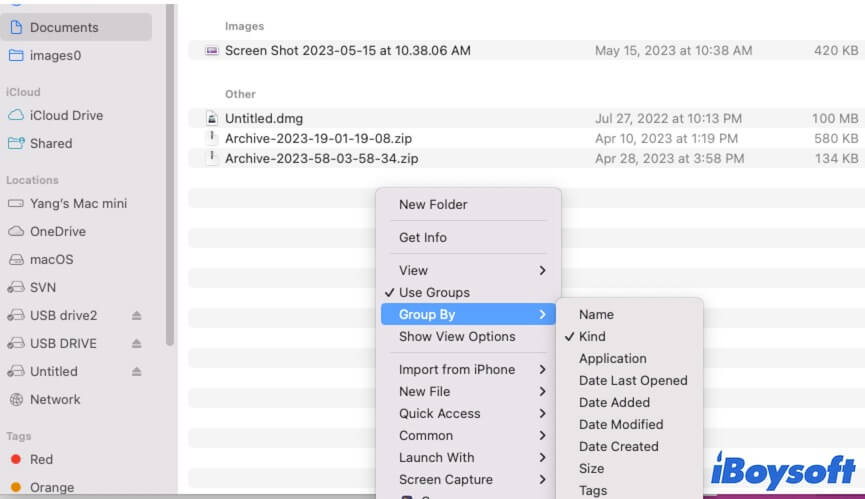
When you open Finder and right-click on a blank place in a folder, you can choose "Use Groups." By default, the items in that folder will be automatically organized into groups by kind. Of course, you can select "Group By" on the right-click menu to change the classification way, including name, application, size, date created, date modified, etc.
Differently, if you right-click on the blank place on the Desktop, you need to select "Sort By" and then choose a mode that you want the files, folders, and other items on your Mac to be sorted by.
7. Group files with tags
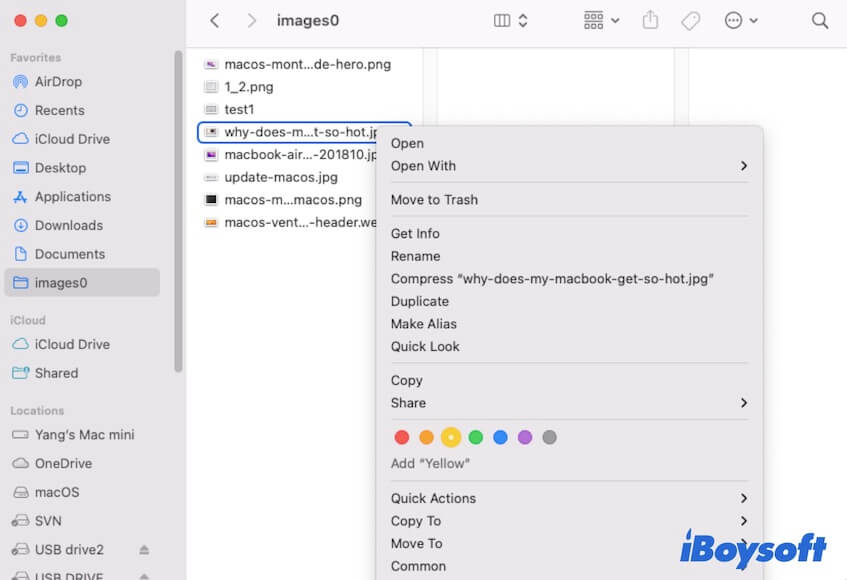
You can also use tags to organize files on your Mac. The Mac tags can highlight a special file with a colored dot, which enables you to see the file much faster on your Mac. Moreover, you can label different groups of items with different colored tags so that you can quickly locate files in different categories.
- Open Finder.
- Find the file or folder that you want to add tags to.
- Right-click on it and choose a color for the tag.
- Repeat the operation on all the files you want to group with tags.
8. Use stacks to automatically organize files on the desktop
If you're used to keeping important documents, folders, apps, etc. on your desktop, you can use the native Stacks tool to tidy the messy desktop. This automatic file organizer on your Mac is an option on the right-click menu that works to move files on your Mac into groups without copying.
You can follow the steps to use Stacks to organize files on your Mac Desktop:
- Right-click or Ctrl + click on a blank place on your desktop.
- Click on "Use Stacks" on the context menu. All of the items on your desktop will be automatically grouped by kind.
- To change the way how Stacks are classified, right-click on your desktop again and hover over Group Stacks By, re-select an option on the drop-down menu.

If you want to cancel grouping desktop items by Stacks, you can right-click on your desktop and uncheck "Use Stacks."
9. Clean up your desktop in structure
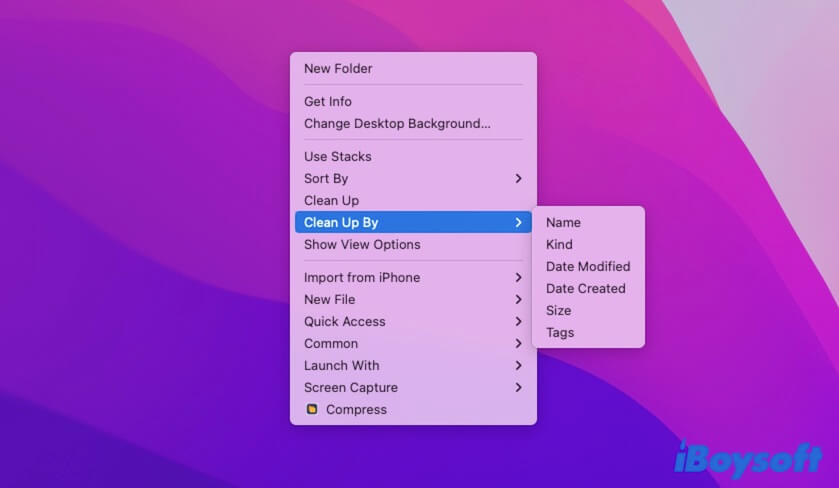
If you want your desktop looks in structure, you can use the "Clean Up" option on the context menu to organize files on it.
Simply click "Clean Up", then the items scattered on the desktop will be listed by kind. You can see they show up in order from disk, app, folder, file, to image. If you want to change the way they are displayed on the desktop, right-click the desktop and choose "Clean Up By."
10. Use Smart folders
The Smart folder is the search folder rather than a real folder on Mac that is mainly used to find files in a certain category you set. You can create a Smart folder to automatically save all of the files that match the criteria you set for your quick search.
Here's how to organize files on your Mac with Smart folders:
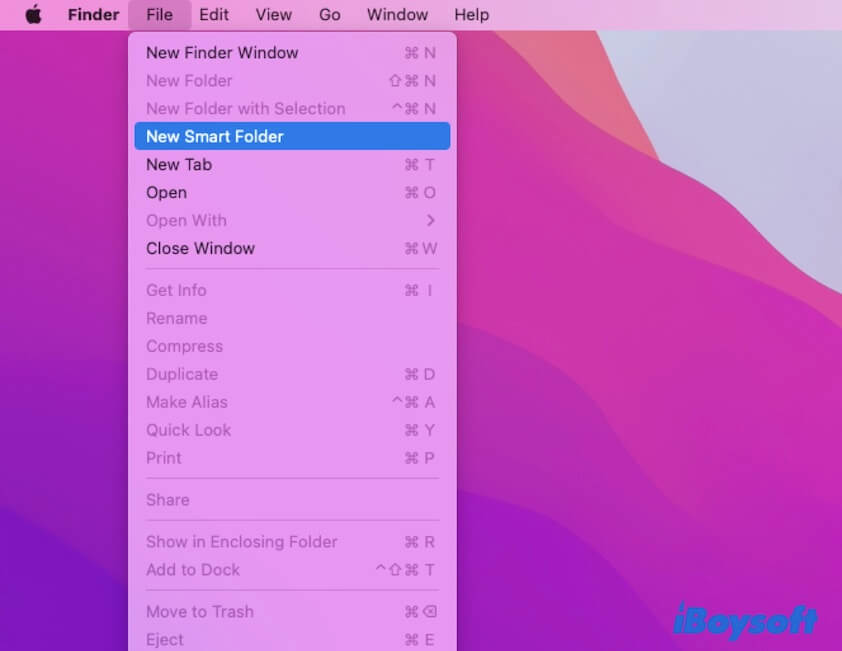
- Open Finder.
- Move to the top Finder menu bar, and click "File" > "New Smart Folder."
- Select This Mac or the specific folder you want to organize files for.
- Click +.
- Expand the drop-down menus to set your specific search criteria.
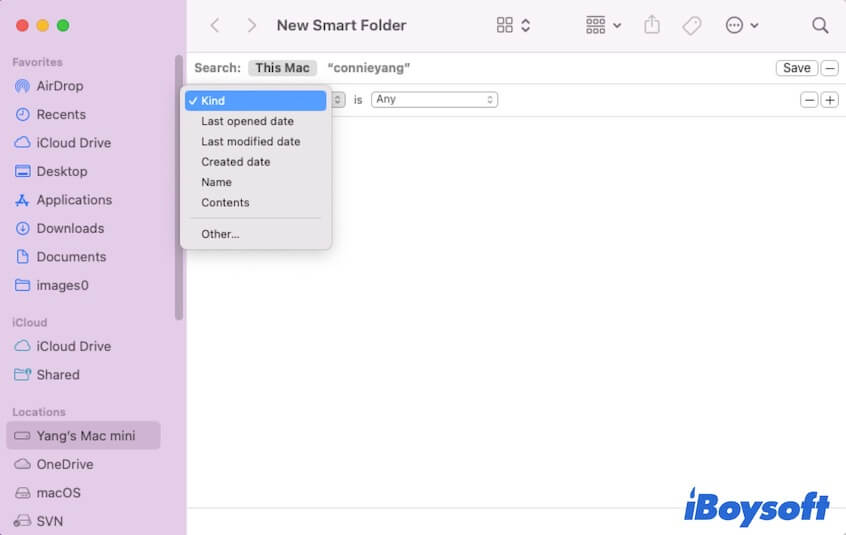
- Click "Save" to create the Smart folder.
Now, you can use the Smart folder to find a group of files much faster.
11. Create a folder for each project
The longer time you work with your Mac model, the more files and folders it will store. The accumulated files will make it hard to quickly find a specific one. So, it is necessary to create a new folder on your Mac for each project or theme. You can move all files related to that project into a folder. Those files will be organized in perfect order.
12. Clean up the Downloads folder
It is worth noting that all your downloaded files, including app installers, documents, images, etc. are stored in the Downloads folder on your Mac by default.
Every time you've installed an app, have you manually deleted the installer? If not, the cumulative DMG or ZIP files in the Downloads folder are not friendly for file management and organization on your Mac.
So, cleaning up your Downloads folder in routine is also a way to organize files on your MacBook.
Share this comprehensive guide to tidying up files on a Mac with others.
FAQs about how to organize files on Mac
- QHow do I organize files in a folders on a Mac?
-
A
Right-click on the desktop or in Finder on your Mac and select New Folder. Click on the new folder and press Return to change its name. Then, move the files in the same category or associated to a specific theme into the folder.
- QDoes Mac have a system cleanup?
-
A
Yes. The system cleanup of a Mac is in the native Storage Management. Go to the Apple menu > Storage > Manage. In the Recommendations section, click Review Files next to Reduce Clutter. Then, you can delete your unwanted files by group.
- QWhat tool is used to organize files on a Mac?
-
A
There are many tools on a Mac that can be used to organize files, including Finder, the Use Stacks, Sort By, and Clean Up options in the right-click menu, Smart folders, and more.
- QHow do I clean junk files on Mac?
-
A
To clean junk files on your Mac, you can empty Trash, clean up app installers in the Downloads folder, delete duplicate files, etc. It is time-consuming and complex work to manually clean junk files on a Mac. You can use iBoysoft DiskGeeker, the multifunctional Mac cleaner, to help you clean junk files on a Mac with a few clicks.