The sixteenth major release of macOS is macOS Catalina (version 10.15). It was unveiled at WWDC 2019 on June 3, 2019, as the replacement for macOS Mojave, and it became available to the general public on October 7, 2019. Catalina is the first version of macOS to have Activation Lock and to only support 64-bit apps. Additionally, it is the final macOS version with the major version number 10.
If you want to try macOS Catalina on a Windows PC, a virtual machine such as VirtualBox is what you need. In this post, we will guide you on how to install macOS Catalina on VirtualBox on a Windows PC, just follow the detailed steps below.
To install macOS Catalina on VirtualBox, you will need to download the Catalina ISO file and the VirtualBox on your Windows PC, make sure the available space is enough, or you can use iBoysoft DiskGeeker for Windows to clean up the Windows first!
Step 1. Download the macOS Catalina ISO file
Regardless of the operating system you want to install, the OS installer file will be required. For VMware & VirtualBox, you will need the macOS Catalina VMDK or macOS Catalina ISO file, no matter whether you want to install it on a Mac or a Windows computer.
You can directly download the macOS Catalina ISO file from the link below:
macOS Catalina ISO download (10.15.7, 16GB, from Internet Archive)
Step 2. Install Oracle VirtualBox on Windows
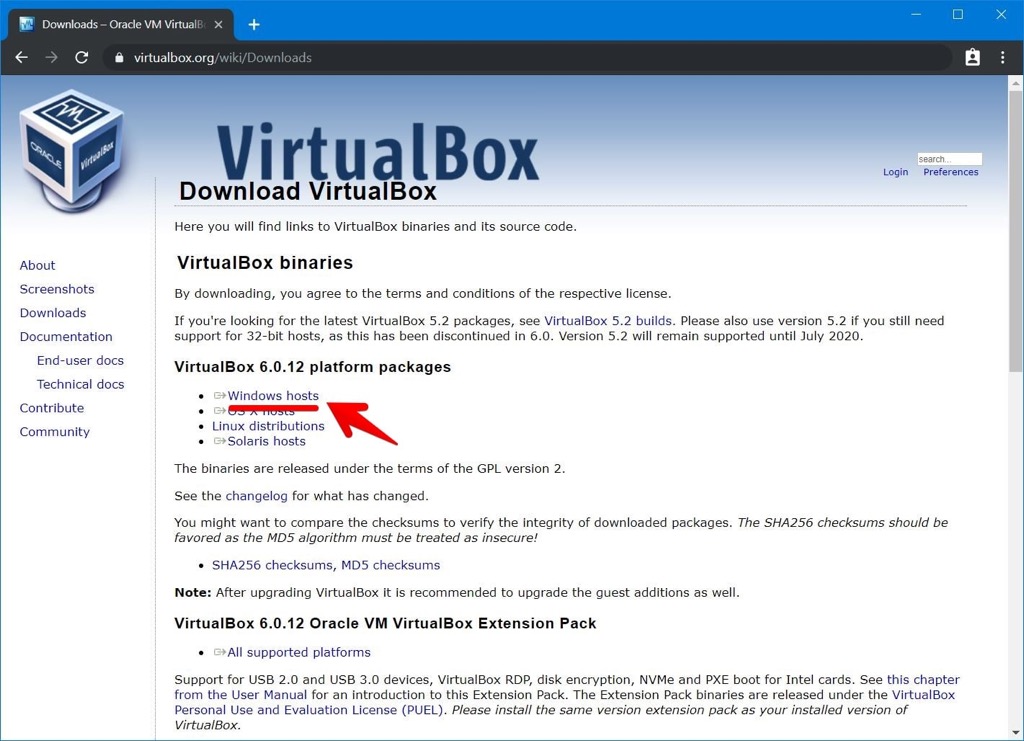
Installing VirtualBox is the next step, which calls for the setup file that is available. On the official VirtualBox website, select Windows hosts and let the download begin. After that, launch the VirtualBox setup, complete the necessary steps, and let the installation proceed.
Step 3. Install VirtualBox Extension Pack
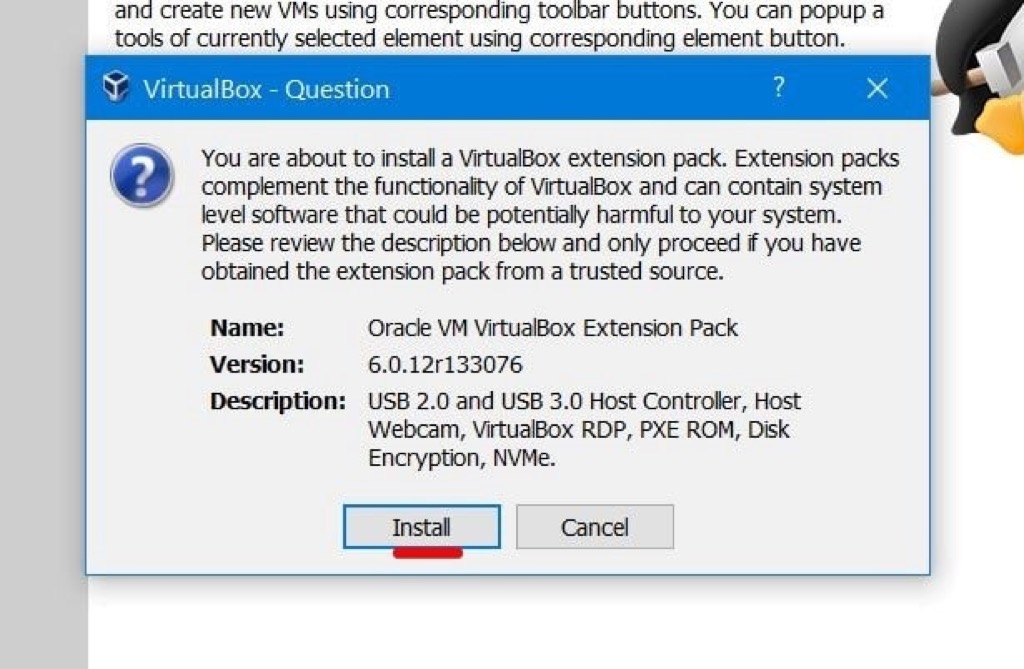
To install macOS Catalina, we must install the VirtualBox Extension Pack, which will allow the keyboard and mouse to function properly. Select "All supported platforms" in the VirtualBox download box. Once it has been downloaded, launch it in VirtualBox and select Install when prompted.
Step 4. Create a new virtual machine for Catalina
After installing VirtualBox, you must create a new virtual machine to install macOS Catalina. Here's how:
- Open VirtualBox on your device.
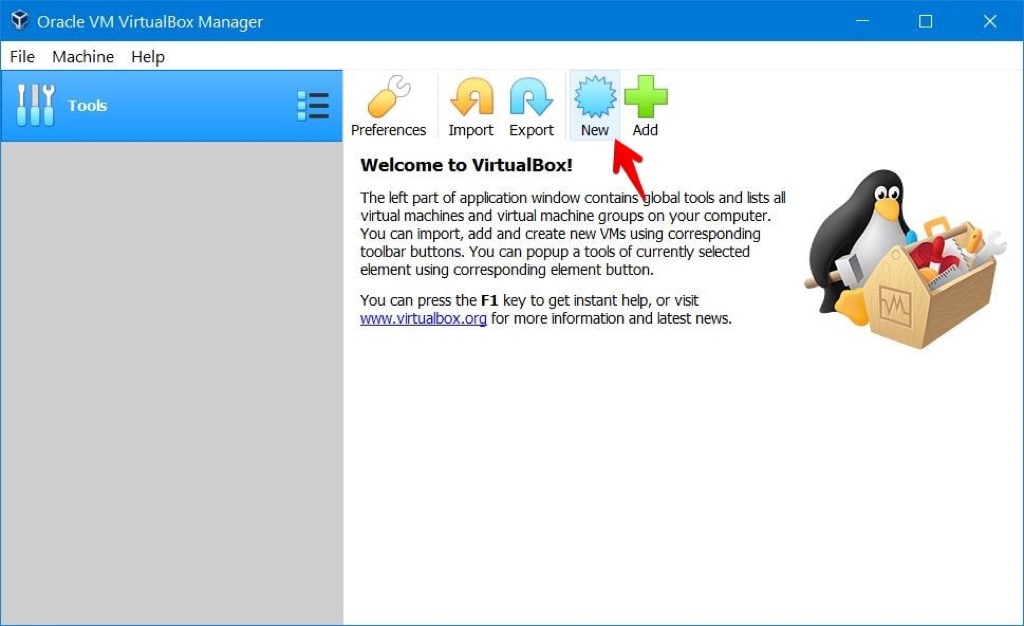
- Tap New on the top menu bar of the VirtualBox home window.
- Name the virtual machine macOS Catalina and keep the rest of the settings (Machine Folder, Type, and Version) unchanged.
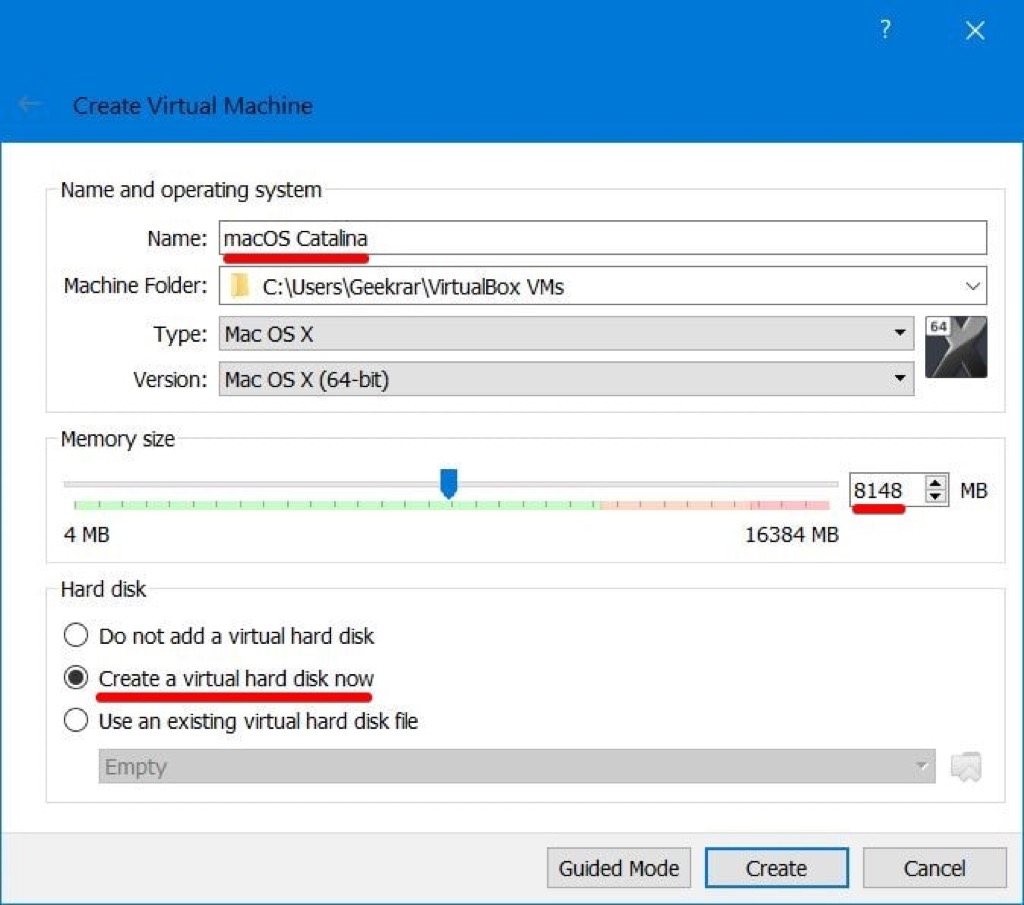
- Expand the memory size to the upper green limit and click Next.
- Choose Create a new virtual hard disk now and tap Next.
- Select VMDK in the list and then select Next.
- Choose Dynamically Allocated and click Next.
- Select a size for you to restore files and data when running macOS Catalina and click Create.
Step 5. Set up new virtual machine settings
Configuring macOS Catalina settings is essential to the installation process. These are the most crucial settings that enable macOS Catalina and ultimately install it. Should one or more of these settings differ from what we've demonstrated, the macOS Catalina is likely to not boot up. Be sure to change these settings correctly if this occurs or if it has happened to you.
- Click Settings on the main interface, click Motherboard, and drag Base Memory to the far right of the green color.
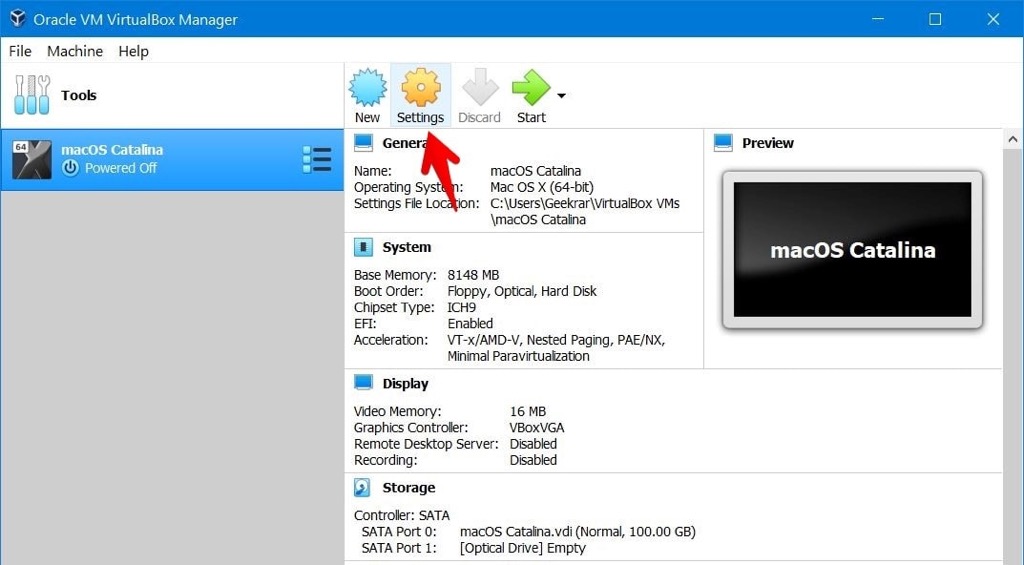
- On the virtual machine settings, tap System and uncheck floppy, then change the chipset to PIIX3.

- Switch to the Processor tab, and adjust the processors to 4.
- Select Display, and drag the indicator to increase the Video memory.
- Switch to the Storage tab, tap Empty, and click the blue icon to select Choose Virtual Optical Disk File.
- Browse the macOS Catalina ISO For VMware & VirtualBox file and select it. Then, click on the Controller: SATA and click on the small disk plus icon and select Choose Existing Disk.
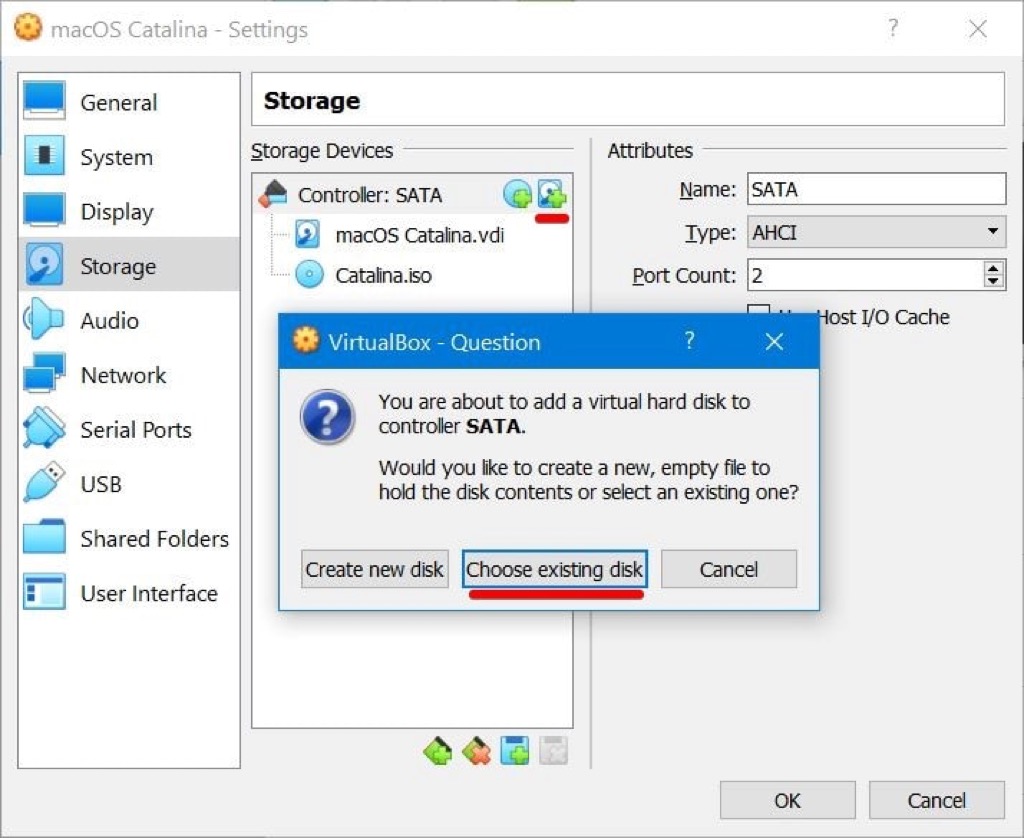
- Click on Add, then select the VirtualBox Boot Image.
Step 6. Run commands on the Command Prompt
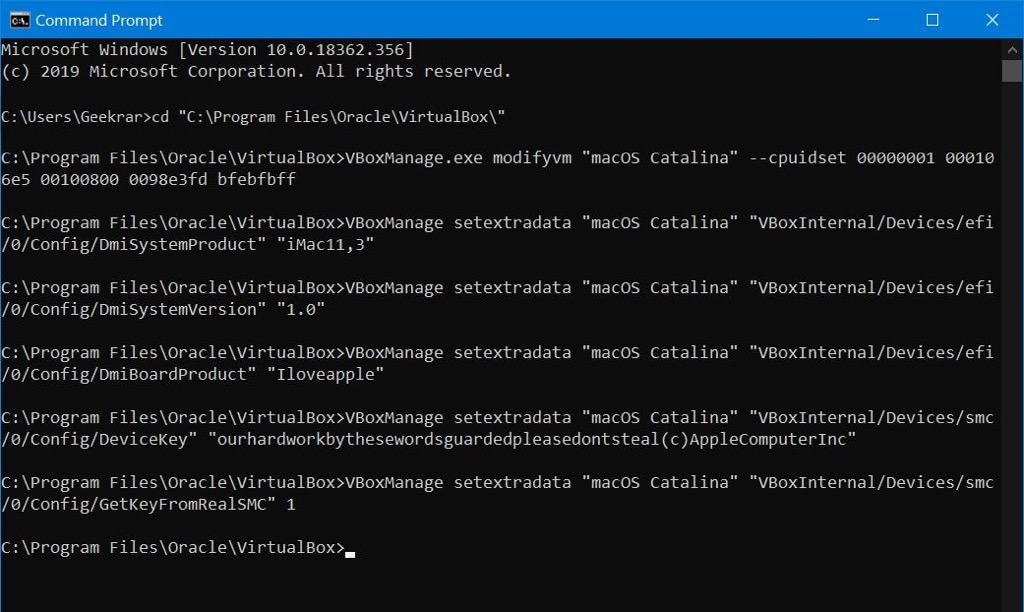
To successfully install macOS Catalina on VirtualBox on a Windows PC, you need to make changes to the codes for VirtualBox using the Command Prompt.
- Exit the VirtualBox on your Windows computer.
- Copy and paste this command on the Notepad. Replace every "Your virtual machine name" with "macOS Catalina."[cd "C:\Program Files\Oracle\VirtualBox\"
VBoxManage.exe modifyvm "Your Virtual Machine Name" --cpuidset 00000001 000106e5 00100800 0098e3fd bfebfbff
VBoxManage setextradata "Your Virtual Machine Name" "VBoxInternal/Devices/efi/0/Config/DmiSystemProduct" "iMac11,3"
VBoxManage setextradata "Your Virtual Machine Name" "VBoxInternal/Devices/efi/0/Config/DmiSystemVersion" "1.0"
VBoxManage setextradata "Your Virtual Machine Name" "VBoxInternal/Devices/efi/0/Config/DmiBoardProduct" "Iloveapple"
VBoxManage setextradata "Your Virtual Machine Name" "VBoxInternal/Devices/smc/0/Config/DeviceKey" "ourhardworkbythesewordsguardedpleasedontsteal(c)AppleComputerInc"
VBoxManage setextradata "Your Virtual Machine Name" "VBoxInternal/Devices/smc/0/Config/GetKeyFromRealSMC" 1 - Then open Command Prompt simply without an administrator.
- Copy and paste the first line of the command, and then paste all of them.
Step 7. Install macOS Catalina on VirtualBox
With all the above steps down, now you can proceed to install macOS Catalina on VirtualBox:
- Launch VirtualBox and click Start on the macOS Catalina.

- Select a language and choose Disk Utility.
- Select the VirtualBox virtual disk named "Vbox HardDisk Media" and click Erase.
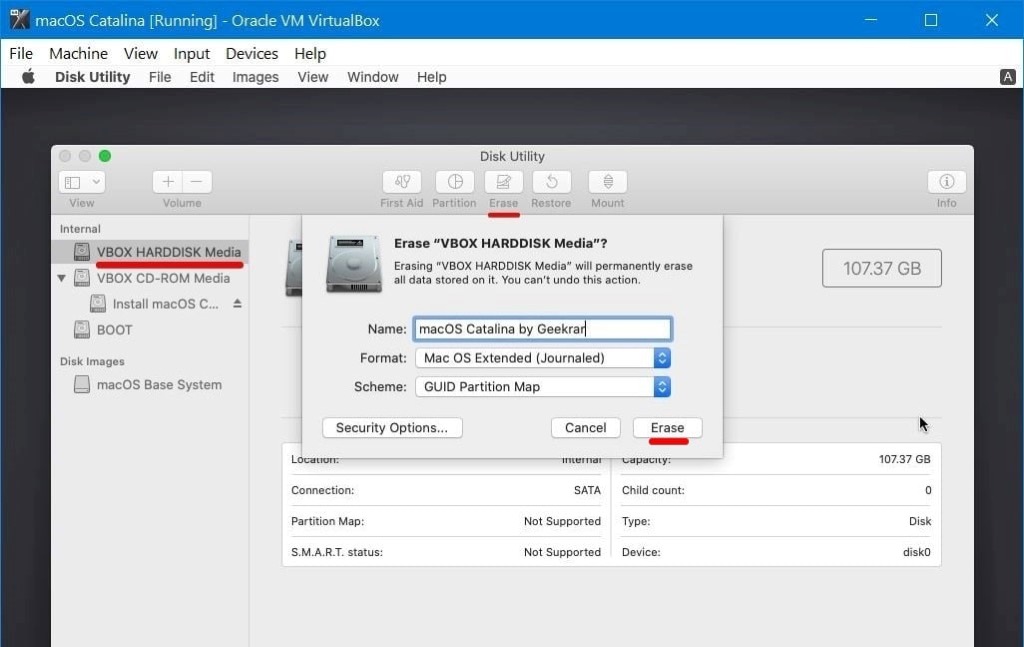
- Name and drive and click Erase > Done.
- Quit Disk Utility, choose Install macOS from the Windows, and tap Continue.
- Follow the on-screen guide to complete the macOS installation.
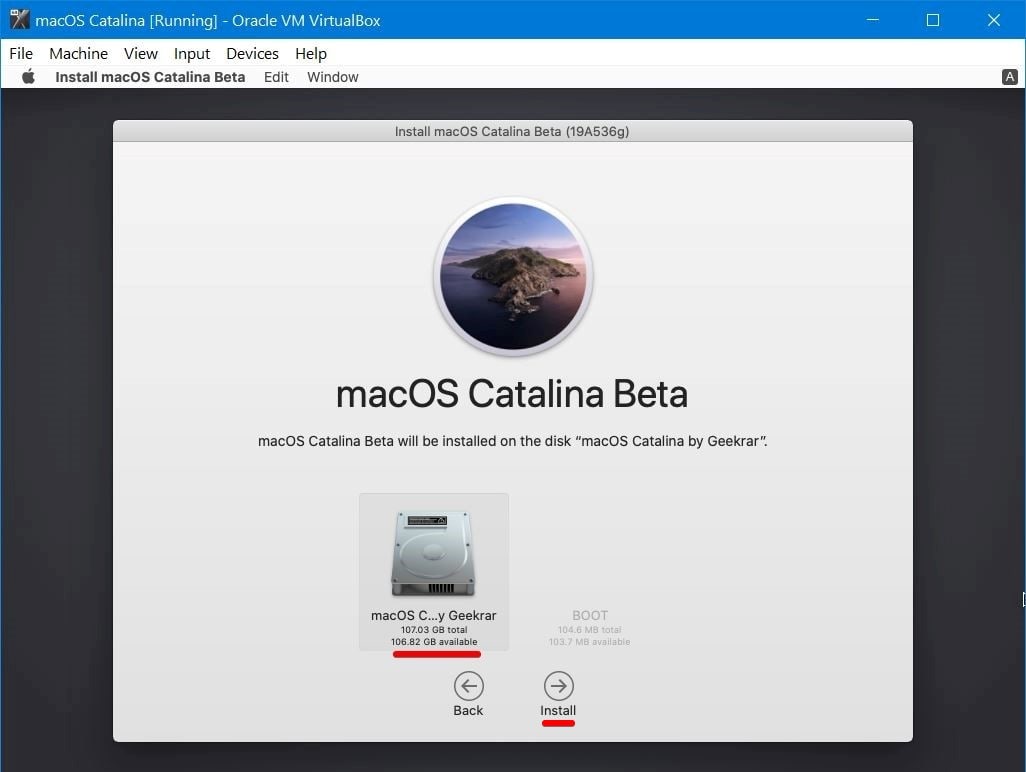
- When it is done, choose Power off the machine to reboot it.
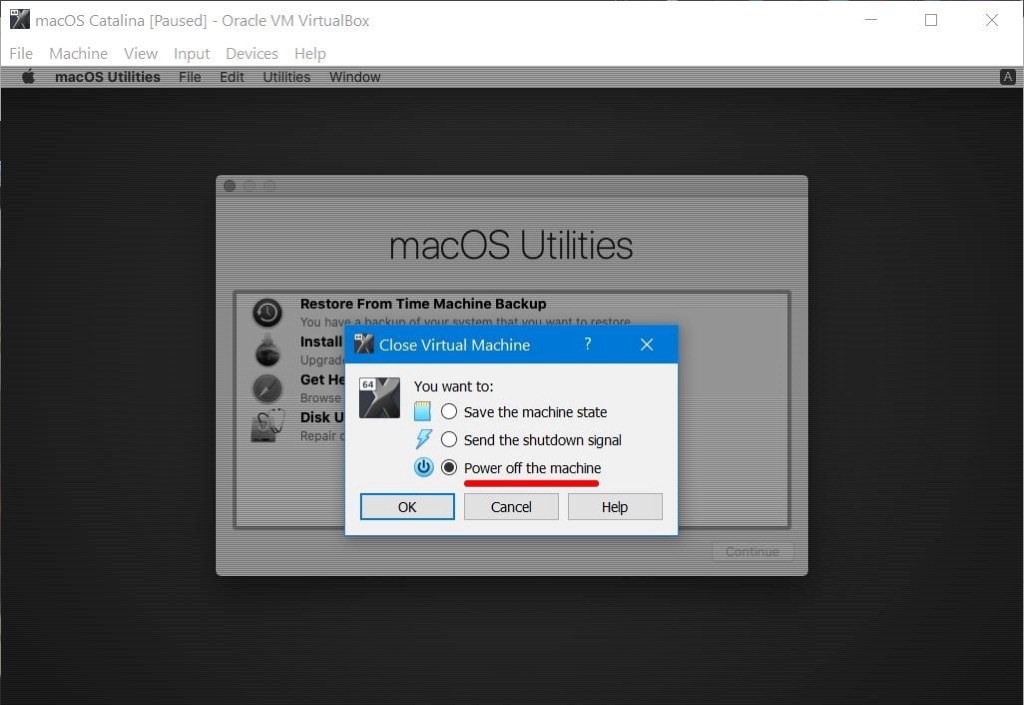
- Go to virtual machine settings > Storage, remove the Catalina.iso file, then click OK.
- Then click Start to start the virtual machine.
- Now press Esc immediately before 5 seconds, then type "install.nsh" and hit Enter.
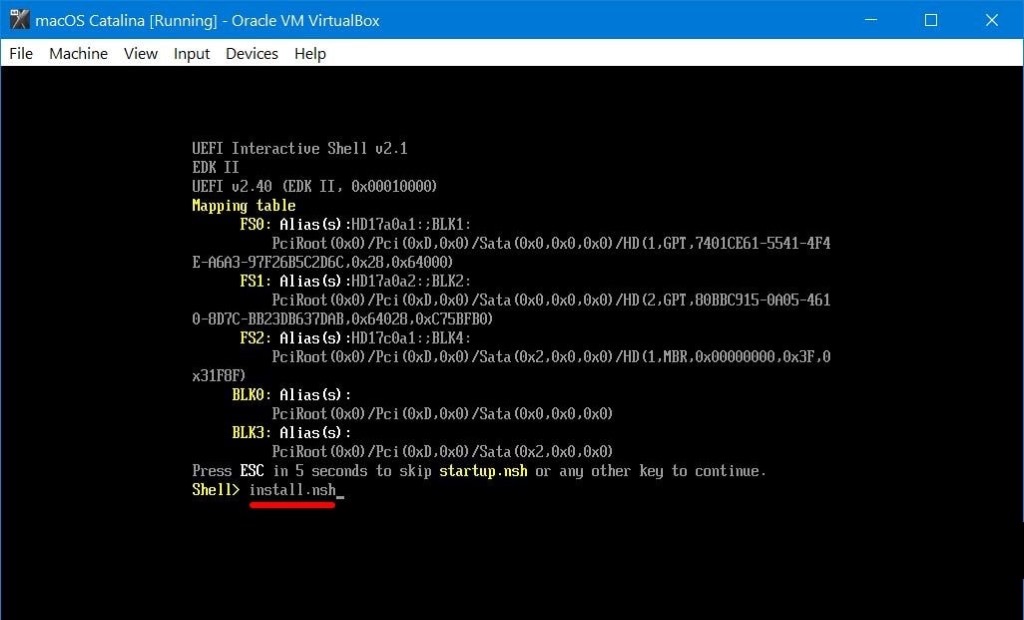
- When it's finished, it will reboot, and wait for it to start.
Let others know how to install macOS Catalina on VirtualBox on Windows!