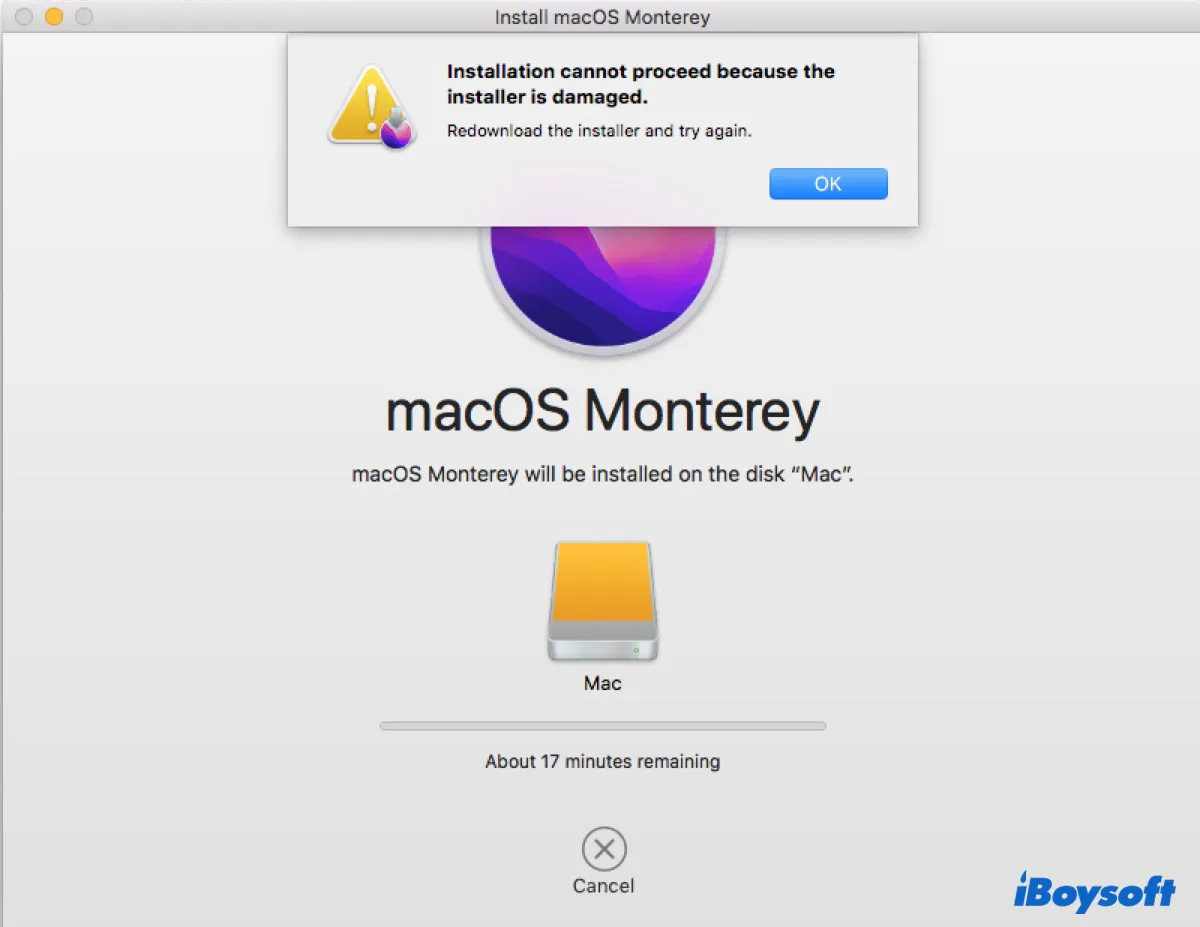
When trying to install or upgrade to macOS Ventura, Monterey, or Big Sur, you may receive the error message saying, "Installation cannot proceed because the installer is damaged. Redownload the installer and try again." This error usually appears in the middle of macOS installation, rendering you unable to upgrade your Mac.
In this article, we'll cover the solutions to the error and help you complete the macOS installation.
How to fix 'Installation cannot proceed because the installer is damaged' on Mac?
Here are the solutions to try when you fail to install macOS Ventura, Monterey, or Big Sur and receive the notification, "Installation cannot proceed because the installer is damaged."
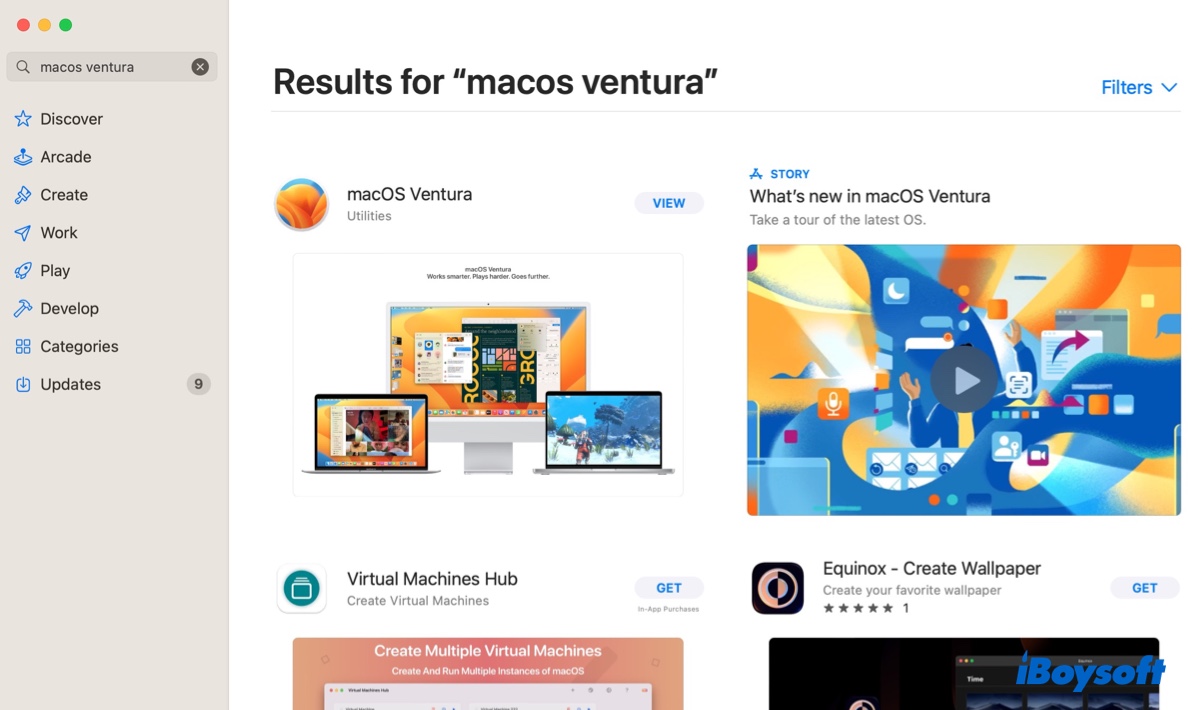
Fix 1: Download the installer from App Store
If upgrading from the Software Update pane always fails with the error "Installation cannot proceed because the installer is damaged," you can redownload the full installer from App Store. Note that before initiating the download, you should delete the damaged installer from your Applications folder and empty the Trash.
If you're using WiFi to download the installer, switch to the Ethernet connection, as it's more stable.
Fix 2: Boot into Internet Recovery
If your Mac is Intel-based, you can also boot into Internet Recovery to update your Mac. It allows you to reinstall the latest macOS version compatible with your Mac directly from Apple's servers.
- Shut down your Mac.
- Press the power button, then immediately press and hold the Option + Command + R keys.
- Release the keys when seeing the spinning globe.
- Click Reinstall macOS.
- Follow the onscreen instructions to complete the macOS installation.
Fix 3: Update macOS before upgrading to the preferred version
Skipping too many updates may cause installation failures. It is recommended to update your current macOS to the latest version before upgrading to your desired macOS.
- Open the Apple menu > System Preferences > Software Update.
- Click the blue texts that read "More Info…"
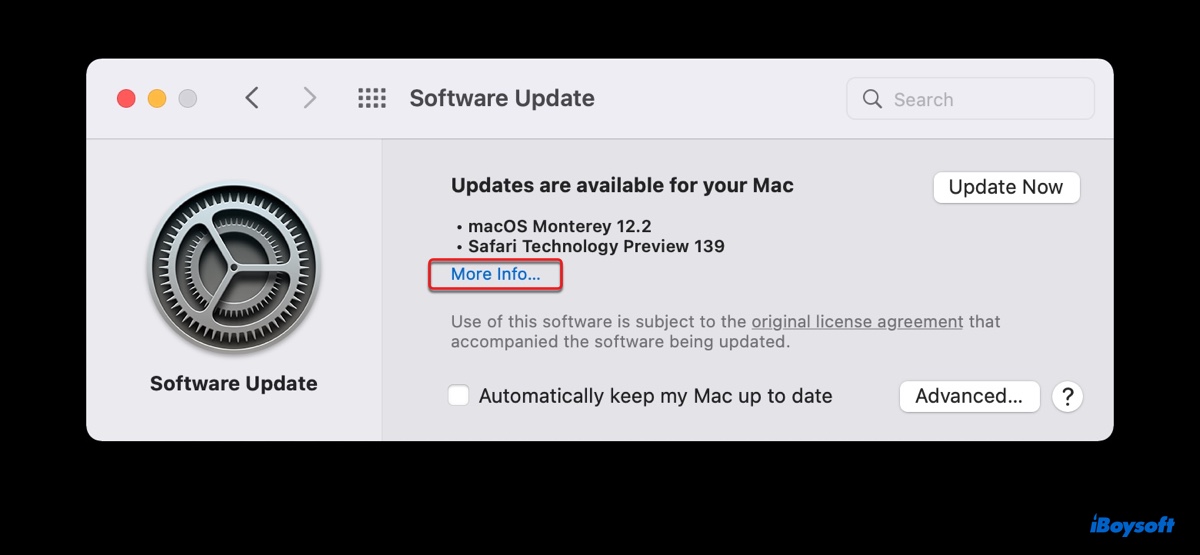
- Check the latest software update to your current release.
- Click "Install Now."
- After the update, try the upgrade again.
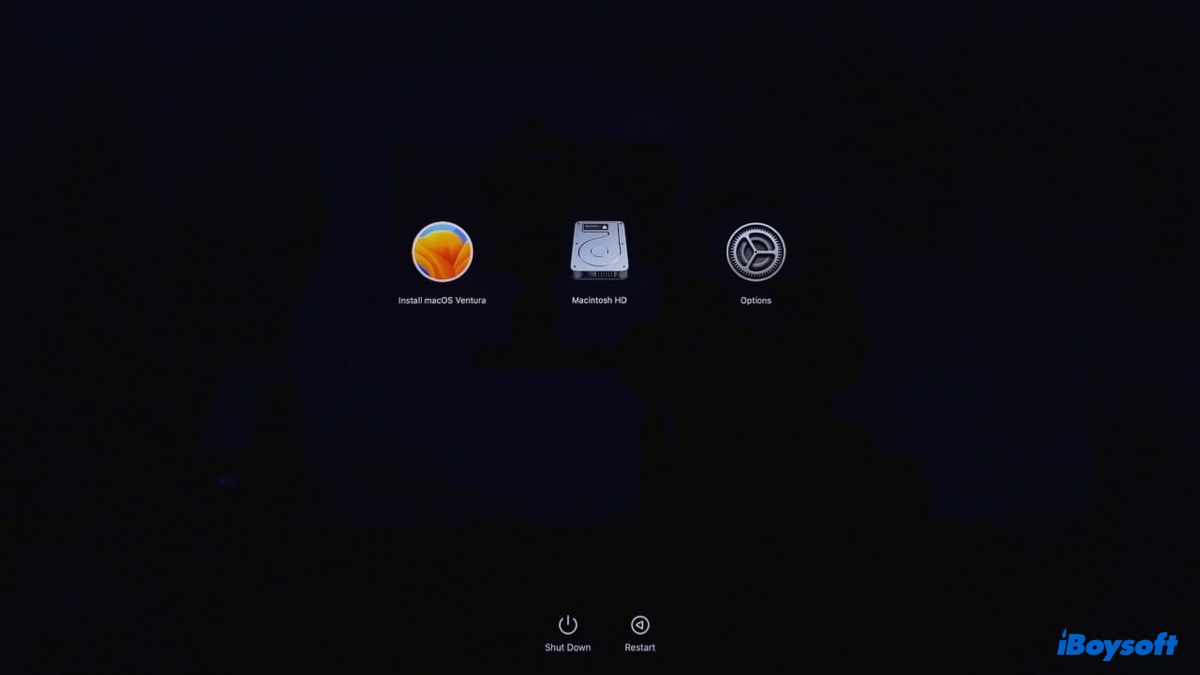
Fix 4: Install from a bootable installer
Alternatively, you can create a bootable macOS installer to install the update. This requires an external storage device with at least 14GB of available storage, formatted with Mac OS Extended (Journaled). After the installer is made, you can take the steps below to install macOS from it:
Ensure your Mac is connected to the internet, as it's needed to get firmware and other information exclusive to your Mac model. Also, if your Mac has a T2 chip, you must allow booting from external media in Startup Security Utility.
On an Intel-based Mac:
- Shut down your Mac.
- Plug the bootable installer into your Mac.
- Press the power button, then immediately hold down the Option (Alt) key.
- Release the key when seeing the bootable volumes.
- Select the volume that contains your bootable installer and click the onscreen arrow.
- Click "Install macOS" and Continue.
On an Apple Silicon Mac:
- Shut down your Mac.
- Plug the bootable installer into your Mac.
- Press and hold the power button until the bootable volumes show up.
- Select the volume containing your bootable installer and click Continue.
- When the installer launches, follow the installation instructions.
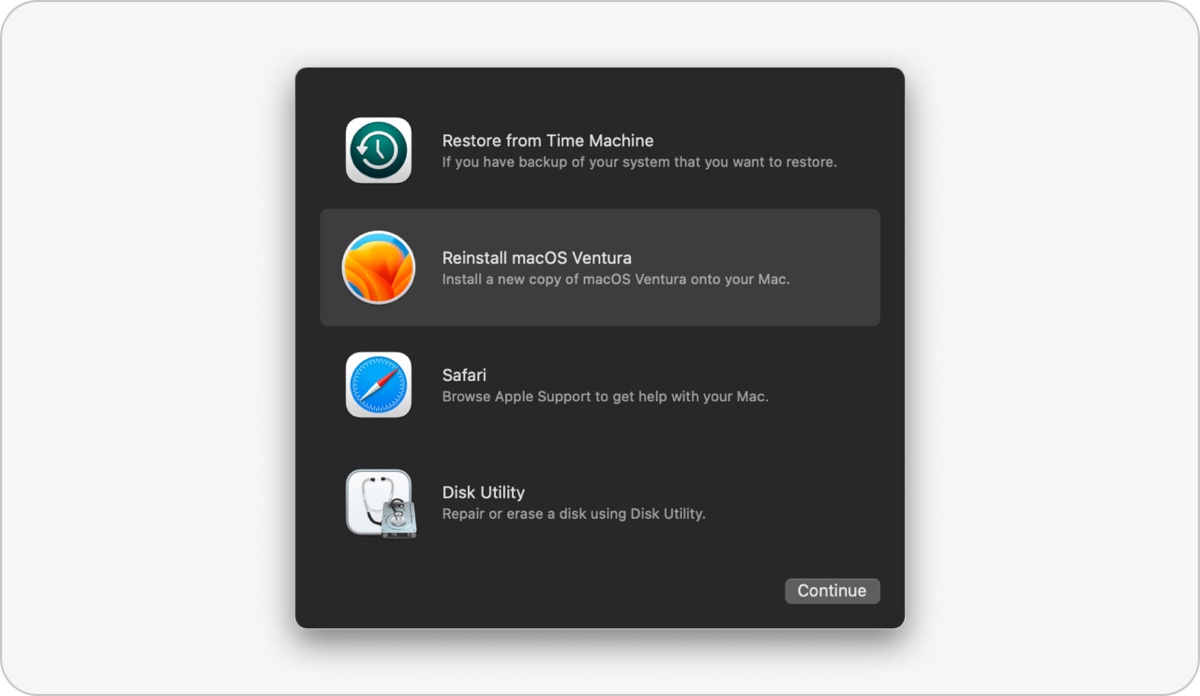
Fix 5: Clean install macOS
Suppose you still encounter the error "Installation cannot proceed because the installer is damaged" when installing macOS Ventura, Monterey, or Big Sur; then consider formatting your internal hard drive and reinstalling macOS.
Be reminded that formatting will erase all data on your Mac, and you should back it up with Time Machine before proceeding.
- After your Mac is backed up, shut it down.
- Boot into macOS Recovery.
- In the macOS Utilities window, select Disk Utility > Continue.
- Click View > Show All Devices.
- Select the top-level physical disk and click Erase.
- Name the drive Macintosh HD.
- Select a proper format. (Choose APFS for macOS High Sierra and later; Choose Mac OS Extended (Journaled) for macOS Sierra and earlier.)
- Keep GUID Partition Map as the scheme.
- Click Erase.
- After the erase process is complete, quit Disk Utility.
- Then you can click Reinstall macOS to install macOS. Or, if you want to install another macOS version, you can boot from a bootable installer, as described in fix 4.
Please share this post if you find it helpful!
FAQs about 'Installation cannot proceed because the installer is damaged'
- QHow do I fix a damaged installer file on a Mac?
-
A
If an installer file is damaged, you can delete it and redownload the full installer from App Store.
- QWhat does it mean when my Mac says the installer is damaged?
-
A
When your Mac says the installer is damaged, it usually means that it was corrupted during the download.