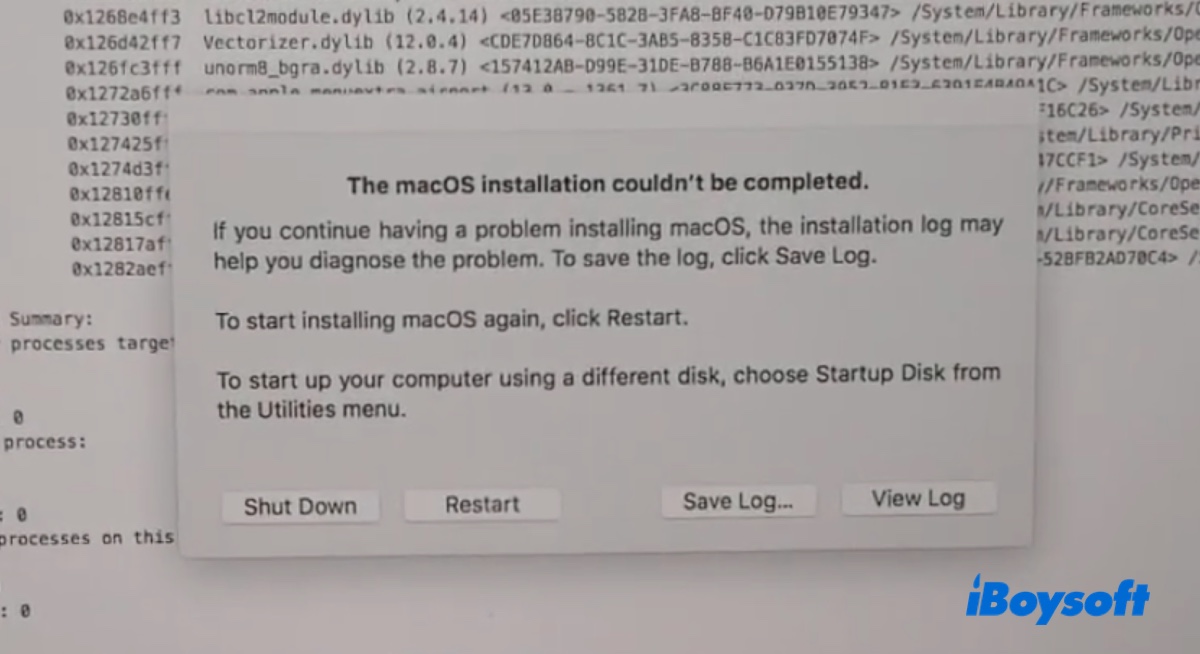
When updating or installing macOS or OS X, you may encounter an error reading "The macOS installation couldn't be completed." Some may also get it when turning on their Mac after months of inactivity.
This message can happen on a genuine Mac or a Hackintosh, preventing your Mac from installing an update or reinstalling the OS. Here's an example:
I tried to update my older MacBook Pro 2018 from 10.13.6 High Sierra to macOS Mojave, but upon restarting, it says "The macOS installation couldn't be completed." I clicked Restart to install macOS again but the result is the same.
If your Mac is also stuck at this error, use the solutions in this guide to fix it.
Why the macOS installation couldn't be completed?
Here are the common reasons why the macOS installation couldn't be completed:
- There's insufficient storage space on the internal hard drive.
- The macOS installer is corrupted.
- The installation process was interrupted and couldn't be completed.
- The internal hard drive has disk issues.
- The computer is trying to update itself, but it doesn't have enough battery.
Share the causes of the error "The macOS installation couldn't be completed" on MacBook Air/Pro and desktop Mac.
How to fix the macOS installation couldn't be completed?
Try the solutions below to fix the error message "The Mac OS X (OS X/macOS) installation couldn't be completed" on macOS Sierra, macOS High Sierra, macOS Mojave, or any other OS version.
Free up space on Mac
Not having enough space is a typical reason why the installation fails with the error "The macOS installation couldn't be completed." If your Mac can still boot up normally, we highly recommend you clean your Mac before attempting the installation again.
Tips: However, if your Mac won't boot up, run data recovery in Recovery Mode to restore the important files from the unbootable Mac, then move on to the next solution.
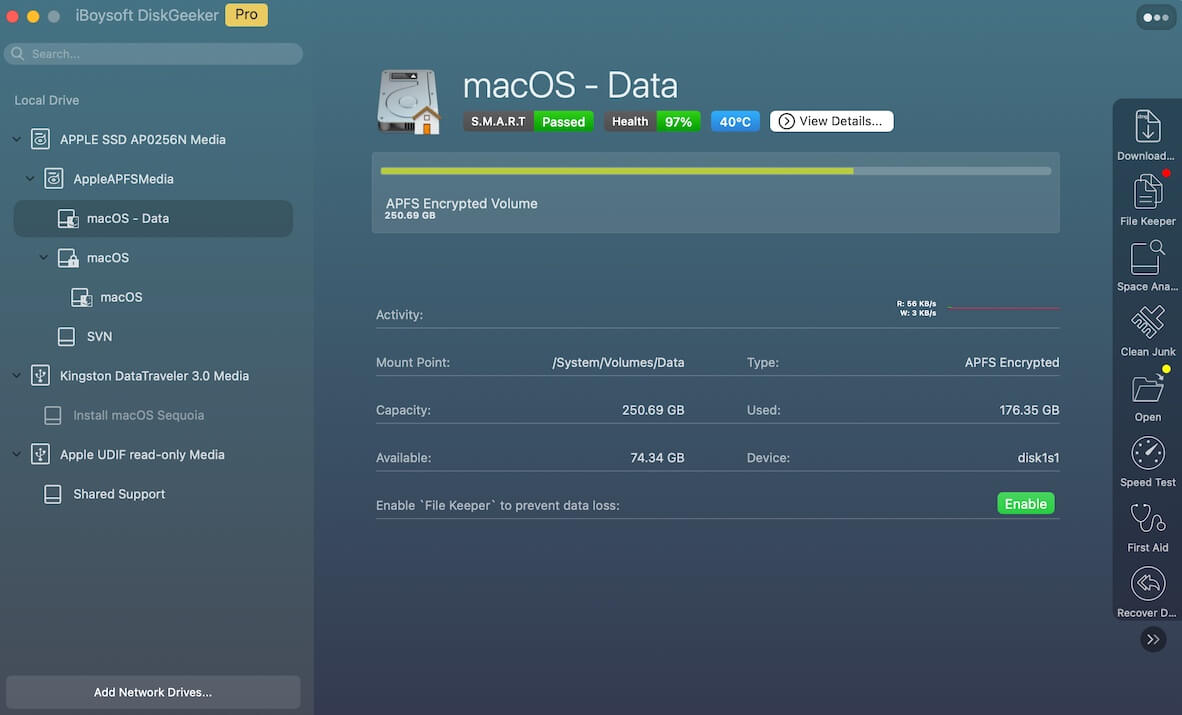
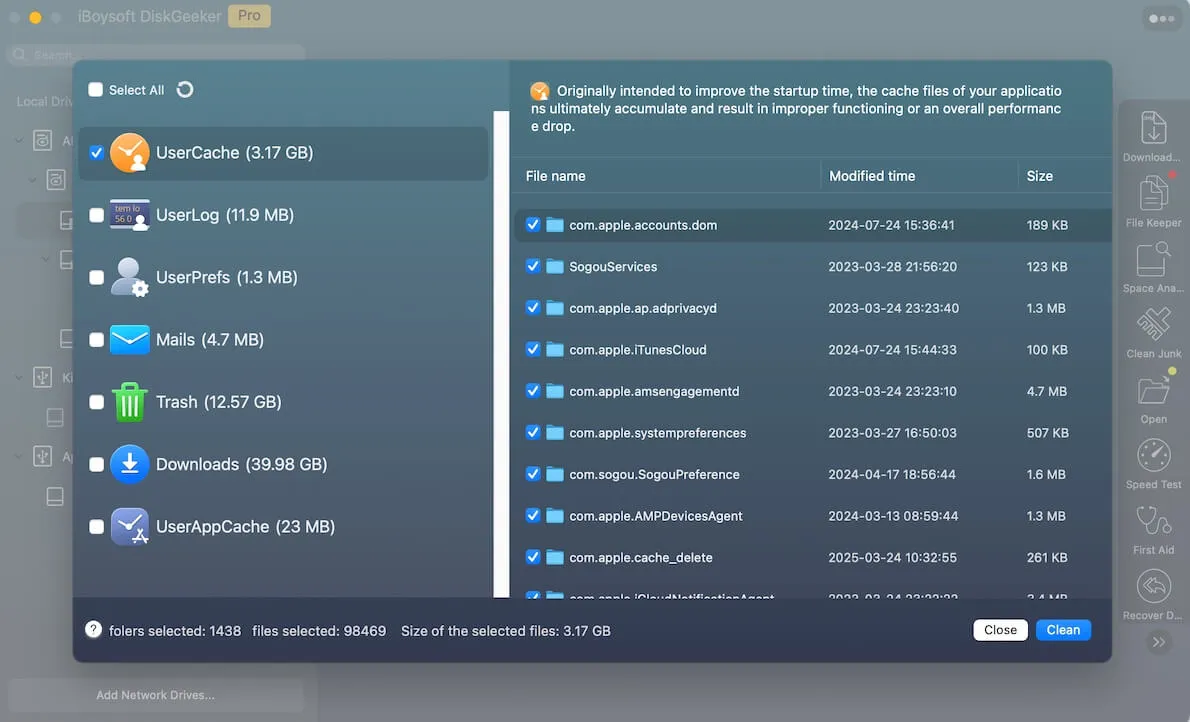
You can utilize a disk cleaner like iBoysoft DiskGeeker to analyze your internal hard drive and remove unwanted files and junk files easily.
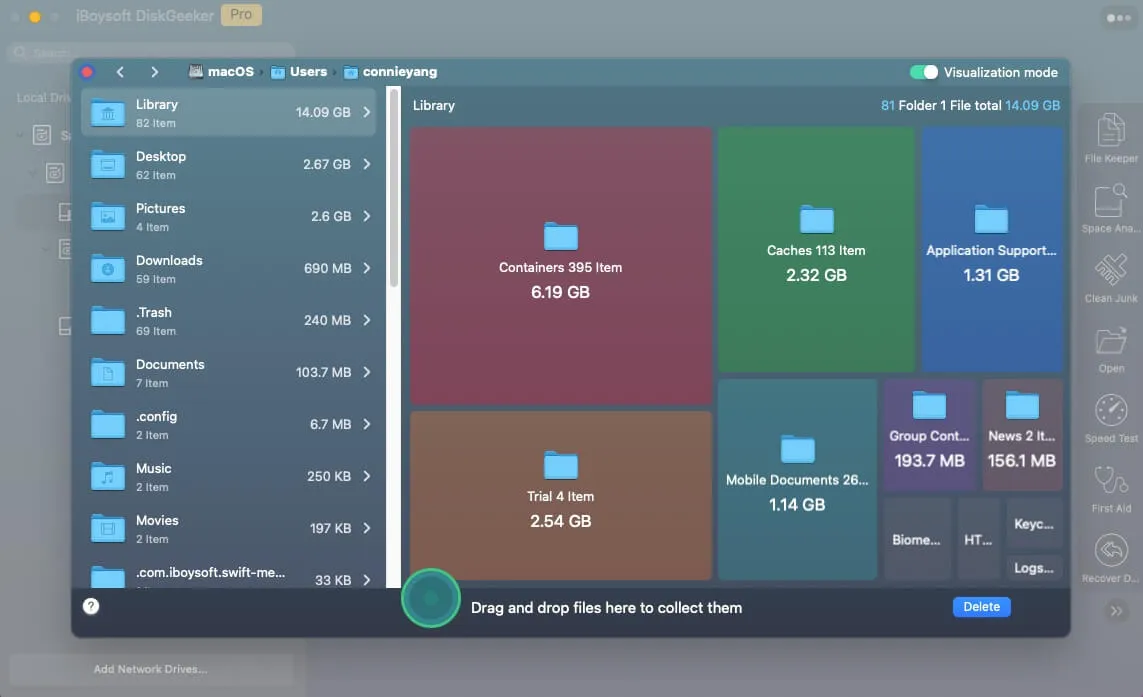
The "Space Analyze" feature can detect all files on your Mac, showing you where the big files are and allowing you to remove unnecessary ones permanently. The "Clean Junk" feature discovers junk files, including logs, caches, preference files, files in the Trash, and emails, ready for you to delete.
Here's how to free up space on your Mac:
Step 1: Download and install iBoysoft DiskGeeker.
Step 2: Select Macintosh HD - Data and click Space Analyze.
Step 3: Check your storage usage. Then drag and drop the unwanted files to the trash can in the center.
Step 4: Click Delete.
Step 5: After clearing the unwanted files, select your internal partition again and click Clean Junk.
Step 6: Select the files you want to remove and click Clean.
After some deep cleaning, you can retry installing macOS.
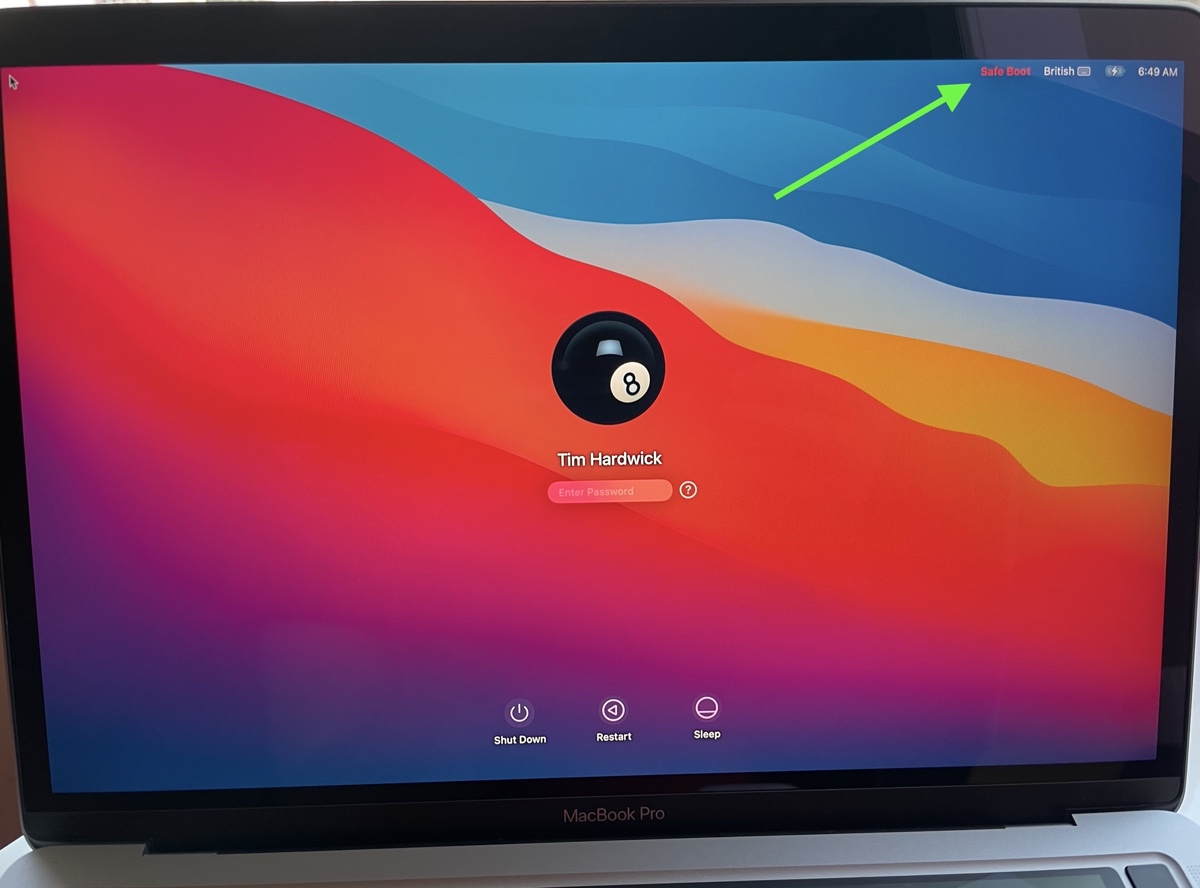
Update macOS in Safe Mode
If the macOS installation couldn't be completed in a regular mode, you can use the macOS Safe Mode. This is a troubleshooting mode that isolates third-party software, clears caches, and repairs disk problems. Here's how to boot into Safe Mode on Mac:
For an Intel-based Mac:
- Turn off your Mac and wait for a few seconds.
- Press the power button while holding down the Shift key.
- Release the key when seeing the login window.
- Log in to your Mac.
For an Apple Silicon Mac:
- Shut down your Mac and wait for 10 seconds.
- Press and hold the power button until you see startup options.
- Choose your startup disk and click Continue while pressing the Shift key.
- Log in to your Mac.
Once in Safe Mode, you should see the words "Safe Boot" in the top-right corner. The next thing to do is to open System Update to update your Mac.
Change SMBIOS to iMac 18,3
If you receive the error "The macOS installation couldn't be completed" on Hackintosh, change the SMBIOS to iMac 18,3, save it, then restart your Mac and initiate the installation again. You can Google to find videos that teach you how to edit SMBIOS on Hackintosh.
Restore from Time Machine and then update
Suppose you've backed up your Mac previously; then you can restore your Mac from that backup to revert to a previous state. To do this, boot into macOS Recovery, then select "Restore from Time Machine backups" and follow the instructions to select a backup and restore your Mac.
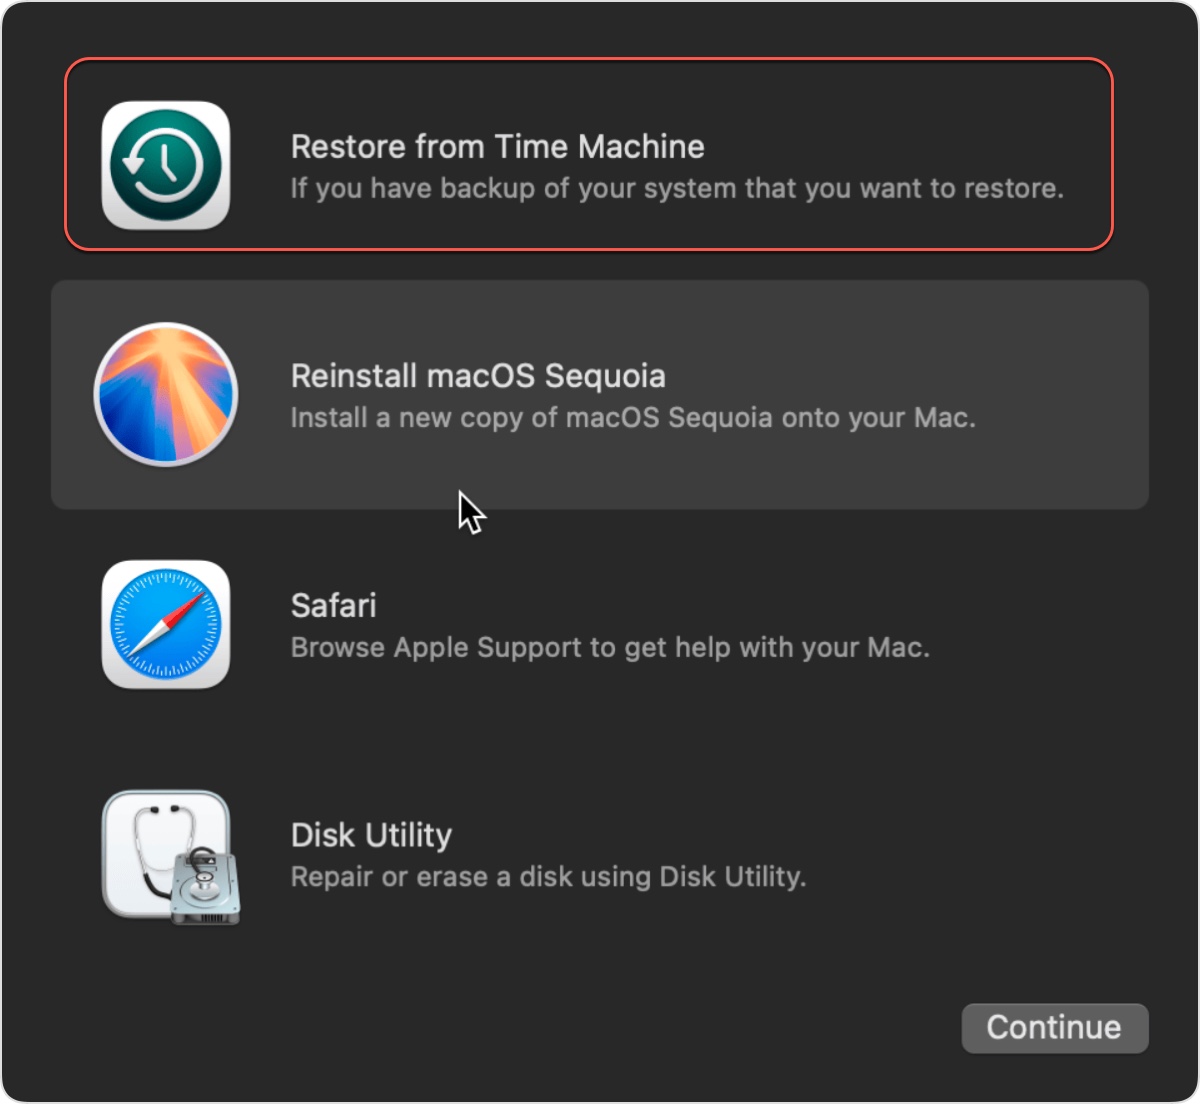
Once you're in a stable version, update your Mac again.
Reinstall macOS
If the error persists on your Mac, consider reinstalling macOS to replace the current system with a new copy of core system files. You can start by reinstalling macOS without erasing your Mac. This will keep all your personal files intact.
If it doesn't work, back up your Mac, then format your startup disk and reinstall macOS.
Share this guide if you resolved the issue with one of the methods!