"The operation couldn't be completed. (OSStatus error)" is a common error you may encounter on Mac. It has various forms, differentiated by the code number. Here are some examples:
- The operation couldn't be completed. (OSStatus error -34.)
- The operation couldn't be completed. (OSStatus error -47.)
- The operation couldn't be completed. (OSStatus error 22.)
- The operation couldn't be completed. (OSStatus error -128.)
- The operation couldn't be completed. (OSStatus error 43.)
- The operation couldn't be completed. (OSStatus error 19.)
In this post, we'll take a deeper look at three of the more frequently discussed error codes, OSStatus error 34, 47, and 22.
How to fix OSStatus error 34?
What does OSStatus error 34 mean?
The error, "The operation couldn't be completed. (OSStatus error 34)," indicates your disk is full. It usually pops up when you're trying to delete files on Mac, empty the trash, move files to external drives, etc.
Some reported seeing OSStatus error 34 when deleting files on Mac's storage tab and getting "The operation can't be completed because the disk is full." when deleting items in folders like Downloads.
To verify if space shortage is the culprit, you can check the available storage space on your Mac.
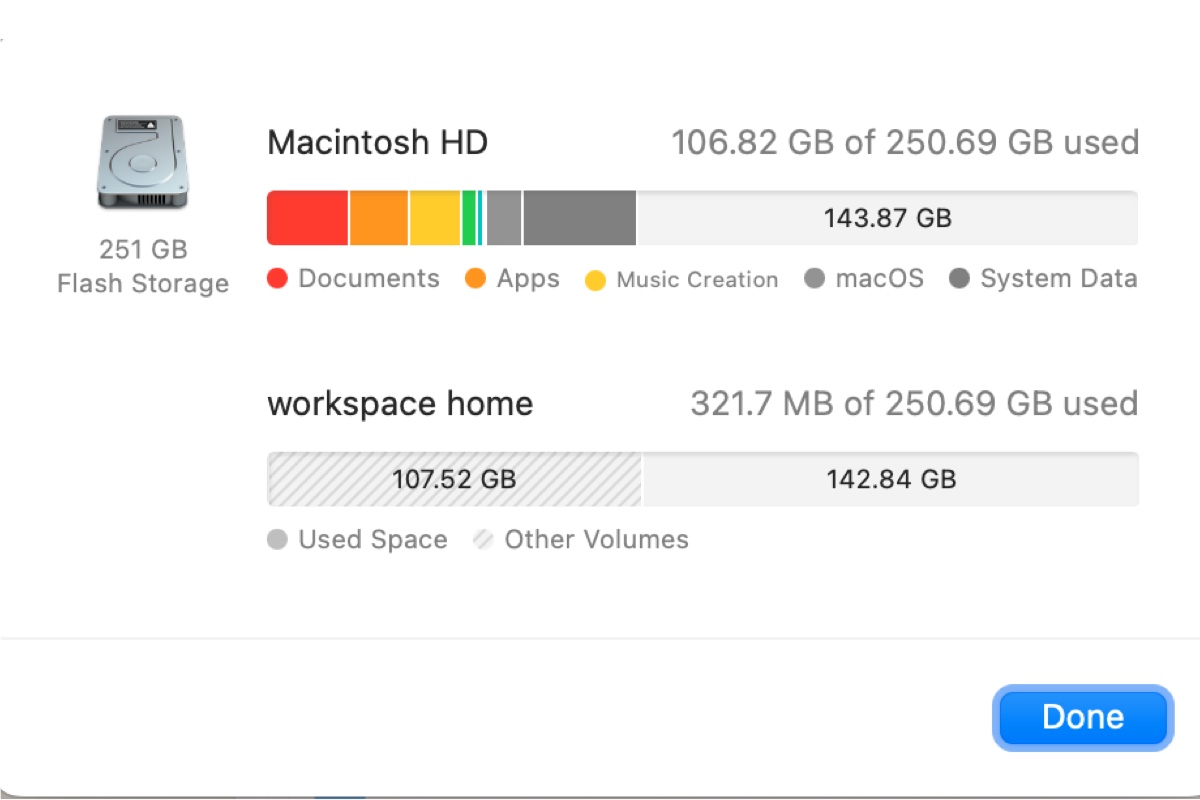
- If you're running macOS Ventura, go to the Apple menu > System Settings > General, then select Storage > All Volumes to view the free space on your Mac.

- If you're running macOS Monterey or earlier, go to the Apple menu > About This Mac, then click on Storage to see the available space on your Mac.
The available space should be at least 15% of your hard drive's capacity for your Mac to work smoothly.
If your Mac still has plenty of available space, OSStatus error 34 could be caused by a minor software glitch. You can reboot your Mac to solve it. If it doesn't work or your Mac is almost full, continue with the following guide to eliminate the error and delete the unwanted files.
Relaunch Finder
If OSStatus error 34 occurs when you're performing tasks involving Finder, it's a good idea to relaunch it to see if it resolves the issue. You can follow the steps below to restart Finder:
- Press the Option key while right-clicking on the Finder icon at your Dock.
- Click Relaunch.
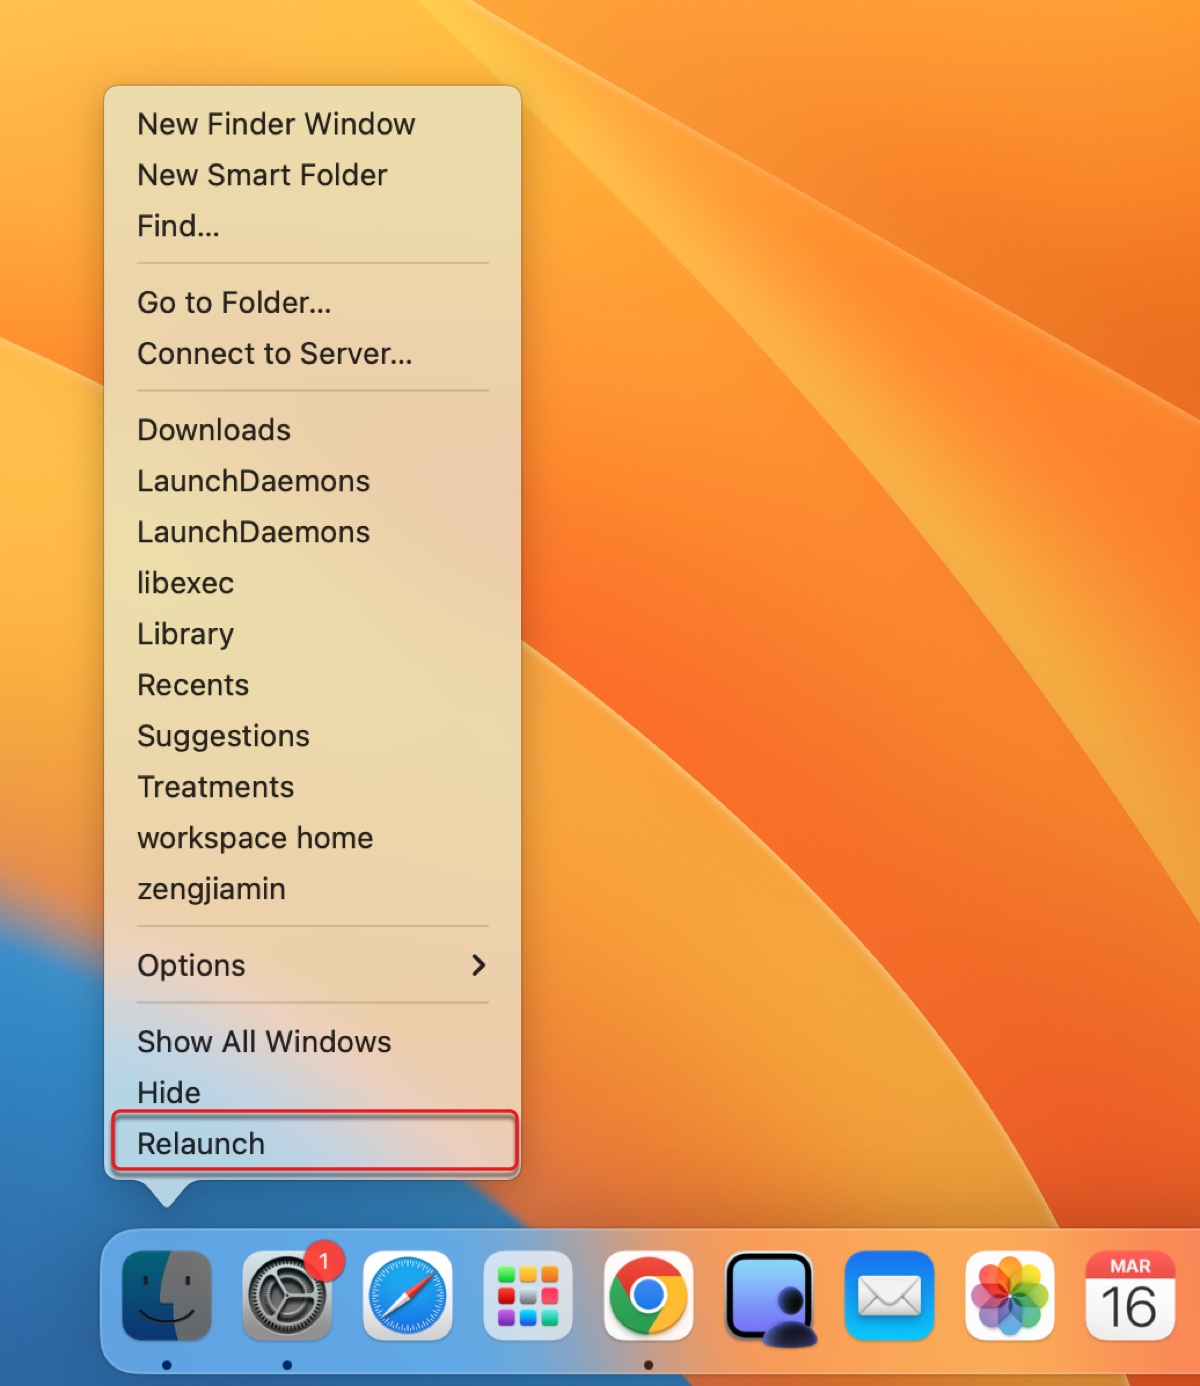
The Finder window and desktop icons will disappear and reappear after a few moments. When Finder is relaunched, you can repeat the task you were doing when the error happened. If the issue persists, move on to the next fix.
Delete unnecessary files using iBoysoft DiskGeeker
Since OSStatus error 34 is an error that occurs when your drive doesn't have enough available space, you can fix it by freeing up storage space on your Macintosh HD. If you can't delete files from Finder or the Storage tab, try doing it using iBoysoft DiskGeeker.
It's a versatile disk management tool that can mount all drives connected to your Mac, including your system volumes and external disks, and allow you to permanently clean garbage and unwanted files on them, encrypt & unlock drives with BitLocker or FileVault encryption, write to NTFS drives, check for disk errors, clone drive contents, map network drives, and prevent virus attacks.
You can utilize the "Clean Drive" and "Clean Junk" features of this software to delete files on your Mac.
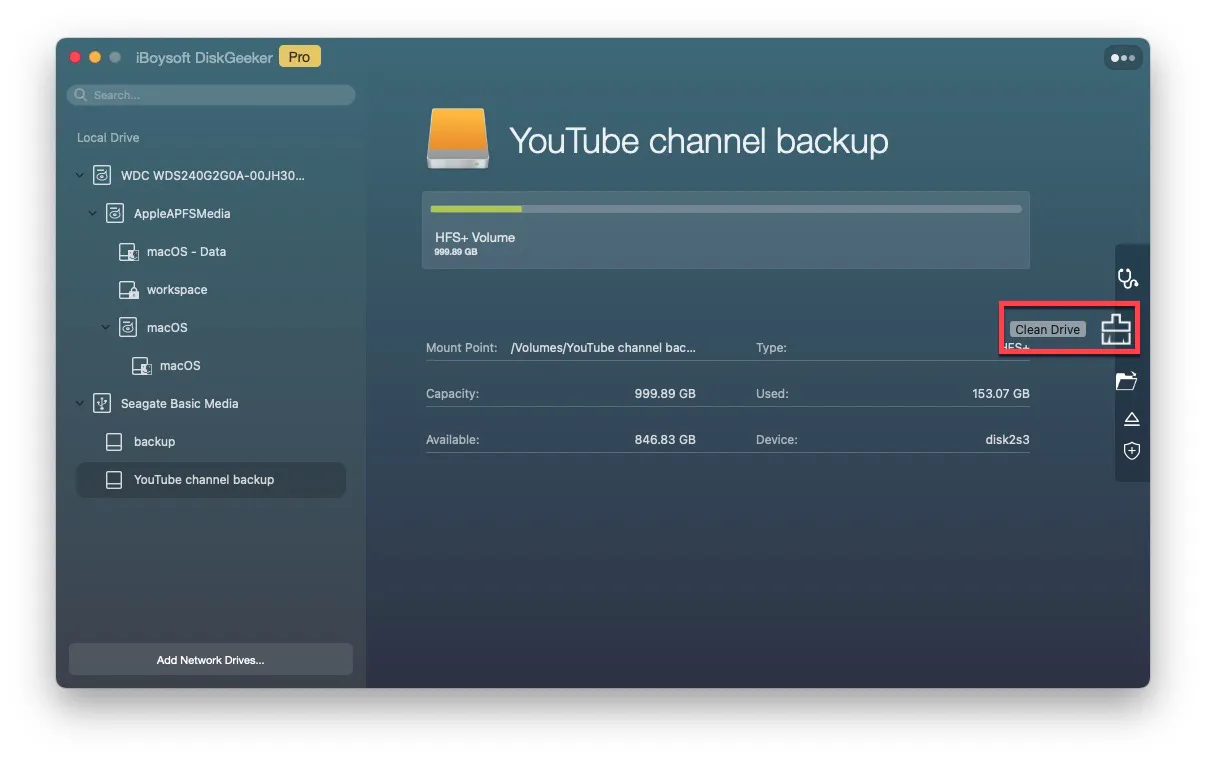
- "Clean Drive" will present all files on your selected drive in an easily navigable structure and empower you to filter them by size. This way, you can quickly find large files on your Mac and delete those you no longer need.
- "Clean Junk" will scan your system drive to find the temporary files (system caches, user logs, or application caches), items in your Downloads folder, files in the Trash, and your emails.
iBoysoft DiskGeeker supports macOS 13 Ventura ~ macOS 10.13 High Sierra running on Apple Silicon (M1 & M2) and Intel-based Macs. Follow the steps below to delete the unnecessary files on your Mac.
Step 1: Click the button below to install the disk cleaner on your Mac and start your 7-day free trial.
Step 2: Open the software, select one of your system volumes, and click "Clean Drive."
Step 3: After the scan is complete, click the Size column to sort your files based on size.
Step 4: Tick the boxes next to the files you want to delete and click the Delete all button.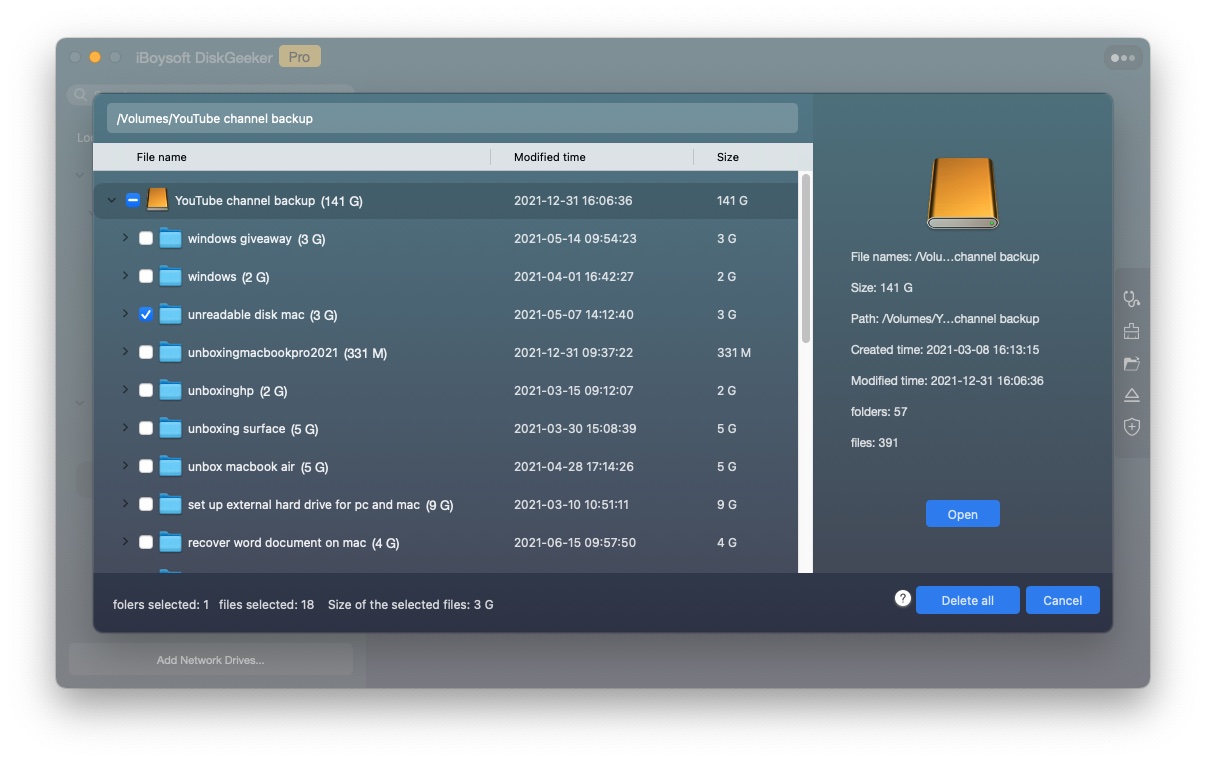
Step 5: Click Cancel to return to the main interface.
Step 6: Select your system volume and click "Clean Junk."
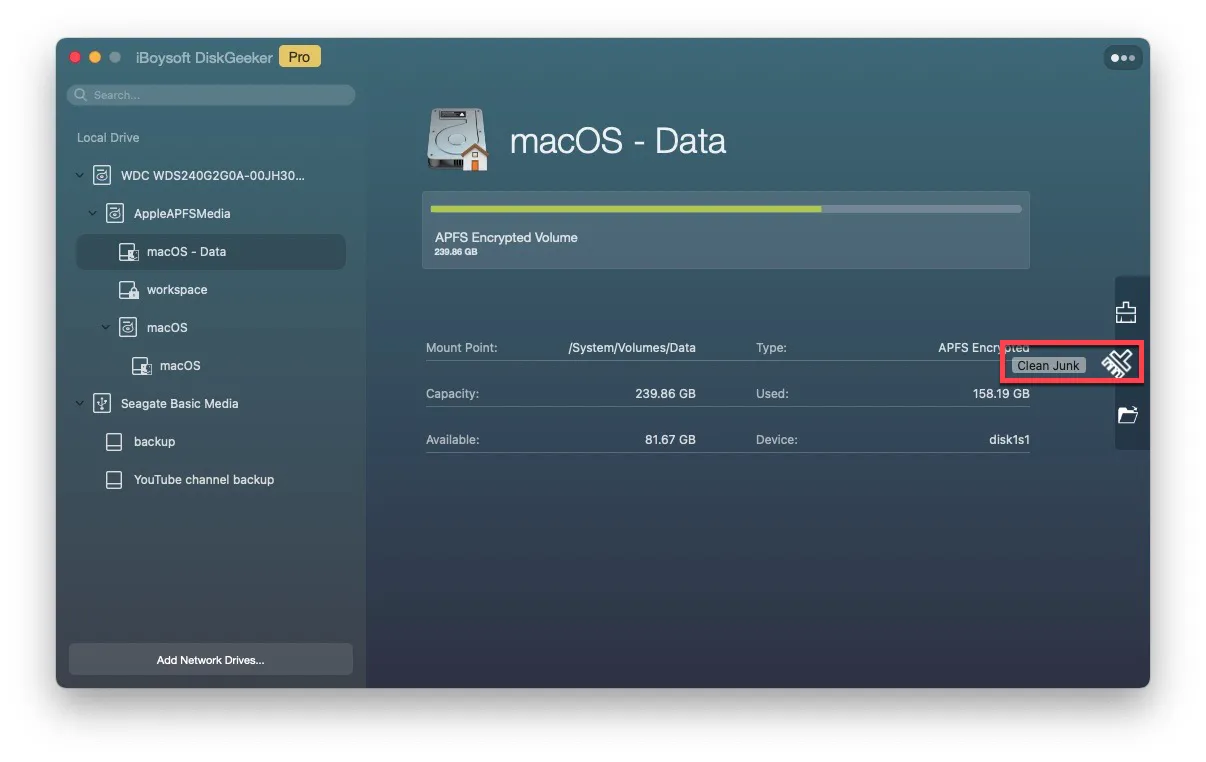
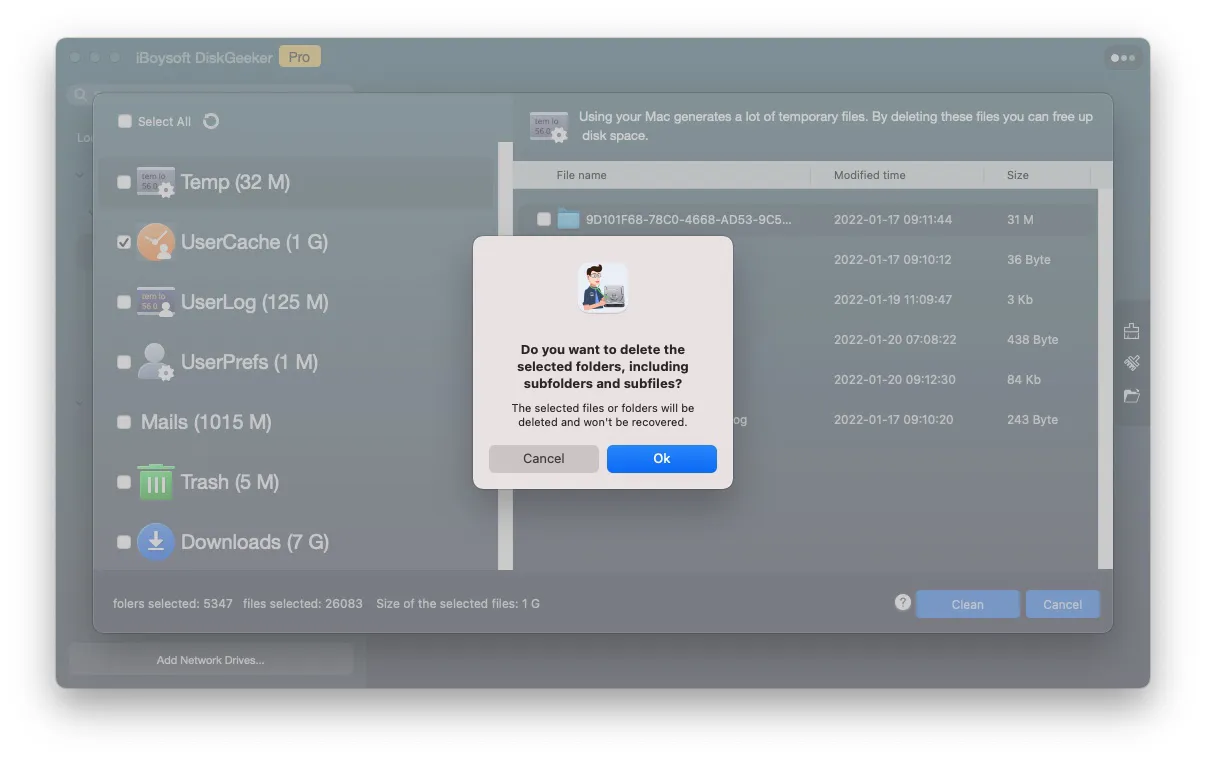
Step 7: Check the boxes next to the files you wish to clean, tap the Clean button, then click Ok.
Boot into Safe Mode
If Mac still won't let you delete files, you can boot into Safe Mode to see if the OSStatus error 34 recurs. Safe Mode can prevent your Mac from loading software like login items, system extensions not essential to macOS, and fonts, check your startup disk, and delete system caches.
Here's how to boot into Safe Mode on Mac:
On an Intel-based Mac:
- Restart your Mac, then immediately press and hold the Shift key when your Mac turns black.
- Release the key when the login window appears.
- Log in to your Mac. You might be required to log in twice.
On an Apple Silicon Mac:
- Turn off your Mac.
- Press and hold the power button until seeing the startup options window.
- Select your startup disk, press the Shift key, and click "Continue in Safe Mode."
- Log in to your Mac. You might be asked to log in twice.
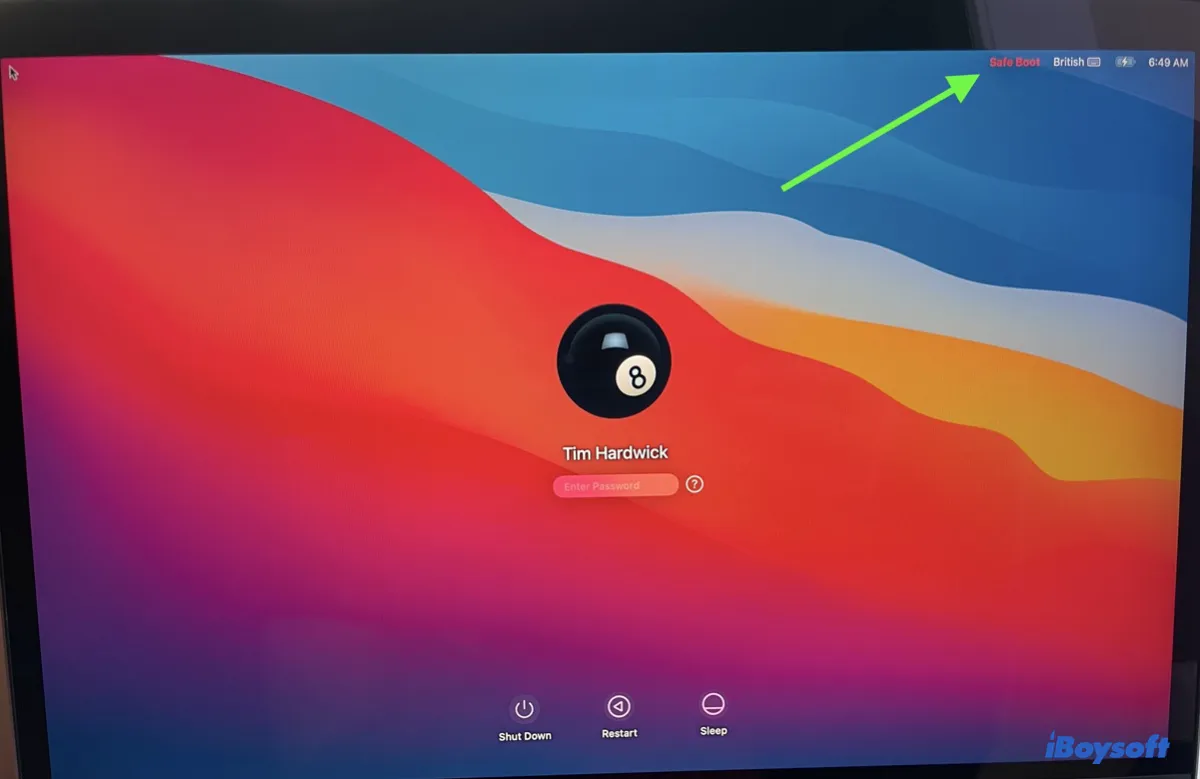
Once you're in Safe Mode, you should see "Safe Boot" in the upper-right corner of your screen.
Delete files & empty the Trash through Terminal
You can also delete files and empty the trash via the Terminal app to eliminate OSStatus error 34 when your disk is full. Terminal is a command-line interface utility built into your Mac, allowing you to perform tasks you failed with the graphical user interface.
Be reminded that the commands we'll discuss below will permanently delete the assigned files and you can't get them back. So, be sure to double-check the items before deleting them.
Take the following steps to delete files and empty the Trash in Terminal:
- Open Finder, and click the Applications folder on the left sidebar.
- Launch Terminal from the Utilities folder.
- Copy and paste the following command into Terminal and press Enter to empty the Trash.sudo rm -Rf ~/.Trash
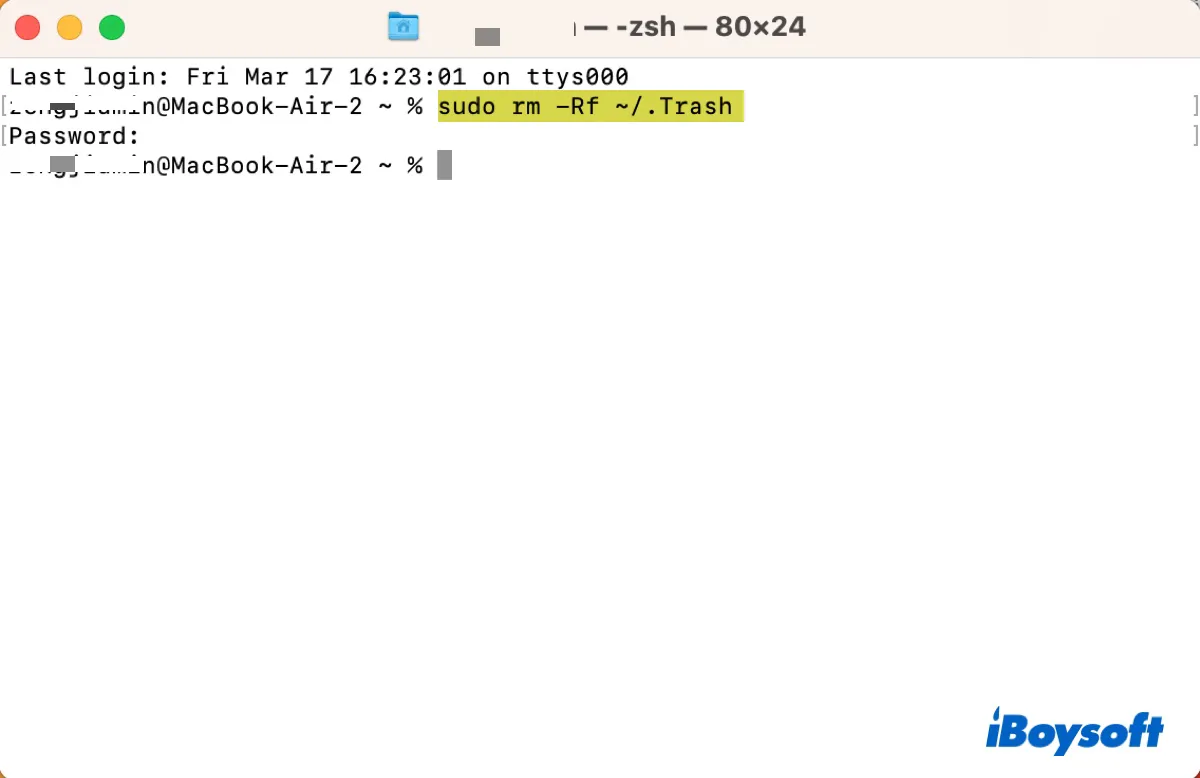
- Enter your admin password and hit Enter again. (Your password will not echo to the screen.)
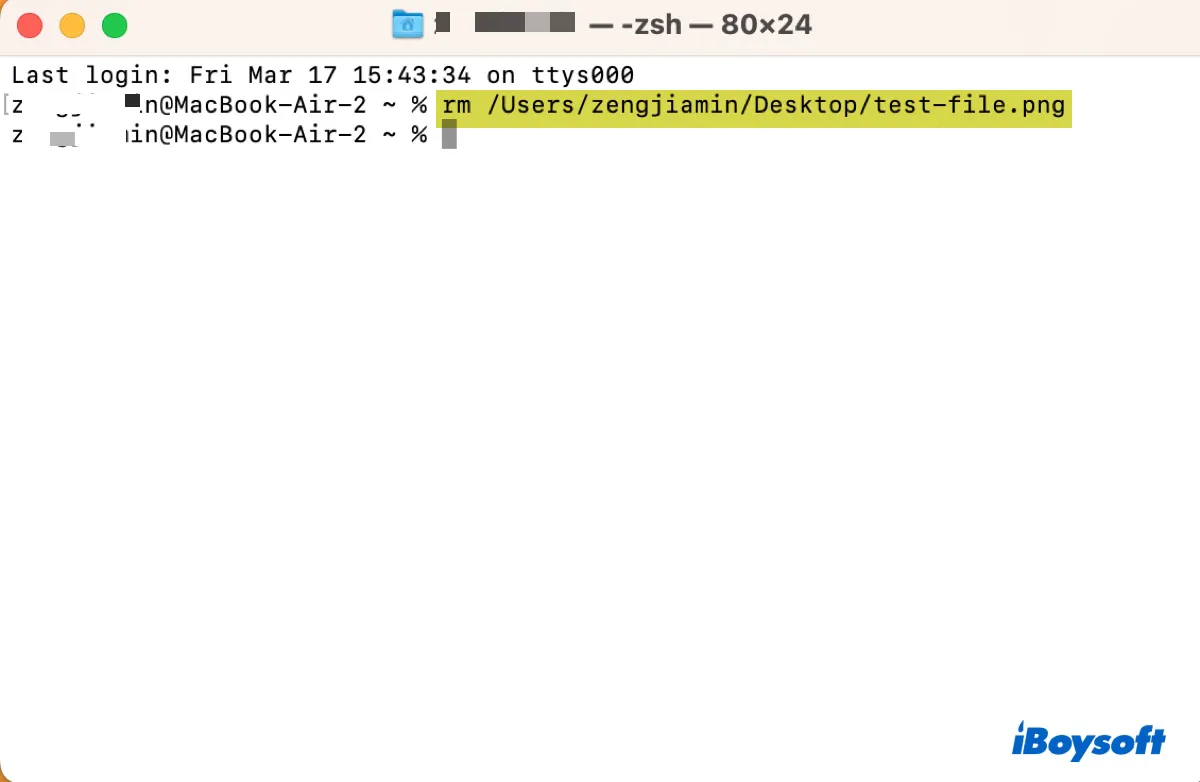
- Type the following command and hit Enter to delete unwanted files.rm file_pathType the command rm into Terminal, then drag and drop the folder or file you intend to get rid of into the Terminal window to acquire its path. Last, press the Enter key.
- Exit Terminal.
Suppose your disk is so full that it can't open Terminal, then you can boot into macOS Recovery and launch Terminal from the top Utilities menu to empty the Trash.
Move your files to an external drive
Another way to clear storage space on your Mac is by transferring files to an external drive without copying them. The process is quite straightforward. Follow the steps below:
- Connect an external drive with enough free space to your Mac.
- Select the files you want to transfer on Mac. (To select multiple files at once, press the Command or Shift key and click a file.)
- Press Command + C.
- Open your external drive, and press Option + Command + V to paste the files.
Delete or transfer files to another Mac via Target Disk Mode
If you have another Mac near you, you can connect to it using a USB, USB-C, or Thunderbolt cable and boot the Mac with OSStatus error 34 into Target Disk Mode to transfer files. In this case, the troublesome Mac will appear as an external hard disk on your spare Mac and allow you to delete or transfer files on it.
Boot from an external drive or clone backup
Alternatively, you can boot from another drive or a bootable clone backup to delete files on your Mac. If you have a bootable clone of your internal hard drive, simply connect the drive that contains it to your Mac then select it as your startup disk with the following steps.
On macOS Ventura, click the Apple menu > System Settings > General > Startup Disk, then select the bootable clone and click Restart.
On macOS Monterey or earlier, click the Apple menu > System Preferences > Startup Disk, then select the bootable clone and click Restart.
Then you can delete the unnecessary files on your Mac as you normally would.
If not, the option left is to install macOS on an external drive and boot from it. Prepare an external drive with more than 25 GB of capacity, preferably an SSD, because APFS is optimized for it. Then take the following steps:
- Plug your external drive into your Mac.
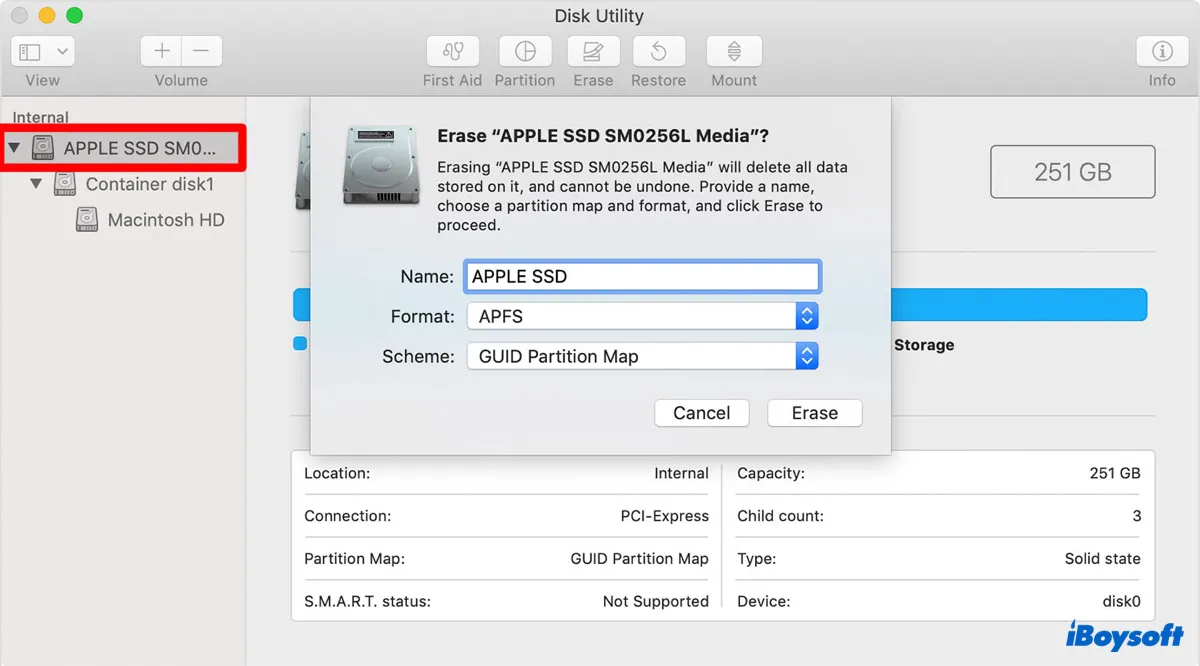
- Open Disk Utility and click View > Show All Devices.
- Select your disk and click Erase.
- Set APFS as the format.
- Choose GUID Partition Map as the scheme.
- Name your drive.
- Click Erase again.
- Wait for the erase process to be finished.
- Download the macOS installer app from this Apple page.
- Run the installer from your Applications folder if it doesn't automatically open.
- Click Continue > Agree > Agree.
- Click "Show All Disks," then select your external drive and click Continue.
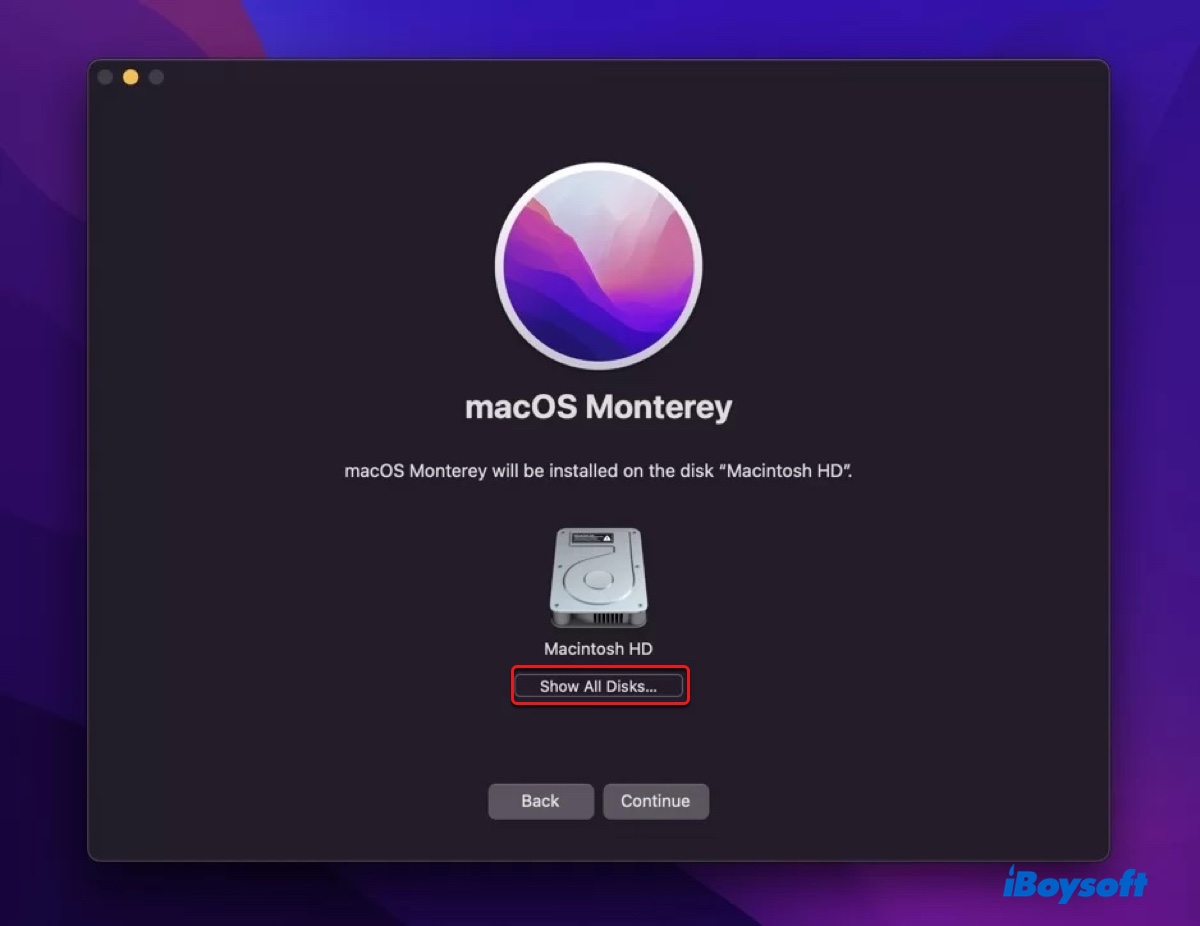
- Follow the onscreen instructions to install macOS on your external drive.
After the installation completes, you can select the external drive as your startup disk, as we mentioned above. Then attempt to delete files and check if OSStatus error 34 occurs.
Erase your Mac and reinstall macOS
The last resort is to erase your Mac, which deletes everything on your internal hard drive, and then reinstall macOS. To avoid losing data, you can back up your Mac with Time Machine if you can or clone your internal hard drive with iBoysoft DiskGeeker, which is way faster.
After your data is secured, use the steps below to clean reinstall macOS:
- Boot into macOS Recovery.
- In the macOS Utilities window, open Disk Utility > Continue.
- Click View > Show All Devices.
- Select your internal hard disk (the one at the top) and click Erase.
- Name your internal drive.
- Choose APFS as the format.
- Select GUID Partition Map as the scheme.
- Click Erase.
- When your drive is erased, close Disk Utility.
- Click Reinstall macOS and Continue.
After the new OS is installed, you won't see OSStatus error 34 again.
Share these solutions to benefit more users if you find them helpful.
How to fix OSStatus error 47?
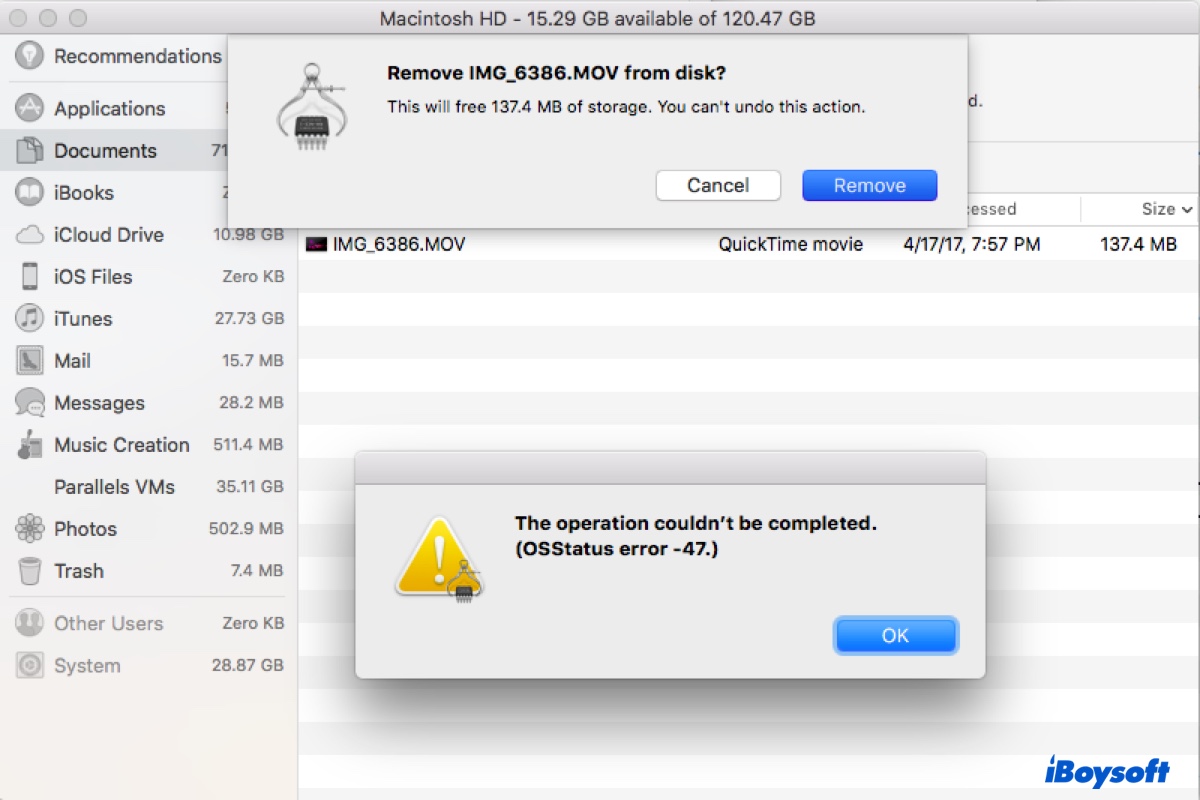
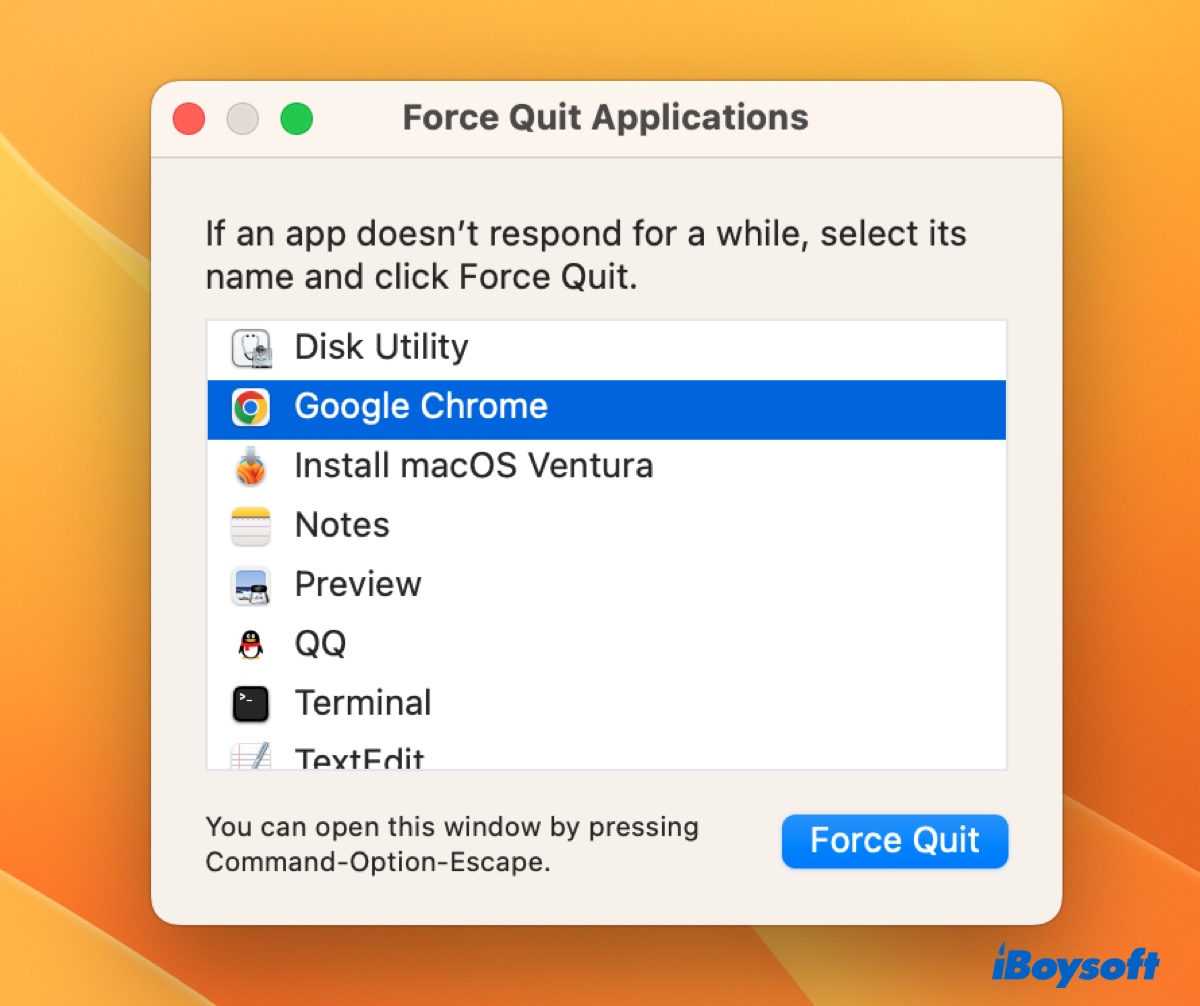
The operation couldn't be completed. (OSStatus error -47.) occurs when you delete files that are busy, and currently used by other applications. To fix it, you just need to quit the application related to your file. If you're not sure which one it is, follow the steps below:
- Press Command + Option + Esc.
- You can now see all the apps opened on your Mac.
- Check the app that you suspect may be using the file and ensure all the changes you made to it are saved.
- Select the app and click Force Quit.
Then you should be able to delete the file that triggered OSStatus error 47 on Mac.
How to fix OSStatus error 22?

The operation couldn't be completed. (OSStatus error 22.) happens when you are unable to clone your Mac's hard drive, typically by using the Restore feature in Disk Utility. The error is usually accompanied by the following details:
- The source volume cannot be restored because it has a broken seal Could not validate source - Invalid argument
- APFS inverter failed to invert the volume - Invalid argument
Regardless, you can try the following solutions to fix OSStatus error 22.
Boot into Internet Recovery Mode
If you're trying to clone an Intel-based Mac's startup disk, you can restart your Mac into Internet Recovery Mode to do it. Internet Recovery will download the recovery partition from Apple's server through your network, so ensure your Mac is connected to the internet.
To boot into Internet Recovery Mode, you need to shut down your Mac, then power it on and immediately press and hold the Option + Command + R keys until seeing the spinning globe. Once in Internet Recovery, try cloning your drive using Disk Utility again.
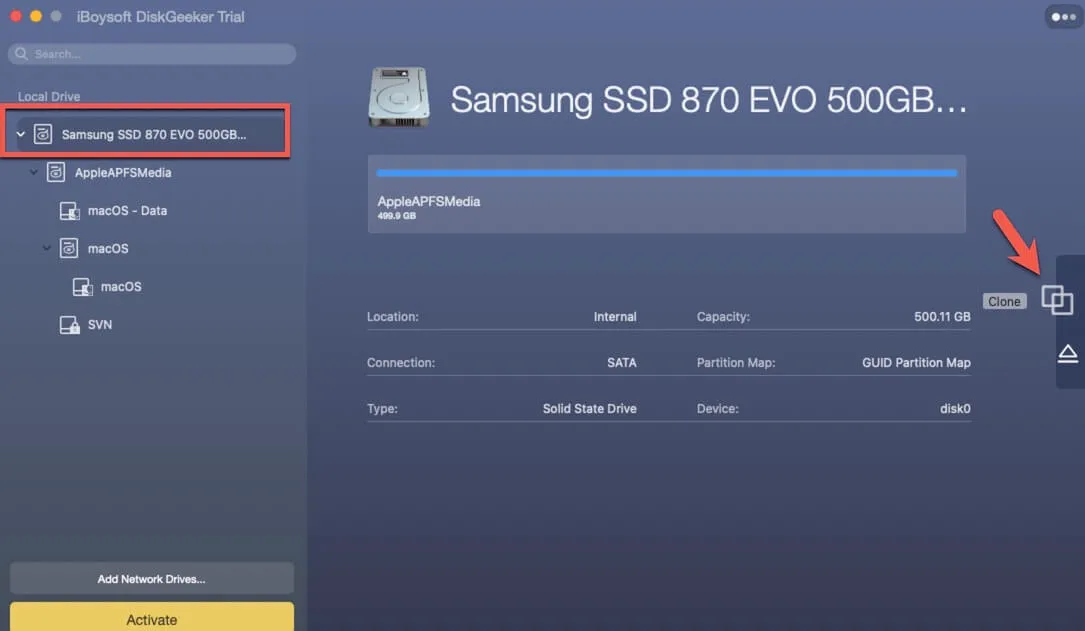
Use another disk cloning tool
If OSStatus error 22 continues to pop up in Internet Recovery Mode, consider employing a third-party disk cloning utility to clone your startup disk. For instance, you can use iBoysoft DiskGeeker to clone your internal hard drive. Unlike Disk Utility's Restore feature, which is often buggy and slow, it can quickly clone your Mac's data onto another drive.
Use Time Machine/Migration Assistant/Target Disk Mode
If backing up your Mac is your goal, you can use Time Machine instead, as it can back up everything on your Mac, including apps, music, photos, document, email, settings, etc.
If you're trying to transfer data from one Mac to another, there are two alternatives to try. The easiest way is with Migration Assistant. It allows you to copy all of your documents, apps, user accounts, and settings to another Mac via WiFi.
You can also boot the source Mac into Target Disk Mode, and connect it with the destination Mac, then you can drag and drop files between the two Macs.
Did this post help you resolve the OSStatus error? If the answer is yes, please share it with more people.