As a content creator, I'm constantly testing new apps and rendering graphics, which eats up my disk space fast. Nothing is more frustrating than a MacBook Air that freezes or requires a force shut-down to be usable right in the middle of a project. If your Mac is becoming unresponsive, the culprit is likely a bloated drive.
In this guide, I'll show you 4 native ways to find large files on Mac and one third-party tool to reclaim your space instantly.
Method 1: Find large files on Mac with one click
When my MacBook Air first started lagging, I spent hours manually hunting through folders for "hidden" space-hogs. While I eventually mastered using Finder, Storage Management, and Terminal (which I'll cover below), I now prefer a faster approach.
For routine maintenance, I use iBoysoft Cleaner to quickly identify large files, clear system junk, and remove duplicates that native tools often miss.
Using a third-party cleaner is the most efficient way to optimize Mac storage without risking the deletion of critical system files.
Steps to find and delete large files with iBoysoft Cleaner:
Step 1: Download and install iBoysoft Cleaner.
Step 2: Click Large Files on the left.
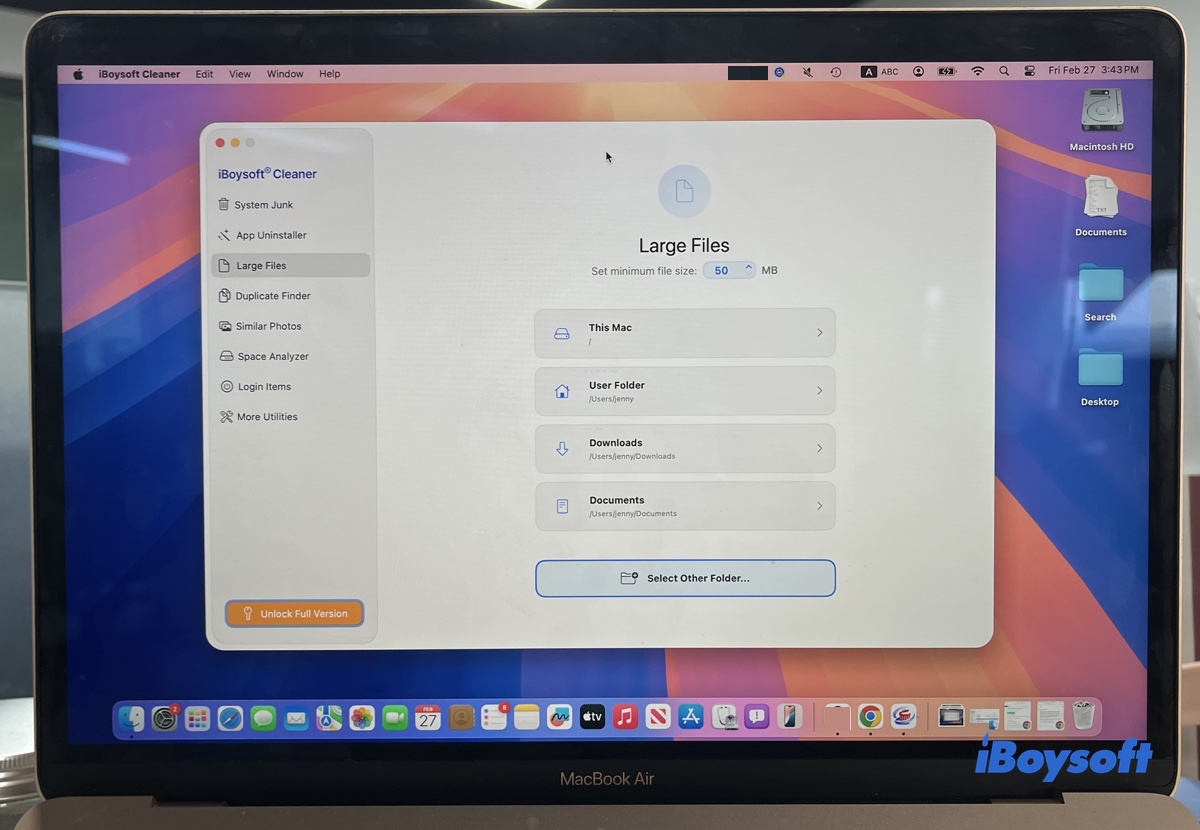
Step 3: Set a minimum file size for files you consider large, or keep the default one.
Step 4: Choose where you want to find large files.
This Mac: Scan the whole Mac.
User Folder: Only scan your user folder.
Downloads: Only scan the Downloads folder.
Documents: Only scan the Documents folder.
Select Other Folder…: Choose any folder or external storage device.
Step 5: After the scan is complete, you'll see the files ranked from largest to smallest in size. Select files you no longer need and click Clean.
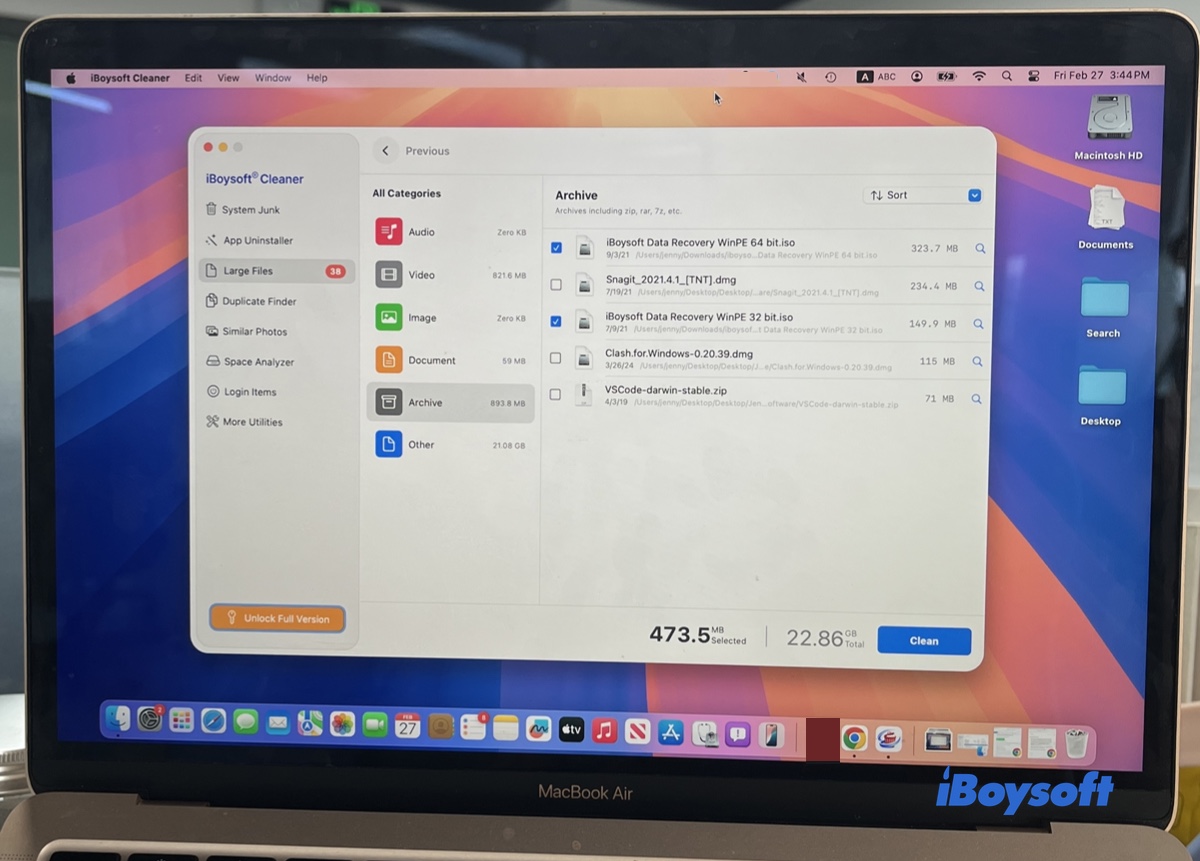
Then you can go back to the main interface and choose to clean system junk, delete duplicates, fully uninstall apps, etc.
However, if you want to manually find and delete large files on Mac, keep reading!
Method 2: Check commonly-used folders for large files
When your Mac disk is full, some of the best places to find large files on Mac are the following:
- Downloads
- Applications
- Documents
- Desktop
- Trash Can
- iTunes (before macOS 10.15 Catalina)
The Downloads folder is the most common destination for storing downloaded items (How to find downloads on Mac) and thus makes a great starting place to find large files. Checking the Applications and Documents folders is also apt for discovering large software and Office documents.
Besides, you should go over your desktop to see if you have left large files there and forgotten to delete them. Moreover, since files you move to the Trash are still on your hard drive until they are completely deleted, you should empty the Trash periodically.
If your Mac is running macOS Catalina or earlier, take a look at the folder where iTunes stores your iPad and iPhone backups. Depending on the amount of data on your devices and the frequency of backups, this folder could potentially take up tens of gigabytes.
Here is how to access the folder where iTunes saves data on your iPhone and iPad:
- Open Finder, and click the Go menu at the top.
- Select Go to Folder, and paste this destination: ~/Library/Application Support/MobileSync/Backup

This post answers where photos are stored on Mac, including the taken photos, downloaded pictures, AirDropped images, screenshots, etc. Plus, it guides you to find the photos you want on Mac.
Method 3: Find large files with Finder filters
Another way to help macOS find large files on macOS Monterey, Big Sur, Catalina, or any other Mac operating system is to use the search filters in Finder or other Mac file managers.
Steps to locate large files with the built-in Spotlight search of Finder:
- Open Finder, then type any letter in the top-right search bar.
- When the add button (+) appears, click on it.
- In the first drop-down menu on the left, choose File Size. If you don't see it, click on Other, tick File Size, and click OK.
- Select "is greater than" in the box next to it, then enter a file size you consider large, like 100MB.
- Finder will automatically search the whole Mac and then show you a list of files over the size you input.
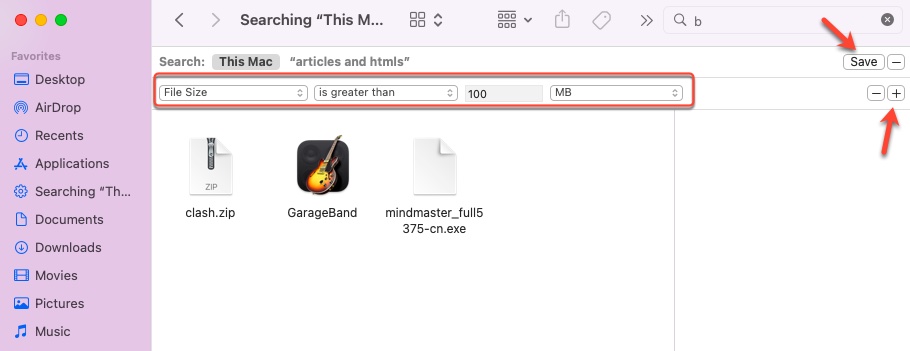
- Select a file and decide if you want to delete it based on the location information on the bottom-left side and the data info on the right side.
- Once you decide, right-click on the file and choose Move to Trash.
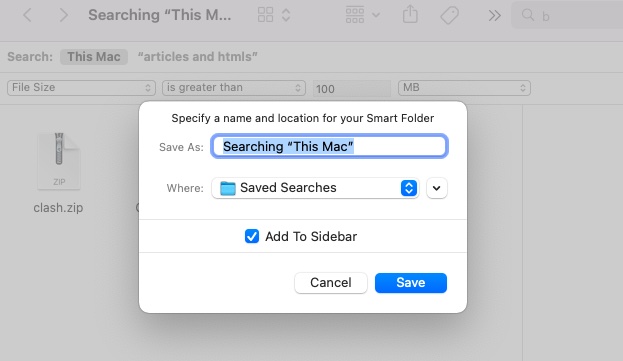
If you want to track down large files over this specific size often, you can click "Save" in the upper-right corner to add it to the sidebar for easy future retrieval.
This method only deals with single large files but not large folders filled with small files. Luckily, Finder offers another way to find large folders on Mac.
How to find the largest folder on your Mac?
- Open Finder and click on your Mac hard drive - Macintosh HD.
If you don't see Macintosh HD on the left sidebar of Finder, you need to open the Finder menu > Preferences > Sidebar, then tick Hard disks.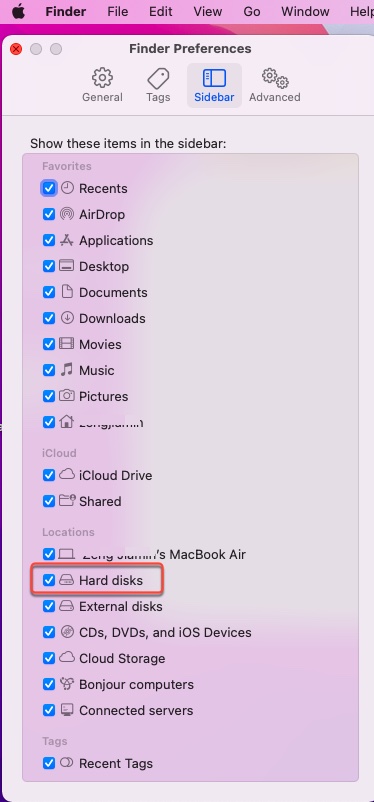
- Then you can see all files on your Mac hard drive organized by four folders—Applications, Library, System, and Users. We don't recommend modifying the Library and System folders because any actions may corrupt files on them and crash your Mac.
- Click on the Users folder, then select the folder with your account name.
- Click the list view button for better navigation if you haven't.
- Choose View > Show View Options on the top menu bar, and tick Calculate all sizes
- Now you can see the size of each folder. Click on the top of the Size column to sort them and locate the largest folder.
Method 4: Find large files using Storage Management
Knowing how to use Finder to find large files seems fine, but you shouldn't miss the Storage Management feature added to Mac since macOS Sierra. It gives you an overview of what's taking up space on your Mac and various tools to manage all types of files.
Steps to find large files in Storage Management:
On macOS Monterey or earlier:
- Click on the Apple logo at the top-left corner.
- Select About This Mac, and tap on the Storage tab.
- Then you will see a bar chart with different colors. Move the cursor to the color to determine what type of files are occupying how much space on your Mac's hard drive.
If you find that the Other category is a big consumer of your storage, you can clean up the Other storage to optimize Mac space.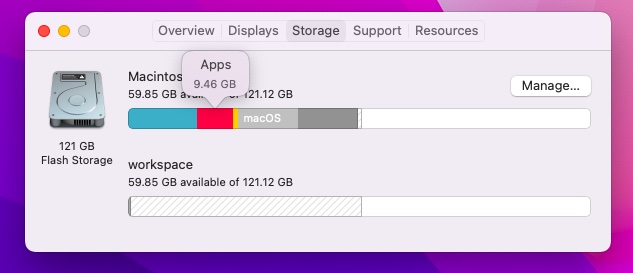
- Click Manage. Then you can go through the recommendations, such as storing files in iCloud, automatically removing movies and TV shows you've already watched, and emptying Trash over 30 days old.
- Click on Review Files to browse large files.
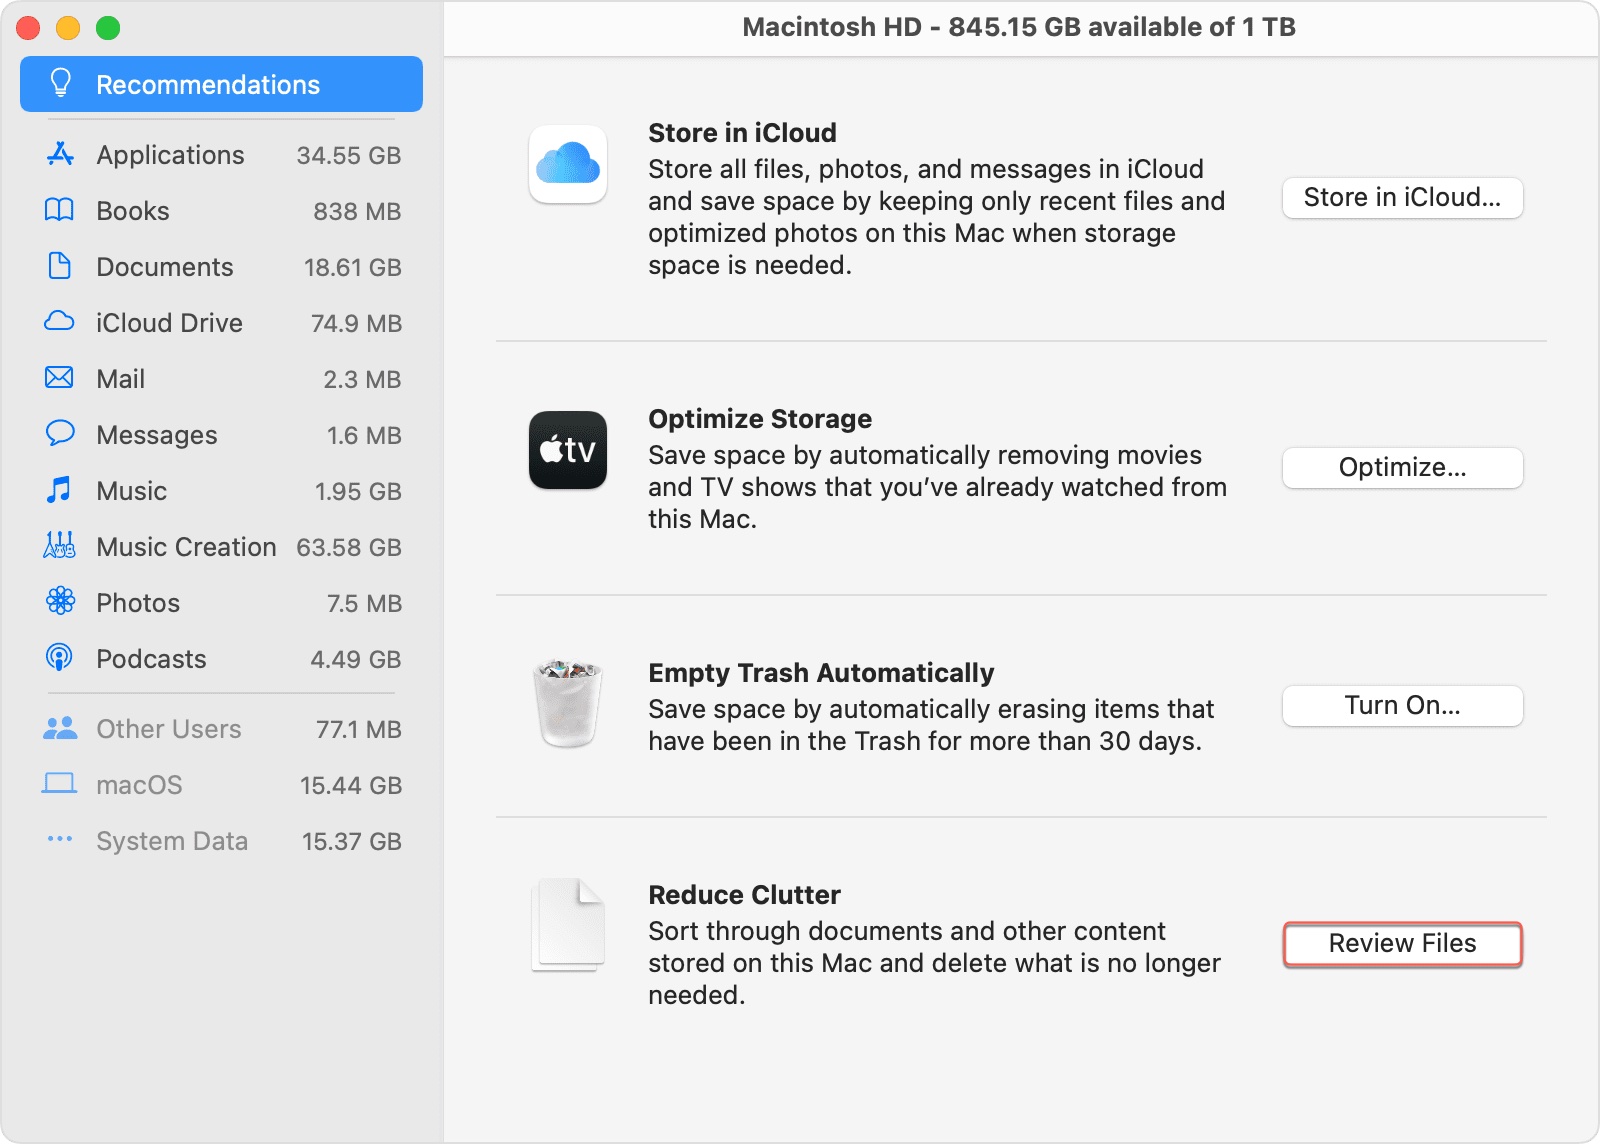
- You can also click on categories listed on the left side to find large files on Mac Photos, Applications, Music, etc.
- Select the unwanted file, and click Delete to get rid of it.
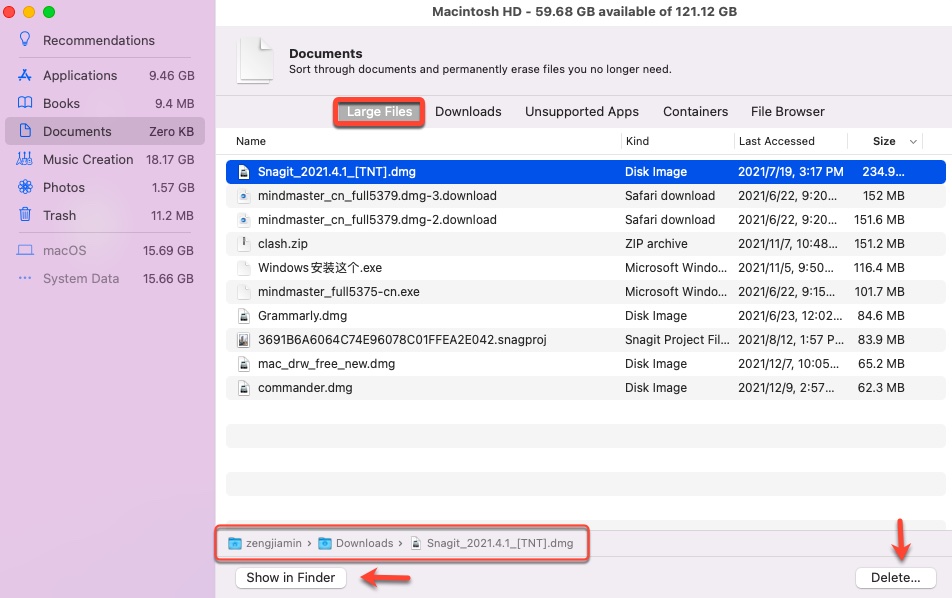
On macOS Ventura or later:
1. Click the Apple Menu > System Settings.
2. Go to General > Storage.
3. Click the 'i' icon next to Documents.
4. Select the Large Files tab to see a list of your largest files sorted by size.
Method 5: Find large files on Mac Terminal
Most users are content with using Finder and Storage Management to find large files on a Mac. But if you want a more efficient way and are used to command lines, the built-in utility Terminal is what you need.
Steps to help macOS find large files using Terminal:
- Launch Terminal by clicking Launchpad > Other > Terminal.
- Enter the following command to locate files larger than 100 MB in the Home directory (your User folder).find /home -size 100M You can replace home and 100MB with a preferred folder and file size. If you want to limit files larger than 30MB but less than 100MB, input this:
find /home -size +30M -size -100M - When Terminal asks you for access to the folder, click OK.
- To delete all AVI files greater than 1GB under the Home directory, enter this command:find /home -type f -name *.avi -size +100M -exec rm {} You can substitute avi for a different file type and 100 MB for another file size.
FAQs
- QHow do I find the biggest files on my Mac?
-
A
The fastest native way to find the absolute biggest files is through the Storage Management tool.
1. Click the Apple Menu > System Settings > General > Storage.
2. Tap the 'i' icon next to Documents.
3. Choose the 'Large Files' tab to find the biggest file on your Mac.
- QHow to find what files are taking up space on a Mac?
-
A
To get a visual overview of your disk usage, go to the Apple menu > About This Mac > Storage on macOS Monterey or earlier or System Settings > General > Storage on macOS Ventura and later.
For a more granular view, use Finder: open Finder and press Command-F, change the 'Kind' filter to 'File Size', then set the operator to 'is greater than' and enter a value.