macOS 12 Monterey is a major update that has brought a lot of new features to the Mac operating system, such as Live Text, Shortcuts, Universal Control, Focus Mode, etc. You can install the OS on a virtual machine like VirtualBox on your Windows PC to try it out if you don't have a Mac.
Tips: Apart from installing on a virtual machine, you can also install macOS on a Windows PC by creating a Hackintosh.
Here, we'll instruct you to install macOS Monterey on VirtualBox, which is a free virtual machine for personal, educational, or evaluation use.
How to Install macOS Monterey on VirtualBox on Windows?
To install macOS Monterey on VirtualBox, you need to make sure your Windows PC meets the following minimum requirements.
- RAM: 4GB (8GB Recommend)
- Hard disk space: 80GB (150GB Recommend)
- CPU: 2 cores (4 Recommend)
If you're not sure about your PC's hardware specifications, you can check it with the following steps:
- Press Ctrl + Shift + Esc to launch Task Manager.
- Select the Performance tab.
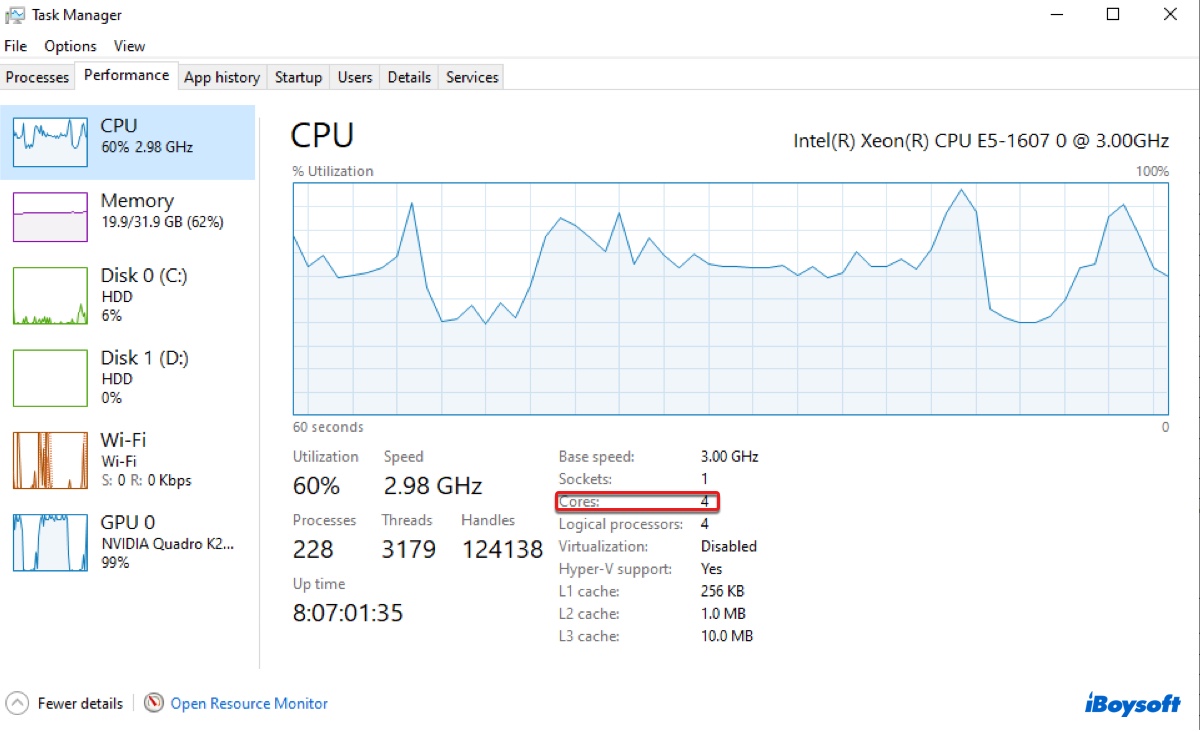
- Highlight CPU, Memory, or Disk from the left side to view the specific information.
If your PC satisfies the necessary requirements, proceed with the steps below to download and install macOS Monterey on VirtualBox on Windows 11/10/8.1/Windows Server 2012-2022.
- Step 1: Download the required files for installing macOS Monterey on Windows
- Step 2: Install VirtualBox on Windows PC
- Step 3: Create the macOS Monterey virtual machine
- Step 4: Customize the settings of the macOS Monterey Virtual machine
- Step 5: Run VirtualBox codes in Command Prompt
- Step 6: Install macOS Monterey on VirtualBox on Windows PC
Step 1: Download the required files for installing macOS Monterey on Windows
Here are the files needed for the installation. You can download them before getting started.
1. Download the macOS Monterey ISO file
The macOS Monterey ISO file is a disk image that contains the installer of macOS Monterey.
2. Download Oracle VM VirtualBox and its Extension Pack
VirtualBox currently supports the following Windows hosts (64-bit):
- Windows 8.1
- Windows 10
- Windows 11 21H2
- Windows Server 2012
- Windows Server 2012 R2
- Windows Server 2016
- Windows Server 2019
- Windows Server 2022
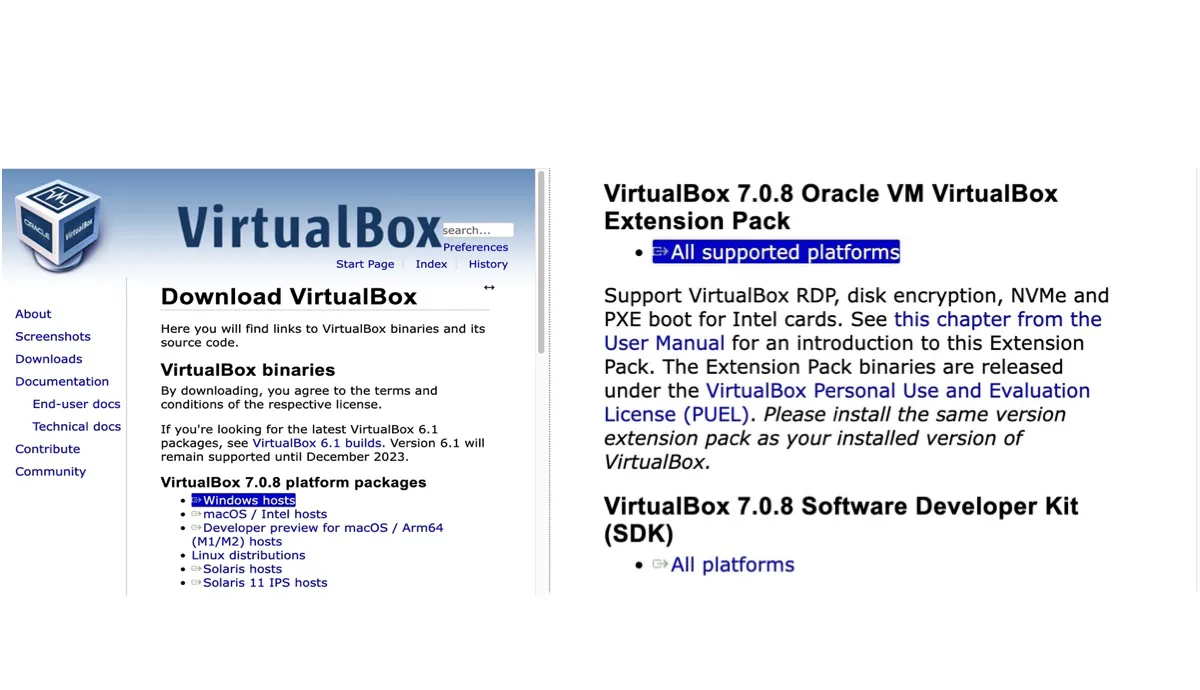
To download VirtualBox, you need to get its base package and the extension pack.
- Base package: The base package includes all open-source components and is licensed under the GNU General Public License V2.
- Extension pack: The extension pack extends the functionality of the Oracle VM VirtualBox base package with features like VirtualBox Remote Desktop Protocol (VRDP), host webcam passthrough, Intel PXE boot ROM, and Disk image encryption with AES algorithm.
Open its website, and click "Windows hosts" to download the base package for Windows. Then click "All Supported Platforms" to download the additional extension pack. (By the time of writing this article, the latest version of VirtualBox is 7.0.8.
Step 2: Install VirtualBox on Windows PC
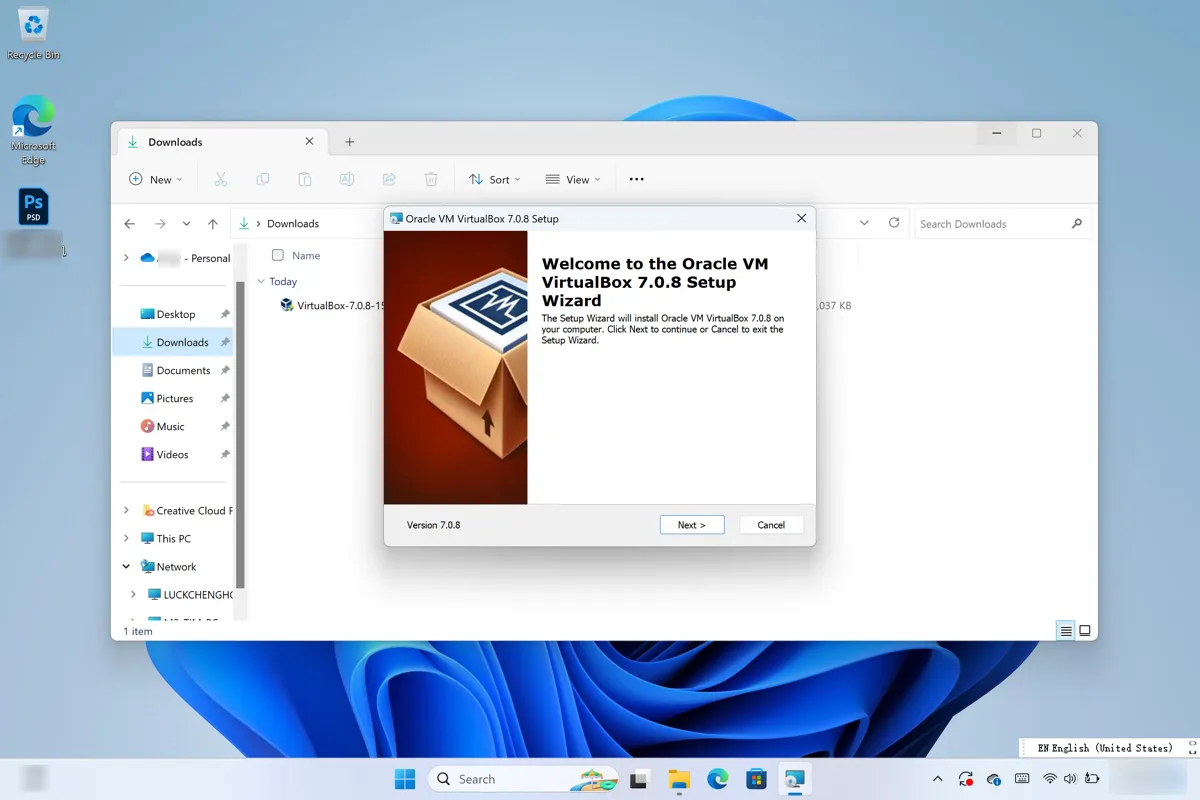
- Double-click the downloaded VirtualBox base package.
- When the Oracle VM VirtualBox Setup wizard shows up, click the Next button.
- Choose a location to install VirtualBox and click Next > Yes.
- Click Yes > Install to start the installation process.
- Click Finish to automatically launch VirtualBox.
- Select Tools > Extensions.
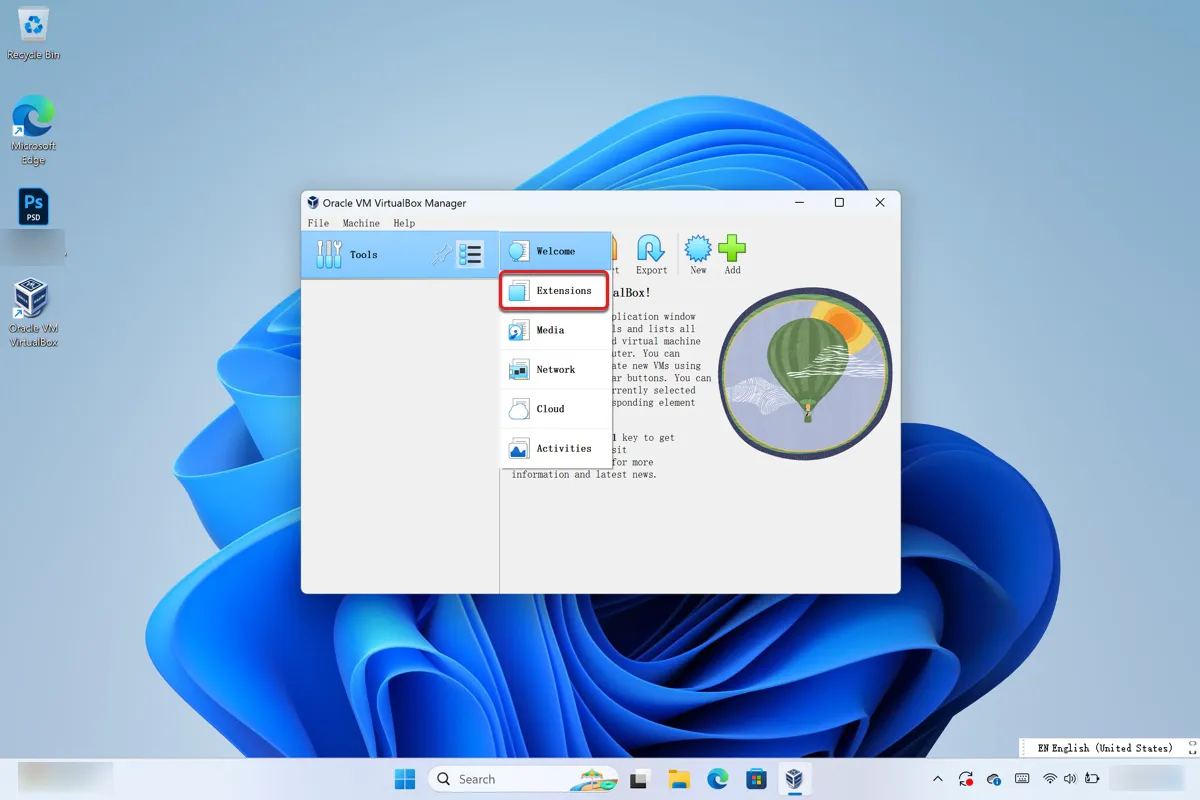
- Click the ( + ) Install icon, select the download extension pack, and click Open.
- Click the Install button.
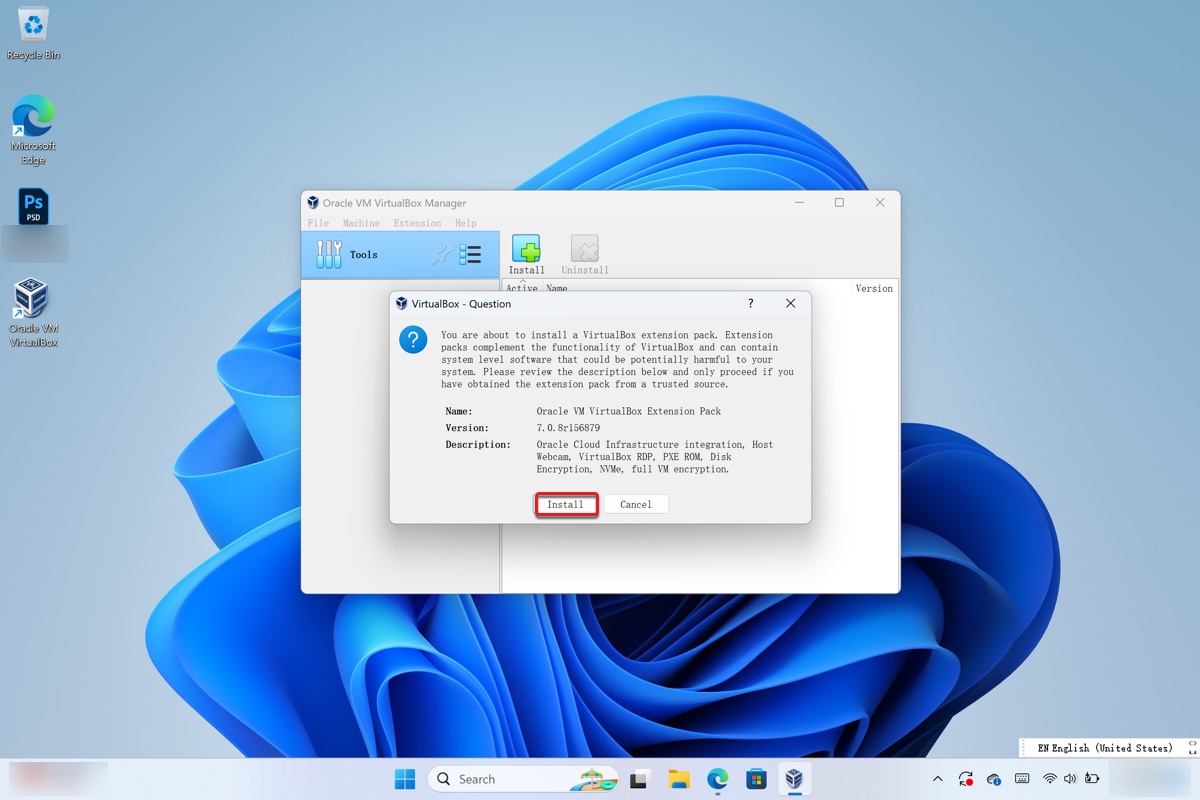
- Click "I Agree" to agree with the terms.
- Click Tools and select Welcome.
Step 3: Create the macOS Monterey virtual machine
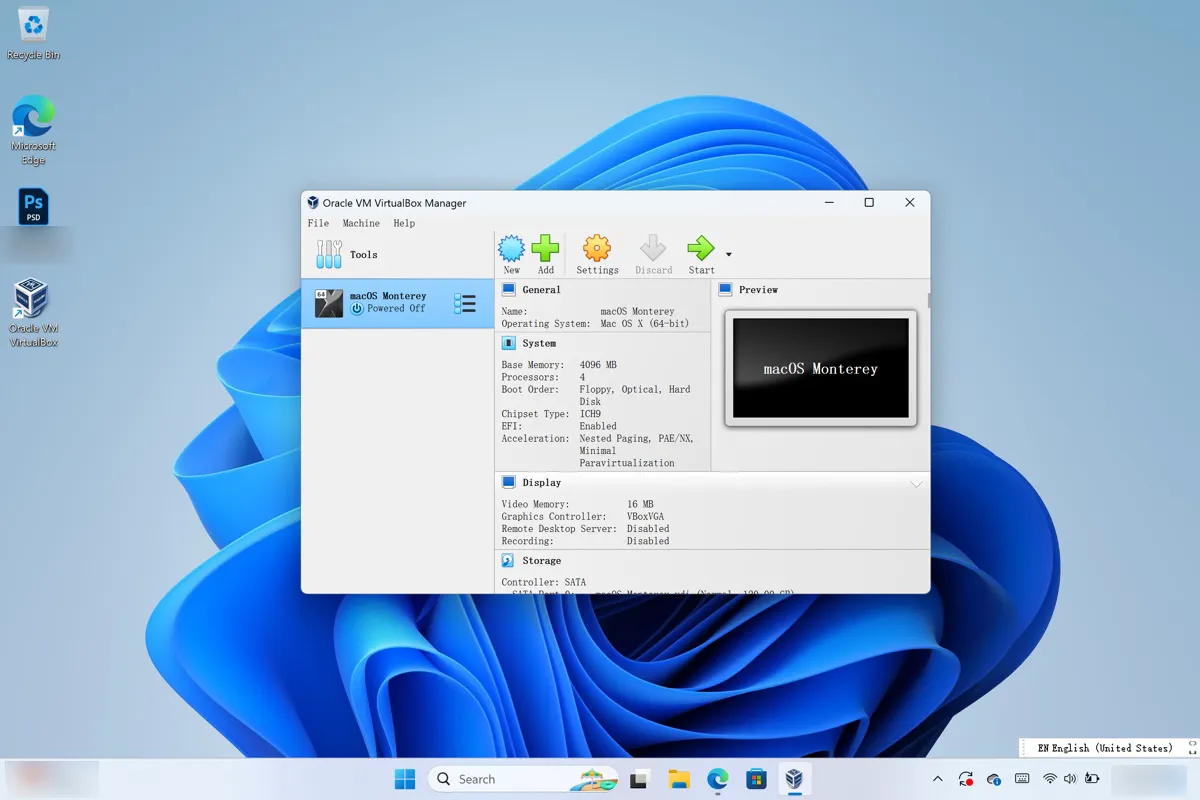
Now that VirtualBox is installed along with its extension pack on your PC, our next step is to create a new virtual machine for macOS Monterey.
- In the Oracle VM VirtualBox Manager interface, click New.
- Name the virtual machine.
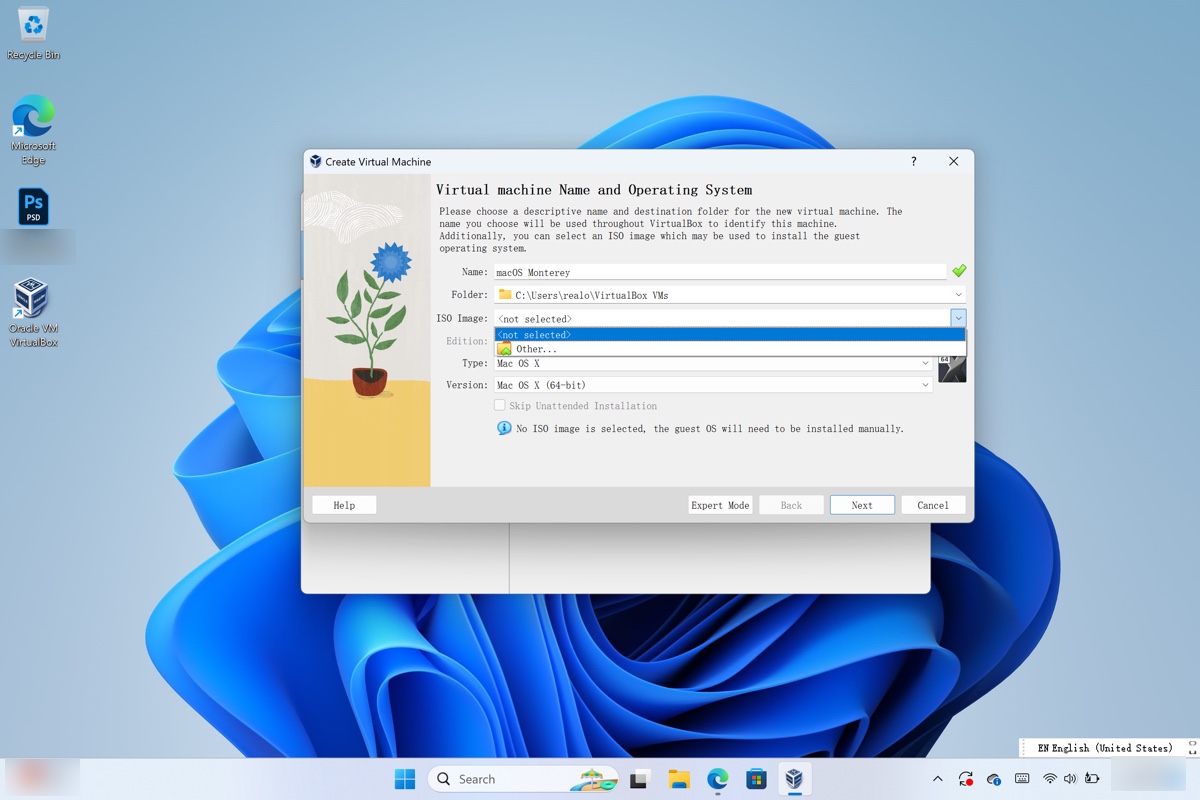
- Tap the arrow next to "ISO Image", then select Others to add the macOS Monterey ISO file.
- Set Type to Mac OS X.
- Set Version to Mac OS X (64-bit).
- Tap Next.
- Move the slider to configure the memory size to at least 4 GB. (Stay away from the red area because it's the memory your PC needs to operate.)
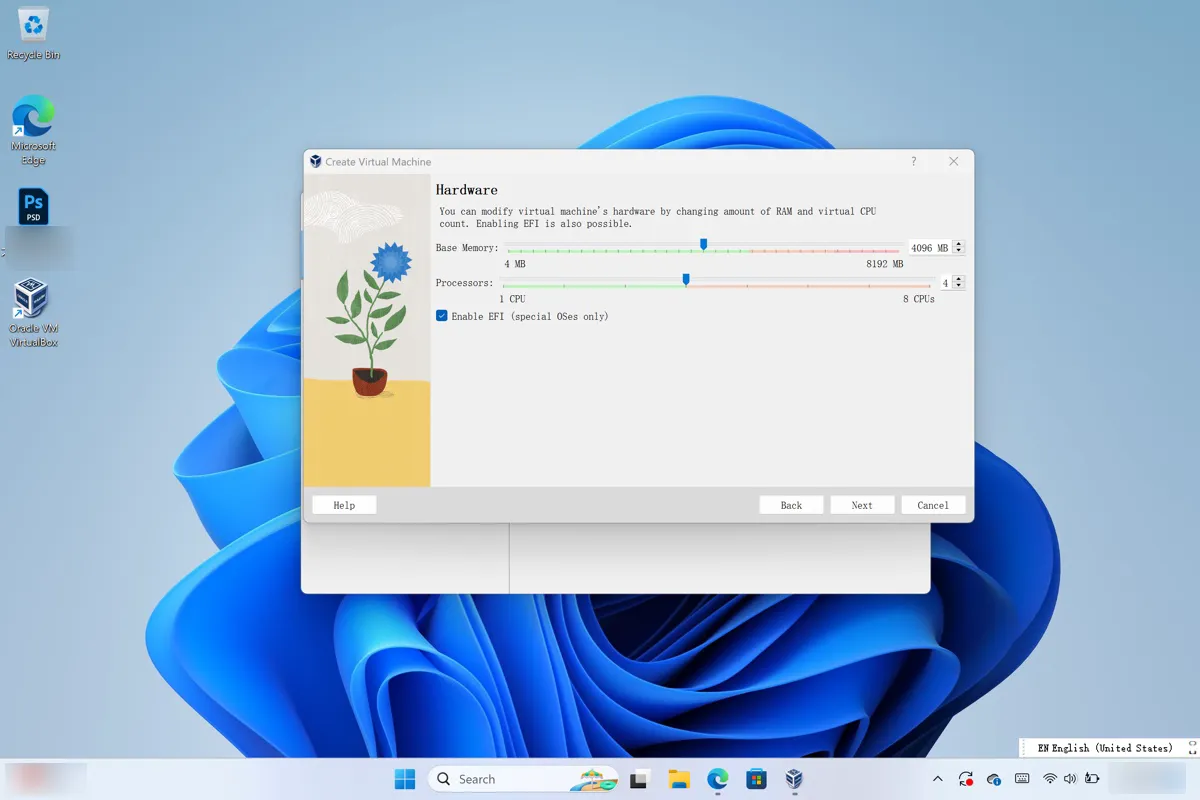
- Set the number of processors to at least 2. (The virtual machine will perform better with more RAM and Processors.)
- Click Next.
- Click "Create a virtual hard disk now."
- Click Create.
- Set "Disk size" to 80GB and higher, such as 120GB.
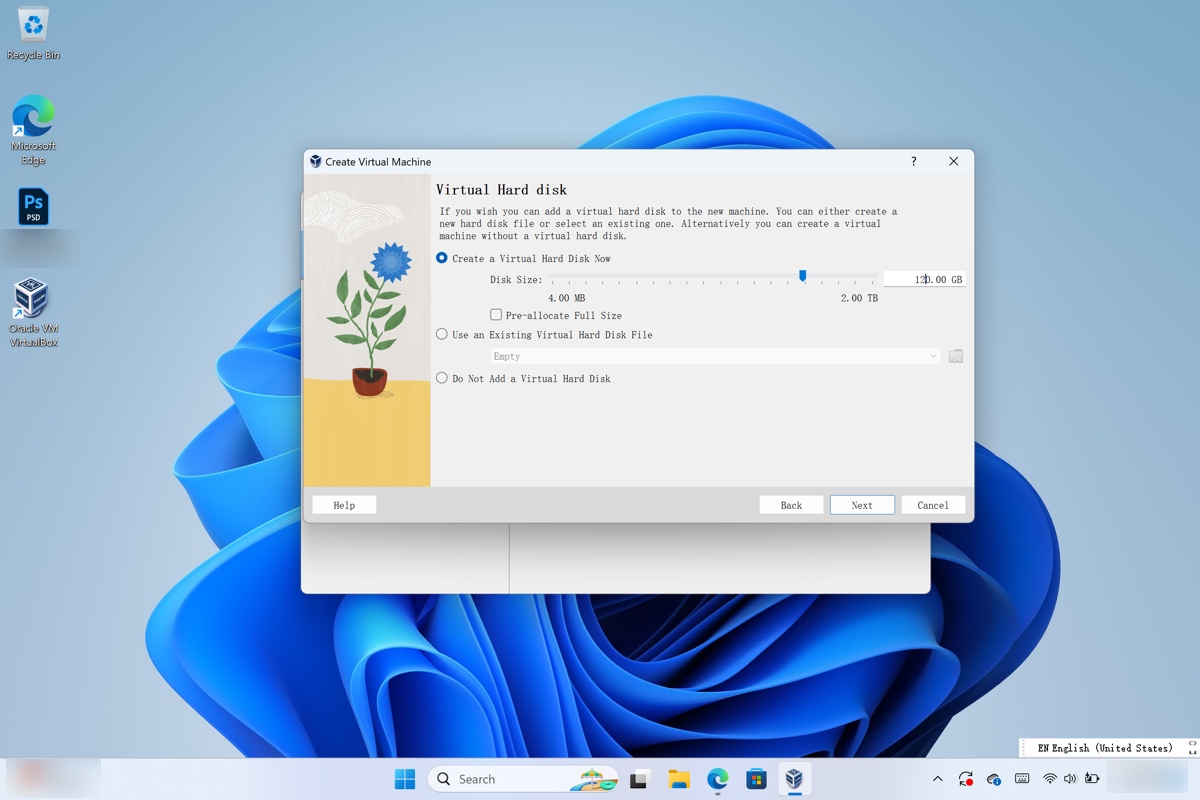
- Click Next > Finish.
Step 4: Customize the settings of the macOS Monterey VirtualBox
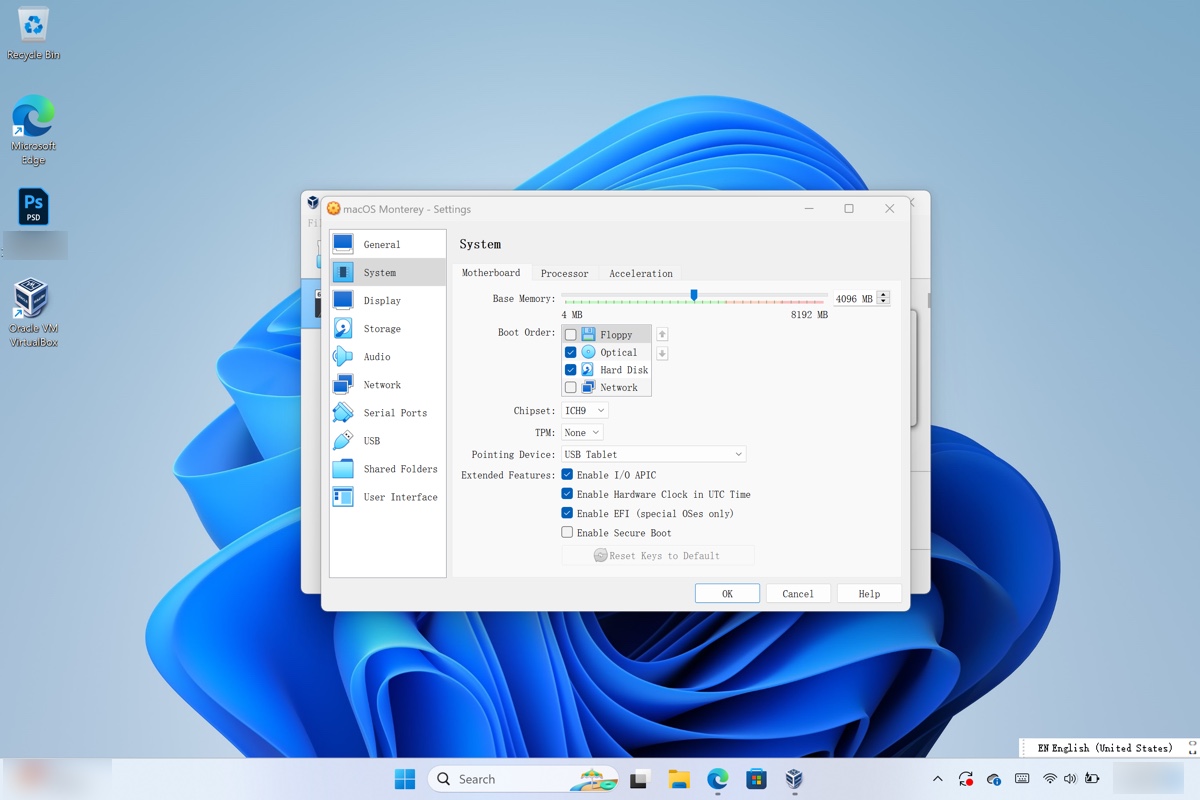
- Select the created macOS Monterey virtual machine from the left side and click Settings > System.
- Uncheck "Floppy" from "Boot Order."
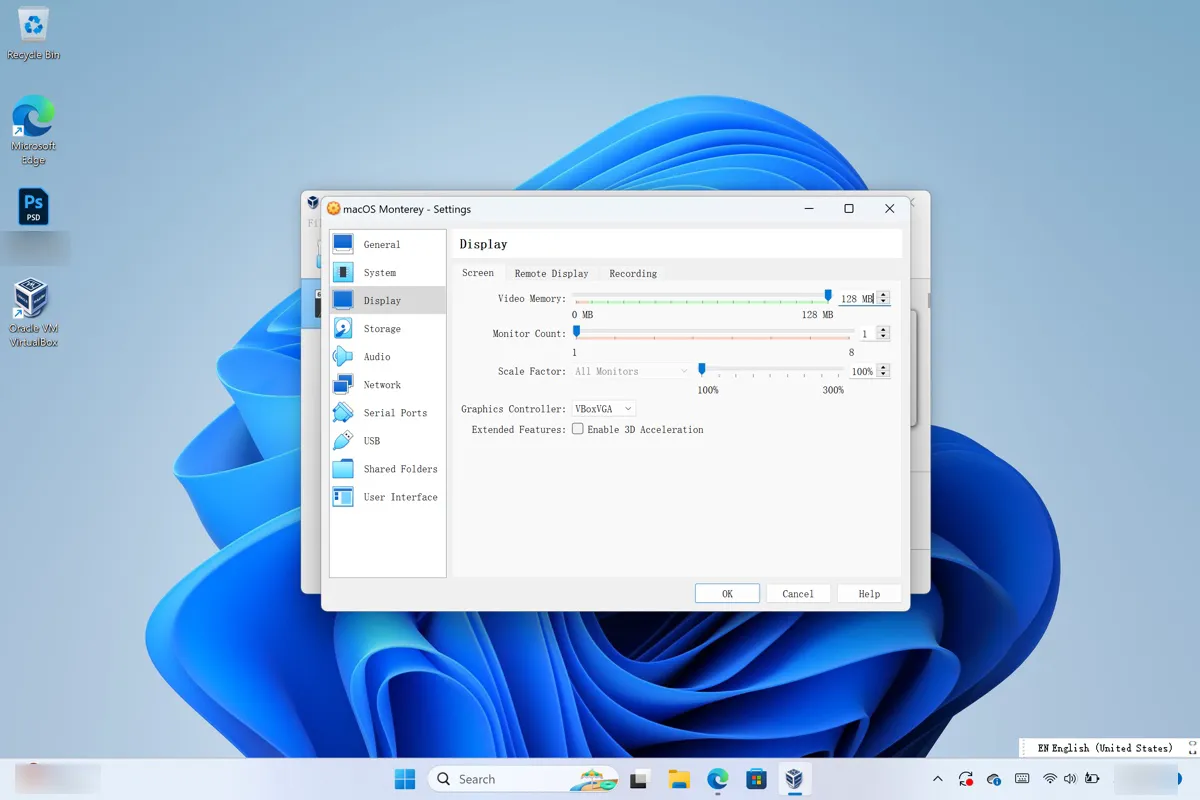
- Click Display from the left side.
- Increase the "Video Memory" to 128MB.
- Click USB.
- Select USB 3.0 (xHCI) Controller and click OK.

- Click File > Quit to exit VirtualBox.
Step 5: Run VirtualBox codes in Command Prompt
Since macOS Monterey is only meant for Mac computers, you'll need to change the code for VirtualBox to trick it to think that it's installing macOS Monterey on a Mac rather than a PC.
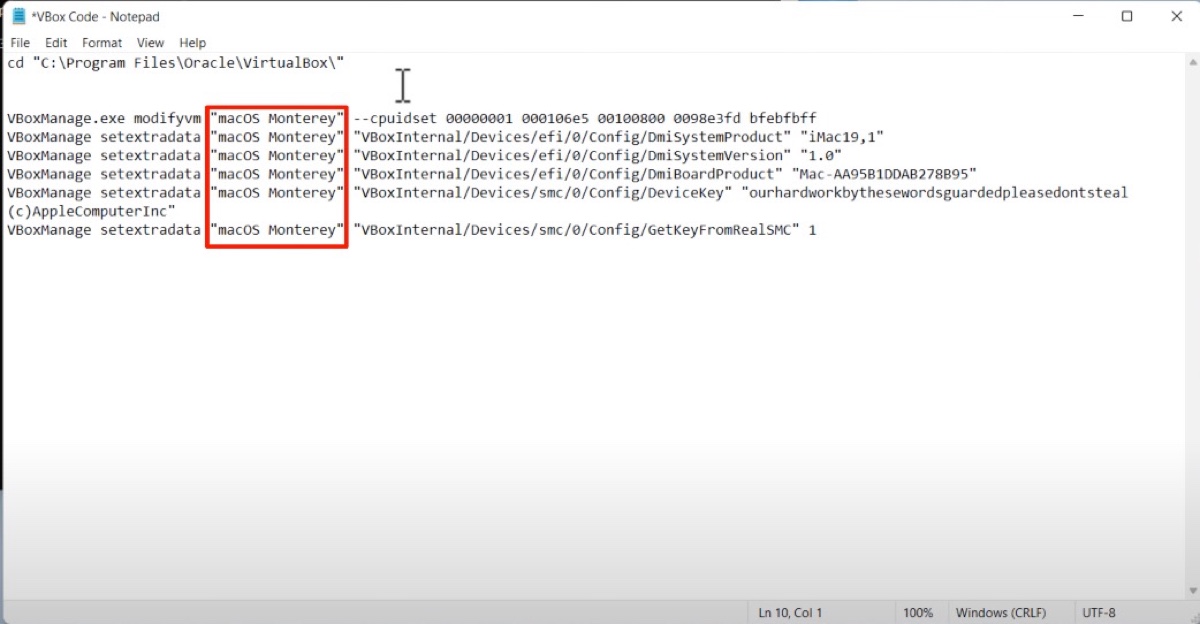
- Open the Notepad app on your PC and copy & paste the following commands into it.cd "C:\Program Files\Oracle\VirtualBox\"
VBoxManage.exe modifyvm "VM Name" --cpuidset 00000001 000106e5 00100800 0098e3fd bfebfbff
VBoxManage setextradata "VM Name" "VBoxInternal/Devices/efi/0/Config/DmiSystemProduct" "iMac19,1"
VBoxManage setextradata "VM Name" "VBoxInternal/Devices/efi/0/Config/DmiSystemVersion" "1.0"
VBoxManage setextradata "VM Name" "VBoxInternal/Devices/efi/0/Config/DmiBoardProduct" "Mac-AA95B1DDAB278B95"
VBoxManage setextradata "VM Name" "VBoxInternal/Devices/smc/0/Config/DeviceKey" "ourhardworkbythesewordsguardedpleasedontsteal(c)AppleComputerInc"
VBoxManage setextradata "VM Name" "VBoxInternal/Devices/smc/0/Config/GetKeyFromRealSMC" 1 - Click Edit > Replace.
- Then replace VM Name with the name you gave to the macOS Monterey virtual machine with the same capitalization or spaces.
- Click Replace All. The changed code should be look like the following picture.
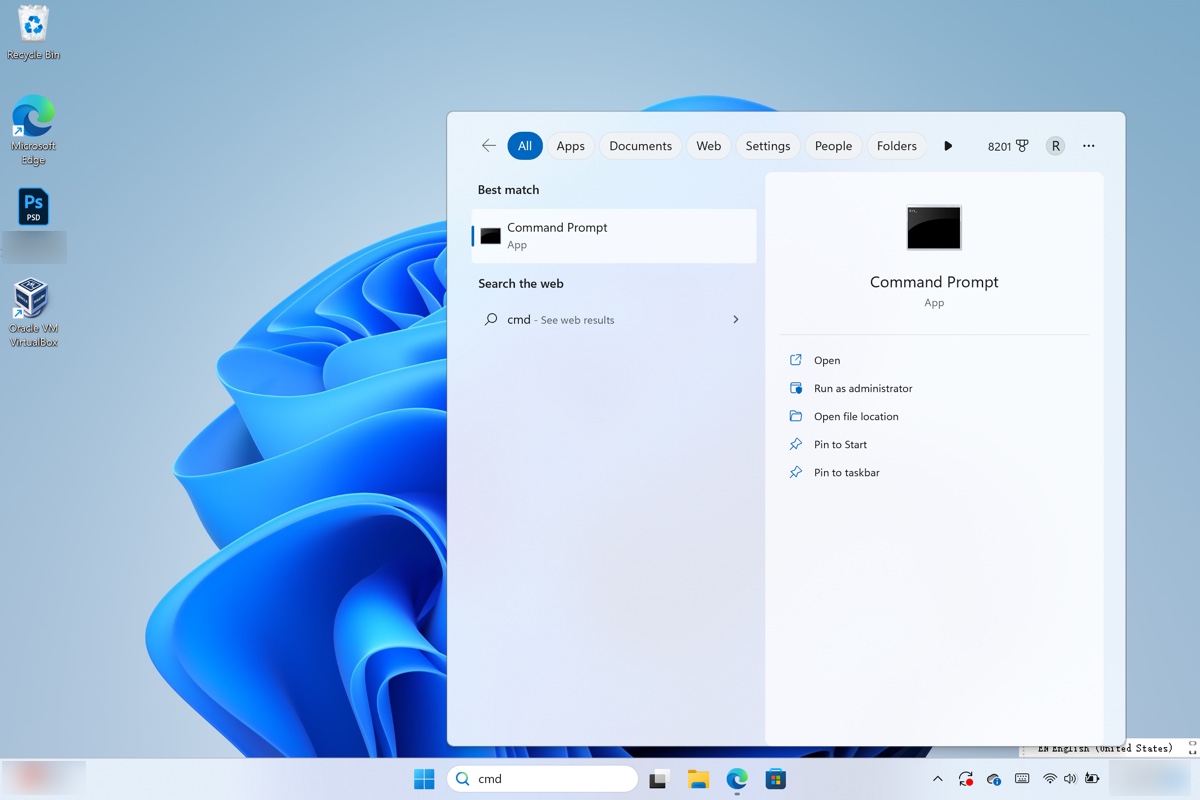
- Type cmd in the Start menu and select "Run as administrator."
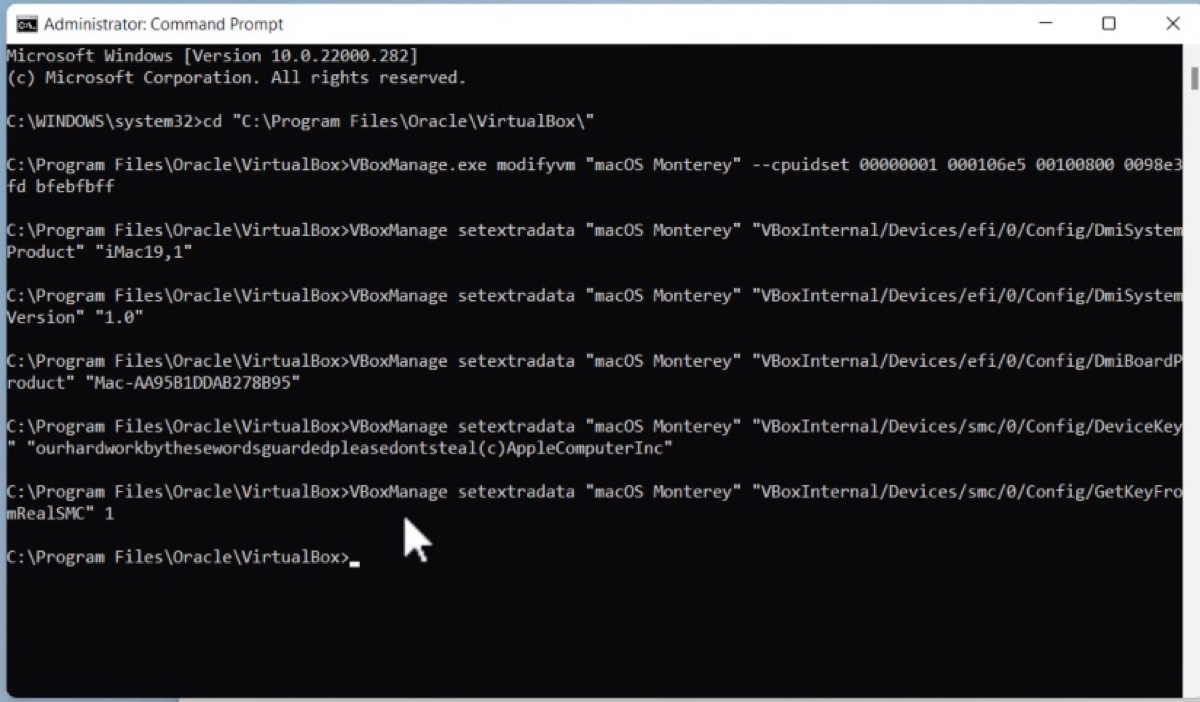
- Copy and paste the first command into CMD and press Enter.
- Repeat step 6 with every command.
- Exit command prompt and Notepad.
Step 6: Install macOS Monterey on VirtualBox on Windows PC
This is the final step for installing macOS Monterey on VirtualBox. let's get started.
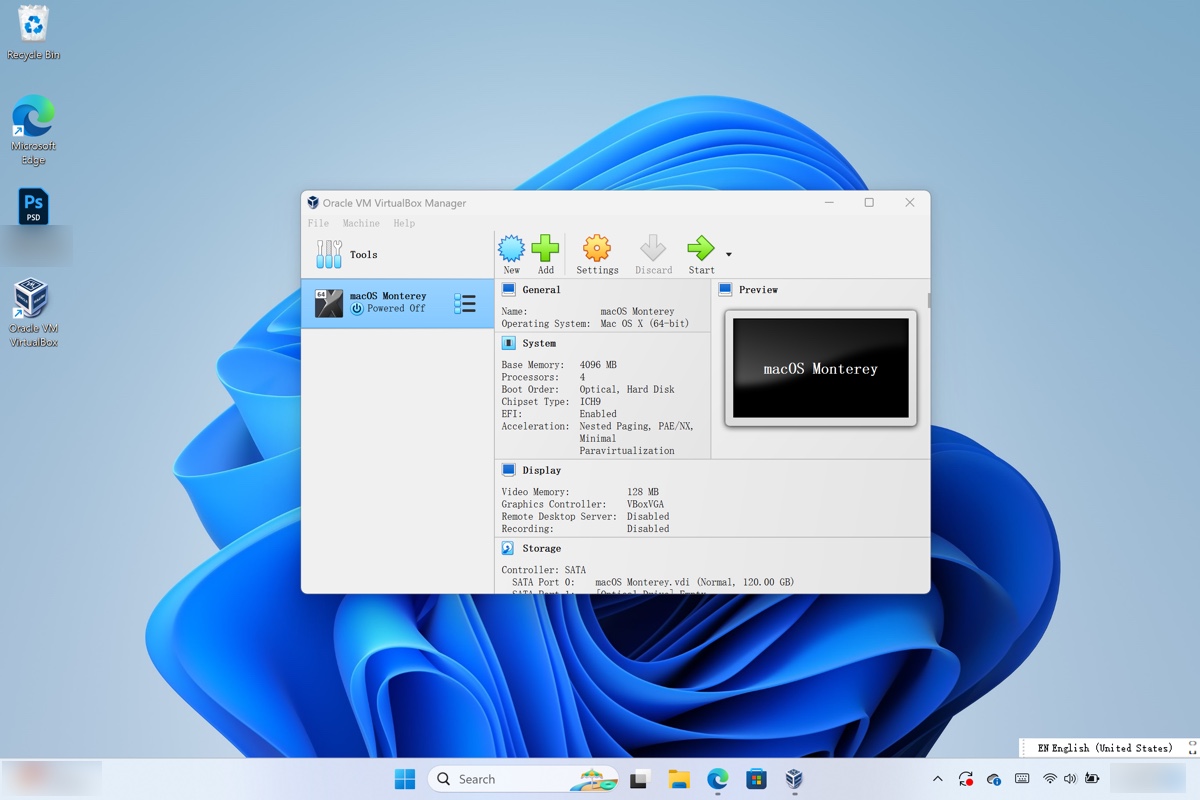
- Launch VirtualBox.
- Select the macOS Monterey virtual machine and click Start.
- Wait for the running codes to finish.
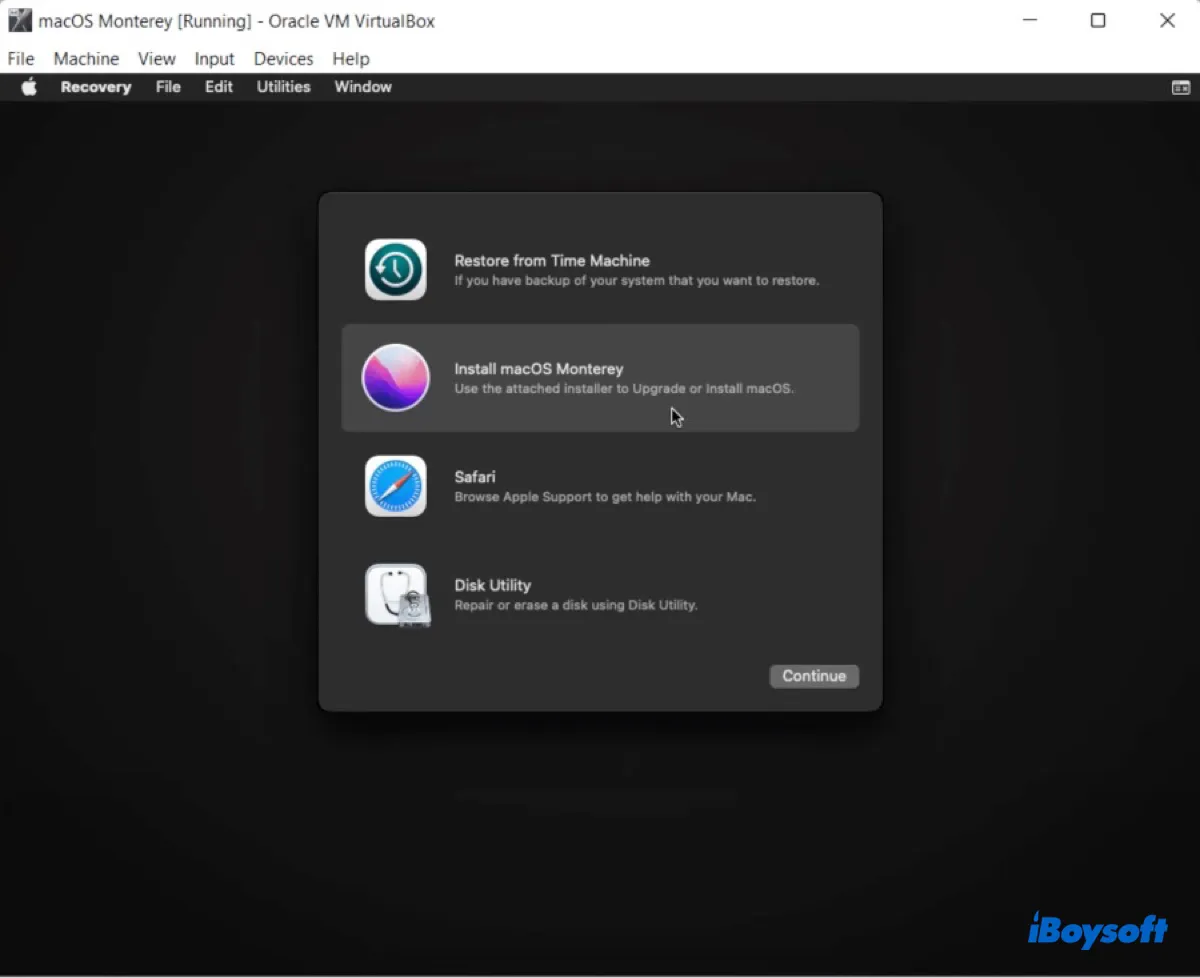
- Select a preferred language.
- Click Disk Utility > Continue.
- Select the top option, VBOX HARDDISK Media.
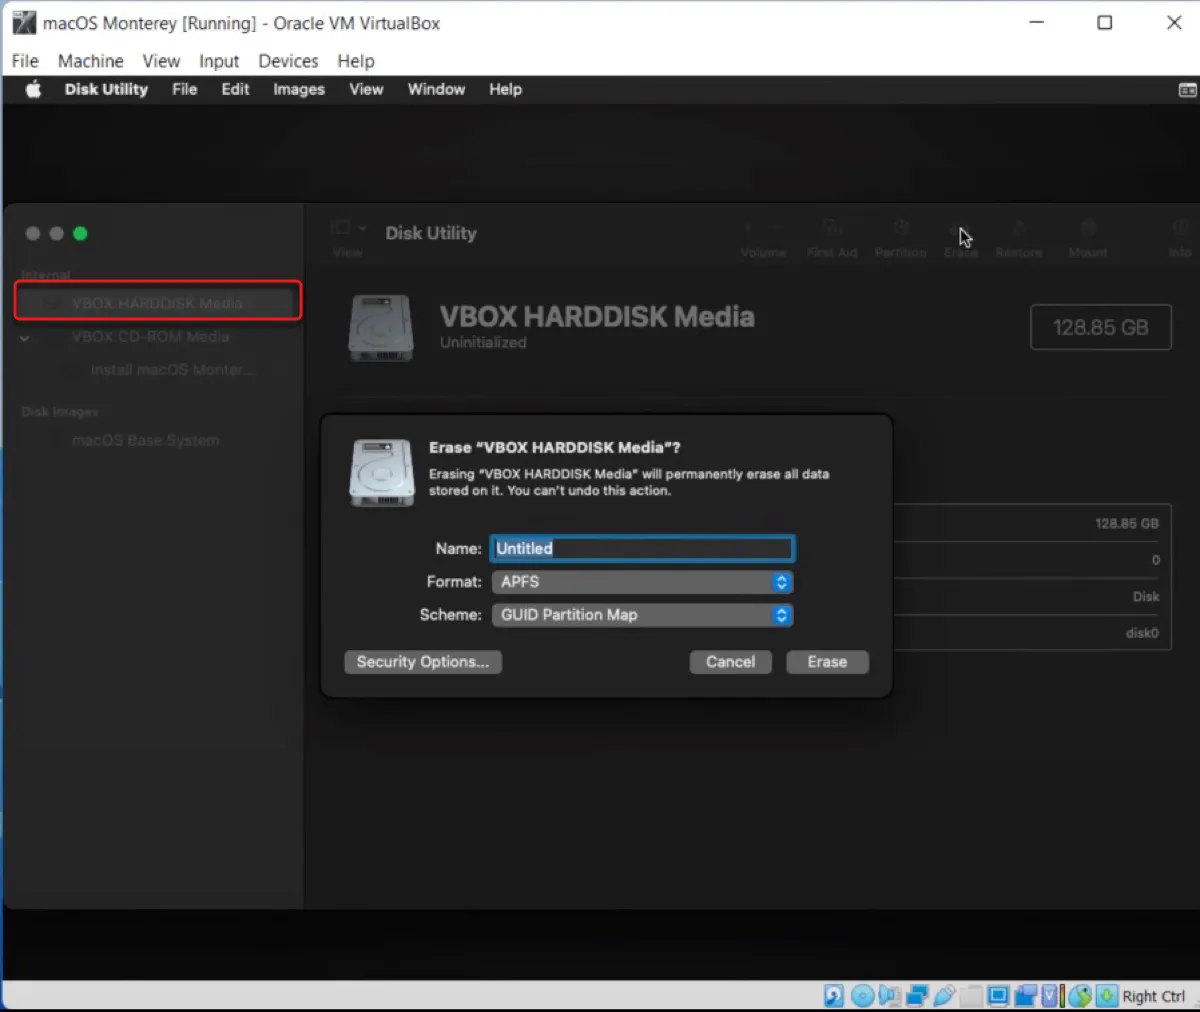
- Click the Erase button.
- Give the disk a name.
- Format it to APFS with GUID Partition Map.
- Click Erase > Done.
- Choose Disk Utility > Quit Disk Utility.
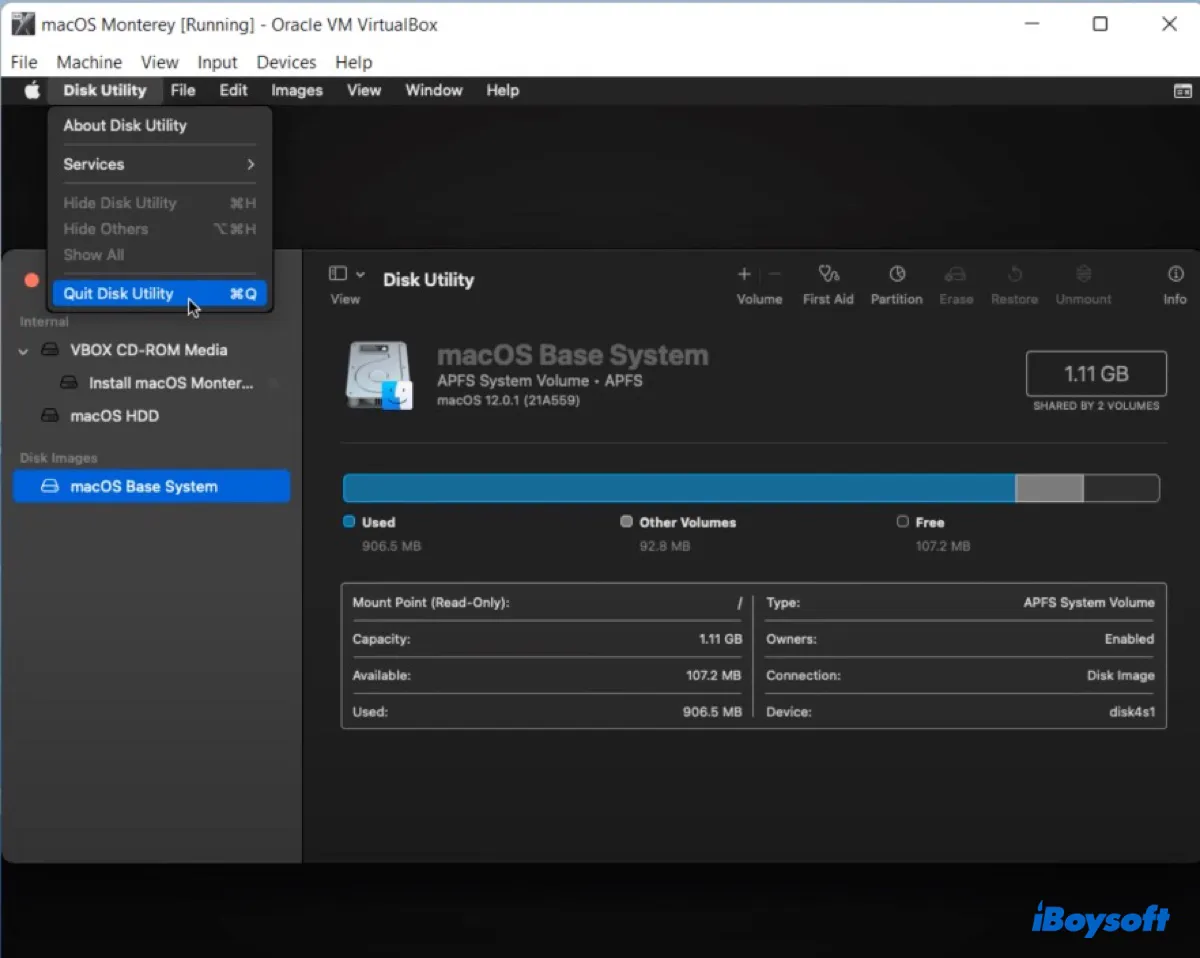
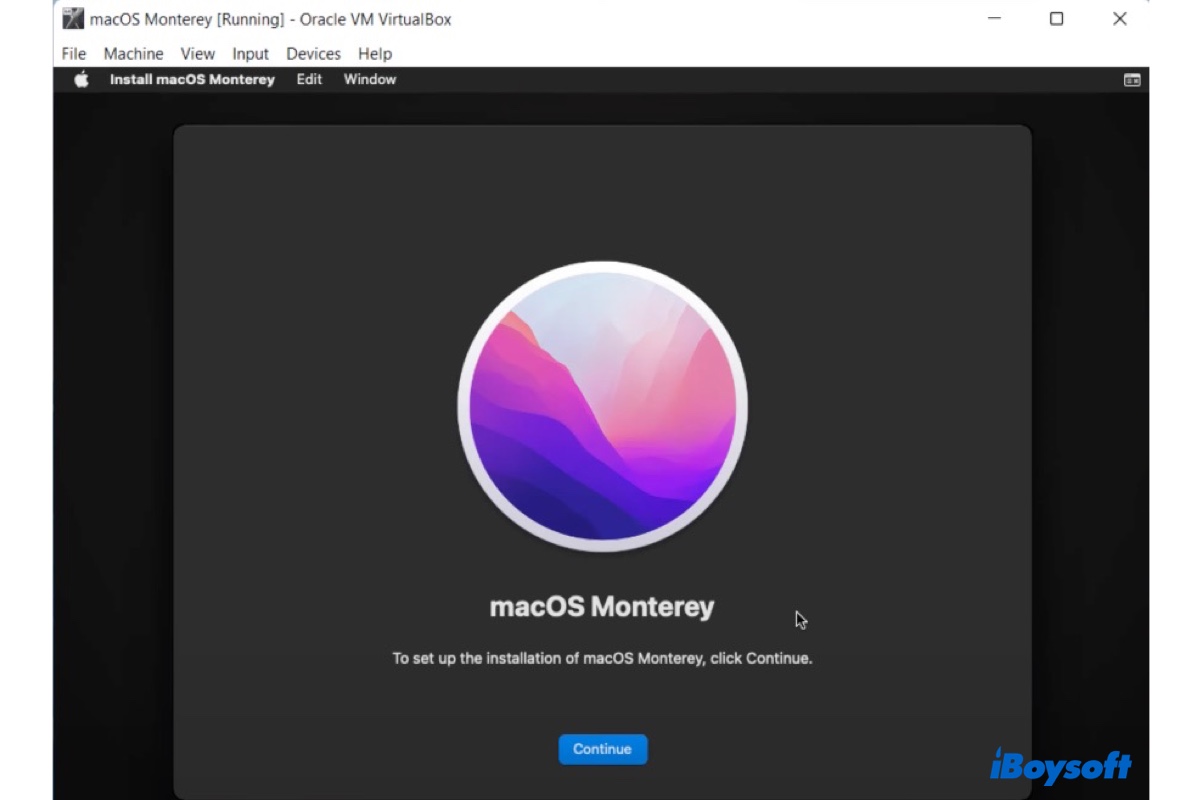
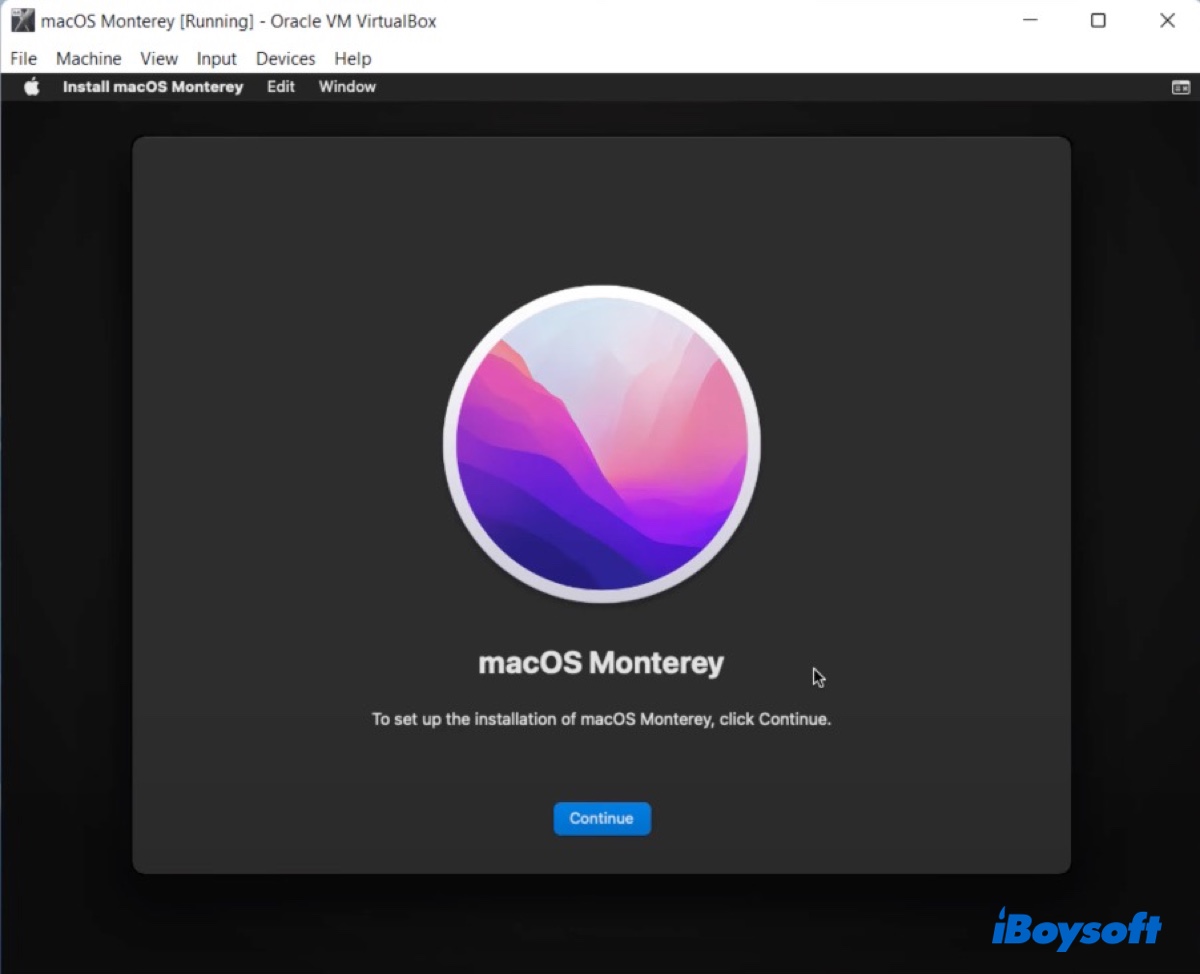
- Select "Install macOS Monterey" > Continue.
- Follow the onscreen instructions to install macOS Monterey.
Troubleshoot macOS Monterey VirtualBox not working
Failed to query SMC value from the host (VERR_INVALID_HANDLE):
If you receive the error "Failed to query SMC value from the host (VERR_INVALID_HANDLE)" when running the macOS Monterey virtual machine, run this command in CMD to fix it after replacing VM Name with the name of your virtual machine:
VBoxManage setextradata "VM Name" "VBoxInternal/Devices/smc/0/Config/GetKeyFromRealSMC" 0
Can't start macOS Monterey virtual machine:
If you're stuck at loops of black codes, change the number of processors back to 1, then restart the virtual machine and install macOS Monterey. You can change it back later after the installation is complete.
macOS Monterey VirtualBox boot loop:
Open CMD, run it as an administrator, then execute the following command:
VBoxManage setextradata "VM Name" "VBoxInternal/TM/TSCMode" "RealTSCOffset"
Share this article to help others learn how to install macOS Monterey on Windows PC with VirtualBox.
FAQs about macOS Monterey VirtualBox
- QIs it possible to run macOS on VirtualBox?
-
A
Yes, it's possible to run macOS on VirtualBox on a Windows PC. You just need to follow the steps in this guide.
- QCan I run VirtualBox on M1 Mac?
-
A
Yes, you can run VirtualBox on an M1 Mac. Go to VirtualBox's website, click Downloads, then you can click on "Developer preview for macOS / Arm64 (M1/M2) hosts to get the correct package.