As a one-in-all workspace, Mac functions as a file creator and processor dealing with the sorts of file creations or editing from users. Mostly, Mac creates common files like text, numbers, keynotes, etc. directly, while for some special files, for example, the SRT file, deep operations need to be done.
Here we are gonna show you how to create an SRT file with the assistance of the local text editor on Mac and a third-party file creator - iBoysoft MagicMenu, which makes creating SRT files in two clicks possible!
No worries that you may be confused on this task as this post walks you through the whole SRT file creation.
How to create an SRT file on a Mac?
An SRT file helps you add responsive content to the matching period, which summarizes the topic of the selected timecode of a video effectively.
Here we provide you with two approaches to creating an SRT file using the Mac machine without downloading SubRip, the original software extracting subtitles from DVDs.
Both two methods are not as complicated as you imagine and even if they are, you can carry out the SRT file creation successfully under the guideline of this tutorial. Let's explore them in detail!
Approach 1: Create an SRT file using TextEdit on Mac
TextEdit is a built-in editor coming with Mac when shipped and it can process Rich Text Format, Rich Text Format Directory, plain text, HTML formats, and the SRT file. Let's see how to create an SRT file with TextEdit:
Step 1: Launch TextEdit on your Mac via Spotlight Search shortcuts by pressing the Command + Space keys together.
Step 2: In the new popup, click New Document for the following SRT file creation.
Step 3: Right in the TextEdit window, click File in the upper left corner of the Mac Desktop > select Make Plain Format from the dropdown menu.
Step 4: Type in the content you want to add to the file: type 1 in the first line, enter a new line to determine the timecode, and then enter a new line to input the text you want to add to the certain video period. Just like this below:
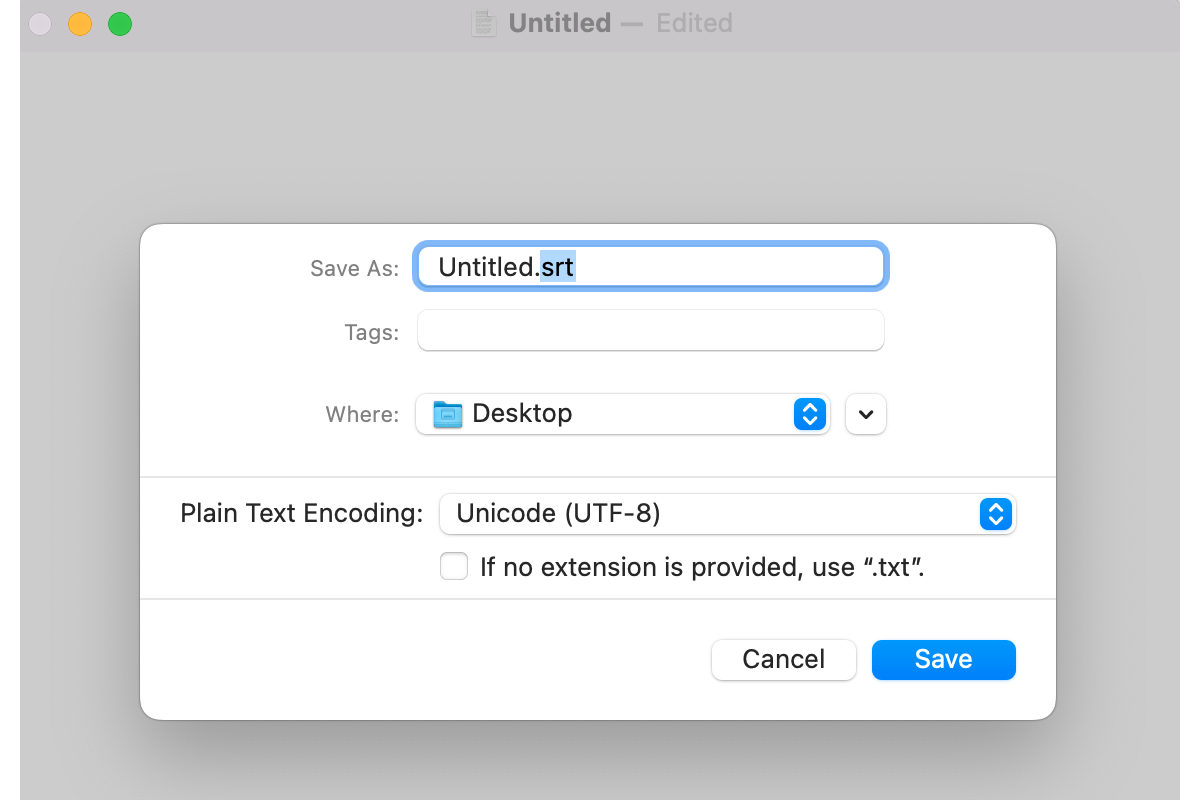
Step 5: Once you've finished the editing, click the File button > Save.
Step 6: Change the file extension to .srt, determine where you want to store this SRT file in the Where section and make sure the Unicode (UTF-8) is chosen in the Plain Text Encoding section.
Step 7: Click Save to confirm all your actions.
Approach 2: Create an SRT file on Mac effectively with iBoysoft MagicMenu
If you're tired of creating an SRT file by launching TectEdit every time, you can simplify this procedure to two clicks with the assistance of iBoysoft MagicMenu.
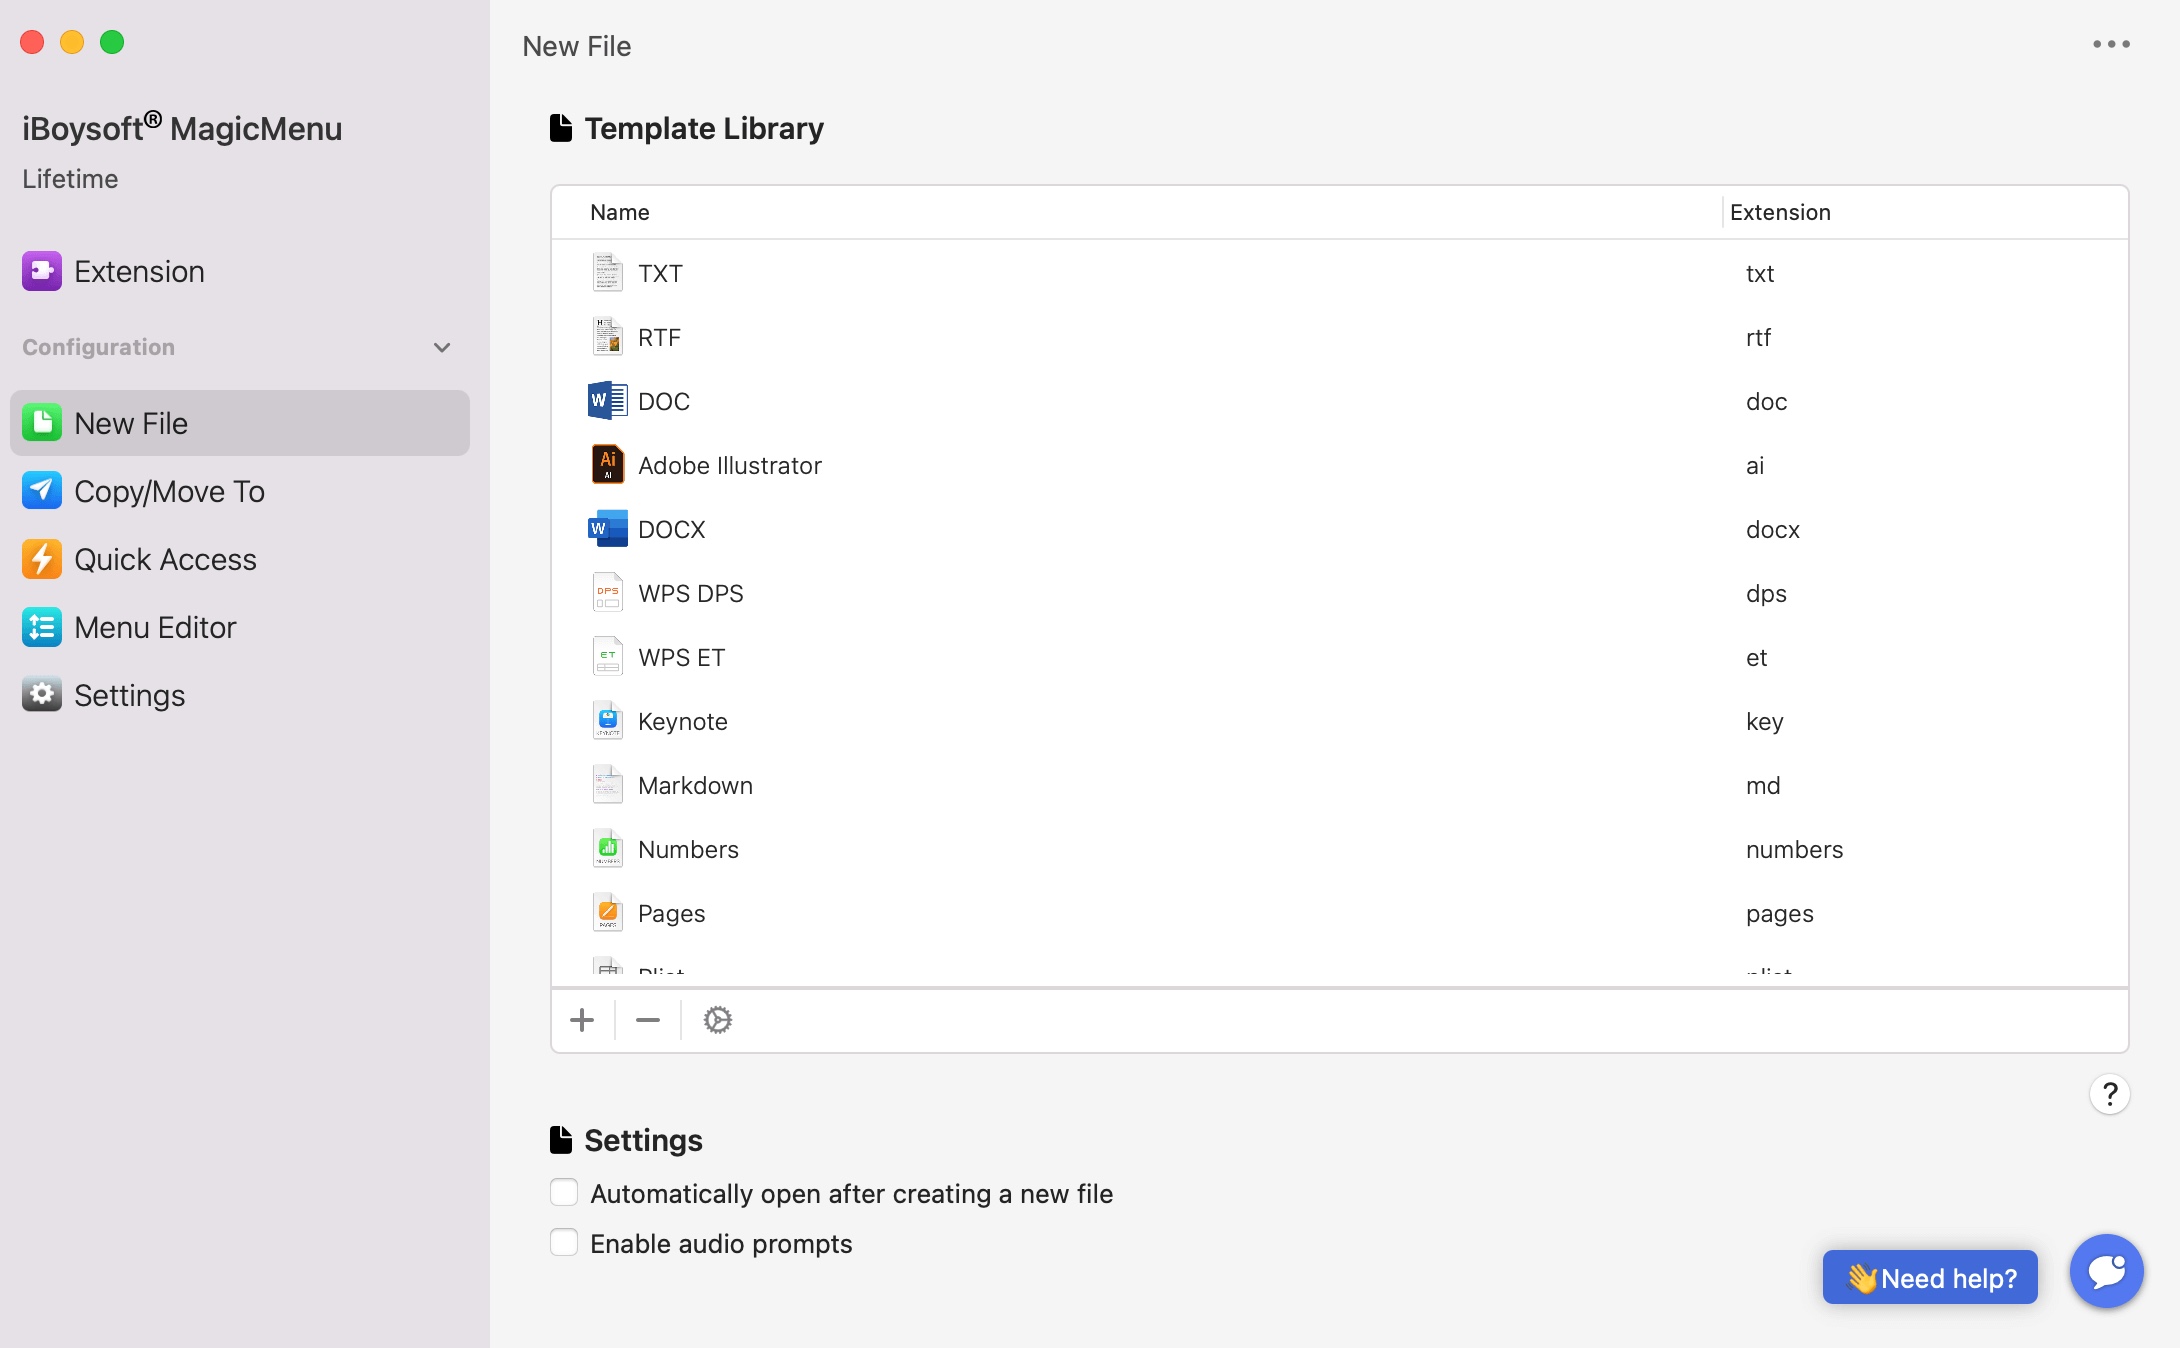
iBoysoft MagicMenu is such a handy and various helper that allows you to create any file in two clicks. Examples include creating a DMG, SRT, TXT, RTF, Doc, Adobe Illustrator, Doc - 07, WPS DPS, WPS ET, Keynote, Markdown, Numbers, Pages, Plist, PPT, PPT - 07, Adobe Photoshop, Python, Ruby, Shell, WPS, XLS, XLS - 07, XML file, etc. on MacBook Pro, MacBook Air, Mac mini, iMac, iMac Pro, and Mac Pro.
With an intuitive interface, you'll love to create new files with it since it simplifies the processes and shortens the time. Here we will show you how to create an SRT file with the help of iBoysoft MagicMenu:
Step 1: Download and install iBoysoft MagicMenu on your Mac and launch it.
Step 2: Create a blank SRT file and place it on your Mac desktop. You can scroll up for specific steps in Approach 1.
Step 3: Go to the New File tab on the left menu bar, click the + button on the right menu bar to add a SRT file format.
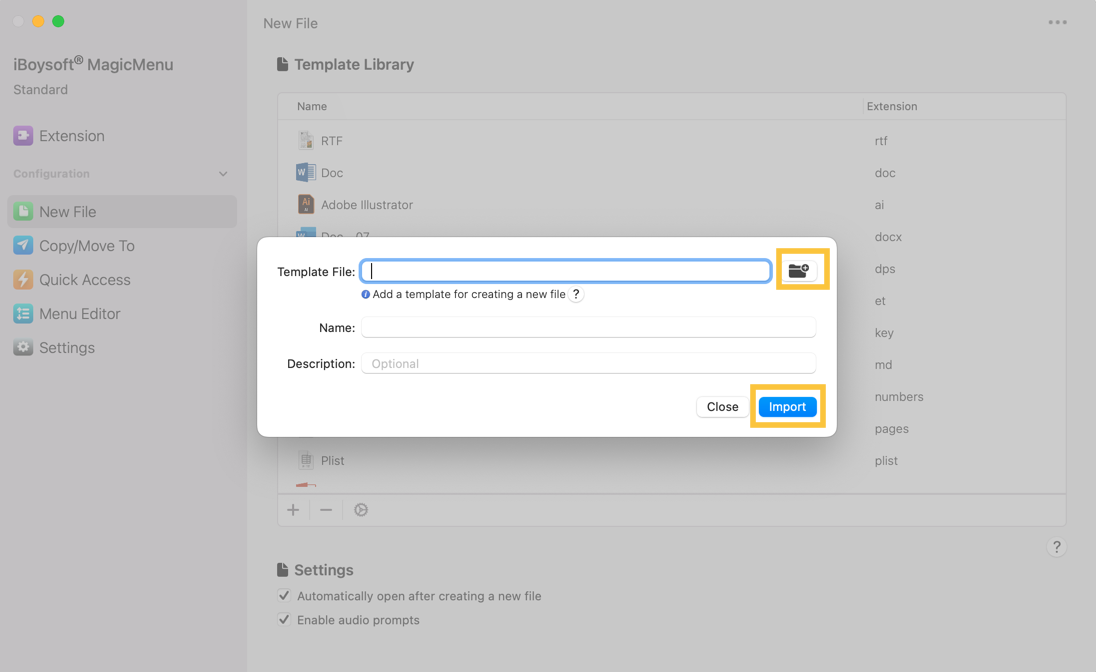
Step 4: Click the file avatar on the new popup, select the new blank SRT file you created before.
Step 5: Fulfill the Name and Description if you want, you can also leave it blank as you like.
Step 6: Click Import to add this SRT file format so that you can create a new SRT file by right-clicking in the future.
Step 7: Click any blank space on the Mac Desktop or a folder, and click New File > SRT. Then you're all set!
From this moment on, you can make an SRT file on any place where you have written permission on your Mac!
Upload the SRT file on the Mac
Once you've finished creating the SRT file, you can upload it to the target platform for perfecting your masterpiece:
Upload the SRT file to YouTube
If you are a YouTuber, you can follow these steps to upload your SRT file:
- Go to YouTube Studio and select the video that you are gonna perfect.
- Click on Subtitles in the left menu.
- Click Add and select Upload File to proceed.
- Choose With timing and upload the SRT file you have created.
Upload the SRT file to Canvas
- Open the course and go to the Media Gallery.
- Select the video you want to edit and click on the Captions tab.
- Click Upload, choose the SRT file, and then add it.
Upload the SRT file to Zoom
- Log in to your Zoom account and go to the Recordings tab.
- Select the recording you want to add captions to.
- Click on the Audio Transcript tab and upload your SRT file.
How to add an SRT file in QuickTime Player Mac
Select View > Subtitles, and then select your language of choice. In Playback control, click the Subtitles button. If you have a newer Mac with a touch bar, simply press and hold the Subtitles button.
If you have successfully created an SRT file with the help of this post, why not share your happiness with your families and friends?
Bonus tips for creating an SRT file on Mac
SRT file, also known as SubRip Subtitle file, is text file that contains subtitles added to the video or recording you've edited. It is available on most wildly used platforms like Facebook, YouTube, Zoom, Canvas, Adobe Premiere Pro, VLC Media Player, Windows Media Player, etc.
It is a perfect creation that explains what the video talks about in a certain period, helping users seize the content quickly before watching the video.
To create an excellent SRT file, here are some tips that you can take into consideration:
1⃣️ Check the SRT file carefully before uploading. Check if the grammar is right, the content is correct, timecode is accurate to avoid any trouble after releasing the video.
2⃣️ Creating different versions of the SRT file is recommended if you have fans from different region, which helps you get more thumbs-up and traffic. This also helps your work rank top on the platform.
Conclusion
This post explains how to create an SRT file on Mac with a step-wise guideline, helping users especially the newbie to macOS create the SRT file with ease.
If you'd like to shorten the time in SRT file creation, iBoysoft MagicMenu is a nice choice, which deserves a shot certainly!