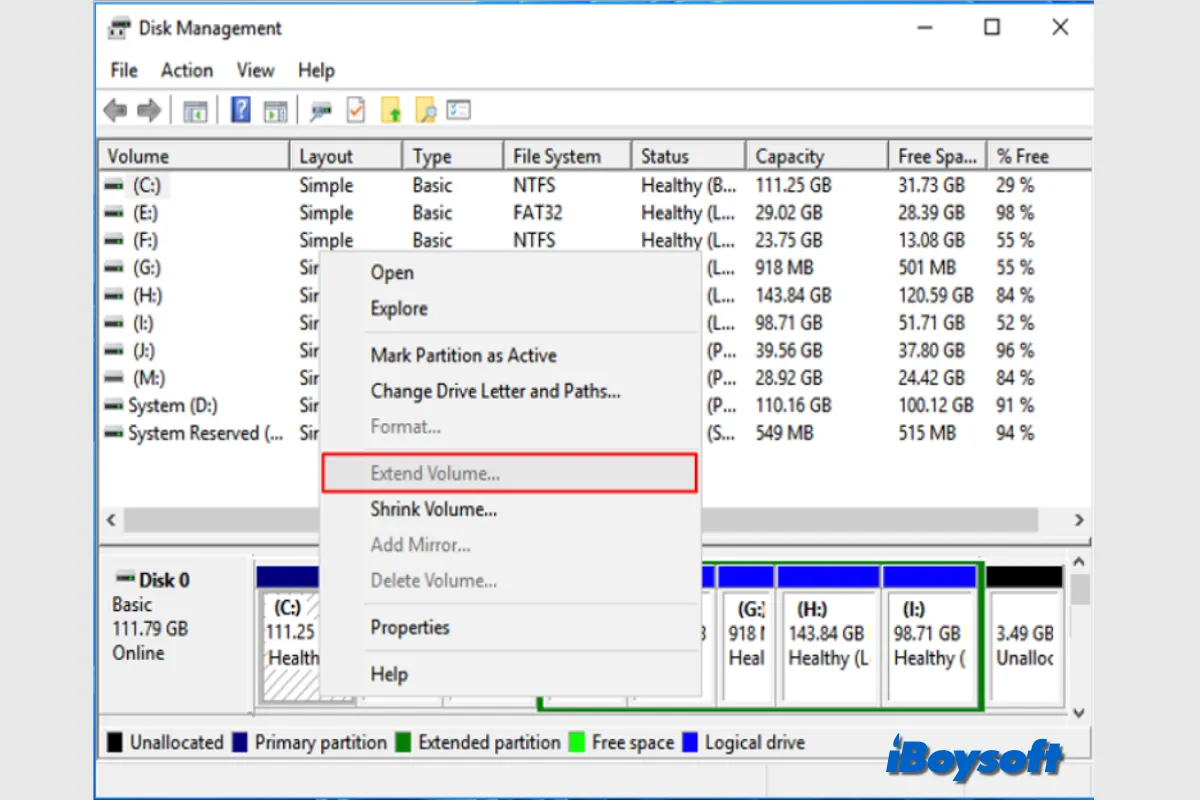
You attempt to extend the volume that is running out on your Windows PC, but only to find the Extend Volume greyed out from the drop-down menu after right-clicking that volume in Disk Management, the Windows built-in tool.
I want to extend C: drive in my Windows 7 PC which is the primary partition. I converted its adjacent D: drive into primary partition which was initially a logical partition. But the problem is that I am unable to extend C: by merging both C: and D:, because in windows disk management when I right-click C:, the extend volume feature is greyed out. Why is it happening and what should I do?
If you have been troubled with the same Extend Volume greyed-out issue on your Windows 11/10/8/7, keep reading to know the common reasons and workable solutions.
Why is Extend Volume greyed out in Disk Management?
When you want to extend the size of the volume on Windows, you must understand the meaning and the requirements. Disk Management enables you to add space to an existing volume by extending the volume into available unallocated space on a disk drive. Besides, it should satisfy the following conditions:
- There is unallocated space without any volume and data;
- The unallocated space must be located right after the volume that you want to extend without any other volumes in the middle of them;
- It should be an NTFS- or ReFS-volume to be extended.
Thus, we can conclude the possible causes of the Extend Volume greyed-out issue:
- There is no unallocated space on the same disk drive;
- There are other volumes located between the volume you want to extend and the unallocated space;
- The volume is not formatted in the NTFS or ReFS file system.
How to fix Extend Volume greyed out on your Windows?
According to the different scenarios when the Extend Volume is greyed out, you can choose the corresponding solutions to get rid of it. Here, we will walk through each method for solving the Extend Volume greyed-out error on Windows 11/10/8/7.
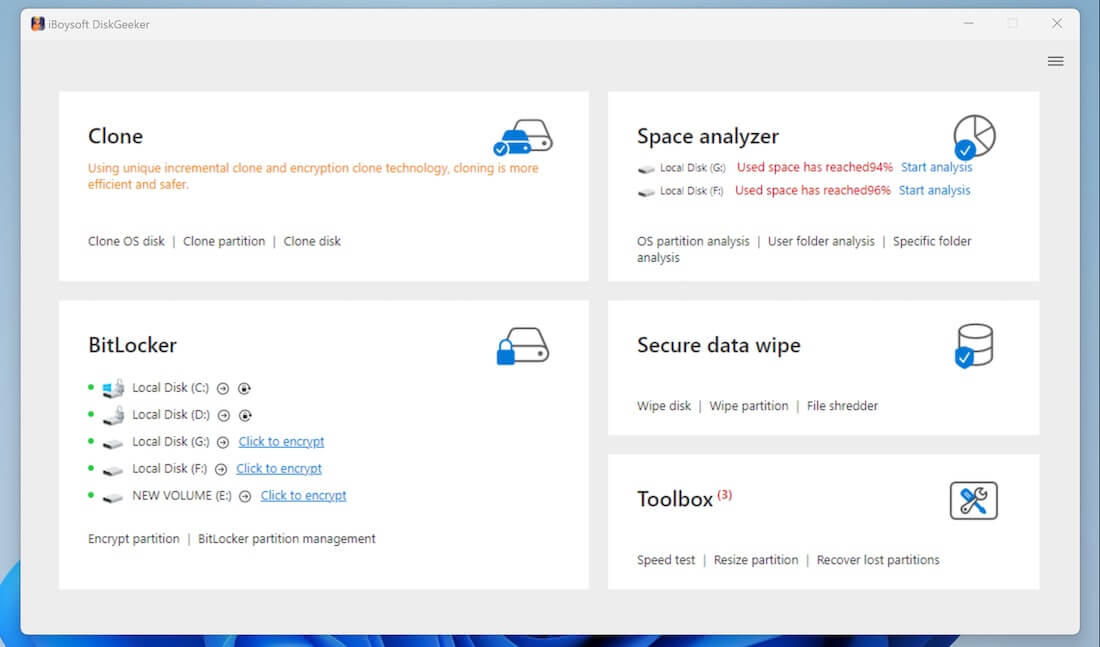
Fix 1. Use an alternative disk manager - iBoysoft DiskGeeker for Windows
When the Disk Management is not loading/working/responding, you can choose an alternative disk management tool for Windows to quickly continue the operations. iBoysoft DiskGeeker for Windows is recommended here. Its Partition Resize feature helps to reduce or increase the size of a partition without erasing any data to optimize disk space use and enhance computer efficiency.
Here's how to extend volume with iBoysoft DiskGeeker for Windows:
- Free download and install iBoysoft DiskGeeker for Windows.
- Launch the disk manager tool, and if you are going to extend a volume located on an external hard drive, ensure it is correctly connected to your device.
- Tap the Toolbox on the main interface then choose Resize Partition.
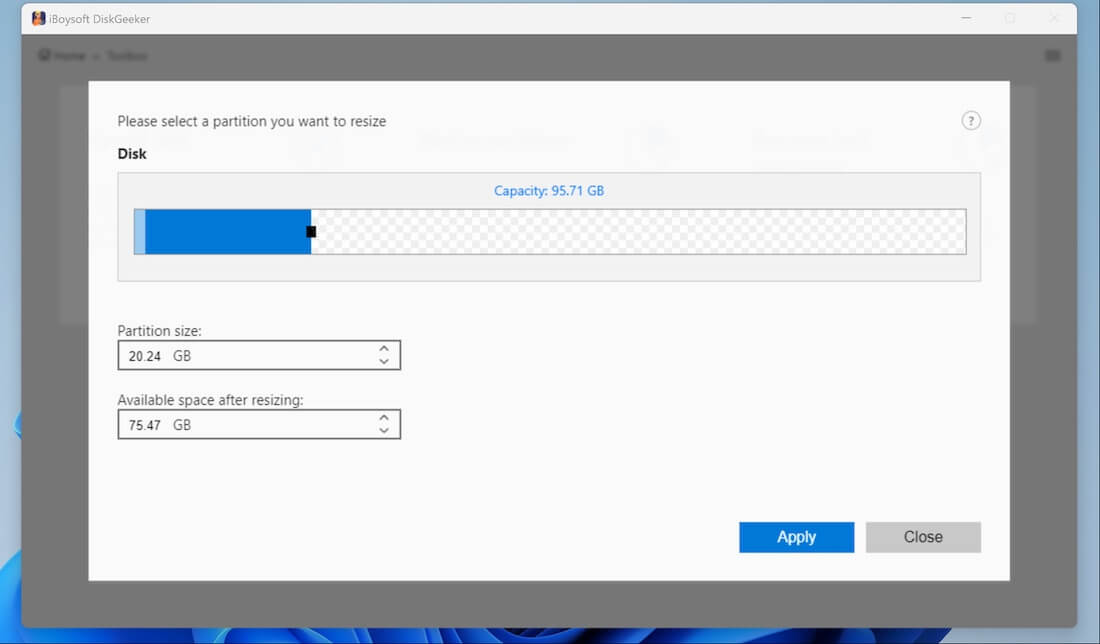
- Select the NTFS volume that you want to extend and click Resize partition.

- Check the selected partition's information, then drag the mouse from the end of the blue area to the right to add unallocated space to it, and release the cursor when it reaches the desired size.
- Tap the Apply button to start resizing the partition.
In addition to resizing partitions on internal and external hard drives on Windows, iBoysoft DiskGeeker for Windows also works to clone a disk/partition to another fully or incrementally, clone a partition to be a BitLocker-encrypted one, analyze disk space for file cleaning, and erase data on disks securely, encrypt disk with BitLocker on Windows Home edition, test disk speed, and recover lost Windows partitions.
Share this versatile disk manager for Windows!
Fix 2. Convert the partition to NTFS file system
NTFS file system is recommended for recent Windows versions and Windows computers, it supports resizing partition sizes such as extending and shrinking. If you find the disk is formatted with exFAT, FAT 32, or other file systems, you can convert it to NTFS to make the Extend Volume option available.
Converting the driver's file system means reformating the drive and reassigning a new file system, therefore, such a process will erase all the drive data, you should back up the partition first(you can use iBoysoft DiskGeeker to quickly clone the Windows disk/partition), and then follow the steps below to convert the partition to the NTFS file system:
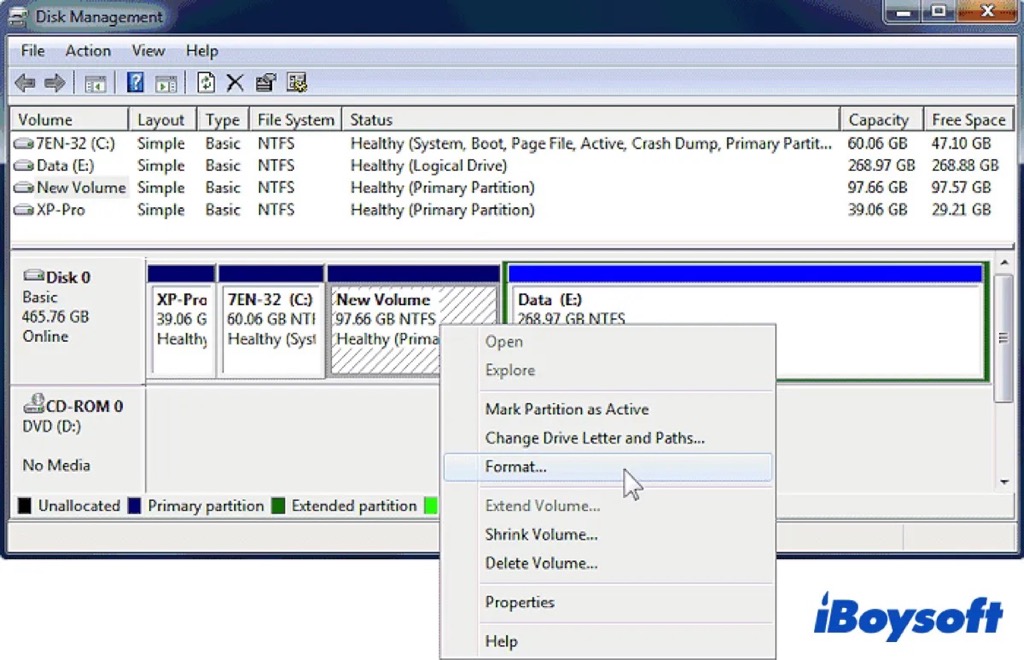
- Right-click the Start button and select Disk Management from the context menu.
- Locate the drive that you want to convert the file system to NTFS.
- Right-click it and choose "Format..." from the drop-down menu.
- Select NTFS and leave the "Quick Format" option checked.
- Click OK and tap OK again to start the reformatting.
- Then, continue to extend the NTFS volume on the same drive.
Fix 3. Create adjacent unallocated space
When the volume that you want to extend the size is already formatted as NTFS but the Extend Volume is also disabled, the reasons could be that there is no unallocated space on the drive, or there is no adjacent unallocated space. The fix is to create unallocated space next to the target volume.
There are two ways to create unallocated space: shrink the partition or delete the partition. However, if you shrink the target partition, the created unallocated space may not be adjacent to the volume you want to extend. Thus, it is more direct to deleting the neighboring partition to create unallocated space.
Similarly, deleting the partition will clear all partition data, and backup it first to avoid data loss. Then follow the steps below:
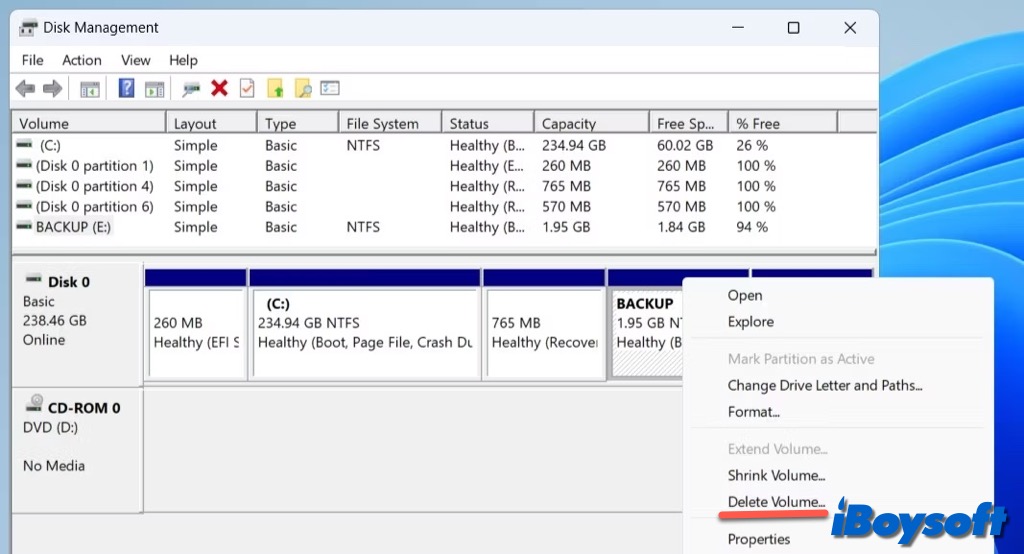
- Press Win + R to open the Run dialog box.
- Type diskmgmt.msc in the text field and press Enter.
- Open Disk Management, right-click the unwanted partition and choose the Delete Volume option.
- Select Yes to confirm the deletion.
- Right-click the volume you want to extend to see whether the Extend Volume is available now.

If you find all options greyed out in Disk Management when you right-click a partition, you can read this post for workable solutions to fix the issue on Windows 10/11.
If you have already fixed the Extend Volume greyed out issue with the above methods, share them to help more people!