From time to time, people take screenshots on their Macs to extract information, save them in Photos, share them with friends or colleagues, provide a guide for their users, etc. Shortcuts and applications make it easy to screenshot a specific area on your Mac.
After grabbing a screenshot, people may need to edit the screenshot such as cropping, resizing, annotating, and so forth. In addition download a snipping tool for Mac, the built-in Preview app can also satisfy your basic needs. Next, we will show you how to use Preview to edit screenshots on Mac.
Get a screenshot into Preview
To edit a screenshot with Preview, you need to get it into Preview in the first place. If you find the screenshots disappeared on your Mac, check if you've saved them to another location rather than the desktop. There are different ways to import a screenshot to Preview. All of them are easy to follow.
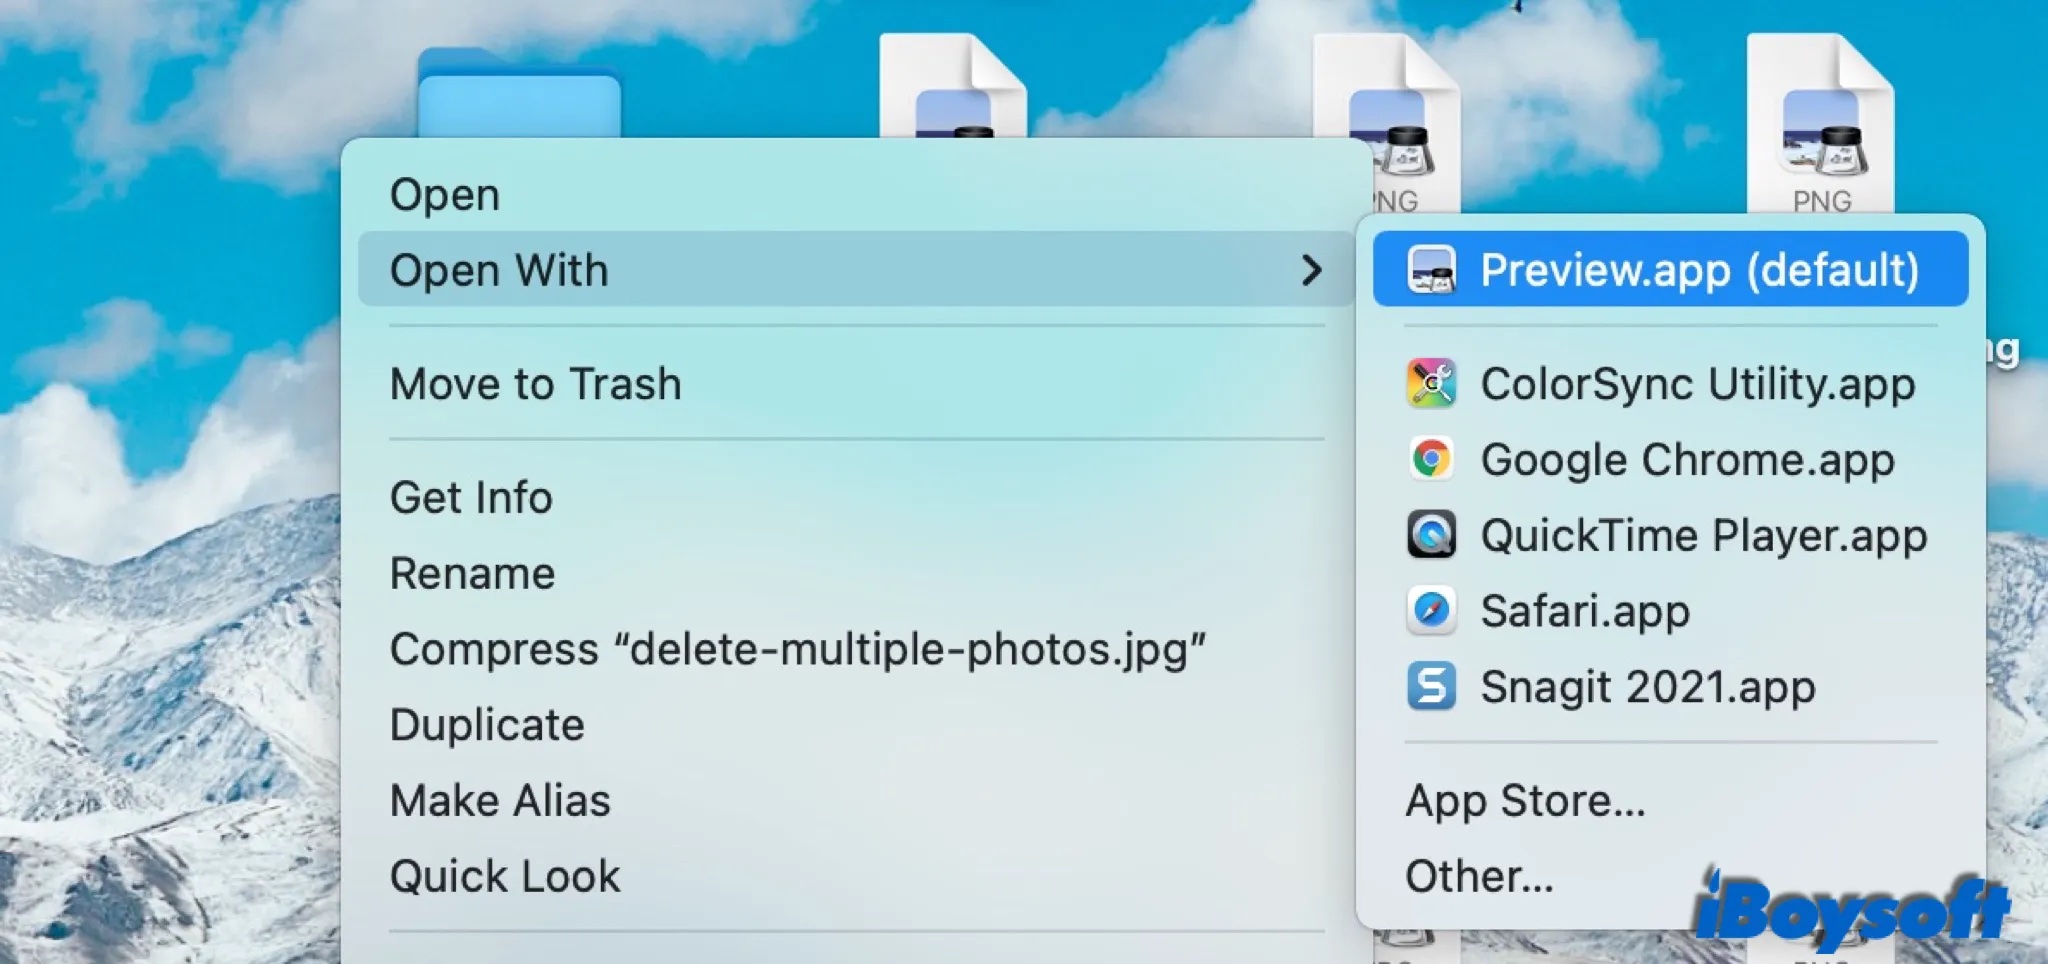
Method 1. Find a saved screenshot on the desktop or in the Finder, double-click to open it. It will open in the Preview app by default. Or, control-click the screenshot and choose Open With > Preview.
Method 2. Launch the Preview app from Applications/Dock/Spotlight. From the top menu, click File > Open to choose a screenshot to edit, or click File > New From Clipboard to import the screenshot saved in your clipboard.
Where Do Screenshots Go on Mac Monterey, Big Sur, or Catalina?
Don't know where your screenshots are saved on Mac Monterey, Big Sur, or Catalina? This post will show you where do screenshots go on Mac and how to change where screenshots are saved on your Mac. Read more >>
How to edit a screenshot with Preview
Basic edits such as cropping, rotating, and resizing a screenshot are featured in the Preview app. In this part, we are going to dive into the detailed steps to edit a screenshot with Mac Markup tool in Preview.
How to crop a screenshot
- To crop any area of a screenshot on your Mac, you can follow the steps here.
- From the menu bar in Preview, click the icon which looks like a pen nib in a circle, or click View > Show Markup Toolbar.
- On the toolbar, click the first icon to select a part you want to crop. There are 4 patterns for you to choose from.
- Click and drag on your Trackpad to select an area. Then release your finger.
- A new icon pops up on the right corner of the toolbar, click it to crop the selected area.

How to rotate or flip a screenshot
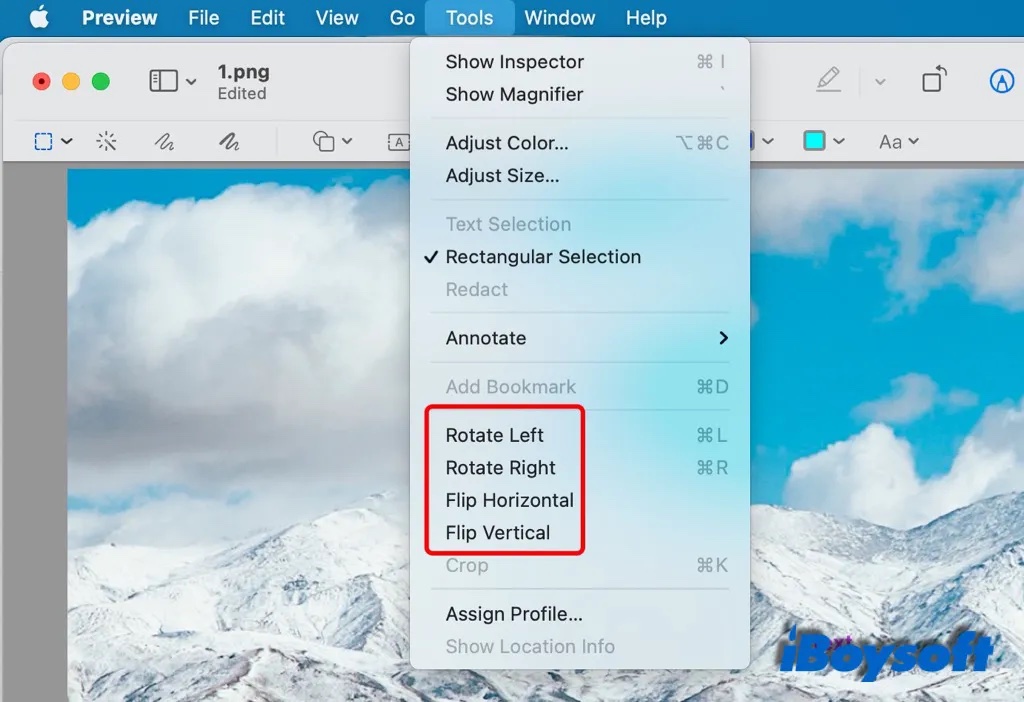
If you want to adjust the orientation of the screenshot, you can make it in Preview easily. From the navigation bar, there is a rotate icon, each time you click it, the screenshot will rotate 90 degrees to the left.
Alternatively, you can click Tools from the top menu bar. From the list, you can choose to rotate left, rotate right, flip vertical, and flip horizontal.
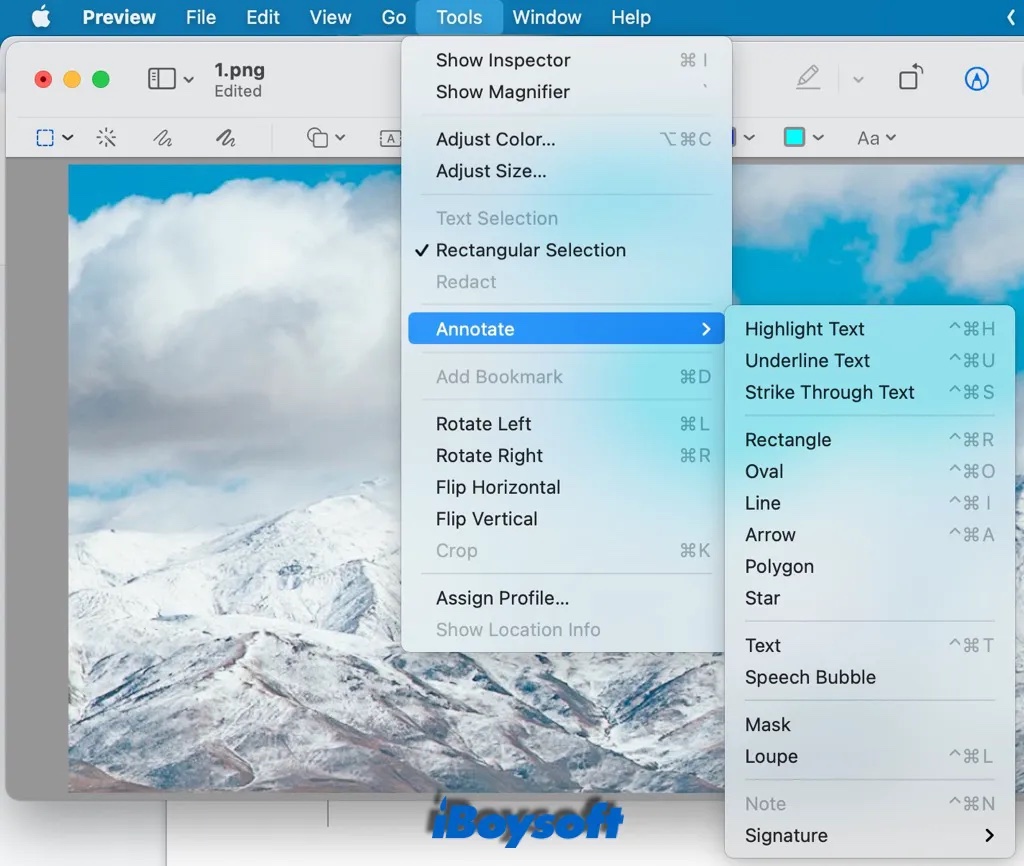
How to annotate on a screenshot
Preview includes various functions to annotate on a screenshot. It can help to clearly explain some content on the screenshot so that the reader can understand it better.
Add text
When you need to write on the screenshot, you can click the Text icon in the toolbar. It will add a text box to the image. Drag and drop it anywhere you want. Then, double-click the box to type content in the box.
Click the Aa icon to adjust the style and size of the written text on the screenshot, including font, size, color, bold, italic, underline, and alignment. What's more, you can adjust the thickness and color of the border, and the filling color of the whole box.
Insert shapes
Two ways to insert shapes on a screenshot. You can click the Shape icon in the toolbar, or click Tools from the top menu. Select line, arrow, oval, polygon, star, or speech buddle from the list. The Added shape will be surrounded by blue handles that let you resize it. If it has green handles, use them to alter the shape.
Highlight, loupe, and mask
To make an area of the screenshot stand out, you can use highlight, loupe, and mask in Preview.
Click any of them from Tools > Annotate, drag and drop it where you want. To resize it, use the blue handles.
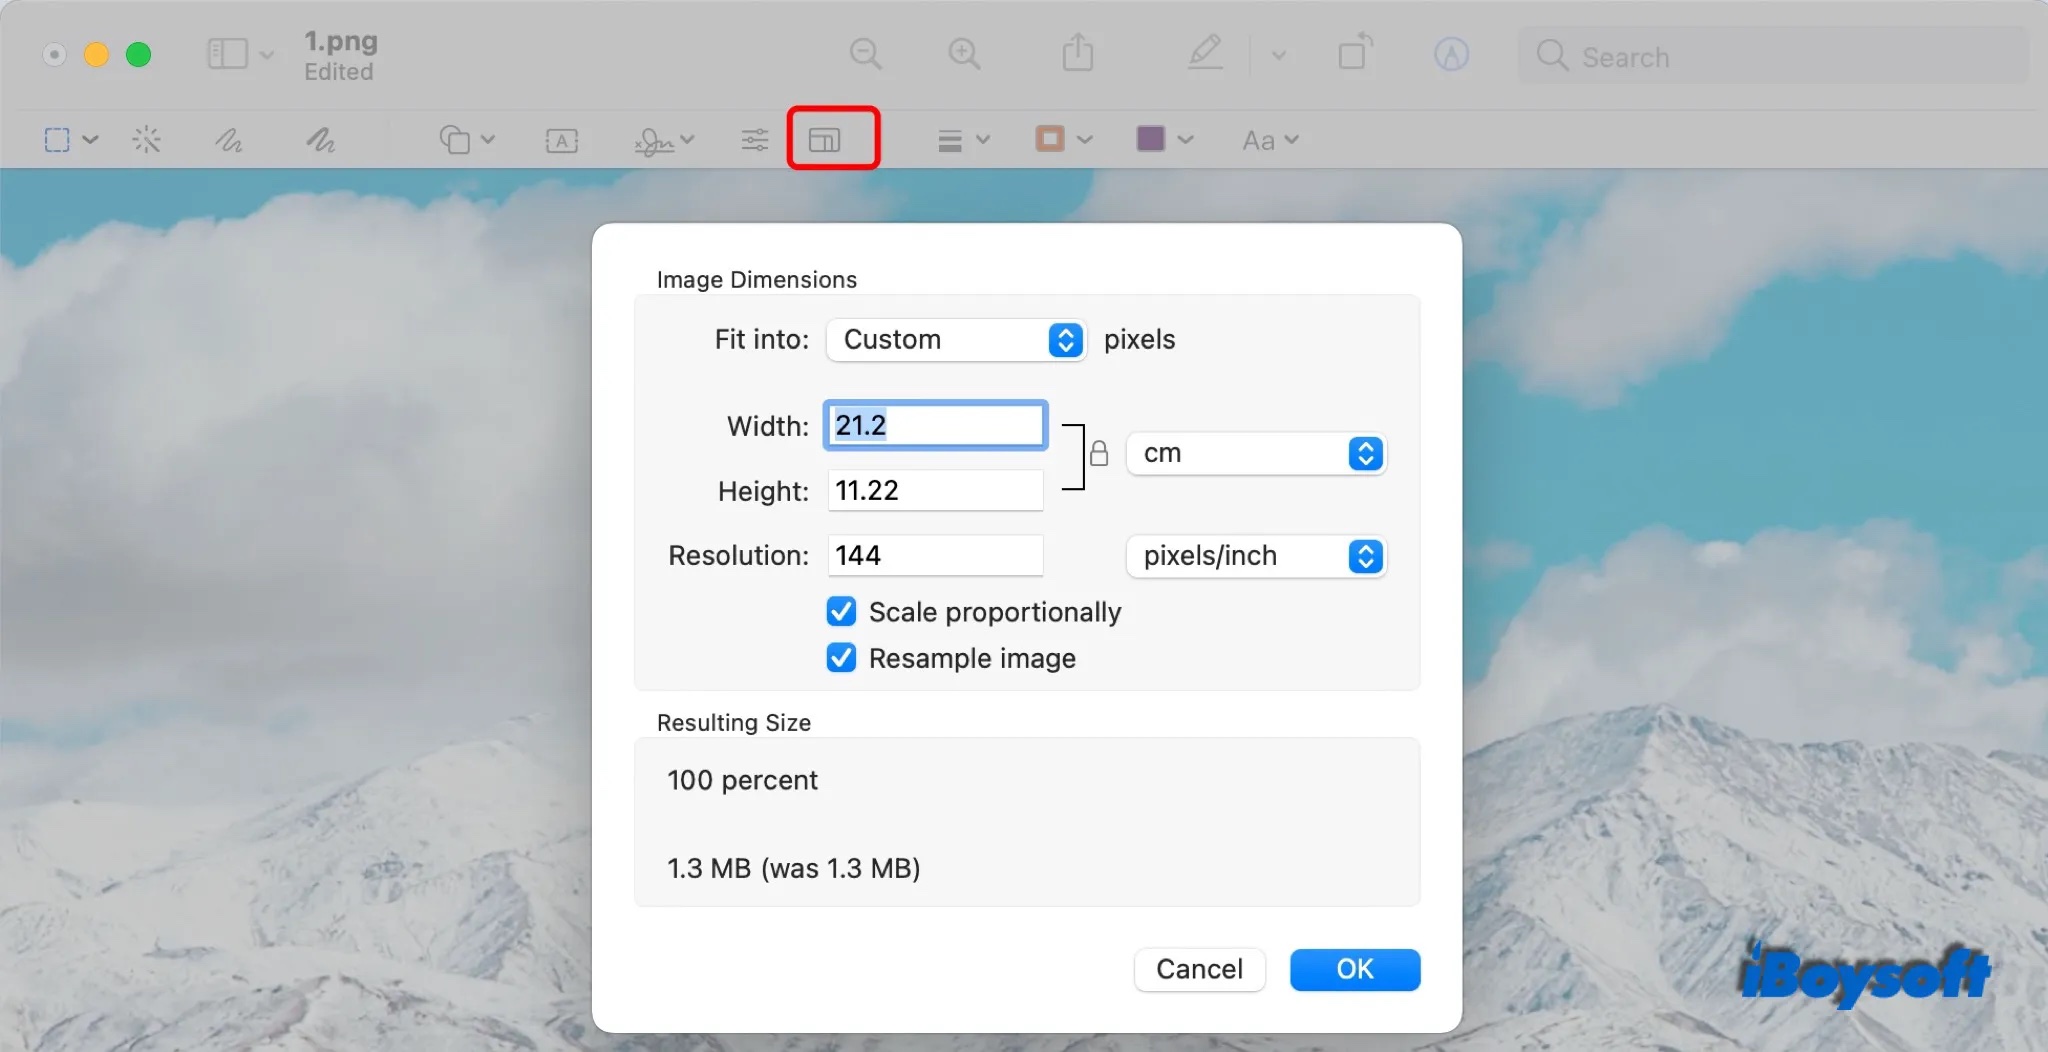
How to resize a screenshot
In some cases, such as uploading an image for registration, the size of the image may be required. Or, you want to shrink screenshots so they don't take up as much visible area or on-disk space.
In Preview, click the Adjust Size icon from the toolbar, you can adjust the width, height, and resolution of a screenshot. Tick the checkbox next to Scale proportionally and Resample image to make the resized screenshot doesn't look stretched or smooshed.
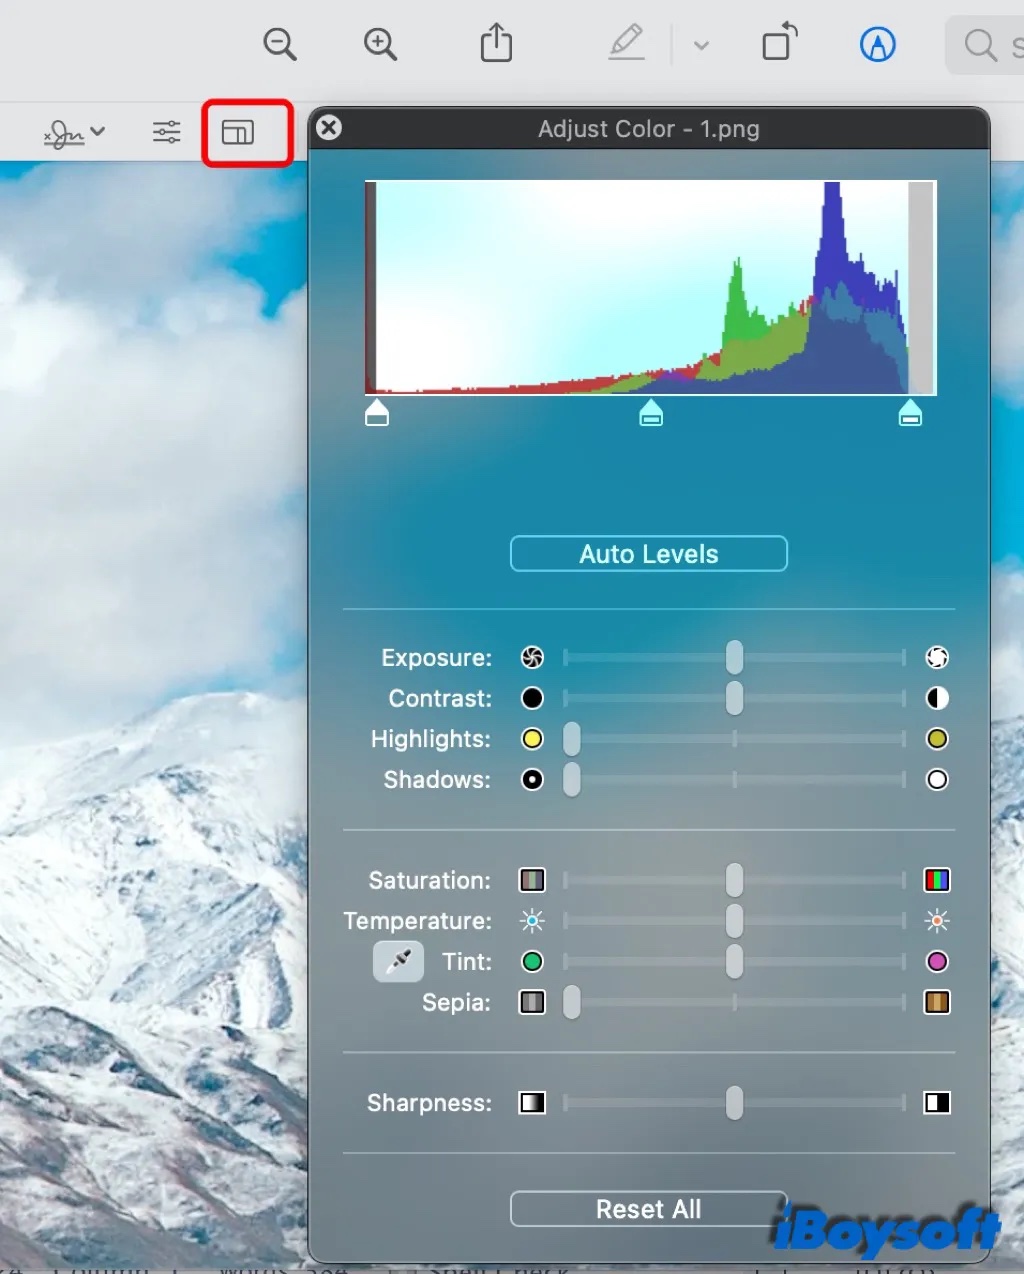
How to adjust the color of a screenshot
Just like you edit a photo on your iPhone, you can adjust the color of a screenshot on Mac as well, making it brighter or darker. Click Adjust color to open the dialogue. More options are provided.
Drag the axis on each dimension to the left and right to adjust the color of the screenshot. To adjust them automatically, click Auto Levels. To reset to the default, hit Reset all.
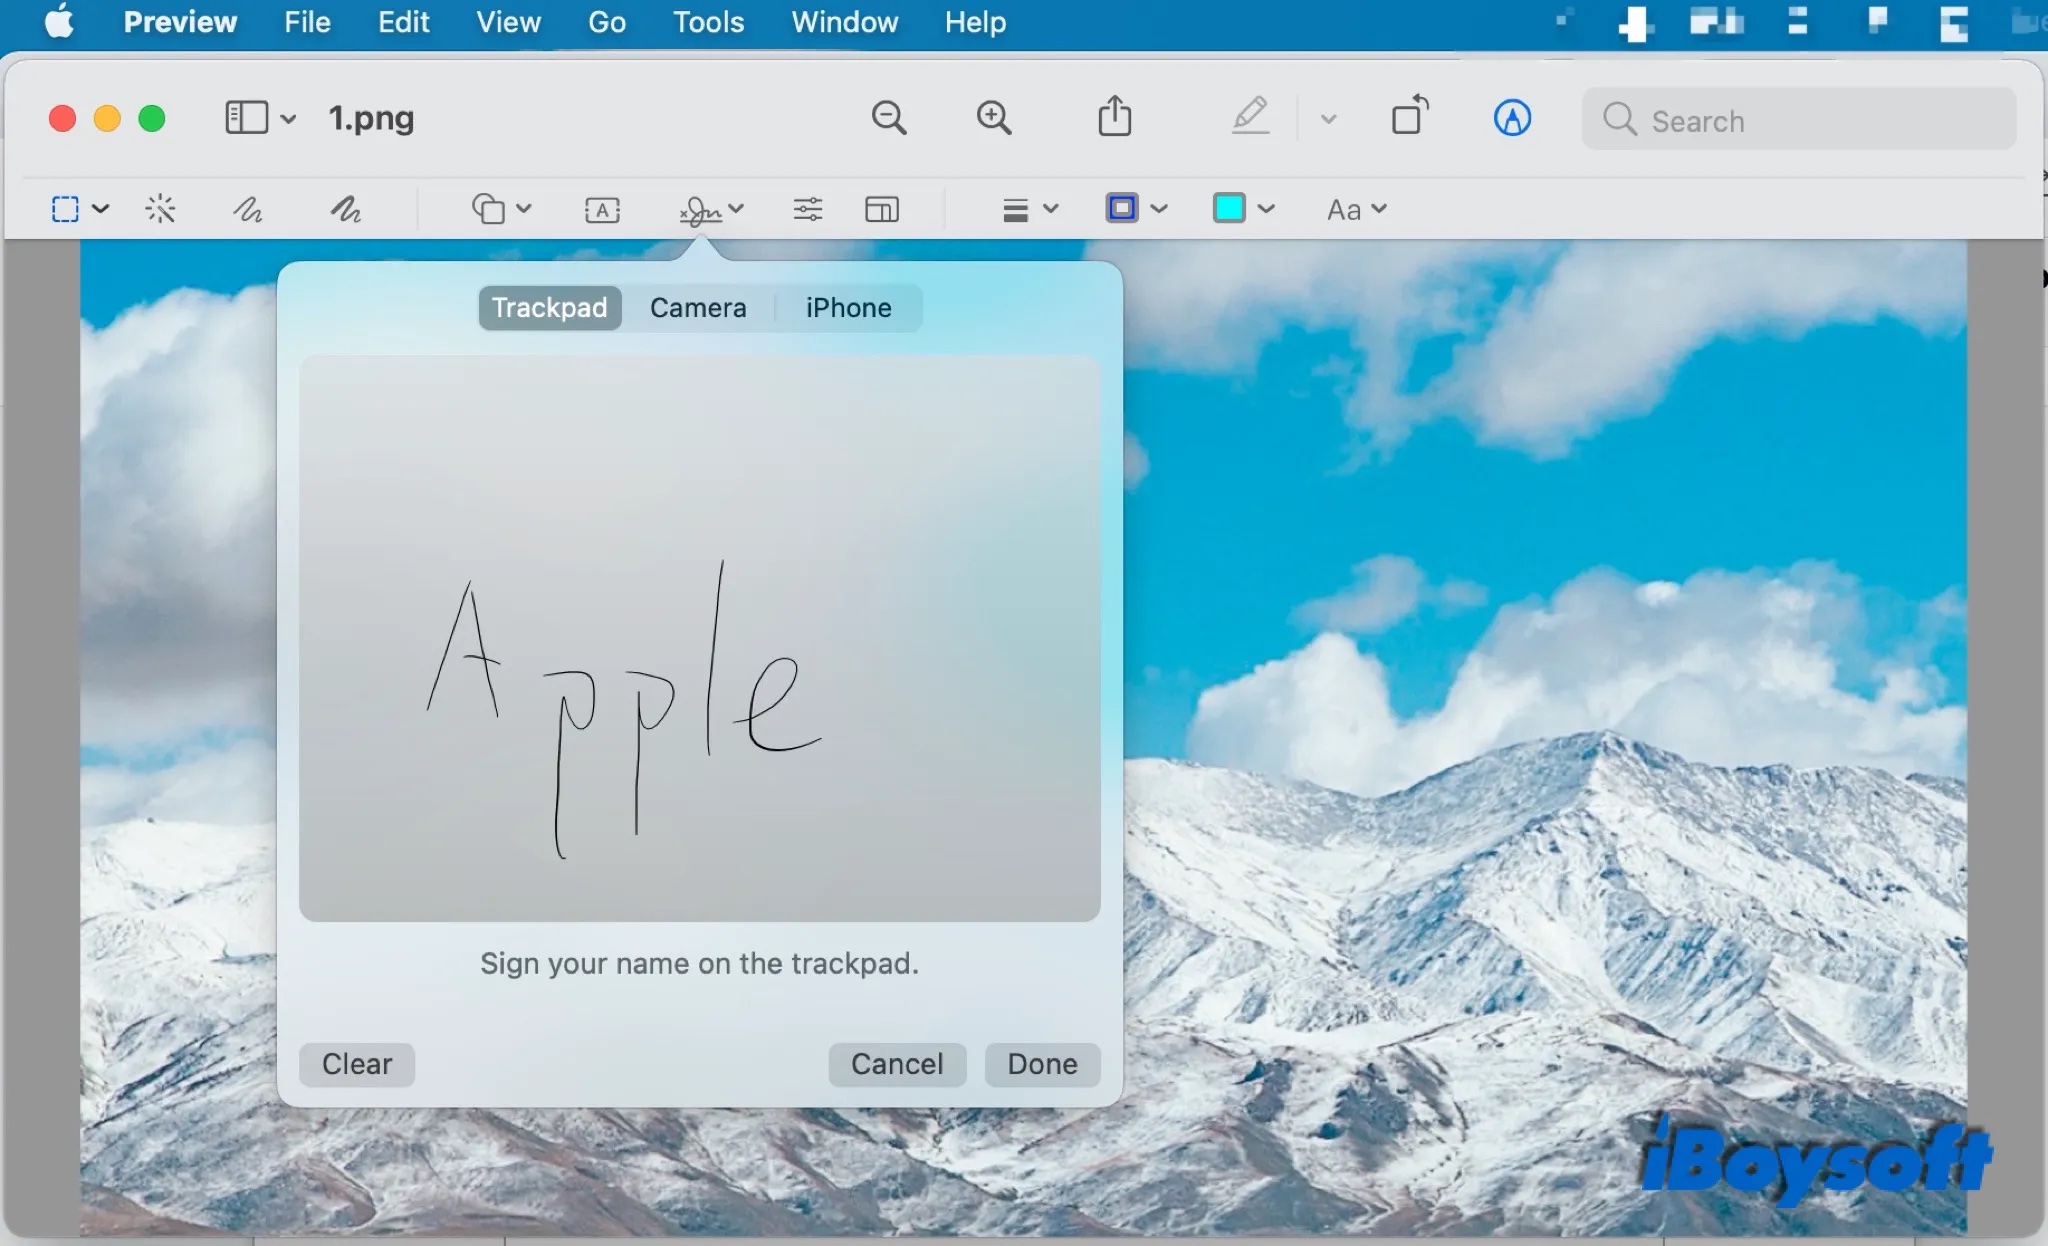
How to add a signature to a screenshot
Preview makes it convenient to sign on any screenshot without printing it out.
- Click the Sign icon in the toolbar.
- Choose to create a signature using a Trackpad, Camera, or iOS device.
- Click Done when you finish signing.
- Then click the Sign icon again, click the newly created signature from the list.
- Drag the signature and put it anywhere on the screenshot.
Other edits you can make to a screenshot
Except for the basic edits mentioned above, there are some other tools in Preview. You can find them in the Toolbar or the top menu. But if you find you can't use some editing tools in Preview, maybe the Preview is not working on Mac. You need to fix the problem first and then use the tools to edit screenshots.
- Instant Alpha can remove the background from an image.
- Convert image files to a variety of file types by clicking File > Export.
- Zoom in and out a screenshot.
- Assign ColorSync profile to image.
- Check general info of the screenshot with Inspector.
- Rename the screenshot and change its location on your Mac
Also read: How to delete screenshots on MacBook?
FAQ about how to edit screenshots on Mac
- QCan I revert the edits on a screenshot in Preview?
-
A
Yes, you can use keyboard combination Command + Z to undo the change. Or click File > Revert to, here you can choose Last saved, Last opened, and Browse all versions.
- QHow to customize the Toolbar in Preview?
-
A
From the top menu, click View > Customize Toolbar, a new window prompts. You can drag the items you like or the default set into the Toolbar. Then click the Done button.