Things would be much easier with a shared folder if you have to exchange files with others users. Luckily for all Mac users, you can create a shared folder and set up permissions to allow others to access it.
This post will walk you through the whole process of how to create a shared folder on Mac, including the setup preparation, the process to create a shared folder, and the way to access it. Let's start with how to set up file sharing on Mac first.
How to set up file sharing on Mac
macOS offers quite a few sharing options for its users, but they are not enabled by default. Therefore, you'll have to set up file sharing before you create and use a shared folder on Mac.
Enable file sharing on Mac
Step 1. Open Apple Menu from the top-left corner and select System Preference from the drop-down menu.
Step 2. When you enter the System Preference panel, find and choose Sharing.
Step 3. In the Sharing dialog window, navigate to the left column. Under Service, check the box in front of File Sharing.
Once the file sharing is turned on, other Mac users can access shared folders. Also, you'll see a network address, which is must-have information for you and other Mac users to access public folders.
Under the network address, you can notice a Public Folder that's automatically shared on your Mac. Remove it by clicking on the minus button if you don't want it to be included in the Shared Folder list.
In case you wonder if is it possible for Windows computers to connect to a Mac that has file sharing turned on, the answer is yes. To enable Windows sharing, click on Options in the file sharing dialog and check the box in front of your account.

Now you've enabled File Sharing on Mac, why not share this feature with more people?
How to create a shared folder on Mac
With the setup prepared, you can create a shared folder on Mac by following the tutorial below. You have to log into the computer as the administrator.
Step 1. Create a new folder on Mac in multiple ways. For example, right-click on Mac desktop and choose New Folder from the context menu. Additionally, you can open Finder > choose File from the top-left menu bar and select New Folder. Avoid using spaces and any punctuation symbols when naming the folder.
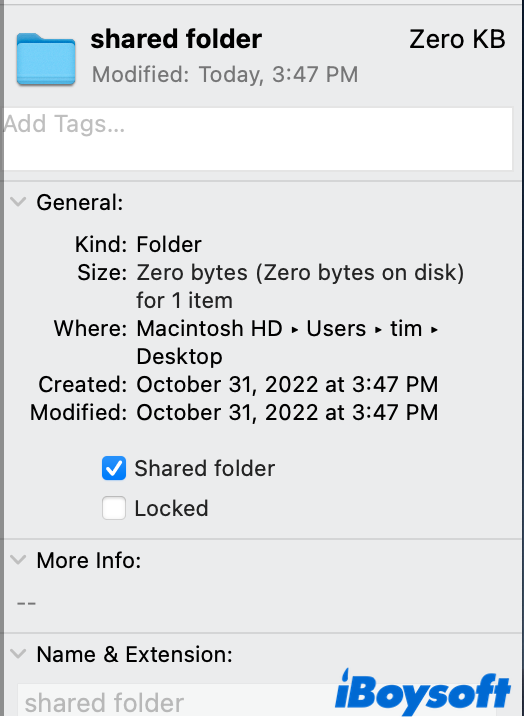
Step 2. Open Finder and right-click on the newly created folder. choose Get Info.
Step 3. Under the General option, tick the box in front of the Shared folder.
If you create a shared folder using this method, share it with more people!
Edit file sharing permissions
Once you add a shared folder on Mac, you can edit the users and the permission they have.
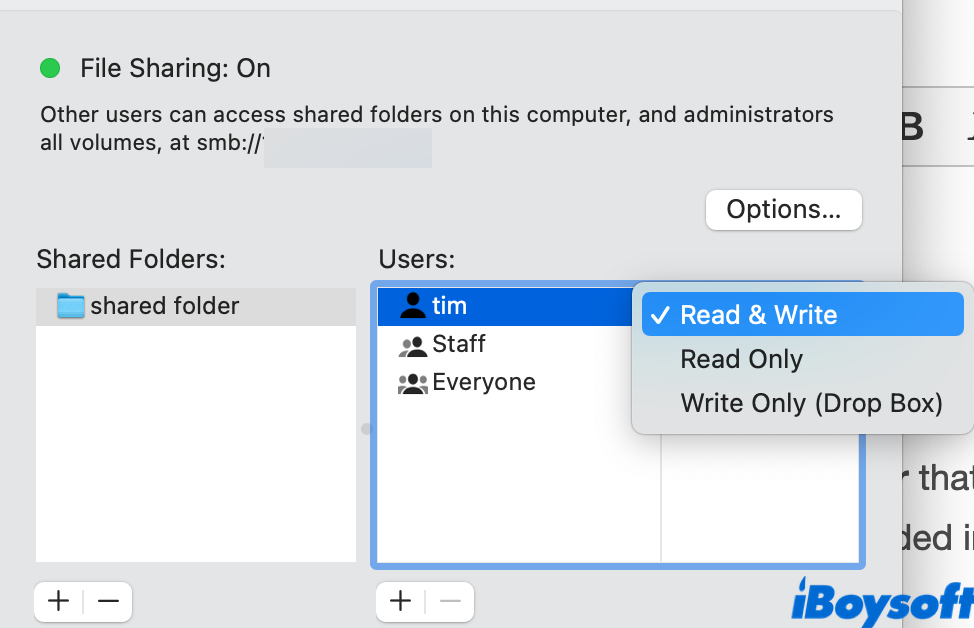
Under Users, the default three users that can access the shared folder include you, Staff, and Everyone. You can click on the add button below to add more people from Users & Groups and your Mac contacts.
In terms of permissions, you should see the read-write permission next to the users. Simply click on it to edit which permission you want to grant them, including read-write, read-only, and write-only (Drop Box). To understand what each permission means, check the notes below.
Read-write: users with read-write permission can open, view, edit, modify, and fulfill other writing tasks in the shared folder.
Read-only: users with read-only permission can open and view your content but are unable to make any changes to the folder.
Write-only (Drop Box): users with write-only (Drop Box) permission can copy files to and from the shared folder but are unable to open the content.
One more way to set up the permission is via the Info option. Right-click on the shared folder and choose Get Info. Scroll down to edit the permissions under Sharing & Permissions.
How to access shared folder on Mac
With everything prepared, users in your list can access your shared folders on Mac by following the instructions below.
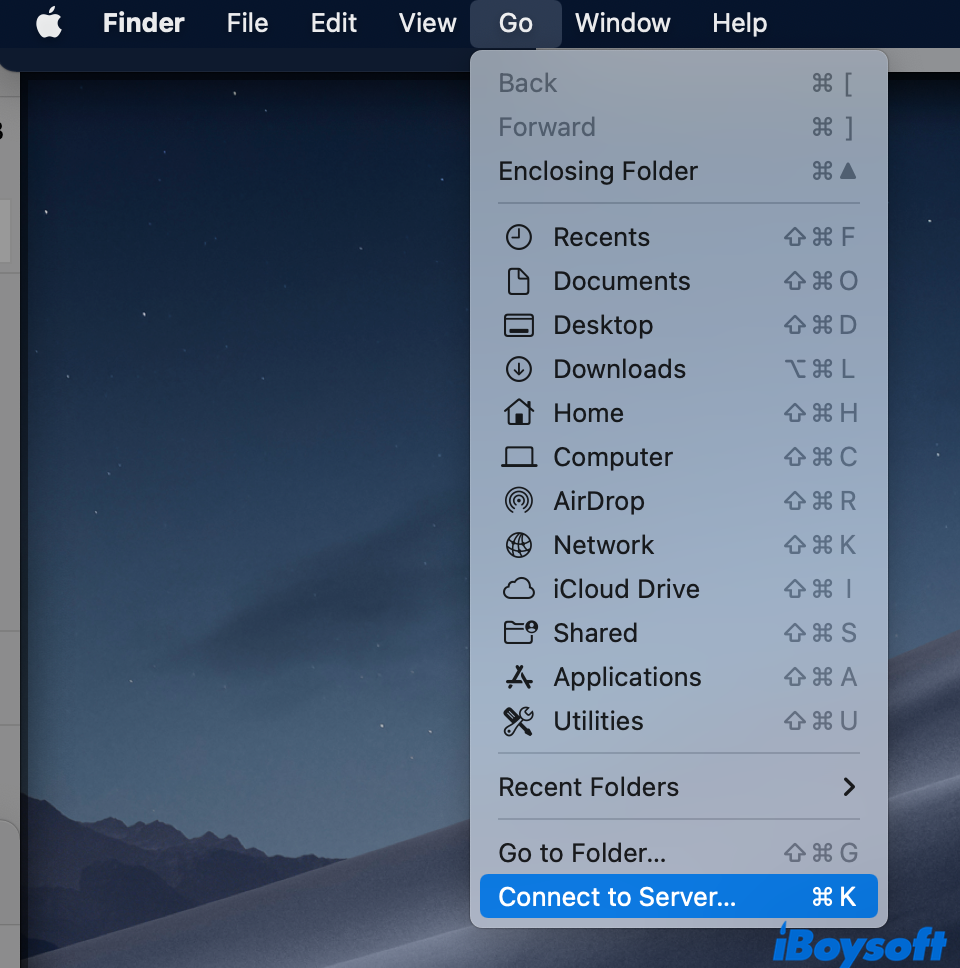
Step 1. Go to Finder and click on Go from the left Mac menu bar.
Step 2. Select the last option, Connect to Server…
Step 3. Enter the server address in the format of smb://address of the shared folder, which you can find in System Preference > Sharing > File Sharing.
Step 4. Click on Connect and the user can access the shared folder.
Bonus: Copy/move files to your shared folder on Mac with ease
Copying files to the shared folder one by one is a tiring job, especially when you have large files to transfer. Fortunately, there's one right-click utility that can help you copy and move files to folders on Mac with ease, including your shared folders. Let's see how iBoysoft MagicMenu copys files quickly and efficiently to shared folders on Mac.

By adding a shortcut to the shared folder to the Copy To or Move To menu, you can right-click on the files you want to transfer and choose Copy To/Move To. You can see the shared folder option and click on it to finish the copy-paste or file transfer process. Needless to say, this is way more convenient than using Command C + Command V combinations.
Additionally, this right-click enhancer lets you right-click to create a new file in the format of doc, xls, txt, pdf, and numerous file types without opening the applications. Also, moving files from one location to another has never been this easy with a single right-click. Download iBoysoft MagicMenu to explore more!
Conclusion
This post covers a comprehensive guide on how to create a shared folder on Mac, including how to enable file sharing, how to set up folder permission, and how to connect to the shared folder on Mac, plus one effective way to manage your Mac folders.
Successfully created a shared folder on Mac? Please share the methods with more people!