
It's common sense that PNG is a high-quality graphics format that is generally higher in quality than JPEGs. This means storing PNG format images on Mac will occupy more space than keeping JPEG files on Mac. If you need to free up some space on Mac, you can choose to reduce PNG files on Mac by converting PNGs into JPEGs or compressing PNG files on Mac.
Have no idea how to reduce the PNG file size on Mac by compression? Luckily, this post will walk you through how to compress PNG images on a Mac in 4 ways, just keep reading.
| PNG compressor | Specific operations |
| iBoysoft MagicMenu | Right-click on a PNG file, and select Compress > Save. |
| macOS Preview | Open PNG in Preview, select Tools > Adjust Size > Resample Image option > OK. |
| macOS Photos | Open PNG in Photos, choose File > Export > Export 1 Photo. Set the compression level and click Export. |
| TinyPNG | Open TinyPNG, upload a PNG file, and then click Download All. |
How to compress a PNG on Mac using iBoysoft MagicMenu
The easiest and quickest way to compress a PNG on Mac is using a right-click. There is a neat macOS right-click enhancer in the market named iBoysoft MagicMenu that is able to provide a few right-click options on Mac including Compress, Create a new file, ImageConvert, etc.
This utility is capable of compressing photos on Mac in a simple way as well as compressing videos on Mac. It supports compressing various image formats, including jpeg, PNG, tiff, gif, etc. Besides, it can help you find duplicate photos on your Mac or MacBook so that you can free up Mac storage space by deleting duplicated images.
To compress a PNG on Mac using right-click with the help of iBoysoft MagicMenu, simply do the following:
- Free download, install and launch iBoysoft MagicMenu.
- Open Mac Finder, and select the file folder which contains the PNG photos or pictures you want to compress.
- Right-click on the picture and choose Compress from the right-click drop-down menu.
- Then, a new window will pop up. You can click "Add files" to select more PNG pictures to be bulk compressed if needed. Also, you can choose its compression level from 3 options: High, Middle, and Low.
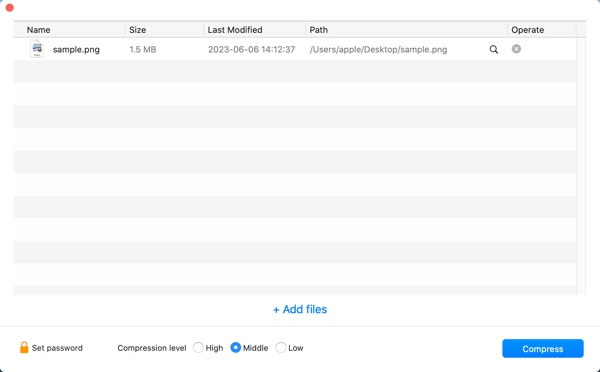
- Click Compress. Rename the compressed file and select where to keep it, and click Save. You can see a new zip file appear in the folder you've chosen, this is the compression file of your PNG image. This zip file should be smaller than the original.
If you think this post is useful, please share it with more people, thanks!
How to compress PNG images with the macOS Preview app
Preview is a macOS built-in photo editor. Luckily, there's a feature in this application to allow you to compress your PNG images. Just follow these steps to see how to reduce PNG image file size on Mac using Preview:
- Click Launchpad and open the Preview app.
- Choose File > Open and select the PNG photos you want to compress.
- Click Tools > Adjust Size.
- Adjust the Width and/or Height by pixel. You'll see an estimate of the new size in the Resulting Size section.
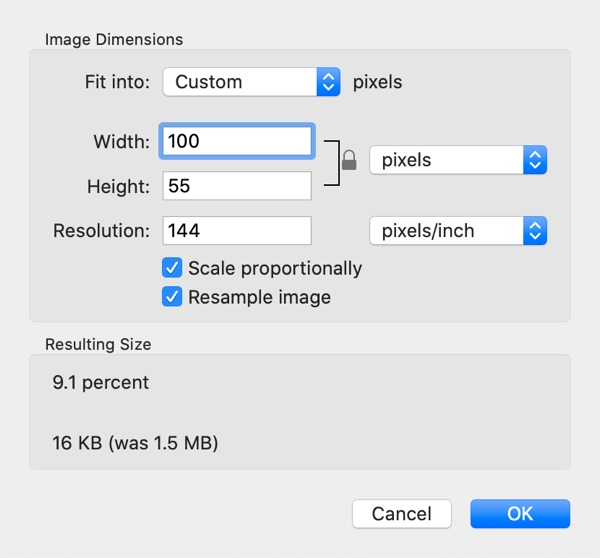
- Check the Resample Image option and click OK.
Note: If you want to compress multiple PNG pictures at the same time. Before step 3, make sure you click on one of the thumbnails in the sidebar and then press Command + A on your keyboard to select all. Then, when you make your size adjustment, Preview will apply it to all of the images.
How to reduce PNG file size using the Photos app
In addition to compressing PNG images with the macOS Preview app, you can also utilize the macOS Photos app to quickly make PNG file size smaller on Mac or MacBook. Here's how to do it:
- Right-click on a PNG picture you want to compress in macOS Finder and choose to open it with the Photos app.
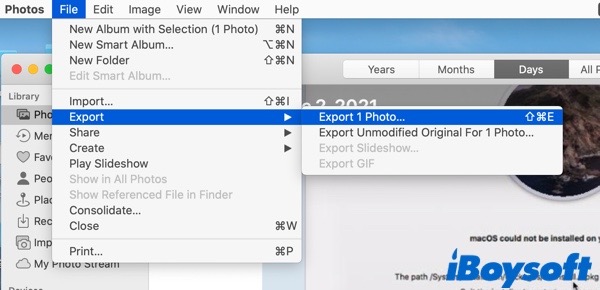
- Click File > Export > Export 1 Photo from the top menu bar. Alternatively, you can press Command + Shift + E.
- Click the tiny arrow next to Photo Kind to see more options.
- Accordingly, set the Photo Kind, Quality, and Size to compress the images.
- Click Export > choose a location > Export.
Would you please share this informative post on your social media? Many thanks!
How to compress PNG photos on Mac online
If you don't want to use apps to compress a PNG image on Mac or you can't compress files or folders on your Mac with the above-mentioned utilities. You can try an online image compressor. As long as your Mac or MacBook is connected to the internet or Wi-Fi, you can use this way to compress PNG on your Mac for free.
TinyPNG is a totally free online image compressor that uses smart lossy compression techniques to reduce the file size of your WEBP, JPEG, and PNG files. By selectively decreasing the number of colors in the image, fewer bytes are required to store the data. To compress a PNG on Mac using TinyPNG, do the following:
- Open TinyPNG in your Mac browser, and click the arrow to upload PNG files or drag and drop PNG files here.

- When the PNG files have been uploaded, they will begin to compress.
- Wait for the PNG files to finish compression and click Download All to save them on your Mac. Alternatively, you can choose to save them to Dropbox and share them on your Twitter.

PNG vs JPG: which is bigger in size
PNG and JPG are the most widely-used formats in daily life and work. PNG, which stands for Portable Networks Graphics, is a popular raster-based graphics format that is mostly used in image editing. PNG is a non-patented format that follows a lossless compression technique to maintain the overall quality of images.
JPEG, which stands for Joint Photographic Experts Group, is a widely used format for storing and sharing digital images. Meanwhile, JPG is a shortened version of JPEG. JPG exists because earlier versions of Windows operating systems (MS-DOS 8.3 and FAT-16) don't support extensions with more than 3 letters.
Just like what was mentioned at the beginning of this post, the file size of PNG is usually bigger than JPGs. Therefore, in the future, you can choose to save a picture in JPG format to save more space on your Mac. Alternatively, you can compress a PNG file on Mac with iBoysoft MagicMenu.
We'd be appreciated it if you shared this post with more people.
FAQs about how to compress a PNG on Mac
- QHow do I make a PNG file smaller without losing quality?
-
A
The best way to make a PNG image smaller is to compress it. Luckily, iBoysoft MagicMenu can help you. Simply download and launch iBoysoft MagicMenu, right-click on the PNG file, and choose Compress from the context menu. Wait until the PNG file compression finishing.
- QHow do I compress a PNG to less than 500kb?
-
A
To compress a PNG file less than 500kb, use macOS Preview to help you. macOS Preview will give you an estimate of the new size of the compressed PNG file before compression.