Have you ever noticed that there is a Recents folder on your Mac Finder? To quickly access the files that you recently created or opened, you can click Recents in the Finder sidebar. All the files on your Mac and in iCloud Drive have been added to the Recents folder automatically.
Some of you may try to clear Recents on Mac to free up space on Macintosh HD, but only to find that you can't delete the Recents folder on Mac. If you clear the files that are showing up in this folder, the original files will be put in the Mac trash.
Actually, the items in the Recents folder do not take up any space on Mac's internal hard drive. Do you know why? Just keep reading to find out what the Recents folder on your Mac is. Besides, this post will guide you on how to clear Recents on Mac without deleting them.
Want more people to read this helpful tutorial? Then let's share!
What is the Recents folder on your Mac
The Recents folder always appears in the sidebar of Finder windows. It's not an actual folder on a physical disk. It is known as a smart folder consisting of an automatic Spotlight search for your most recently used files. Every file you see listed in the Recents folder actually lives in different folders across your Mac.
You can't delete the Recents folder since it doesn't exist. However, you can remove it from the Finder sidebar or disable the way it works. Besides, clearing the Recents folder results is also possible.
How to clear Recents Folders results on Mac Finder
Like what was mentioned above, you can't completely clear the Recents folder from macOS. But you can clear the Recents folder results on Mac. The process to clear your Mac Recents result in Finder is easy to handle. All you need to do is follow the steps below.
- Open Finder on your Mac.
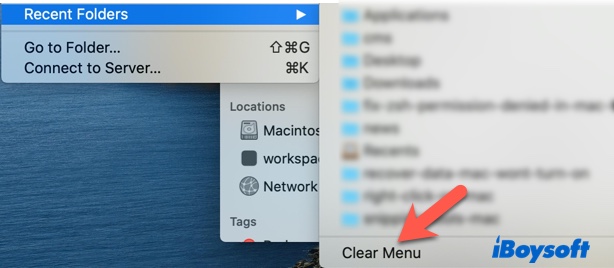
- Click on Go from the menu bar.
- From the dropdown menu, go to Recent Folders and click on Clear Menu.
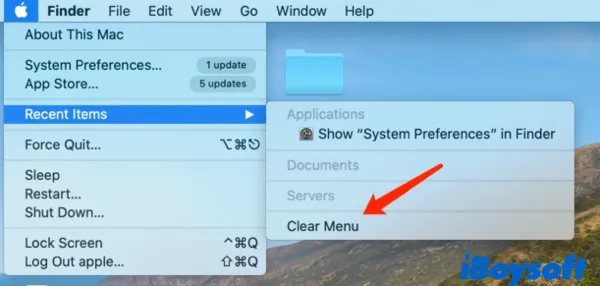
If you're familiar with the Apple menu, you'll notice that there is a Recent Items option. It may sound similar to the Recents folder, but it is completely different. It's accessible from the Apple menu and tracks the most recently-opened applications and files, and the servers to which you have most recently connected.
And clearing the list of recent items is also simple. Go to the Apple menu and select Recent Items. At the bottom of the list, find the Clear Menu option and click on it.
This will remove all items from the menu. However, it won't stop the list from filling in again as you use your Mac. You just have to remember to clear it when needed.
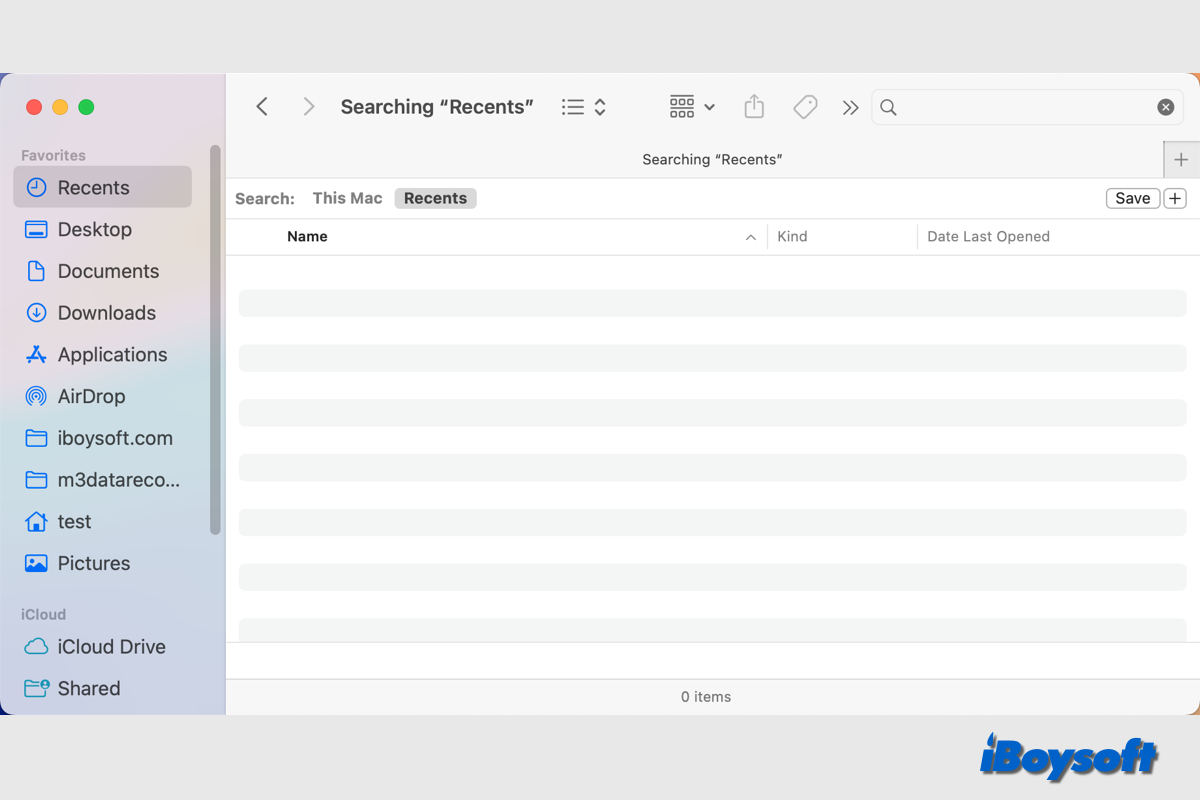
If you find the Recents folder in Finder is abnormally empty, here are fixes you can try.
Problems solved? Share your happy experience with other people!
How to remove the Recents folder in Finder
Even though you have cleared your Mac Recents result in Finder, you'll still see the Recents folder on Mac and its related files in the sidebar of Finder. If your purpose is not to see the Recents folder in Finder, simply do the following:
- Open Finder on Mac.
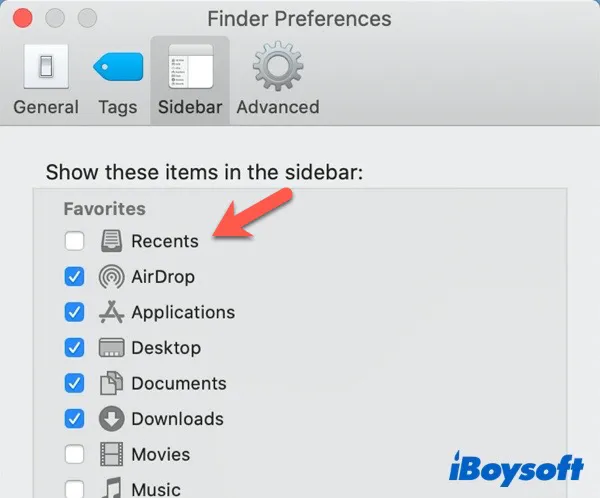
- From the Mac top menu, select Finder > Preferences.
- Switch to the Sidebar tab, then uncheck the Recents option.
Now, you shouldn't see the Recents folder on your Mac since it has been hidden by the Mac finder. And there's also another easy option to hide the Recents folder on Mac. Here's what you can do:
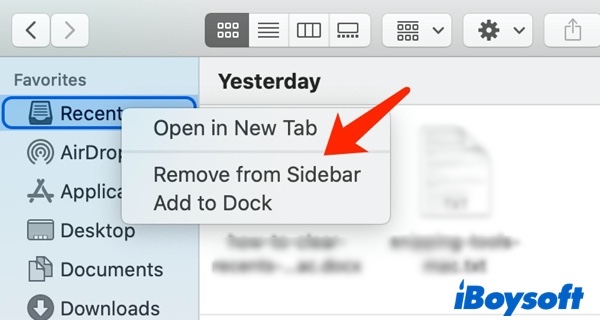
- Open Finder and find the Recents tab under Favorites.
- Right-click on the Recents tab.
- Select Remove from Sidebar.
How do you clear Recents on Mac without deleting
If you can't delete the Recents folder on Mac, what else can you do if you want to clear Recents on Mac without deleting? You can enable those files not to show up in the Recents folder but the Recents folder still can be found in Finder. There are several ways to achieve it. Some of them are easy, and some require some technical skills.
Following are 3 ways to clear Recents on Mac without deleting:
Method 1: Hide Startup Disk from Spotlight Search
Spotlight search is an app that runs in the background all the time and tracks all file modifications on your Mac. In a nutshell, it is responsible for creating an index of all the files on the Disk and aware of all the changes done on the File or folder.
Therefore, hiding the entire startup disk from the Spotlight search helps delete items from Recents. To do so, try the below steps:
- Click on the Apple logo.
- Select System Preferences > Spotlight.
- Click the Privacy tab.
- Locate the + icon and click on it to open the Finder window.
- Click on Macintosh HD under Locations and then click Choose.
- Accept the warning message, and click OK.

Now, open the Recents folder in the Finder, and you can see it's absolutely empty. However, these changes could create problems for you. Removing the entire disk will exclude all its contents from the Spotlight Search, i.e., you will not be able to find any file with the search function in the Finder.
But, at the same time, this can make the Mac much faster because the indexing process has been stopped. Hence, CPU Usage will be less. Sometimes, people even suggest doing this when the Mac runs slow.
This will show you whether you have permission to write or modify the file.
Method 2: Rename the file to hide it from the Recents folder
There are many system files on Mac, and to hide them, macOS uses a special technique: it can be done by adding a (.) dot at the beginning of the file name. When reading this, you might be thinking of renaming the files to hide them manually.
Unfortunately, the Finder on Mac does not allow to add a dot symbol at the beginning of the filename. But as usual, what we can't achieve in Finder, can be done with the help of the Terminal app and its commands.
In the Terminal, go to the folder where the file is located and use the mv command. For instance, if the filename was MyPic1.png, then the command would be:mv MyPic1.png .MyPic1.png
Finally, hit the Return key to execute the command, and the file will be gone from the Recents folder. If you want to show the hidden files on the Mac Recents folder again, press the Command + Shift + dot (.) when opening the Recents folder.
Method 3: Move files to an encrypted drive
The last method to avoid files in the Mac Recents folder is to move them to an encrypted drive, where Spotlight search cannot perform any indexing, and it will remain safe within an encrypted drive.
- Launch the Disk Utility app.
- In the top menu click on File > New Image > Blank Image.
- Choose where the drive will be stored.
- Give it a name and set the size.
- Choose the Encryption method and enter the password.
- Set Image Format to 'read/write disk image' and click Save.

The Disk Utility will create a DMG file. Open the drive by double-clicking on its icon and entering the password, then move the file to the encrypted folder. This will remove it from the Recents folder in the Finder, too. When done working with the file, eject the DMG.
Share this guide to help more people who are trapped in the same obstacles.
FAQs about how to clear Recents on Mac
- QWhat happens if I delete Recents on Mac?
-
A
Deleting files from the Recents folder will move items to Trash. Instead of hiding items from the list, this will delete the file from the disk. And if you clean the Trash after that, the file in most cases will be gone forever.
- QDo Recents on Mac take up space?
-
A
The Recents is not a true folder, it is a saved SmartSearch. It automatically shows files that were recently opened. The items in the Recents folder do not take up any space.