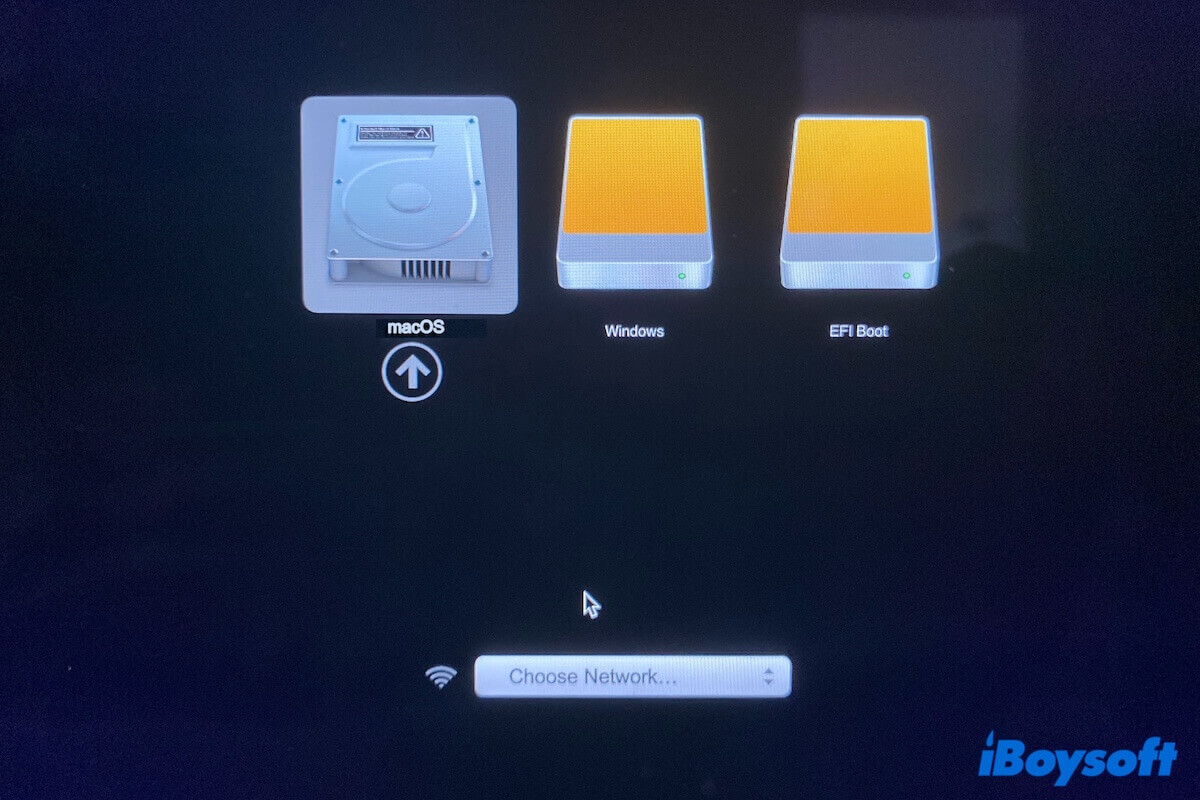
If you have used Boot Camp Assistant to install Windows on your Mac, your Mac will automatically boot up into Windows after installation.
If you want to switch from Windows to macOS, restart your Mac computer and simultaneously press the Alt or Option key on your keyboard. Then, choose the macOS startup disk to enter macOS again.
However, you find that you can't switch back to Mac from Windows and are in one of the following cases:
- The macOS option doesn't appear when you restart your Mac along with the Alt or Option key pressed down. (The case from the Apple Community)
- Your Mac gets stuck on the progress bar to log into macOS. (My true case)
- Your Mac goes into a black screen after choosing to boot up from the macOS startup disk.
- Your Mac automatically back to Windows in a loop.
Whatever the case you're in, this post can give you solutions. You can read this post to learn the reasons and stepwise ways in more detail.
Check your way to switch to macOS
When you are in Windows on your Mac computer, you need to follow these steps to switch to macOS:
- Restart your Mac and then immediately press down the Option key on your Mac's built-in keyboard.
- Release the key when you see the Startup Manager window.
- Select your macOS startup disk and press Return.
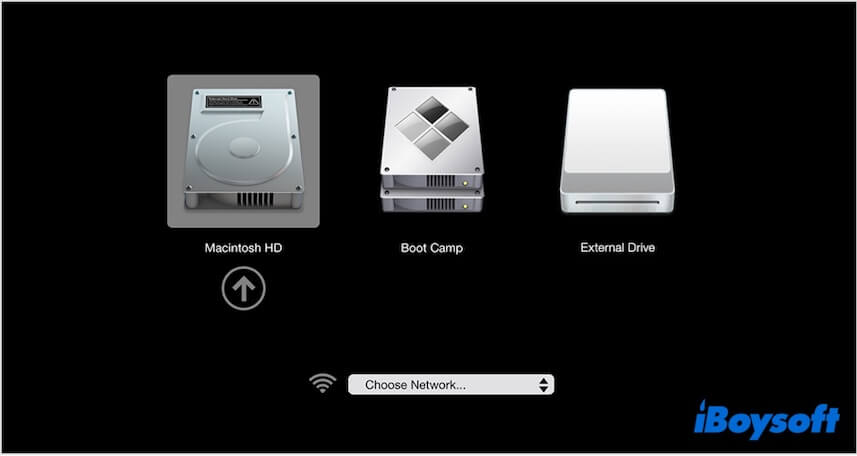
Warning: If you press the Option key on the external keyboard of your Mac laptop, it's probably the culprit that makes you can't switch back to Mac from Windows.
Go to tell others how to switch from Windows to macOS on a Mac.
Enter into macOS Recovery Mode
If restarting Mac with the Option key still can't switch from Windows back to Mac, enter macOS Recovery mode and run Disk Utility First Aid to check your Mac hard drive:
- Go to Disk Utility.
- Select the startup disk (Macintosh HD or macOS volume) from the left sidebar.
- Click First Aid on the toolbar > Run.
- Wait for the process to end.
Erase your Mac & Reinstall macOS
If even First Aid can't help you out of the loop of the Mac login screen when switching from Windows, your Mac probably is T2-secured and enabled FileVault.
The T2 firmware bug that arose by Bootcamp installed Windows is the troublemaker that blocks you from switching from Windows to macOS. In that case, you have no other choice except to erase your Mac and then reinstall macOS.
Rescue data first
Erasing your Mac will wipe the Windows Bootcamp partition and of course all other contents on your Mac. So, if you don't want to lose your necessary files, you need to use a data recovery tool to help you.
iBoysoft Mac Recovery Mode is a special mode that is specially designed to run iBoysoft Data Recovery software in macOS Recovery Mode. It helps you get back files from an unbootable and inaccessible Mac without creating a bootable USB drive.
Step 1: Enter macOS Recovery mode
For an Intel-based Mac:
- Turn off your Mac and wait a moment.
- Turn your machine on and simultaneously press down the Command - Option - R keys together.
- Release the keys when you see a spinning globe on the screen.
For an Apple silicon Mac:
- Completely shut down your Mac.
- Press and hold down the power button until you see the startup options.
- Select Options > Continue.
For a T2-secured Mac:
- Turn off your Mac.
- Restart your Mac and immediately press down Command + Option + Shift + R together.
- Release the keys when you see a spinning globe on the screen.
Step 2: Run iBoysoft Data Recovery in macOS Recovery Mode.
- Click Utilities on the menu bar > Terminal.
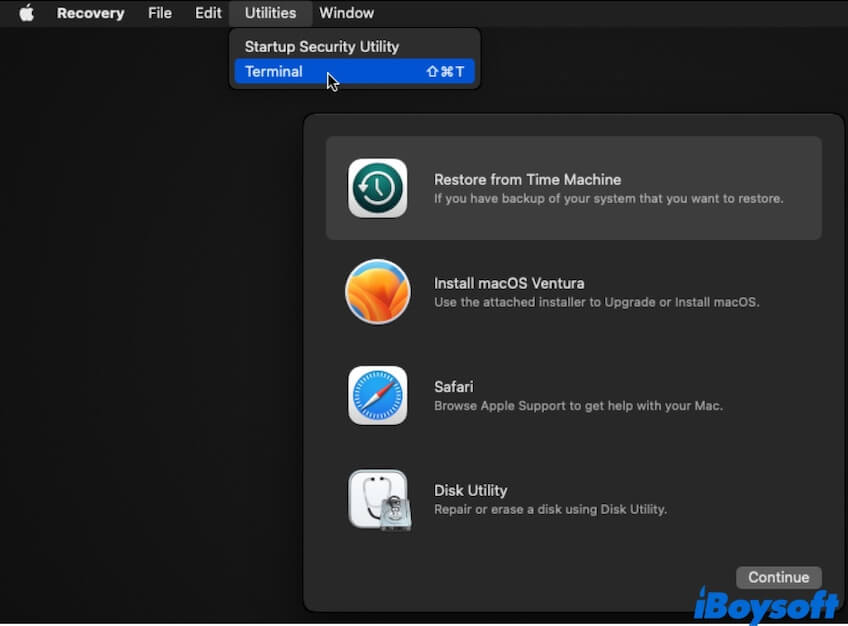
- Enter the command below to launch iBoysoft Data Recovery software from iBoysoft's server. Thus, ensure your network is stable. sh <(curl http://boot.iboysoft.com/boot.sh)
Share this useful data recovery mode for more people to help them rescue files from unbootable Macs.
Step 3: Recover data from the inaccessible or unbootable Mac
- Select your Mac internal disk on the main interface.
- Click Search for Lost Data.
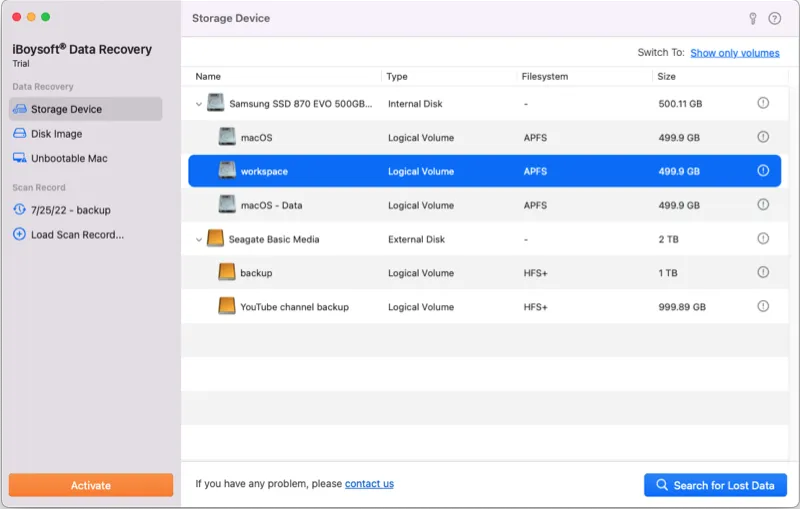
- After scanning, check the scanning results.
- Connect an external hard drive to your Mac.
- Preview and choose your wanted files, then click Recover to save them to the external drive.
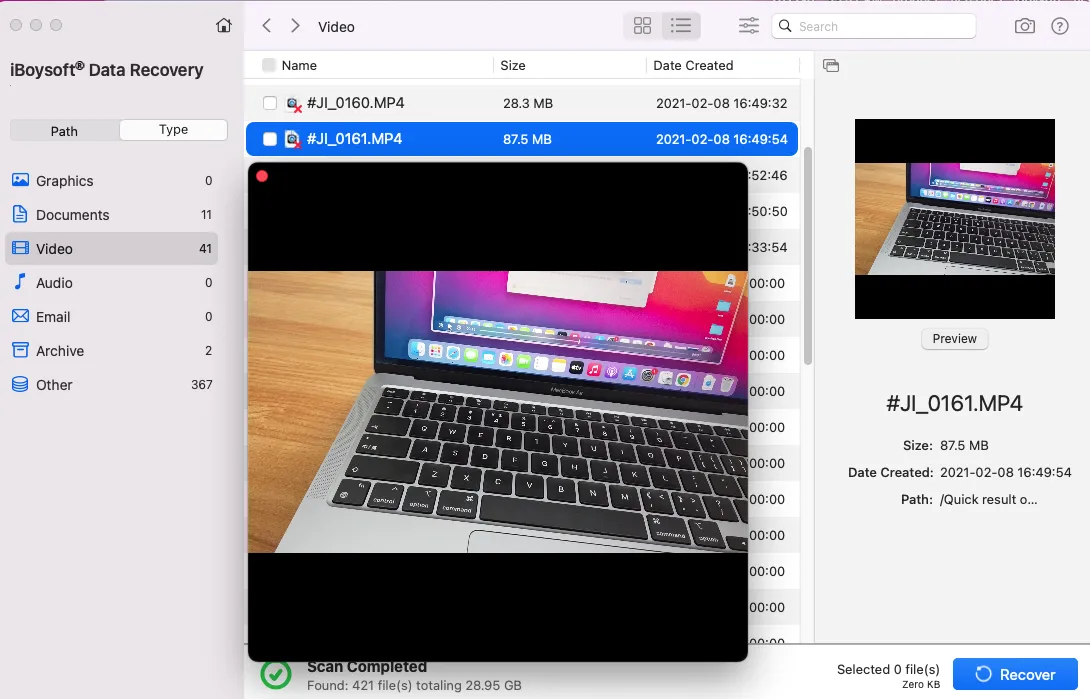
Erase Mac & reinstall macOS
Now, you can start to erase your Mac and reinstall macOS.
- Enter macOS Recovery mode.
- Select Disk Utility.
- Choose the Macintosh HD or macOS volume.
- Click Erase on the toolbar.
- On the pop-up, click Erase. If you see the Erase Volume Group button, click it instead.
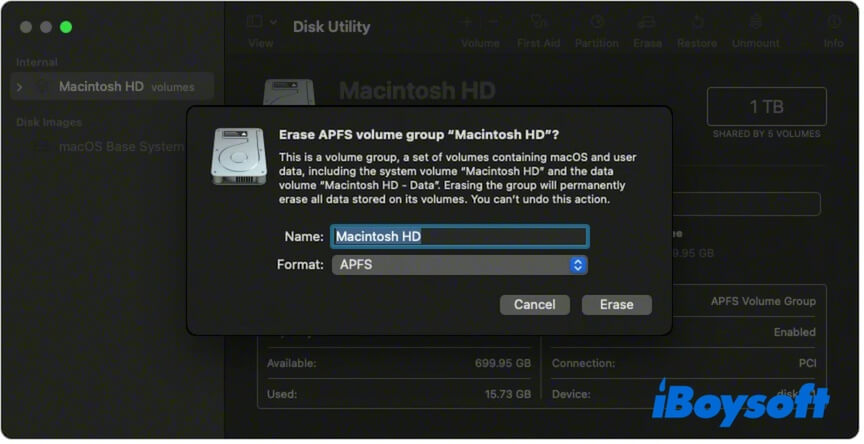
- Enter your admin password if asked.
- Wait for your Mac to be erased.
- Back to the utilities window.
- Choose Reinstall macOS.
- Follow the on-screen guide to install macOS.
- Restart your Mac to normal mode.
Now, you can connect your external hard drive and restore your files to your Mac.
Note: If your Mac is a MacBook Air or Pro with a T2-secured chip and has the FileVault enabled, don't use Boot Camp Assistant to install Windows on it anymore. Or else, your Mac will fail to switch from Windows back to Mac again and won't boot up properly. Instead, you can use Boot Camp Assistant to create a bootable Windows USB drive.
If you think this post helps you fix the macOS and Windows switching issue on your Mac, share it with others.
