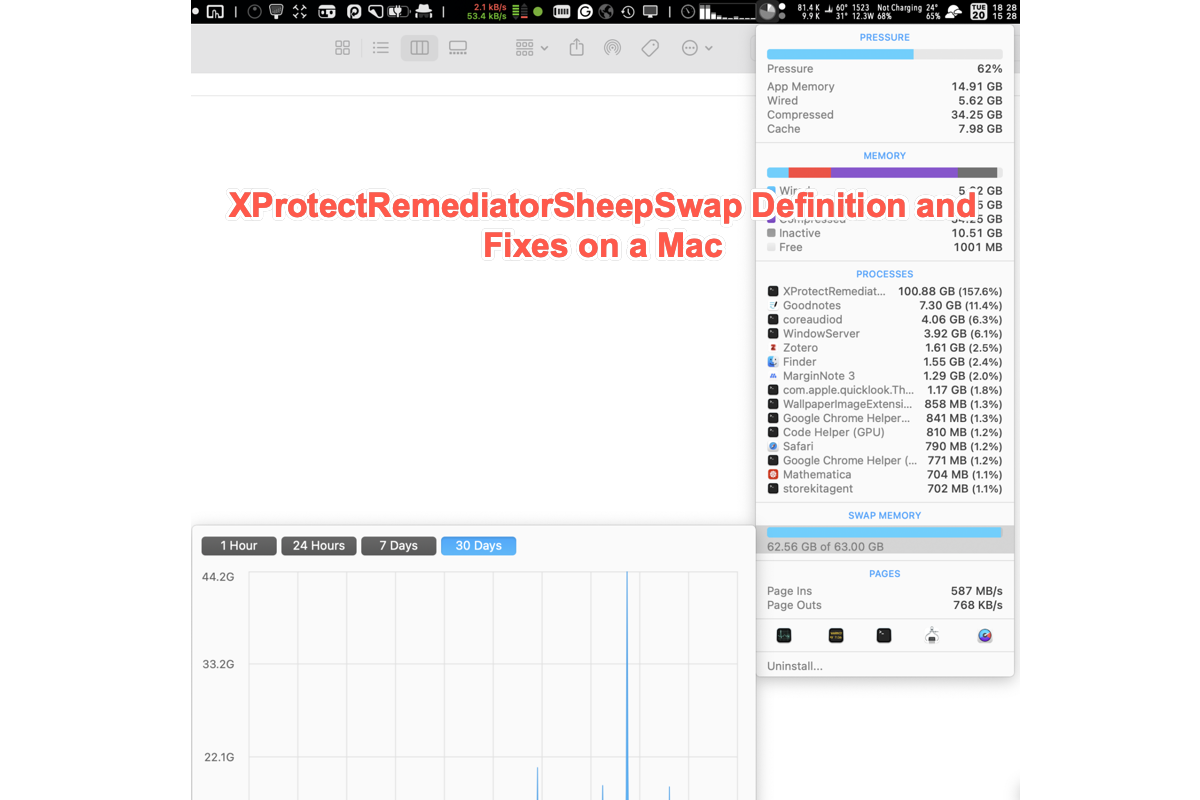
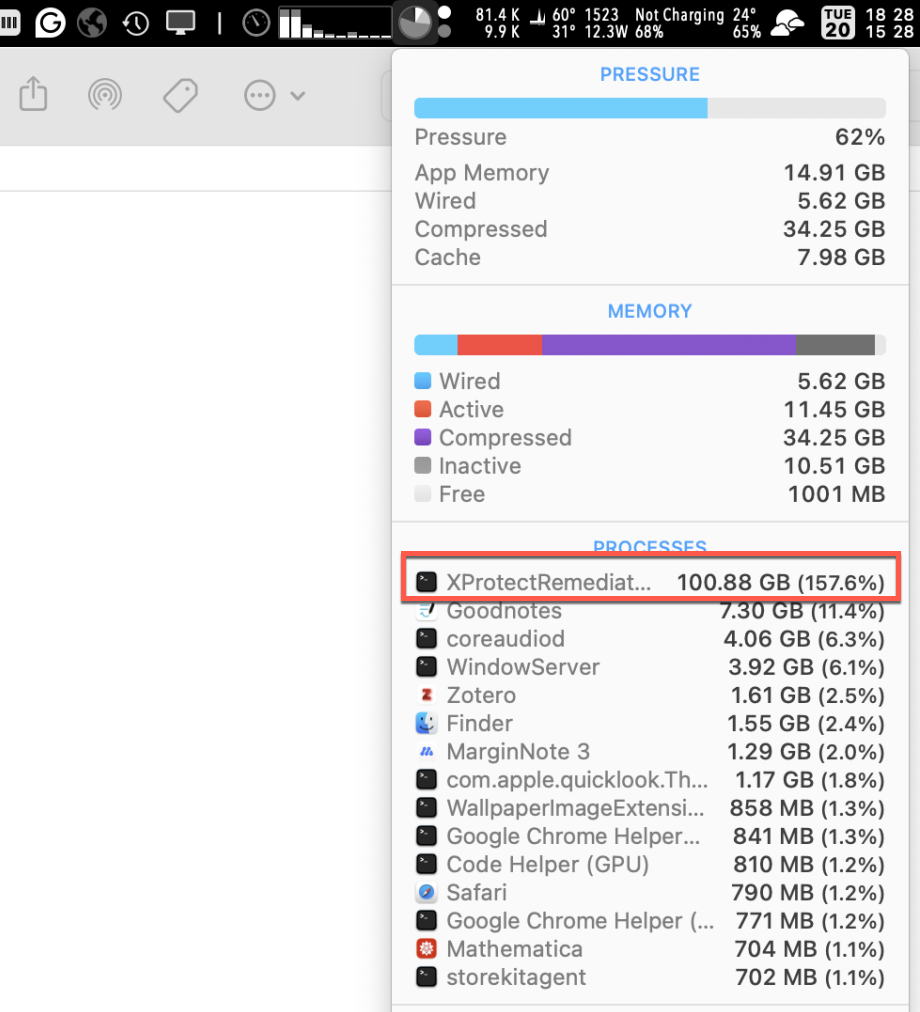
Over the last couple of days, my computer has periodically ground to a halt. The culprit appears to be XProtectRemediatorSheepSwap – which uses anywhere between 30 to 40 GB of memory! (I only have 16GB, so it's using lots of swaps). The only thing that helps is rebooting, but even that's only proved temporarily effective so far, as it begins to happen again after some usage. The other thing I noticed is that it's spamming my console with thousands of these logs:
default 05:24:09.614543-0800 XProtectRemediatorSheepSwap [0x7fb5e20c8de0] activating connection: mach=true listener=false peer=false name=com.apple.bird
default 05:24:09.614682-0800 XProtectRemediatorSheepSwap [0x7fb5e20c8de0] failed to do a bootstrap look-up: xpc_error=[3: No such process]
default 05:24:09.614711-0800 XProtectRemediatorSheepSwap [0x7fb5e20c8de0] invalidated after a failed init
error 05:24:09.614851-0800 XProtectRemediatorSheepSwap Error querying cloud docs root URL: <private>what's going on? is there anything I can do? Any suggestions and advice would be loved!
Are you familiar with these logs and XProtectPluginService or XProtectRemediatorSheepSwap programs? If you are, you have come to the right place. Today, we'll walk you through what XProtectRemediatorSheepSwap is and how to fix this abnormal program on your device in this article. Just read on!
What is XProtectRemediatorSheepSwap on your Mac?
Before we go into the XProtectRemediatorSheepSwap procedure, let's first study XPortect and XProtect Remediator, since the XProtectRemediatorSheepSwap program is derived from both of these items.
XPortect is a built-in security feature introduced in 2009 with macOS Snow Leopard. As an advanced antivirus technology, it defends against malware threats by a signature-based method. While XProtect Remediator is a lot more advanced technology released in macOS 12.3 in 2022, it aims to check your Mac regularly for viruses and malware. Both two features do not influence Mac's performance and speed at all.
XProtectRemediatorSheepSwap refers to a program that is busy scanning your Mac computer for any hiding viruses or malware. It's verified that if you have installed apps from untrusted sources on your device, the XProtectRemediatorSheepSwap will start to check around for potential or suspicious bugs or quirks automatically.
However, the reason why XProtectRemediatorSheepSwap creates such a large memory leak or consumes the majority of RAM on a Mac is yet unknown. Set aside the reasons for the moment and focus on how to stop it so that your Mac may resume normal operation.
If you think this article is informative, why not share it with more people on your social platform?
How to fix XProtectRemediatorSheepSwap on your Mac?
XProtectRemediatorSheepSwap consumes a large amount of RAM, causing your computer to occasionally crash. We attempt to prevent it from interfering with your routine business operations by providing efficient solutions.
Keep in mind that not every option will work in your situation; simply move on to the next one if the current one fails to resolve XProtectRemediatorSheepSwap on Mac.
Solution 1: Kill XProtectRemediatorSheepSwap in Activity Monitor
At the moment you find a program or app making trouble, the simplest way to make it disappear is to kill it in Activity Monitor. The Mac XProtectRemediatorSheepSwap is not an exception, too.
Step 1: Launch Activity Monitor on your computer via Spotlight Search.
Step 2: Locate the Mac XProtectRemediatorSheepSwap process and select it from the running programs list.
Step 3: Click the X button on the top menu to force quit it from your Mac computer.
Solution 2: Reboot your Mac computer
Another simple way to cut this abnormal XProtectRemediatorSheepSwap program is to restart your Mac computer. A device reboot stops any strange errors or bugs and gets the device ready for the following work routine, so it does in fixing the XProtectRemediatorSheepSwap on Mac.
Click the Apple Menu > Restart > wait for your device to reboot. After that, check if this annoying code comes back.

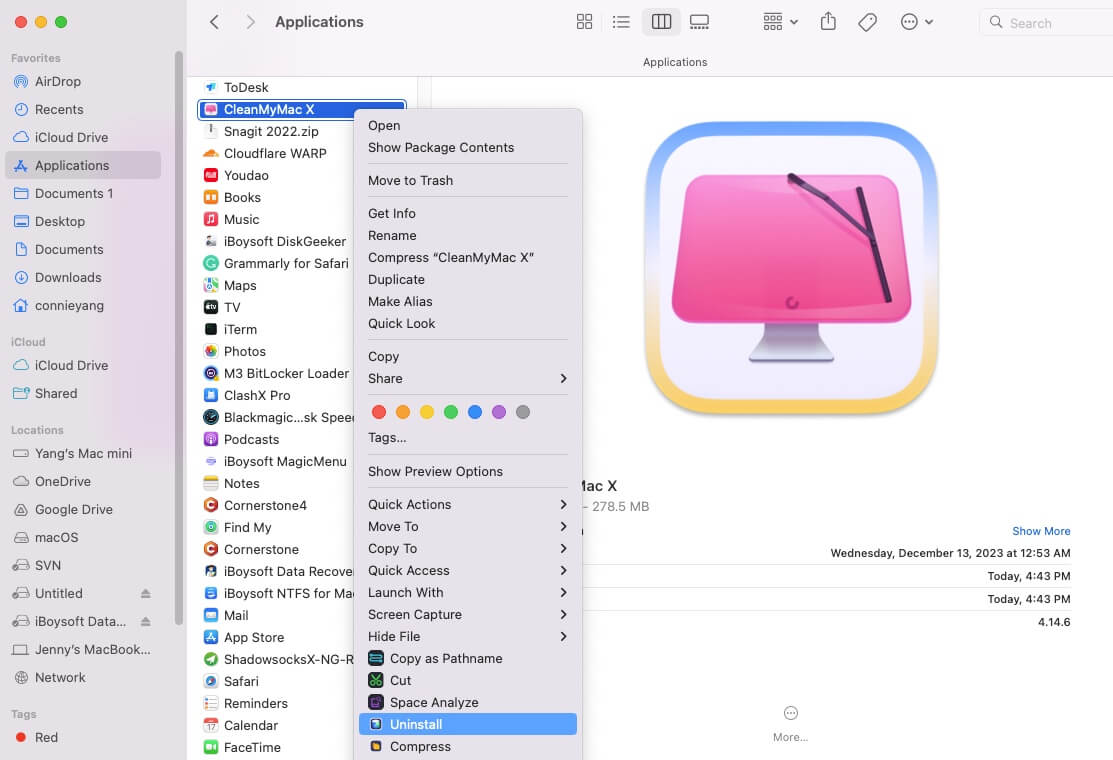
Solution 3: Remove CleanMyMac
It has been investigated that apps like Cleaners, Optimizers, AntiVirus, or VPNs would lead to the XProtectRemediatorSheepSwap scan your Mac all day long, and CleanMyMac is a typical example.
These app installs possibly cause this process to show up, eating up bulks of memory and interrupting your normal work. If you do install them on your computer, you're recommended to remove CleanMyMac and other apps at once!
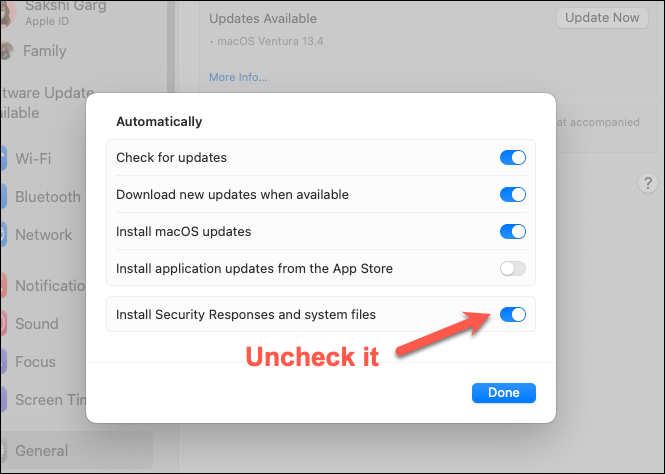
Solution 4: Disable "Install Security Responses and system files" on Mac
Disabling the "Install Security Responses and System Files" will disable /Library/Apple/System/Library/CoreServices/XProtect.app, which helps in fixing the XProtectRemediatorSheepSwap process on your Mac, and you can give it a try:
Click Apple Menu > System Settings > General > Software Updates > Automatic Updates > uncheck Install Security Responses and system files.
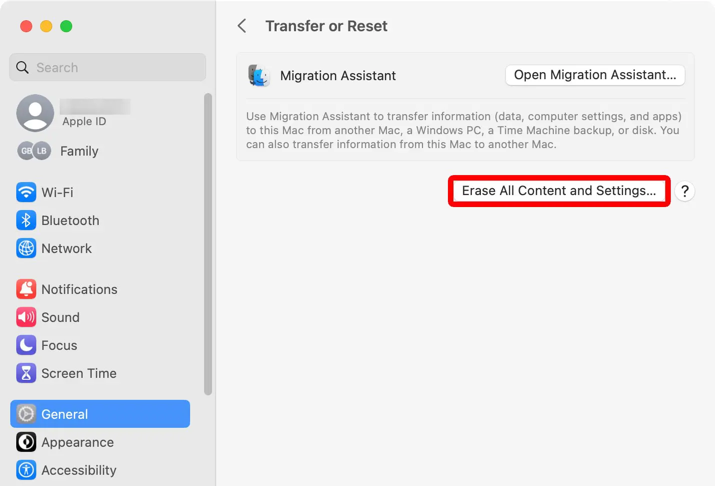
Solution 5: Factory reset your Mac
The final solution you can count on is to factory reset your Mac computer. A clean install would remove any legacy files carried over previously installed that could be causing problems with the scanning of your files by XProtect.
Step 1: Before factory resetting your Mac, please BACK UP your computer via Time Machine. A second backup would be great!
Step 2: System Settings > General >Transfer or Reset > Erase All Content and Settings.
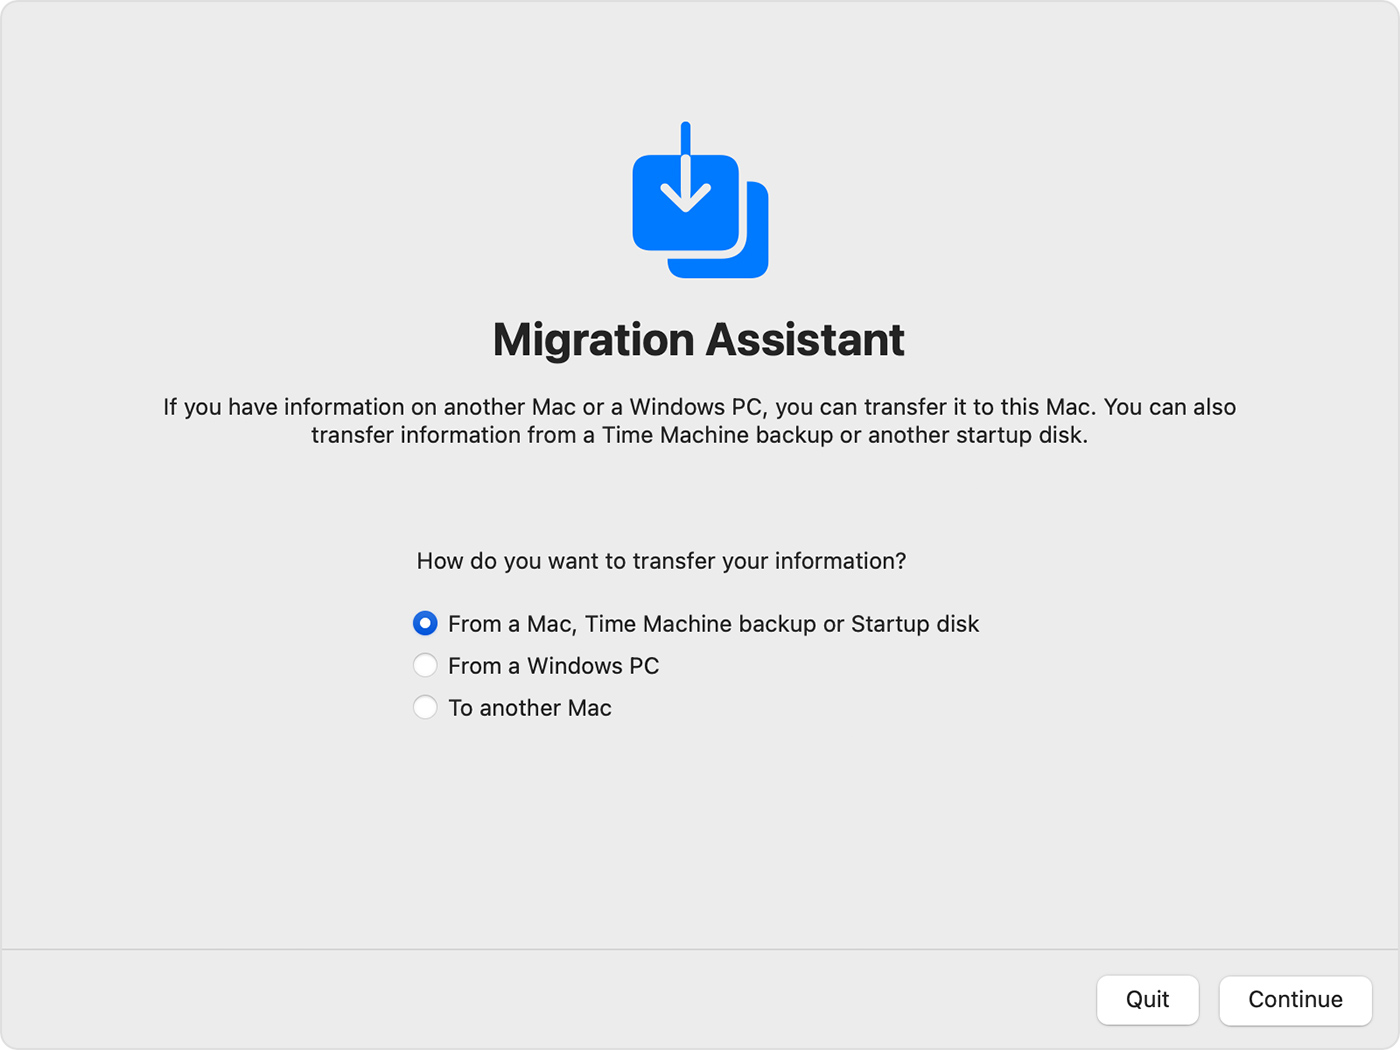
Step 3: When asked, please choose From a Mac, Time Machine backup or Startup disk, and then select the TM backup drive you used.
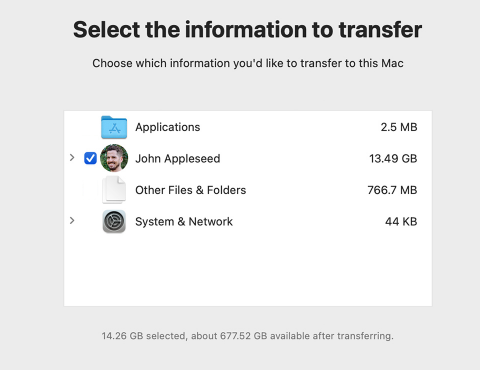
Step 4: Select to migrate ONLY the user accounts. Do not choose Applications, Other Files & Folders, and System & Network, or you'll just be back to where you started.
Step 5: Follow the on-screen wizard to complete the following steps and you're all set!

Some people have reported experiencing issues on macOS Ventura suck as the 'knowledgeconstructiond' error pops up with no reason. This article guides you to know this error and fix it.