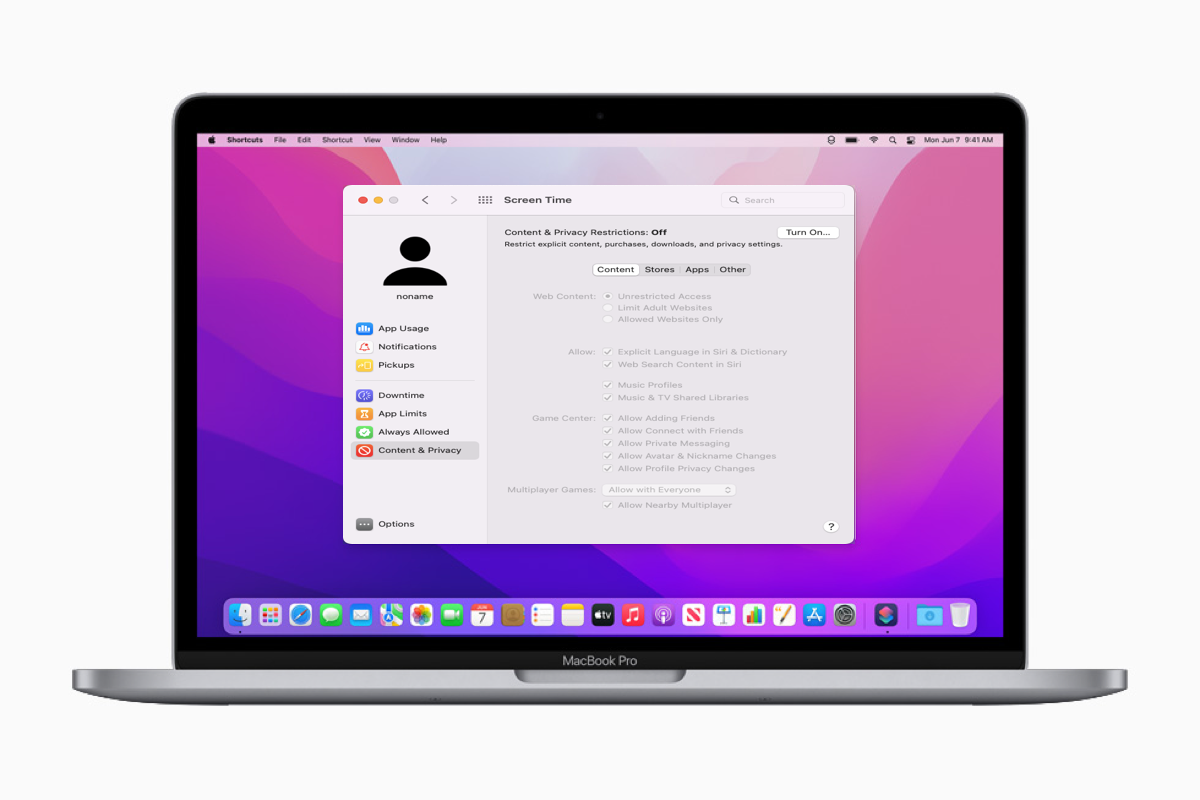
What is Screen Time on Mac?
If you're looking for a tool that enables you to monitor the screen time on a Mac, display information on the usage of applications and websites, and set some permissions and limitations of specified applications and websites, Screen Time fits you the most.
Screen Time feature is developed by Apple, which is able to count the screen time on a digital device, record applications and websites in use, display the notifications received, and control the time spent on any activity.
In a nutshell, Screen Time is an excellent helper, especially for those who want to know their screen behaviors and for parents or guardians to know their children's use of digital devices.
What can you do with Screen Time on Mac?
Specifically, by applying the Screen Time feature, you can see what applications are used in the App Usage tab, what notifications the device received in the Notifications tab, and how many times the device is picked up in the Pickups tab.
Simultaneously, you're granted to create some settings in the Downtime, App Limits, Always Allowed, and Content & Privacy tabs. If one of your children wants more time to have fun on a digital device, you can allow it at a specific time or not via this wonderful tool.
If you have more than one child in your family, you can create individual, age-appropriate limits and rules to monitor their use conditions on Mac. Meanwhile, Screen Time settings are synced with all devices in the same Apple ID. Therefore, you needn't repeat the setting work anymore.
Share this post to let more people know about it!
How to use Screen Time on Mac?
Since you have known the benefits of Screen Time, now it's time for you to experience these benefits.
How to turn on/off Screen Time on Mac?
If you are a noob to Mac, you may never see Screen Time on your Mac, for it is really oblivious. Anyhow, it is not a big thing for learning how to see Screen Time on Mac is just a piece of cake.
- Type Screen time in the Spotlight Search box and launch it.
- Click Options in the lower left corner of the home window.
- Tick the Turn On/Off button on the upper right corner of the window.
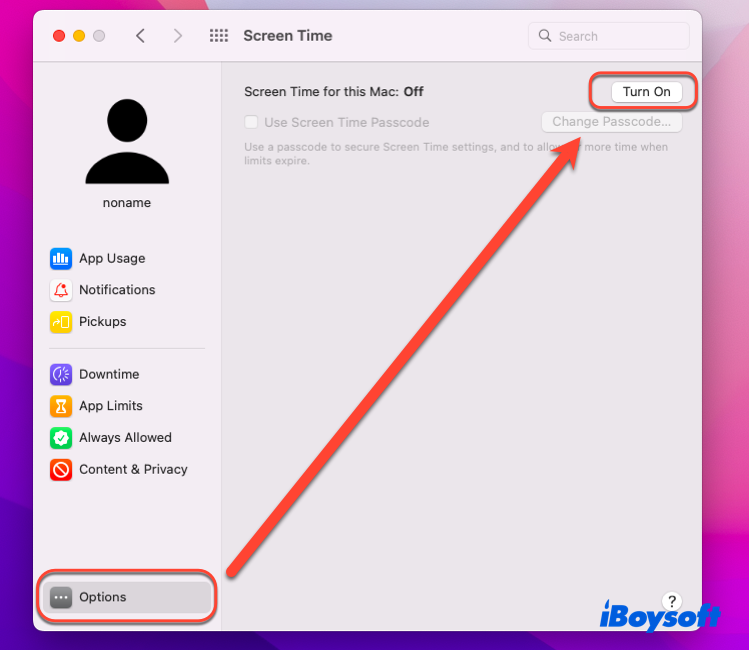
After you have learned how to see Screen Time on Mac, more instructions are presented for further usage.
How to share Screen Time across devices
Thanks to the invention of Apple IP, the Screen Time feature allows you to enjoy the benefits of different Apple devices with the same Apple ID, such as the iPhone, iPad, and iPod touch. The steps to enable this function is easy:
- Click the Apple menu, and select System Preferences in the dropdown menu.
- Locate Screen Time and launch it.
- Click Options on the lower right corner of the home window.
- Tick the Share across devices button.
After you enable this function, other devices will monitor the usage and time of specific apps and websites installed on them.
How to create a Screen Time passcode on Mac?
If you don't want others to change the Screen Time settings on Mac, creating a Screen Time passcode is a must. Here are how to do it:
- Click the Apple menu, and select System Preferences in the dropdown menu.
- Locate Screen Time and launch it.
- Click Options on the lower right corner of the home window.
- Tick Use Screen Time Passcode.
- You'll be prompted to convert your account to a standard user account.
- You are highly recommended to tick Don't allow this user to administer this computer and create a new user account to be the administrator, in case the account you are using has the privileges to change Screen Time settings.
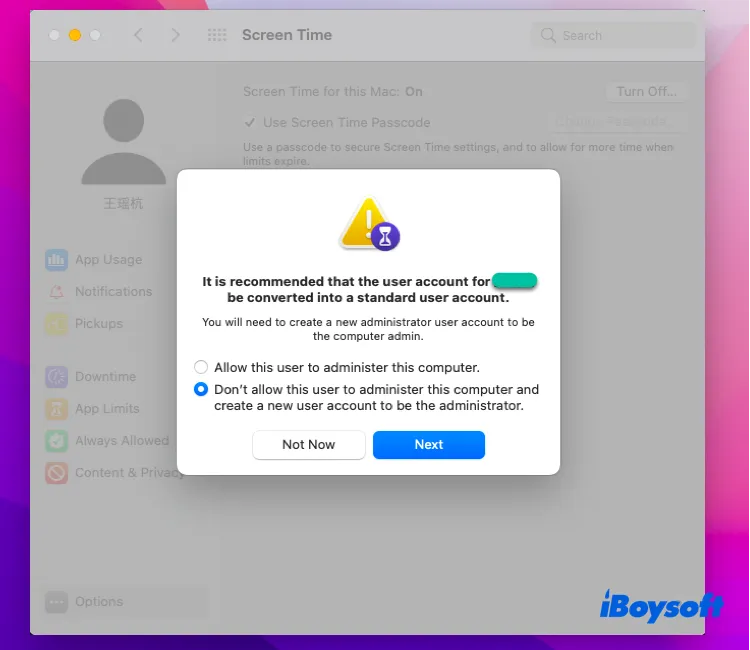
- Enter the password of the admin account that you're using, and click Modify Configuration button.
- Fill in the information of the new user account, and then hit Create User button.
- You'll be prompted to enter the Screen Time passcode, and only numbers are available, while letters are not.
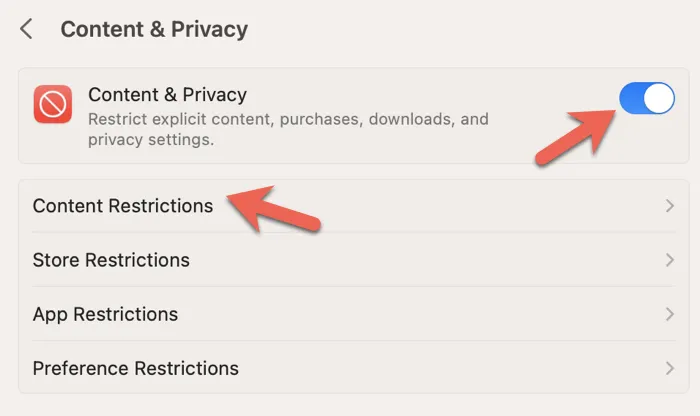
Mac computers provide several ways to help you create a backlist of websites, including blocking websites by enabling Parental Controls in Screen Time.
Last but not least, you will be asked to enter your Apple ID and password to recuse yourself from forgetting the Screen Time passcode.
After you create the Screen Time passcode, it's not possible to change the Screen Time settings, including turning the Screen Time function off on Mac.
Forget the Screen Time passcode on Mac: what to do?
If you forget the passcode, it's easy to change the passcode of Screen Time since you have the password of the new user account:
- Click the Apple menu and select System Preferences.
- Locate Screen Time and launch it, and then click the Options button.
- Tap the Change Passcode button in the home window.
- Click Forget Passcode button in the prompt, and then enter your Apple ID and password.
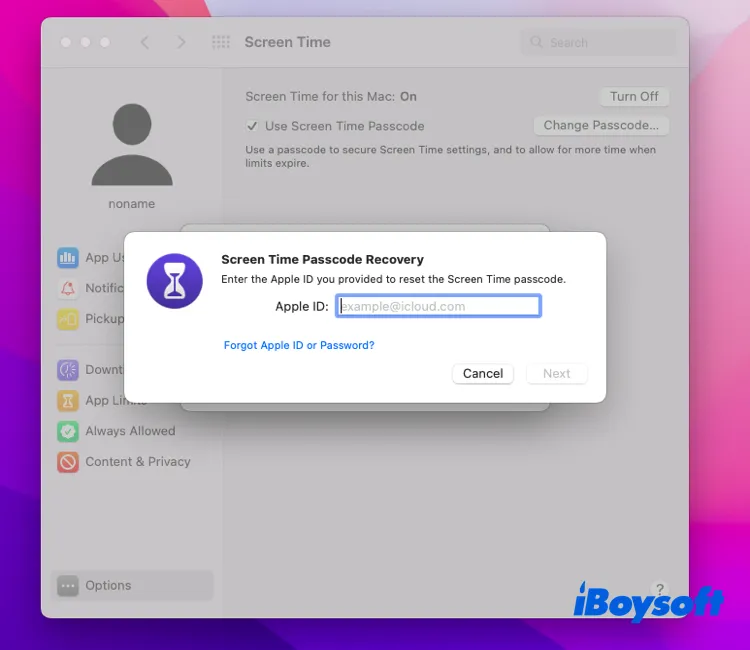
- Hit the Next button, and then you're allowed to enter a new passcode.
Noticeably, if you have ticked the Share across devices button, your new passcode will update on other devices automatically.
Moreover, you are recommended to write down or print the passcode on paper to avoid forgetting again. If you unluckily forget the Apple ID password, you need to find ways to reset it.
Verdict
Screen Time on Apple devices is such powerful software that enables you to know the time and usage of devices, offering you the excellent monitor function of the usage conditions and screen behaviors of digital devices.
This post introduces you the Screen Time from an all-around standpoint, meanwhile, how to apply this outstanding software and way to fix forgetting Screen Time passcode are included. If you're interested in it, try it now!
Share this post with others right now!
FAQ about Screen Time on Mac
- QHow to bypass Screen Time passcode on Mac?
-
A
There is no possibility to bypass the Screen Time passcode on Mac, unless you have the passcode to turn the Screen Time off.
- QCan I check Screen Time on Mac?
-
A
Yes, you can. Just click the Apple menu > System Preferences > Screen Time. You can know the information provided by App Usage, Notifications, and Pickups. Moreover, you can create or change the settings of the Screen Time.
- QDoes MacBook has Screen Time?
-
A
Of course, MacBook does if it runs macOS Catalina and later macOS versions. Just click the Apple menu > System Preferences > Screen Time > Turn on Screen Time.
