Data security has increasingly become a concern of modern society, Apple provides robust solutions for Mac and iPhone/iPad users to back up their user data and settings, including Time Machine, iCloud, and backing up with Mac/PC, you can choose the specific solution based on your needs.
Time Machine enables you to encrypt the backup while backing internal/external disk and macOS settings. iCloud features Advanced Data Protection to protect the could backup. Similarly, when backing up your iPhone, iPad, and iPod Touch to Mac or PC, you can also encrypt the backup with the option "Encrypt local backup."
Encrypt local backup overview
To free up iPhone storage, reset iPhone without losing data, etc., you can back up iPhone to Mac or PC. It provides a way to restore your iPhone, iPad, and iPod touch data when your devices suffer unexpected situations. But backing up data only creates a copy of your iPhone/iPad, to protect your privacy, you need to encrypt it.
When you turn on the encryption for iPhone/iPad backup on your Mac/PC, it locks and encodes your information with a password, you can only access the encrypted data with the correct password. What's more, encrypted backup contains more info like your saved passwords, Wi-Fi settings, website history, health data, and call history.
How to turn on encrypt local backup
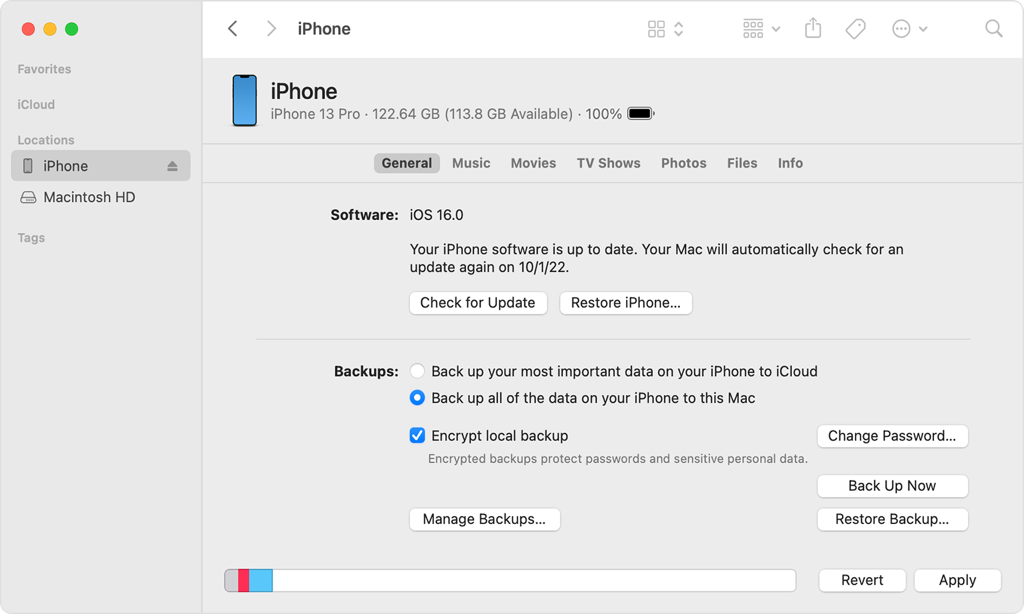
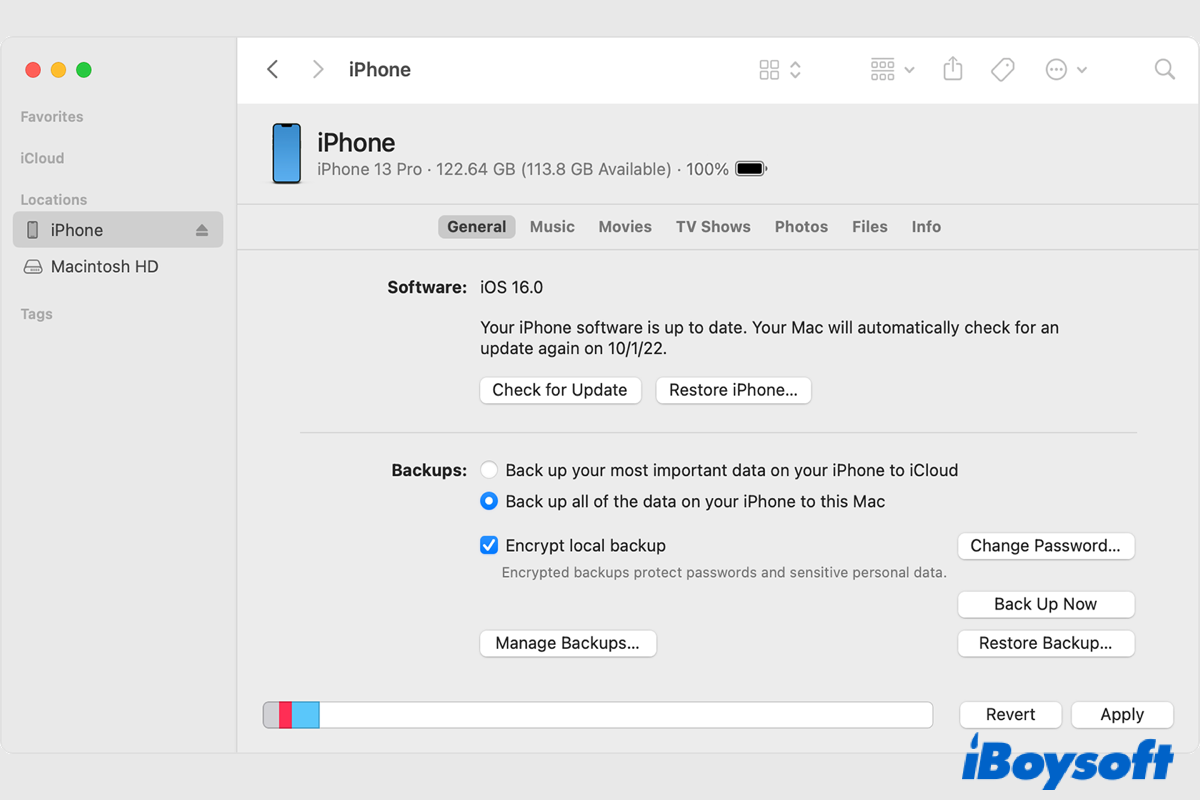
Unlike iCloud, your local backup on Mac/PC is not encrypted. For the first time to back up your iPhone to a computer, you need to enable the password-protected "Encrypt local backup" option in the Finder or iTunes. Your device's backups will thereafter be encrypted automatically.
On a Mac running macOS Catalina 10.15 or later:
- Connect your iPhone/iPad/iPod touch to your Mac with the included cable.
- Open Finder to locate your device on the left sidebar. (iPhone not showing up in Finder?)
- Click the name of your connected device.
- Choose the General tab and check "Encrypt local backup" under Backups.
- Create a password for the encrypted local backup when asked.
- Confirm the password and start the process.

On a PC or Mac running macOS Mojave 10.14 or earlier:
- Connect your iOS/iPadOS devices to the Windows PC.
- Open iTunes and find the icon of your device in the upper-left corner of the window.
- Click the device icon to show up more information.
- Choose the Summary tab and tick the "Encrypt local backup" under Backups.
- Enter a password to protect the local backup when prompted.
- Confirm the password to begin to encrypt the backup.

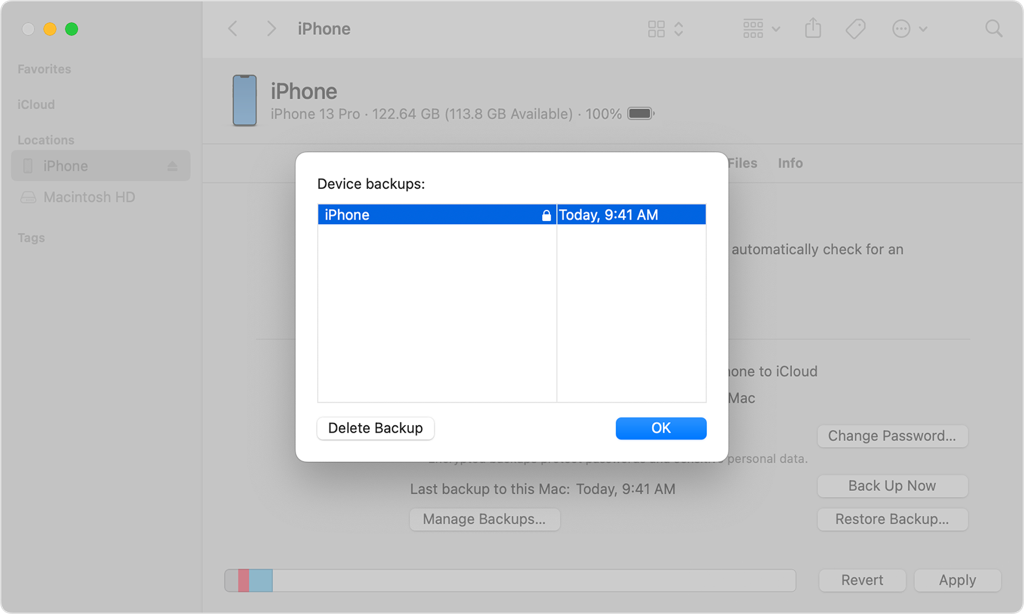
When the process completes, you can check whether the backup has been encrypted successfully. Go to Finder > General > Manage Backups or head to iTunes > Edit > Preferences > Devices, you can see the encrypted backup followed by a lock icon.

How to disable encrypt local backup
To turn off encryption for the backup of your iPhone/iPad/iPod touch, just uncheck the "Encrypt local backup" option, and enter the password as required to decode the backup.
In case you forgot the encrypt local backup password, you can't use the previous backups anymore, but you can disable encrypt local backup to disallow it to encrypt future backups for devices with iOS 11 or later or iPadOS. to reset encrypt local backup password. Here's how:
- On your iPhone/iPad, go to Settings > General > Transfer or Reset [Device].
- Tap Reset and choose Reset All Settings.
- Tap Reset All Settings again to confirm the operation.
- Follow the onscreen steps to complete the process. Your personal information and passwords won't be impacted, it just resets basic settings to the default and removes the encrypted backup password.
Share this information post about backup encryption with more people!
