Xcode is a program developed by Apple for assisting developers to facilitate iOS and Mac app development. Xcode can be utilized to write codes, test programs, and enhance and invent apps.
This software suite offers developers a unified and standard workflow for UI design, coding, testing, debugging, and all others that an Apple-supported app creation required.
Therefore, if you are totally a regular Mac user, you don't need Xcode on your Mac and you can uninstall Xcode on your Mac or MacBook, that's what this post talks about.
Share this tutorial with your friends who have the same problem as you.
Why do you need to uninstall Xcode on Mac/MacBook?
Besides the little scope of application, another disadvantage of Xcode is its large size and the temporary cache files or junks created while running the program, which would occupy much storage for slowing down the speed of Mac.
Using Xcode for an extended period of time creates gigabytes of cached data. The most unpleasant thing about it is that even after work completion, caches still eat up a significant amount of disk space. This is the reason why you can't delete the app just by dragging it into the Trash.
A quick way to uninstall Xcode on Mac/MacBook
To uninstall Xcode usually requires you to move it to the Trash and go over about 9 folders to delete the leftovers associated with it. For people who are still coming around the way to getting started, or are afraid of the risky and complicated process, utilizing a professional clean-up application to get Xcode uninstalled would be a rational choice.
With iBoysoft Magic Menu, you can better control your right-click menu on your Mac/MacBook. You can add customize new file reactions, file transfer, quick access, screen recording shortcuts, and more to your right-click context menu.
What's more, iBoysoft MagicMenu can help you completely uninstall any unwanted third-party apps with three clicks. Simply right-click an app in the Applications folder, select Uninstall, and tap Uninstall again to fully get rid of it.
- Free download and activate iBoysoft MagicMenu.
- Go to Finder > Applications > Xcode.
- Right-click Xcode.
- Click Uninstall in the pop-up menu.
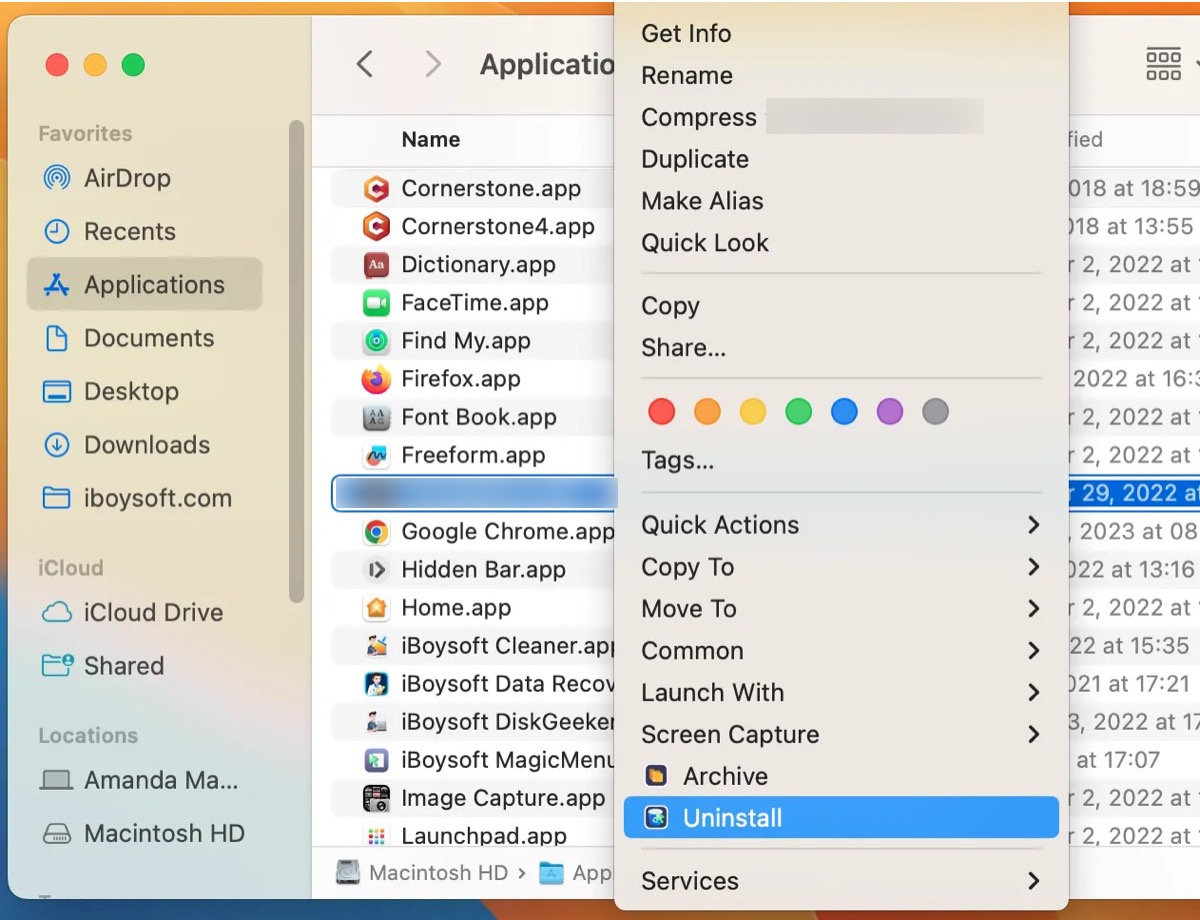
It's the quickest way for you to completely uninstall Xcode, including all the leftovers on Mac/MacBook.
Uninstall Xcode on Mac/MacBook manually
The manipulation for uninstalling the newer version of Xcode, including Xcode 10, 11, or higher from on Mac manually is not a tough job as well. Follow the below steps to uninstall Xcode on your Mac/MacBook manually.
Delete the Xcode app
First, you need to uninstall the app on your Mac/MacBook. It's simple to move it to the trash.
- Turn to Finder > Applications > Xcode.
- Right-click Xcode.
- Click Move to Trash in the pop-up menu.
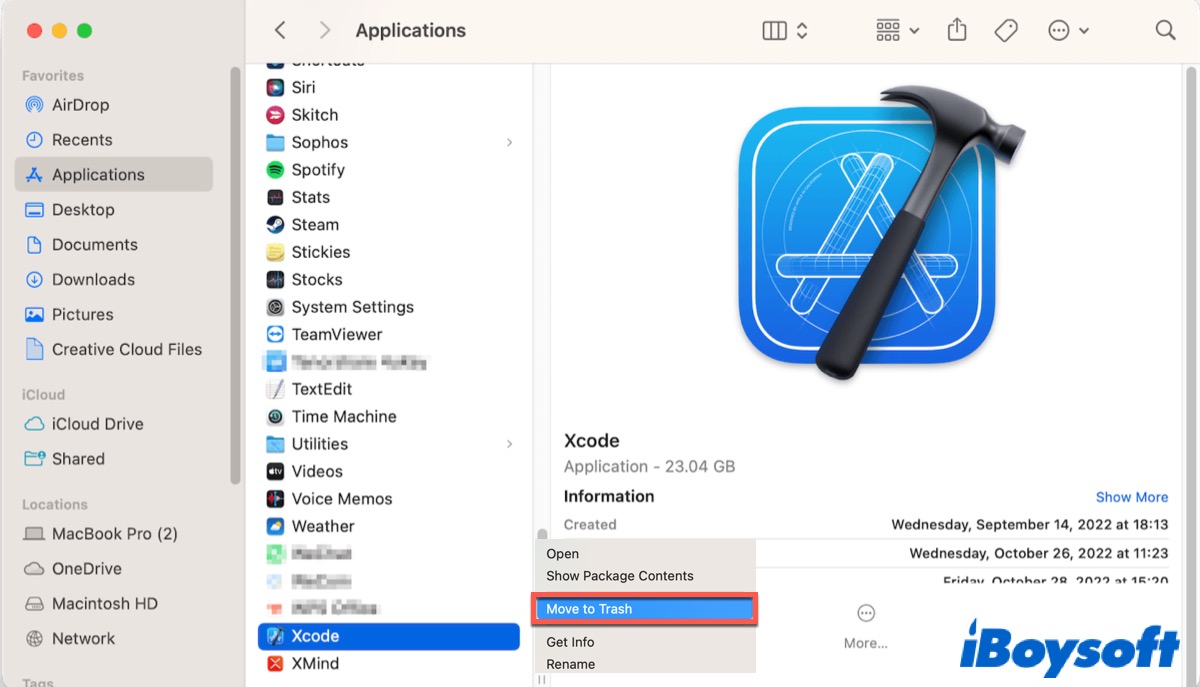
After that, Xcode will disappear on your Mac/MacBook immediately, but there is still something remaining. Proceed to remove them now.
Delete the remaining files
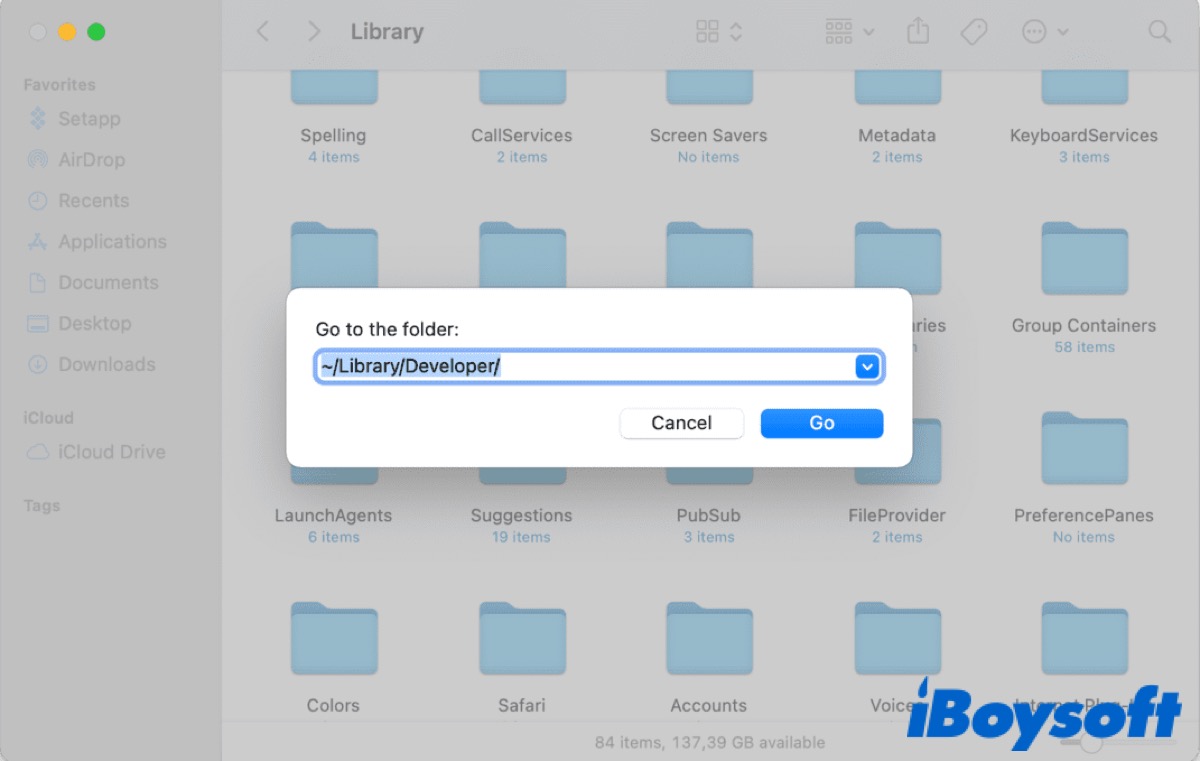
The files of newer Xcode versions are usually consolidated in the ~/Library/Developer/ folder. You may also find support files in the ~/Library/Caches/ folder. If your Mac doesn't delete these files/folders after uninstalling Xcode, you can take the following steps.
- Open Finder.
- Click Go in the menu bar at the left top of your screen.
- Select Go to Folder in the pop-up list. (Or you can press Control + Command + G.)
- Type in ~/Library/Developer/ accessing for the Developer folder.
- Right-click the folder to delete.
Problem solved? Share your happiness with your friends!
Uninstall Xocde in the Terminal
Terminal is a command line interface for the Mac operating system. You can run the command line to completely uninstall Xcode on your Mac/MacBook.
If you had earlier versions of Xcode, like 7 or 8, it would be better to proceed with the uninstallation utilizing Terminal on Mac/MacBook for ensuring a throughout cleaning. The steps are as follows.
- Go to Finder > Applications > Utilities > Terminal and double-click to launch it. (Or you can open it in Launchpad > Other > Terminal.)
- Type in the following command line.
sudo /Developer/Library/uninstall-devtools --mode=all - Enter your admin password to confirm.
- Wait until the scripts finish running and quit Terminal.
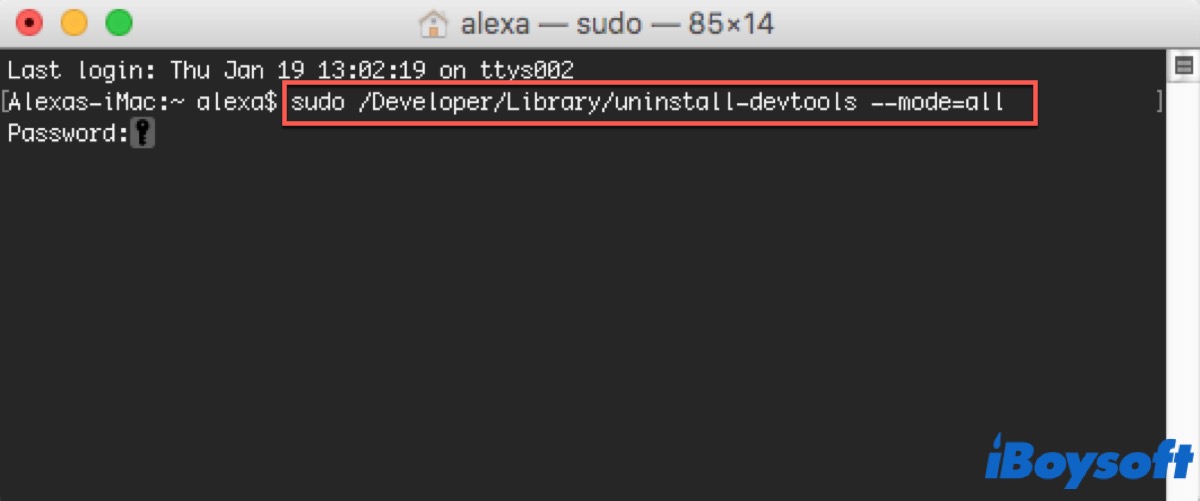
After that, there is one more procedure is to clear the caches. In some versions of the app, they are left even after the purging, so you can check if there are files stored in the following folder.
- Open Finder and do the same operation above to click Go to Folder.
- Type in ~/Library/Caches/com.apple.dt.Xcode in the search box.
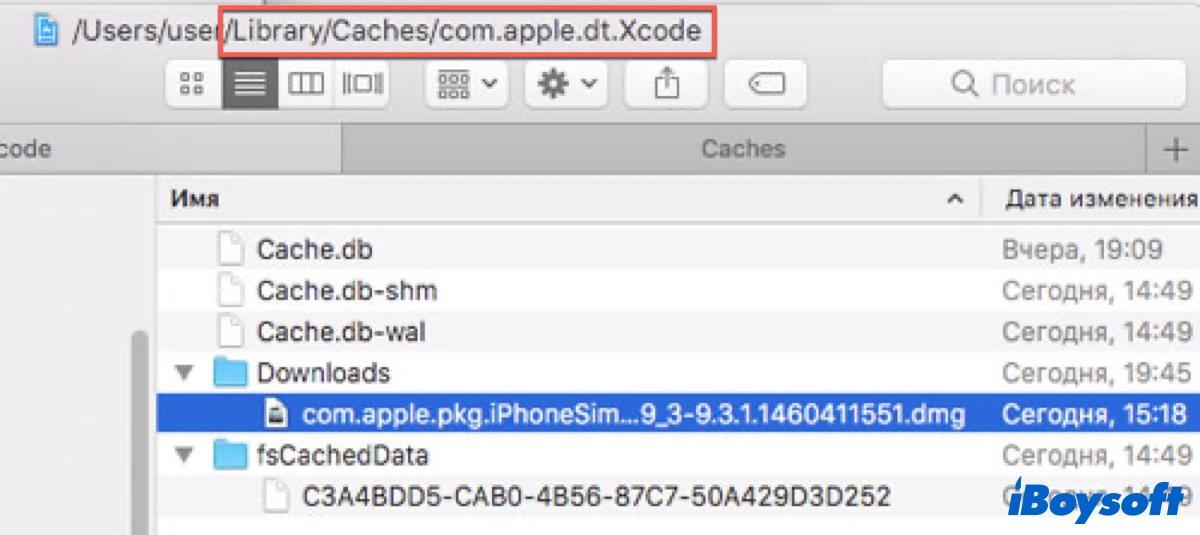
Check if there are any files left, if it is, clean up the folder.
Much appreciate it if you share this post on your social media. And if you don't want to use the language Java in Xcode, you can learn Java macOS uninstall.
FAQ about uninstalling Xcode
- QHow do I uninstall Xcode from my Mac?
-
A
The easiest way to uninstall Xcode from your Mac is to use iBoysoft MagicMenu. And you can also uninstall it manually or in Terminal.
- QIs it safe to delete Xcode from Mac?
-
A
Absolutely yes.
- QDo I really need Xcode on my Mac?
-
A
Apple Xcode is only necessary for program developers. So if you are just a regular Mac user, you can uninstall it to release your memory.
