Transferring files to external media is an excellent approach to ensure that your important data is safe in case of a computer breakdown, hard drive failure, or virus infection. Putting files on an external hard drive also makes it possible to use your data whenever needed. Besides, you can remove the original files after moving them to an external hard drive to make room for more content.
If you need to transfer files from a Windows PC/Laptop to an external hard drive, keep reading this post for different methods, and choose the one that best suits your case.
| Move files from Windows to external hard drive | Best for |
| Clone the whole drive/partition to an external drive | Transfer the whole hard drive/partition files to an external hard drive |
| Manually copy-paste/drag-drop files from PC/Laptop | Move a few files and small in size |
| Save computer files to external disk using CMD | Familiar with computer commands |
Share these different methods for moving files to external hard drives on Windows!
Method 1. Use disk cloning software for Windows - iBoysoft DiskGeeker for Windows
When you need to transfer all the disk/partition files to an external hard drive, especially if there are a lot of items and the total size of them are large, you can consider directly cloning the target disk/partition to your external hard drive to back up those important files, which is time-saving.
All you have to do is pick a reputable and effective disk cloning tool and attach the external disk to your PC/laptop To this end, iBoysoft DiskGeeker for Windows is a good choice which can help you move all of your computer's data to an external hard drive at once.
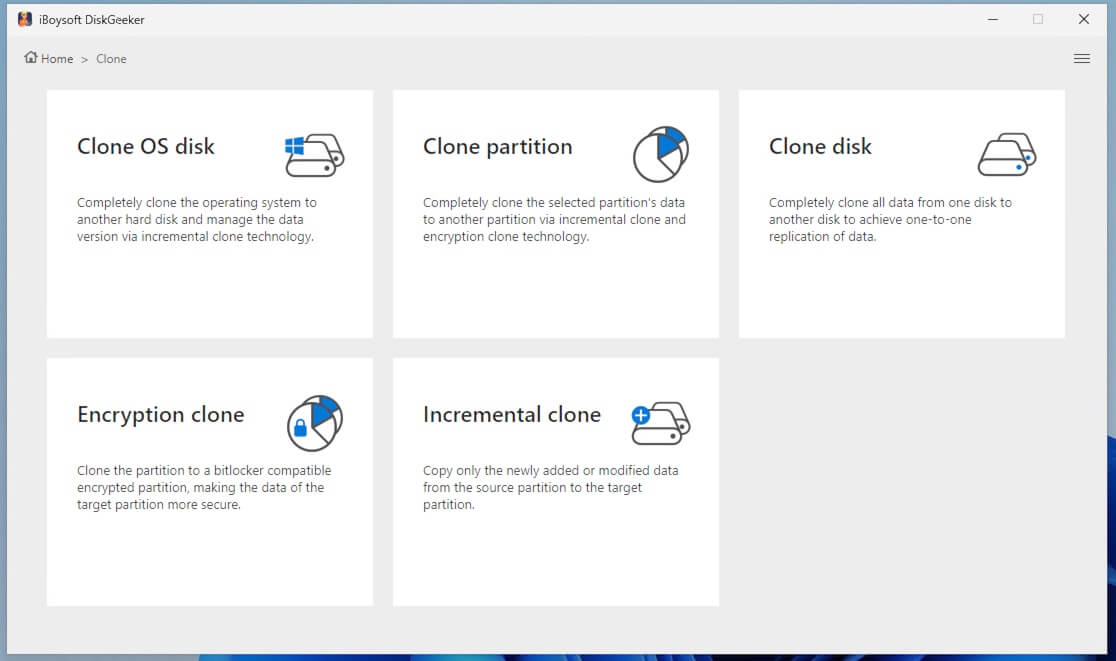
"Clone," a feature of iBoysoft DiskGeeker for Windows, is the process of creating an identical duplicate of a chosen partition or disk (source disk), including the file systems, partitions, settings, personal information, and system files (if any), onto a destination partition or disk. This free disk copying software for Windows has five sections tailored to your needs: clone OS disk, clone partition, clone disk, encryption clone, and incremental clone.
Free download iBoysoft DiskGeeker for Windows!
Here's how to clone the disk/partition to an external hard drive with iBoysoft DiskGeeker for Windows:
- After downloading this disk cloning software, install and open it.
- Connect your external hard drive with a capacity larger than the source disk/partition, and make sure there is no important file on the external drive given that the cloning process will erase the external hard drive.
- On the software main interface, click the Clone module.
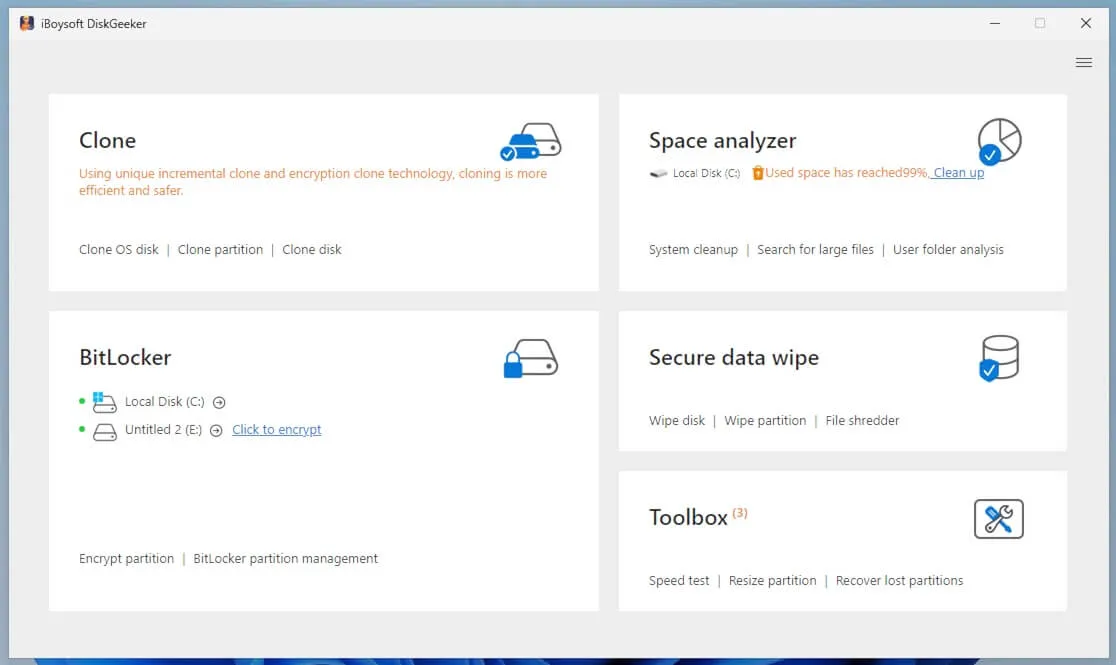
- Select Clone partition or Clone disk based on your needs.
- Follow the on-screen guide to choose the source disk/partition, the one you need to mirror, and tap the Target disk/partition and choose the connected external hard drive.
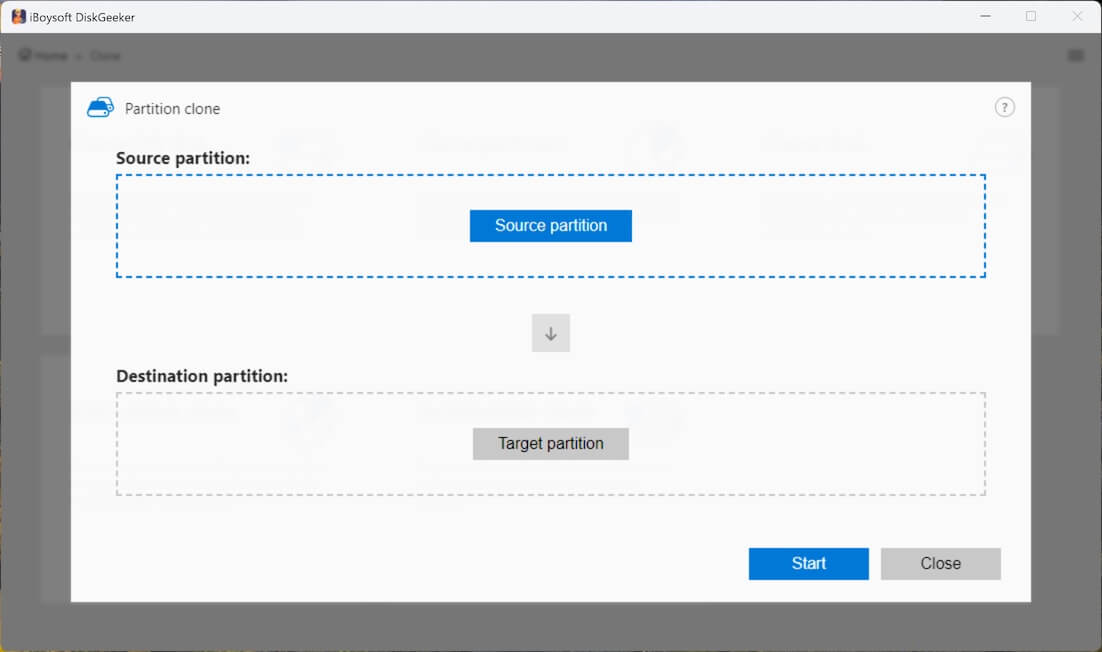
- Click the Start button and tap Confirm, then wait for the process to complete.
After you have created the clone for the PC, you can quickly and directly access the cloned data on the external hard drive on any other computer.
In addition to disk cloning, iBoysoft DiskGeeker for Windows is helpful when you need to analyze and manage disk space, wipe disk, encrypt drive with BitLocker, test disk speed, resize partition, and recover lost partition, just download it if it satisfies your needs!
Method 2. Copy files from computer to external drives on Windows 10/11
The most straightforward way to transfer files between Windows PC/laptop and the external hard drives is the copy-paste method. Simply put, copy all files from the Windows computer's hard drive and paste them to the external drive.
This method is suitable when you need to transfer partial files instead of all files from the Windows hard drive to the external storage, but if the items are large, the process could be time-consuming. If you decide to save computer files to the external hard drive via copying-pasting, you can follow the steps below:
- Open the File Explorer by clicking its icon at the bottom of the desktop.
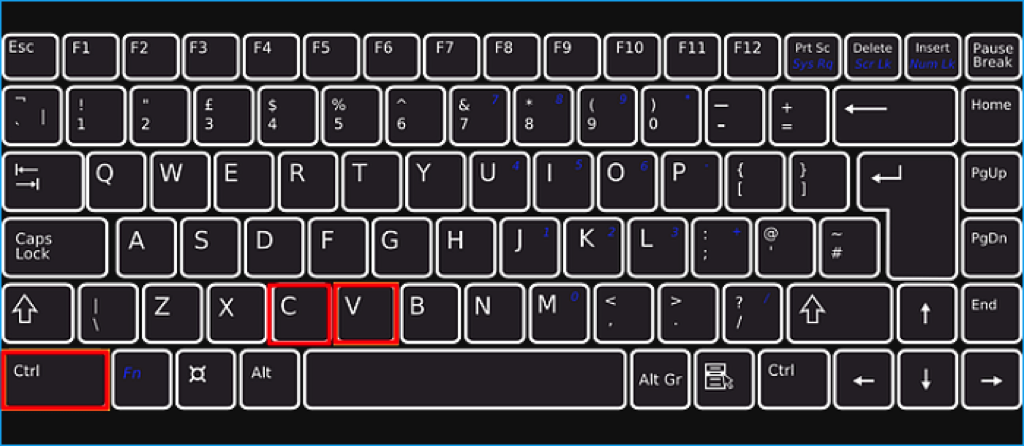
- Go to each partition of the source disk, highlight the folders and files you want to copy, and hit Ctrl+C to copy them all at once.
- Head to This PC and locate the external hard drive, then double-click it.
- Click on any blank space in the external hard drive's window, then, press Ctrl+V to paste the copied folders and files there.
Method 3. Use CMD to Transfer files from PC/Laptop to external hard drive on Windows 10/11
You can move files from a PC or laptop to an external hard drive using CMD if you don't want to utilize third-party software. Compared with the default copy in Command Prompt, the XCOPY tool in Command Prompt is more recommended, because it can copy the folder, all of its contents, and other subfolders, while the default copy does not copy subfolders.
- Press Win + R to open the Command Prompt, then type CMD and press the Shift + Enter keys.
- On the command prompt, type the following command to copy all the files from the C drive to the E drive (E is the drive letter of your external disk): xcopy c:\tally e:\
- In the above command, you can also use options such as /h /c /k /e /r /y to copy hidden files, empty directories, overwrite options, and more: xcopy /h /c /k /e /r /y c:\ e:\
If you find these methods helpful to transfer files from PC to external hard drive on Windows, just share this post!
