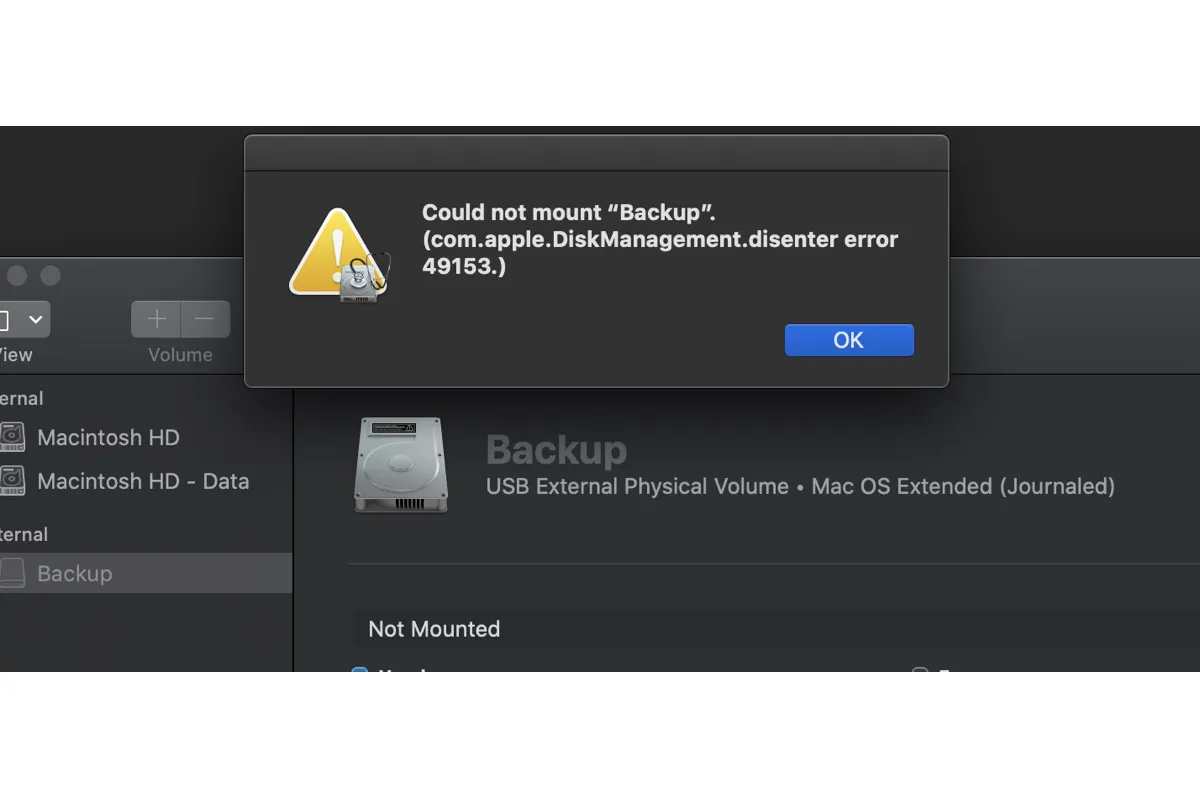
Sometimes, you may receive the error “Could not mount ”my passport".(com.apple.DiskManagement.disenter error 49153)" when manually mounting your external drive in Disk Utility.
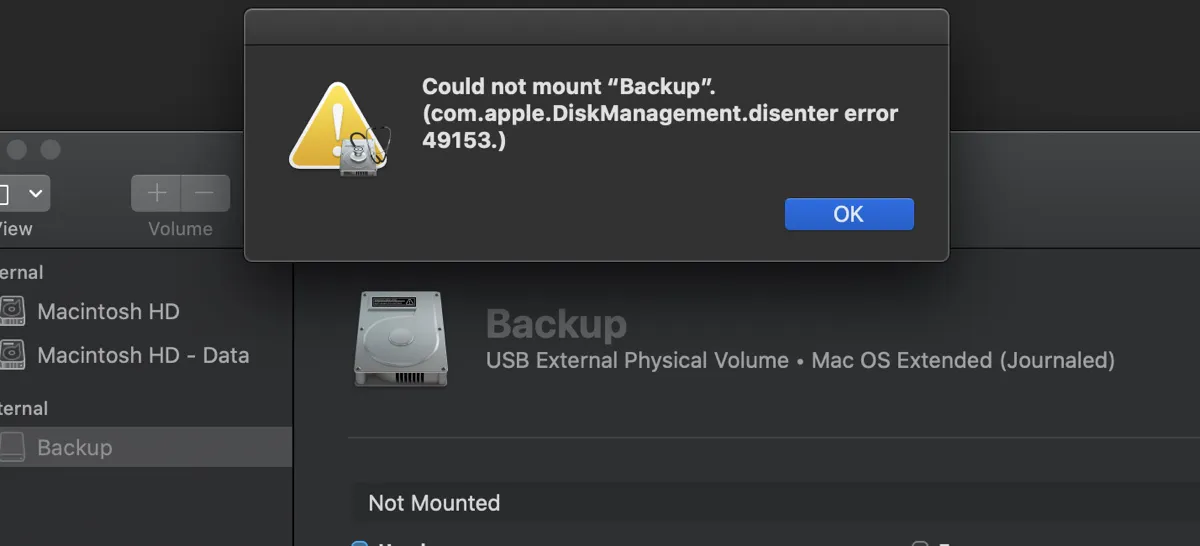
It may occur on macOS Sequoia, macOS Sonoma, Ventura, Monterey, Big Sur, Catalina, and other versions of operating systems. Users have also reported experiencing "com.apple.DiskManagement.disenter error 49153" on different types of storage devices of different brands, such as:
- com.apple.DiskManagement.disenter error 49153 on Seagate external drives
- com.apple.DiskManagement.disenter error 49153 on SanDisk USB flash drives
- com.apple.DiskManagement.disenter error 49153 on WD My Passport Ultra
- com.apple.DiskManagement.disenter error 49153 on Lacie external SSD
Regardless of what brand or type of external drive you're using, you can learn how to fix "Could not mount "disk_name".(com.apple.DiskManagement.disenter error 49153) in this article.
| Fixes to com.apple.DiskManagement.disenter error 49153 | When it works |
| Way 1: Mount your NTFS drive with iBoysoft NTFS for Mac | If the unmountable drive is formatted in NTFS |
| Way 2: Repair your drive in Disk Utility | If the drive is corrupted |
| Way 3: Log out and log back in | For all situations |
| Way 4: Restart your Mac | For all situations |
| Way 5: Restart in Safe Mode | If the problem lies in third-party software |
| Way 6: Quit the fsck process | If the disk was improperly ejected |
| Way 7: Turn off Time Machine automatic backup | If the drive is a Time Machine backup disk |
| Way 8: Try it on another computer | For all situations |
| Way 9: Reformat the unmountable drive | For all situations |
How to recover data when encountering com.apple.DiskManagement.disenter error 49153?
If you don't want to lose your data, you can recover it with iBoysoft Data Recovery for Mac.
It's a professional data recovery tool that enables you to retrieve lost files from unmountable external hard drives, USB flash drives, SD cards, SSDs, etc that are experiencing "Could not mount "drive_name com.apple.DiskManagement.disenter error 49153" on Mac.
It supports both Intel-based and Apple Silicon Macs running Mac OS X 10.11 El Capitan and later. Besides, it allows you to preview found files on the unmountable drive for free.
Take the following steps to recover data that becomes lost or inaccessible due to com.apple.DiskManagement.disenter error 49153:
Step 1: Download and install iBoysoft Data Recovery for Mac for free.
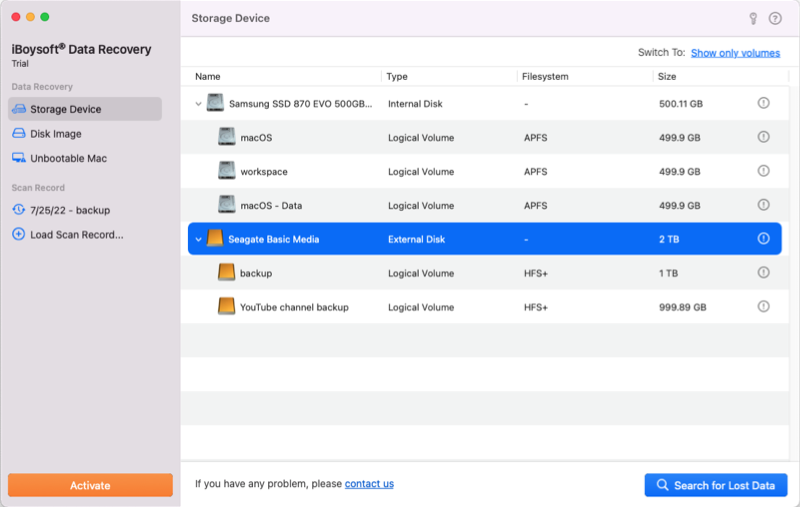
Step 2: Launch the software, select the unmountable drive, and click "Search for Lost Data."
Step 3: After the scan is complete, you can preview files on the drive for free.
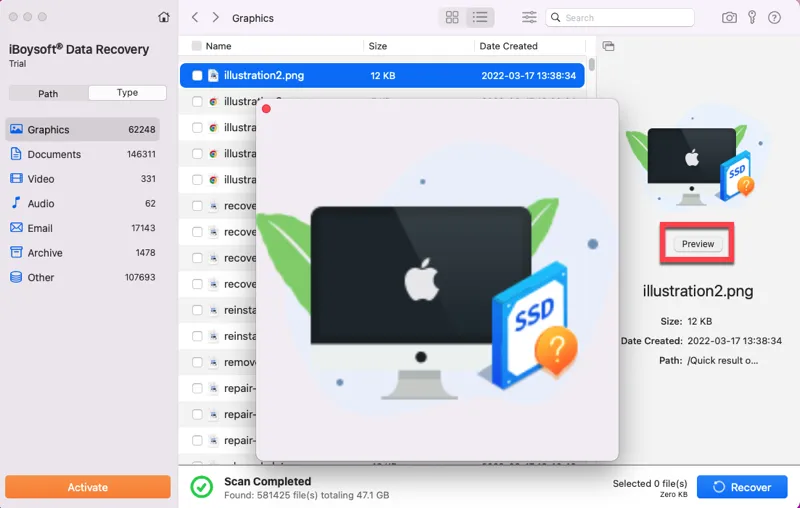
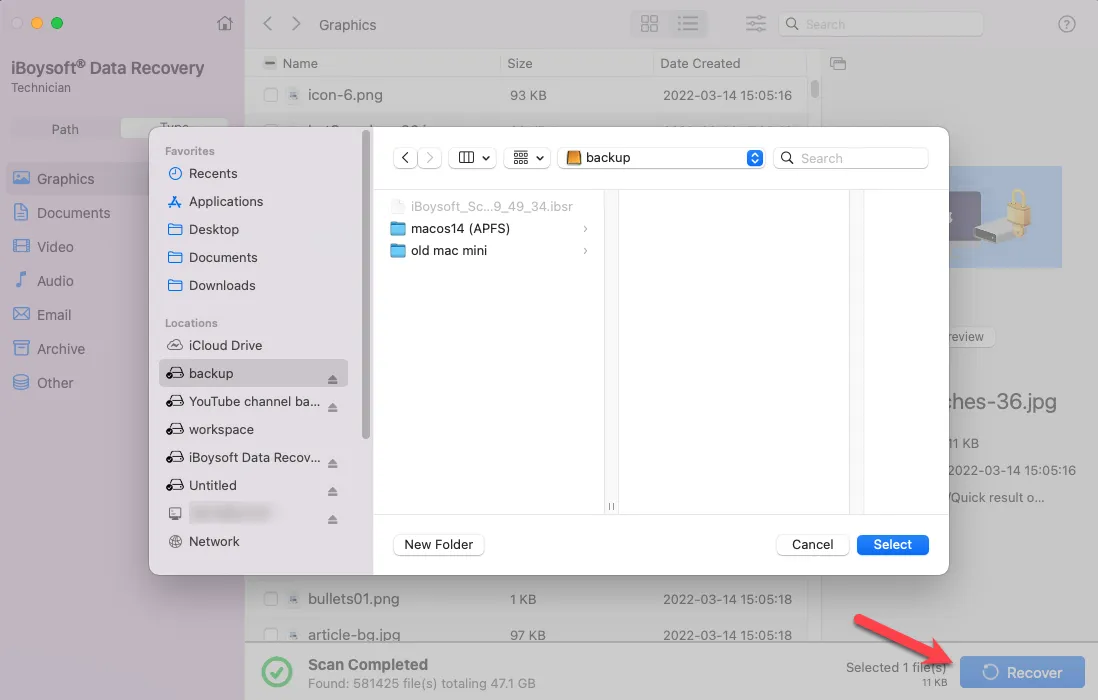
Step 4: Check the box beside the files you want to restore, click the Recover button, and then you can save the recovered file to a different location.
How to fix com.apple.DiskManagement.disenter error 49153 on external drives?
If you're unable to mount your external hard drive, USB flash drive, SSD, SD card, etc due to com.apple.DiskManagement.disenter error 49153, try the following solutions.
Fix com.apple.DiskManagement.disenter error 49153 on external drives/USB drives/flash drives and others:
- Way 1: Mount your NTFS drive with iBoysoft NTFS for Mac
- Way 2: Repair your drive in Disk Utility
- Way 3: Log out and log back in
- Way 4: Restart your Mac
- Way 5: Restart in Safe Mode
- Way 6: Quit the fsck process
- Way 7: Turn off Time Machine automatic backup
- Way 8: Try it on another computer
- Way 9: Reformat the unmountable drive
Way 1: Mount your NTFS drive with iBoysoft NTFS for Mac
The first thing I suggest you try when encountering com.apple.DiskManagement.disenter error 49153 is to mount your NTFS drive with iBoysoft NTFS for Mac.
For instance, your drive may be NTFS-formatted and the current NTFS for Mac software is no longer compatible after updating macOS.
These situations require a professional tool that has the ability to read and write to NTFS drives like iBoysoft NTFS for Mac.
If not, continue with the other solutions below.
Way 2: Repair your drive in Disk Utility
The First Aid feature in Disk Utility can also check and repair errors on your drive and fix issues with file permissions, directory structure, and other disk-related problems that may be rendering "Could not mount com.apple.DiskManagement.disenter error 49153."
So, it's a good idea to try repairing your drive in Disk Utility. But before that, please recover your important data, First Aid may risk your data during repairing the errors process.
- Open Finder and launch Disk Utility from the Applications/Utilities folder.
- Click View > Show All Devices.
- Select the last volume of your drive and click First Aid > Run.
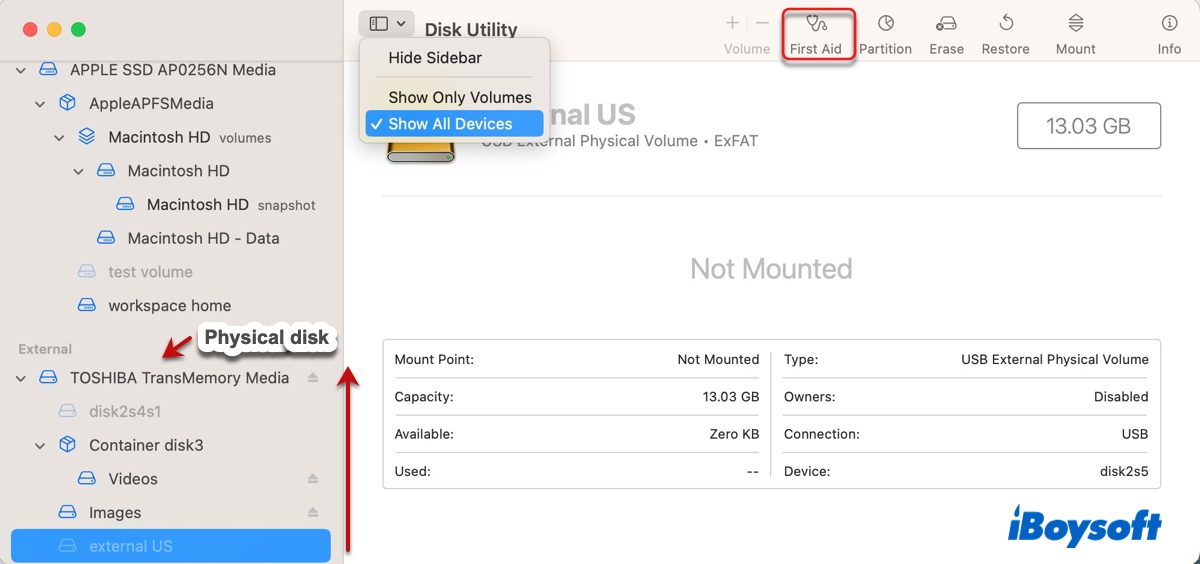
- After the scan is complete, repair the next volume in order until the physical disk is checked.
Once the repair is finished, check if your drive or volume is mounted. If not, select it and click the Mount button again.
Way 3: Log out and log back in
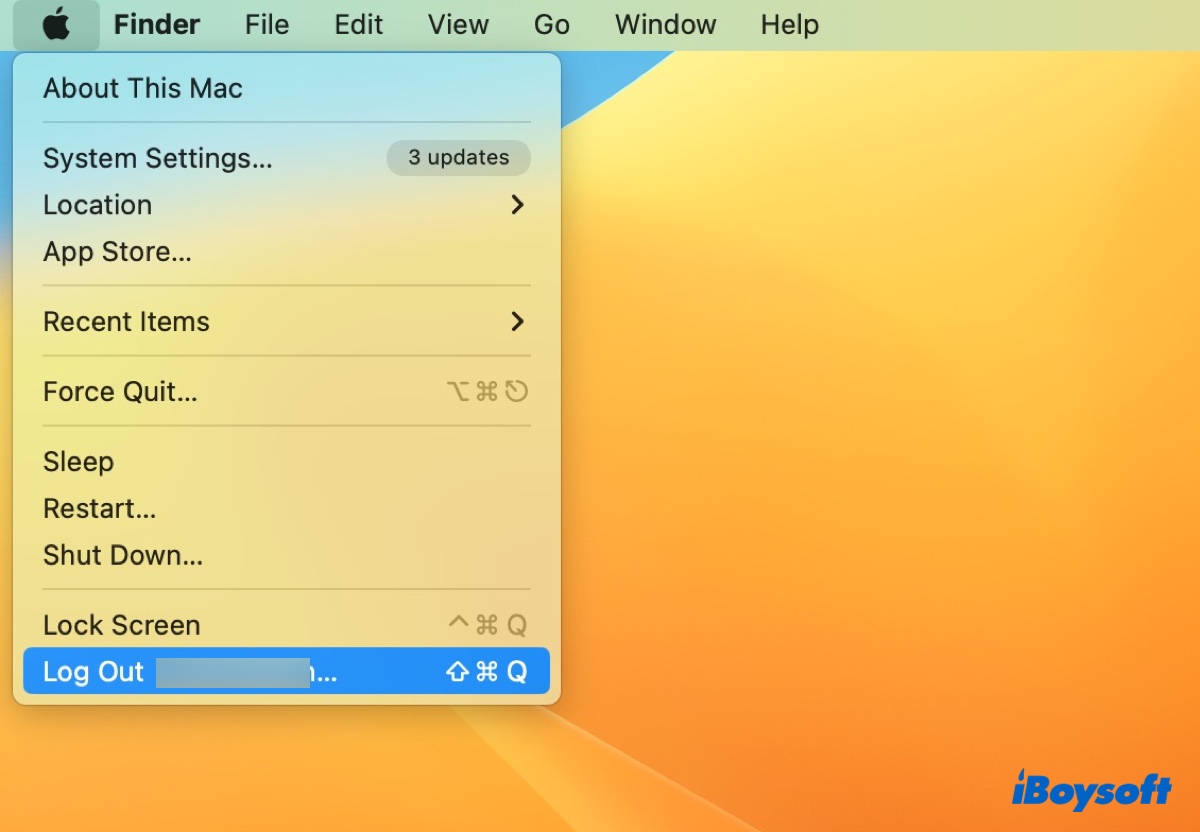
Another way to fix com.apple.DiskManagement.disenter error 49153 on external drives is to log out of your Mac and then log back in. Simply go to the Apple menu and select Log out, then select your account to log in again.
Way 4: Restart your Mac
A reboot can resolve all sorts of minor issues on a Mac. If you haven't tried it already, try rebooting your Mac. Safely eject the unmountable drive and unplug it from your Mac. Then restart your Mac and reconnect the drive.
Way 5: Restart in Safe Mode
Safe Mode is a common troubleshooting mode that can help you rule out third-party software interference, clear system caches, and quickly check your internal hard drive for errors. You can boot into Safe Mode and then restart your Mac normally to see if that mounts your external drive or USB drive.
On an Intel-based Mac:
- Restart your Mac and immediately press and hold the Shift key when the screen turns off.
- Release the key when the login window shows up.
- Log in to your account (May need to do it twice).
On an Apple Silicon (M1 & M2) Mac:
- Shut down your Mac.
- Press and hold the power button on your Mac until seeing "Loading startup options."
- Select the startup volume.
- Hold down the Shift key and click "Continue in Safe Mode."
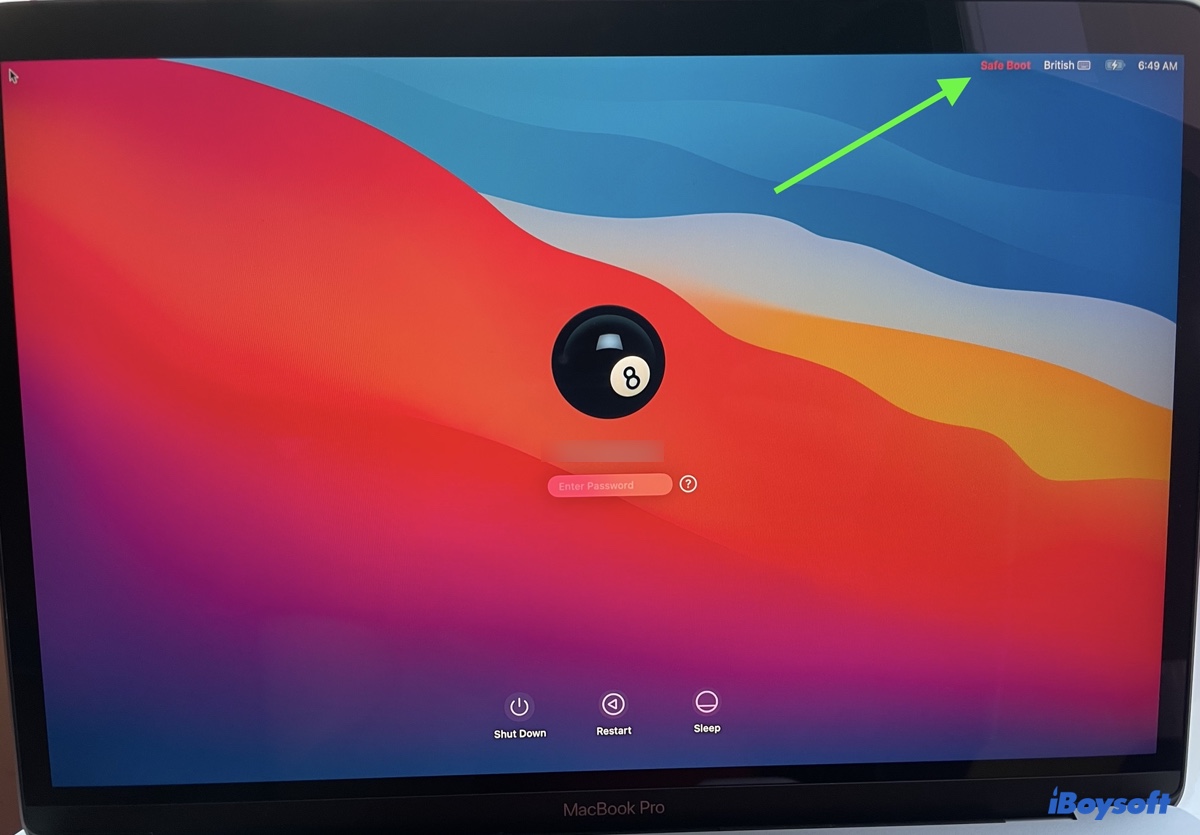
Once in Safe Mode, you should see the words "Safe Boot" in the menu bar. Go to Disk Utility to see if the drive is mounted. If not, click the Apple menu and select Restart to reboot your Mac.
Way 6: Quit the fsck process
If you have unplugged the drive before ejecting it from your Mac, the fsck process may be checking and repairing your drive, rendering it unmountable.
To verify whether the process is running, you can open Activity Monitor and search for it in the search bar. If it is working, you can either wait until it finishes its job (left the drive connected overnight) or quit the process by selecting it, clicking the x button, and selecting Quit.
Way 7: Turn off Time Machine automatic backup
If you receive com.apple.DiskManagement.disenter error 49153 when trying to mount a Time Machine disk, you can turn off Time Machine to fix the problem. Here's how to do it:
On macOS Ventura or later:
- Safely eject your Time Machine drive.
- Open the Apple menu > System Settings.
- Click General > Time Machine.
- Click Options.
- In the "Back up frequency" box, select "Manually."
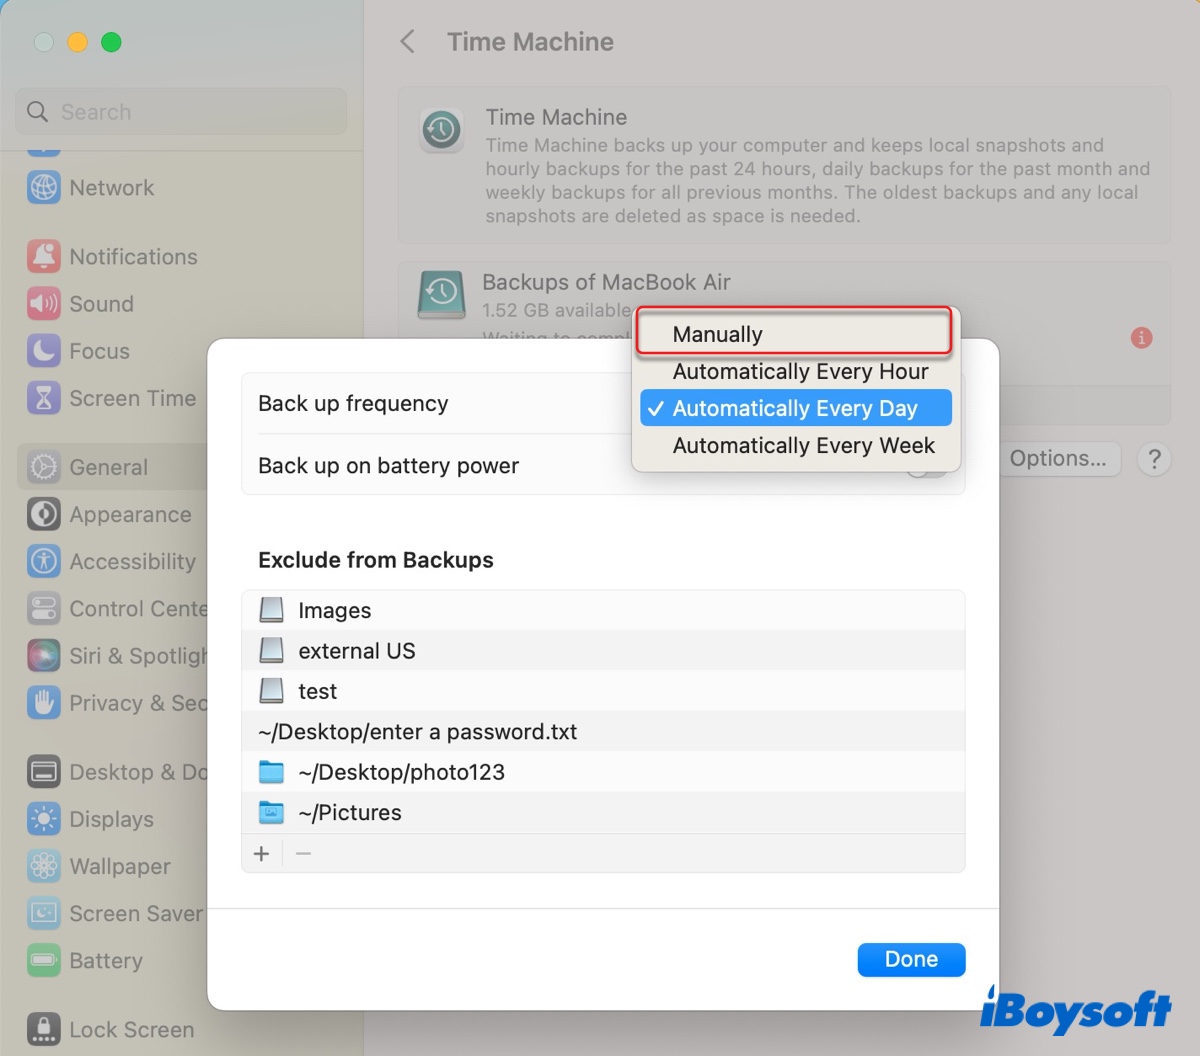
- Click Done.
- Restart your Mac.
- Connect the drive to your Mac again.
On macOS Monterey or earlier:
- Safely eject your Time Machine drive.
- Open the Apple menu > System Preferences.
- Select Time Machine.
- Uncheck the box next to "Back Up Automatically."
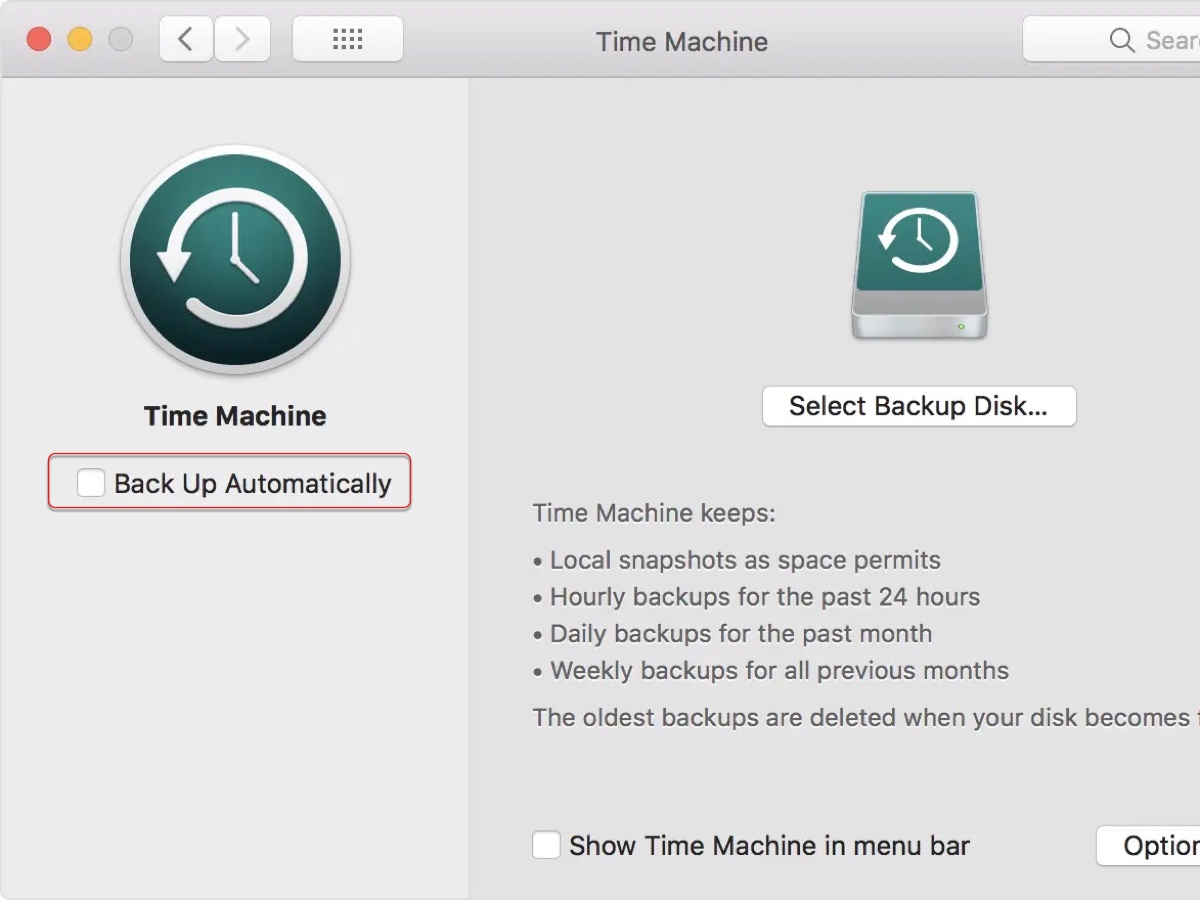
- Reboot your Mac and reconnect the drive.
Way 8: Try it on another computer
If you can't mount an Apple SuperDrive or a generic external CD or DVD drive formatted with an old file system like HFS, try it on a computer with an older operating system. It seems that HFS is no longer supported since macOS Catalina. If you don't have another Mac available, you need to reformat it with a more advanced file system.
Way 9: Reformat the unmountable drive
If you still can't mount the drive on Mac, consider reformatting it in Disk Utility. This erases all content on it and gives it a working file system, which is often the most efficient solution to mounting issues on external drives. If you haven't restored data from the unmountable drive, use iBoysoft Data Recovery for Mac to get it back first.
Seeing that your data is secured, you can use the steps below to erase the drive:
- Open Finder, and launch Disk Utility from the Applications/Utilities folder.
- Click View > Show All Devices.
- Select the physical disk, which is often named with the manufacturer's name.
- Click the Erase button.
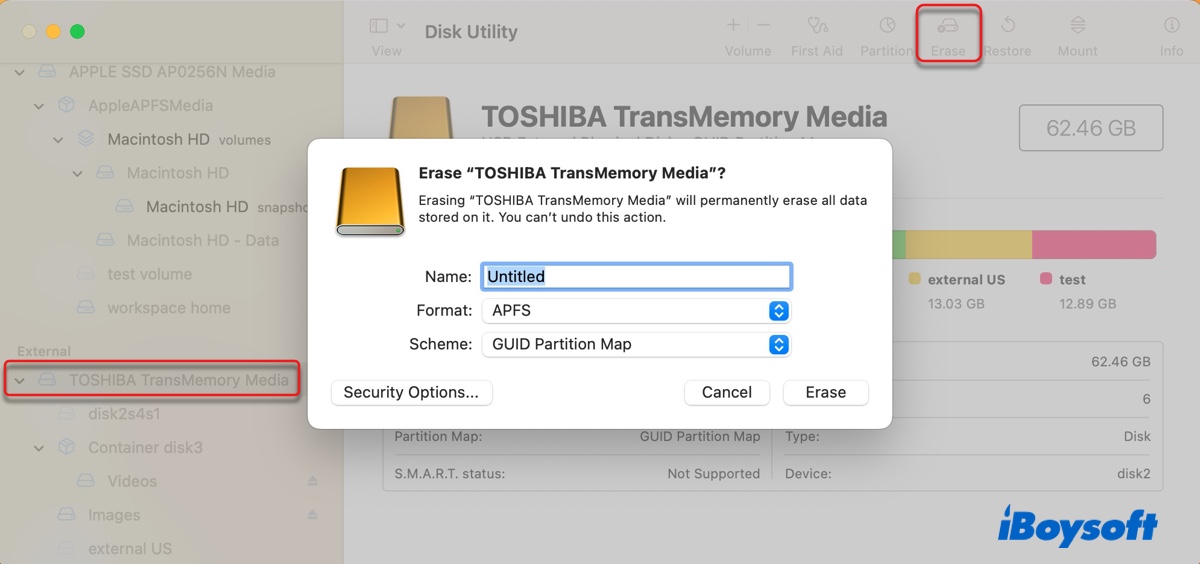
- Name your drive.
- Select APFS or Mac OS Extended (Journaled) as the format.
- Select GUID Partition Map as the scheme.
- Click Erase again.
Wait for the erase process to complete. After that, your drive should be automatically mounted in Disk Utility. If the erase process failed, read this guide to fix it: [Complete Guide] Disk Utility Won't Let You Erase Hard Drive
Read Also:
'com.apple.DiskManagement.disenter error -119930868' [Fixed]
Please click the button below to share this article!
What is com.apple.DiskManagement.disenter error 49153?
com.apple.DiskManagement.disenter error 49153 is an error you may encounter when macOS fails to mount your drive or volume after you clicked the Mount button in Disk Utility. When your drive is not mounted, it will be grayed out in Disk Utility and won't show up in Finder or on your desktop.
Error 49153 can result from various reasons. Here are some common ones:
- Your Mac has temporary system glitches.
- Your external drive is corrupted.
- Your external drive is formatted with an unsupported or incompatible file system, such as NTFS or HFS.
- Your external drive was improperly ejected.
- Your external drive is BitLocker-encrypted.
Find it helpful? Share this post to help more people!
FAQs about com.apple.DiskManagement.disenter error 49153
- QWhat is a com.apple.DiskManagement.disenter error?
-
A
A com.apple.DiskManagement.disenter error often occurs when you click the Mount button in Disk Utility, as an indication of mounting failure. It has various codes. For example, besides error 49153, you may receive one of the following error codes:
com.apple.DiskManagement.disenter error 0
com.apple.DiskManagement.disenter errore 49244
com.apple.DiskManagement.disenter error 49221
com.apple.DiskManagement.disenter error 49223
com.apple.DiskManagement.disenter error -119930872
com.apple.DiskManagement.disenter error 49218
com.apple.DiskManagement.disenter error 53249
- QHow do I mount an unmounted hard drive on Mac?
-
A
If you have tried to manually mount the drive in Disk Utility to no avail, you can repair it using First Aid and then try mounting it again. You can also try other solutions in this post.
