Are you running low on disk space? Don't worry – Windows 10 and Windows 11 come equipped with a built-in feature called Storage Sense to help you free up space automatically, so you don't have to manually clean out your files. Let's dive into that powerful feature in Windows.
What is Storage Sense in Windows?
Have you used the Disk Cleanup tool in Windows, a system tool for freeing up disk space on your Windows PC? But in 2018, Microsoft made this tool obsolete and swapped it out for Storage Sense.
Storage Sense is a smart, automated feature that helps you manage your storage by clearing out unnecessary files. It scans your system for files you don't need anymore—such as temporary files, old system files, and content in your Recycle Bin—and deletes them to free up valuable disk space. This feature is perfect for users who want to keep their system running smoothly without constantly monitoring storage.
Storage Sense can be set to run on a regular schedule, such as daily, weekly, or monthly, to keep your system clean and optimized. Once enabled and configured, Storage Sense automatically runs the cleanup process in the background based on the settings you've chosen. This means you don't need to remember to run it manually.
What will be deleted by Storage Sense?
Windows Storage Sense is designed to automatically clean up files that are safe to delete and are unlikely to affect your system's performance or functionality. Below is a list of the types of files that may be deleted by Storage Sense:
- Temporary files: These include system temporary files created by Windows or apps that are no longer needed, such as installation files, system error memory dumps, and temporary cache files, app data created by apps during their operation (like app logs or cache), and internet explorer/edge cache stored by web browsers like IE or Edge.
- Old Windows Update Files: After a Windows update, old files from previous versions of Windows are often stored for rollback purposes. These files can take up a significant amount of space. It removes previous Windows installations after a set period (usually 10 days) unless the user opts to keep them for rollback purposes.
- Downloaded files: Files in the Downloads folder that haven't been accessed in a certain amount of time can be deleted automatically. Storage Sense identifies files you haven't used in a while, which are likely to be unnecessary and removes them to free up space.
- Temporary files from Microsoft Store Apps: Files that are set to "online-only" mode in OneDrive may be removed from your local storage to free up space on your PC. These files remain available in the cloud and can be downloaded again when accessed.
- Windows Defender antivirus quarantine files: Storage Sense can remove quarantined files from Windows Defender that are considered unnecessary or older, helping to clear space.
- Old user files: Files in the Documents, Pictures, Videos, and Music folders may be cleaned up if Storage Sense detects that they've not been opened for a while. However, this is usually configurable, so you can set preferences for these.
How to set up Storage Sense in Windows?
If you want to keep your system running smoothly with less intervention, enabling Storage Sense is a good idea, it helps you to automatically manage your storage space, and here's how:
Enable Storage Sense in Windows 10:
- Press Windows + I to open the Settings app.
- In the Settings window, click on System.
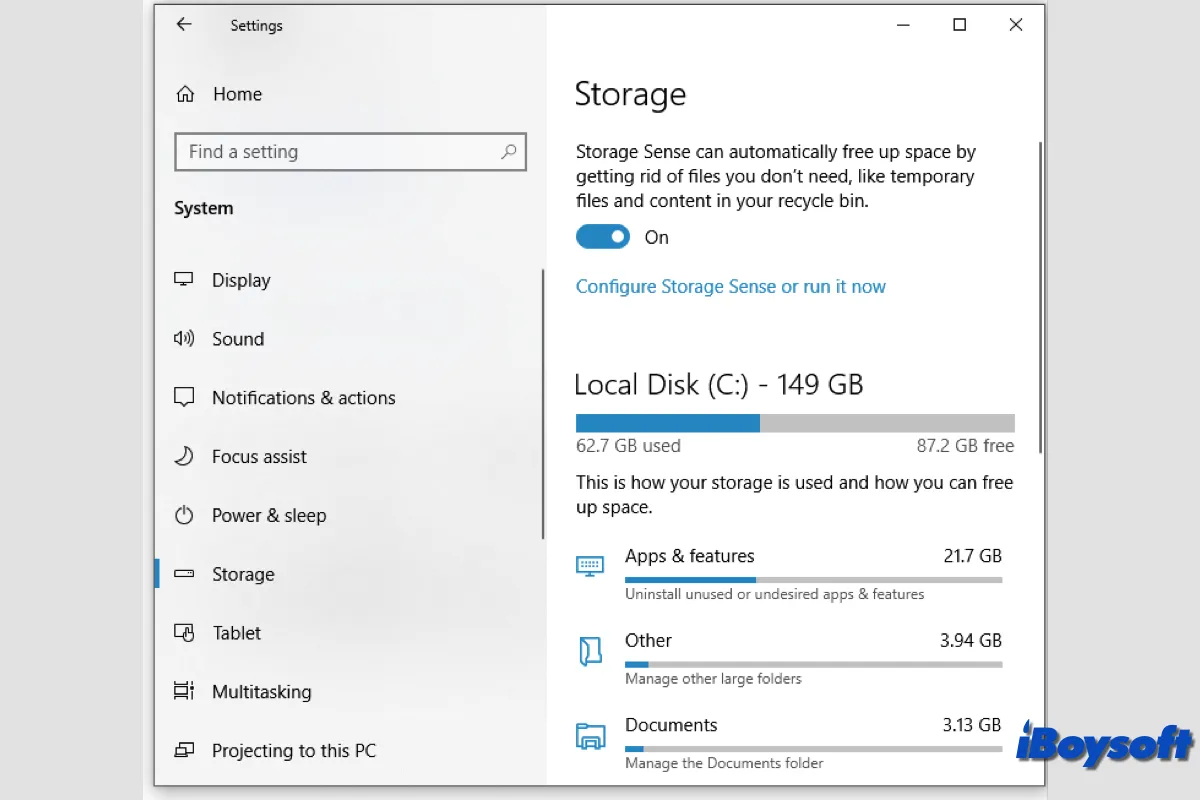
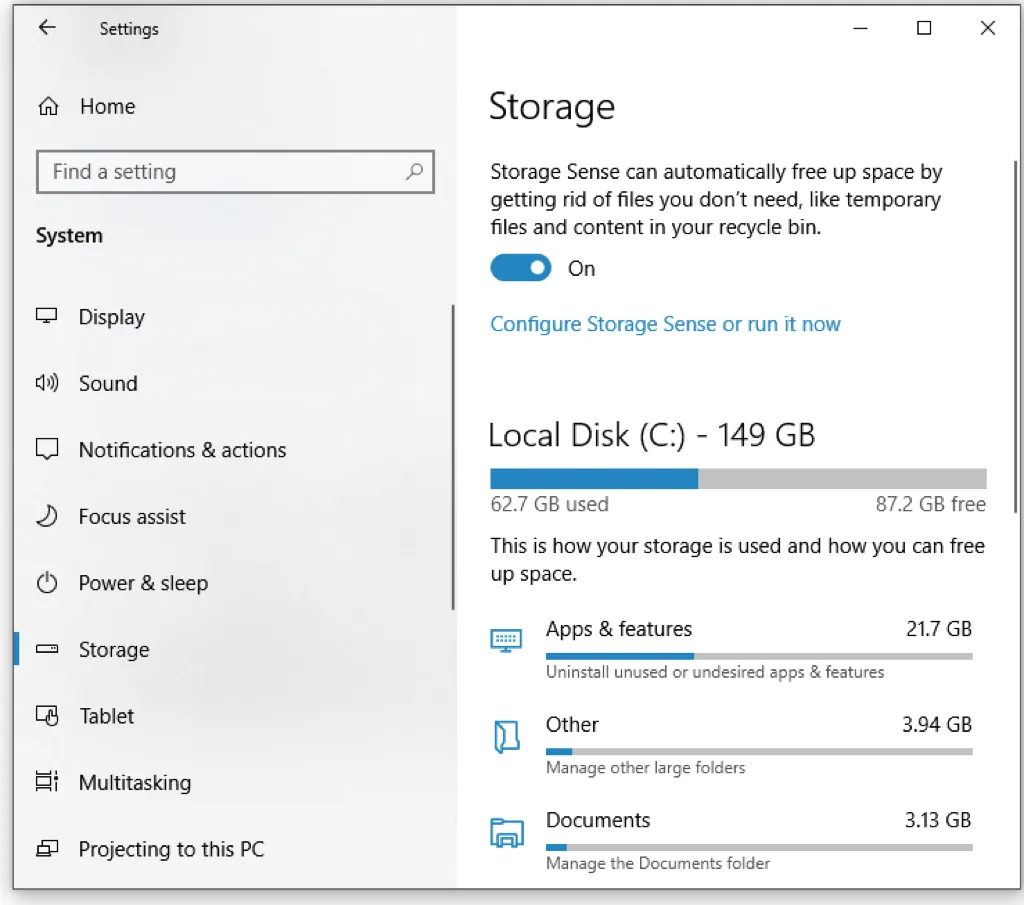
- On the left-hand side, select Storage under the "System" category.
- Under the "Storage" section, find Storage Sense, and toggle the switch to turn it ON.
- To customize how Storage Sense works, click on Configure Storage Sense or run it now. You can choose when to run Storage Sense (e.g., every day, every week, every month, or when your disk space is low). You can also specify if you want to delete files in the Recycle Bin and Downloads folder after a certain period (e.g., 30 days).
- If you want to run it right away, click Clean now to free up space.
Enable Storage Sense in Windows 11:
- Press Windows + I to open the Settings app.
- In the Settings window, click on System.
- Under System, click on Storage.
- Under the Storage Management section, find Storage Sense and toggle the switch to turn it ON.
- Click on Storage Sense to open the settings and customize its behavior. You can select how often you want Storage Sense to run (e.g., Every day, Every week, Every month, or when low on disk space). Configure options to delete files in the Recycle Bin and Downloads folder after a specified time (e.g., 30 days).
- If you want to clean up space right away, click on Run Storage Sense now to delete unnecessary files.
Recommend the Storage Sense tool to help others manage disk space!