In late October this year, the public release of macOS Ventura brings a number of new features to the Mac. These features include a new method of managing multiple windows with Stage Manager, the capacity to use your iOS device as a FaceTime camera, and a redesigned System Preferences (now called System Settings).
There's a rather small one among all these changes, and you may miss it if you don't pay enough attention to, Weather app macOS. Previous versions of macOS have a weather widget, which only offers the most basic weather information. This is why it's such a big deal that Apple includes a complete weather app in macOS Ventura. If you want to learn more about this Weather app for Mac, keep reading!
What is the Weather app on macOS Ventura?
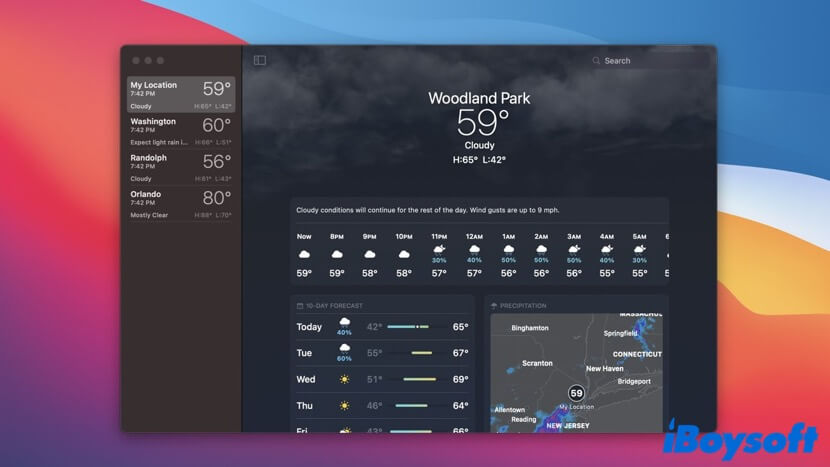
The Weather app for Mac is very similar to the Weather app you use on your iOS or iPadOS devices. In the earlier versions of macOS Ventura, like macOS Monterey or macOS Big Sur, Weather remains as a widget in the Mac Notification Center instead of an application in Mac Launchpad.
If you recent update your Mac to macOS Ventura, you can find and open that app from the Launchpad or the Applications folder in Finder. The quickest way to get to it is to simply search for Weather in the search box of Spotlight.
What information you can get from the Weather app for Mac?
As we mentioned above, the Mac Weather app is very similar to the one on iOS and iPadOS. So, like using it on your iPhone, you can know the temperature for your current location in either Fahrenheit or Celsius, the weather conditions (cloudy, sunny, rainy, etc.), and the weather forecast.
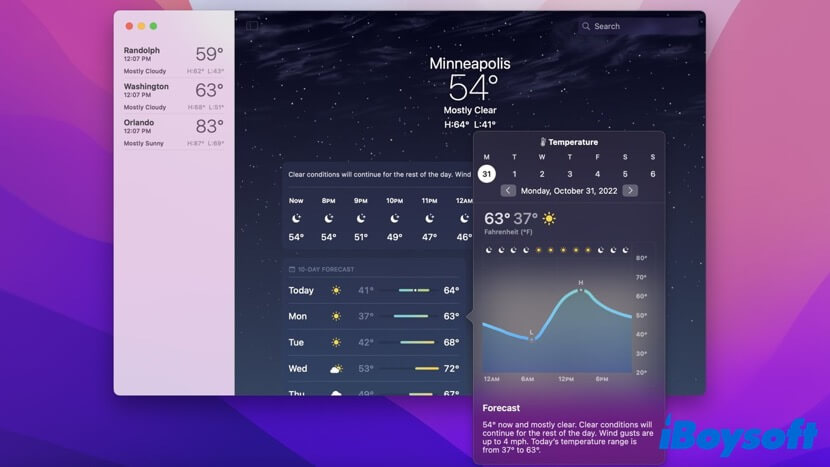
Also, you can get information in the macOS Weather app such as precipitation, 10-day forecast, air quality, UV index, rainfall, wind, humidity, and other information. Check the following list to learn this information in detail:
- Precipitation: A mini-map that displays rainfall in a visual format.
- 10-day Forecast: You can get the weather conditions and the approximate temperature for the next 10 days through the 10-day forecast.
- Air Quality: It shows the AQI (Air Quality Index) on a scale of 0 to 500. 0 to 50 is good, 51 to 100 is considered to be acceptable, and 101 or higher is unhealthy, which means you may need a mask to go out.
- UV Index: Stands for ultraviolet index. 0 to 20 is good, 3 to 7 means you may need to wear sunscreen, and 8 or higher indicates that you may get sunburned if exposed to the sun for a long time without any protection.
- Rainfall: Displays the amount of rain that has fallen in the last 24 hours as well as the anticipated next downpour.
- Sunrise: Shows the sunrise and sunset of your current location and the daytime.
- Feels Like: Indicates how the current temperature actually feels in your location or on a selected location, it depends on factors like humidity or wind.
If you think this content is informative, please share it with more people!
How to use the macOS Weather app on Mac?
By default, the Weather app for Mac displays the weather information of your current location. But what to do if you want to check out the weather condition of the city your parents live in? Actually, this app allows you to view weather information for locations worldwide. All you need to do is manually add the wanted location:
- Open the Weather app on your Mac computer. You can press the Command + Space bar keys on your keyboard, type weather, and hit Return.
- Type in the name of a city that you want to check out the weather information in the search box in the upper-right corner of this application.
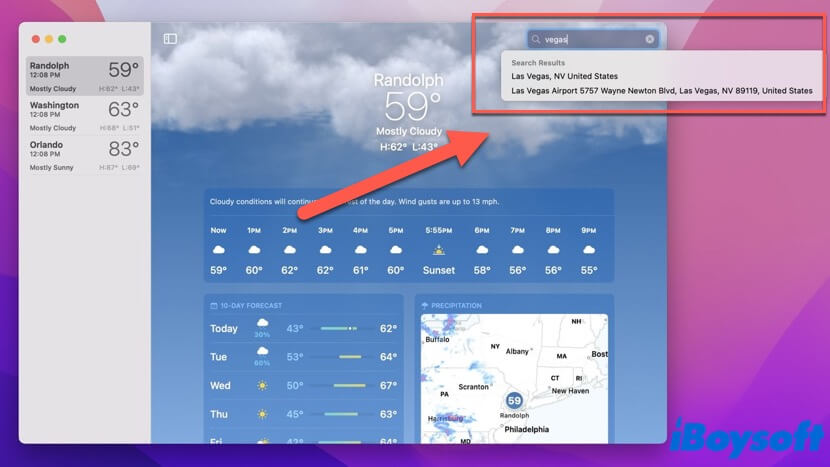
- Browse the Search Results and see if the wanted city is available in the Weather app. If it does, select it and click the Add button to add it to your favorites list so you won't have to search for that city again and again next time.
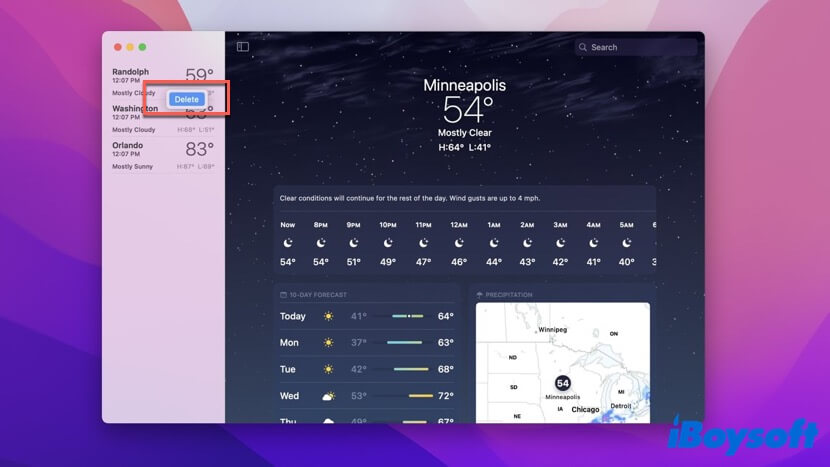
Also, there's a sidebar in the left panel of the Weather app on macOS Ventura, which allows you to switch between your current location and the locations you manually add. You can also delete an unwanted location anytime. Simply select that location, right-click on it then select Delete.
Like this post? Share it on social media so more people can read it!
Conclusion
In this article, we talk about the Weather app for Mac. Before the macOS Ventura, Weather exists on Macs as a small widget instead of an application. If you recently update your Mac to Ventura, you can check out the brand new Weather app on your Mac according to this article!
FAQ about Weather app macOS
- QHow do I get the Weather app on my Macbook?
-
A
The Weather app comes pre-installed on macOS Ventura. You can access it by searching weather in the search box of Spotlight. If your Mac runs the earlier versions of macOS, then the Weather feature is a widget in the Notification Center.
- QDoes macOS have a Weather app?
-
A
Yes, but the Weather app for Mac is only available on macOS Ventura, the latest version of Mac's operating system. On earlier versions, Weather is a widget.
