When you create, download, save a document or copy a file to your mac, a path will be assigned to locate the file automatically or manually. If you have used the same Mac for several years, there may be hundreds of files stored on your computer, or even more.
How to Delete 'Other' in Mac Storage to Free up Mac Space?
If you need to get more available storage, see how to free up space on Mac. Read more >>
With the full address of a file, you can easily and quickly get to any folder or file on your machine, saving you time to enclose folders one by one. There are 5 methods to reveal the path of a file on your Mac. You can copy and save the path for directly visiting it next time. Let's delve into them.
Find file path with Get Info
If you have already opened a file and want to know the complete address of the file, it is pretty easy to get all information about the file, the file path included.
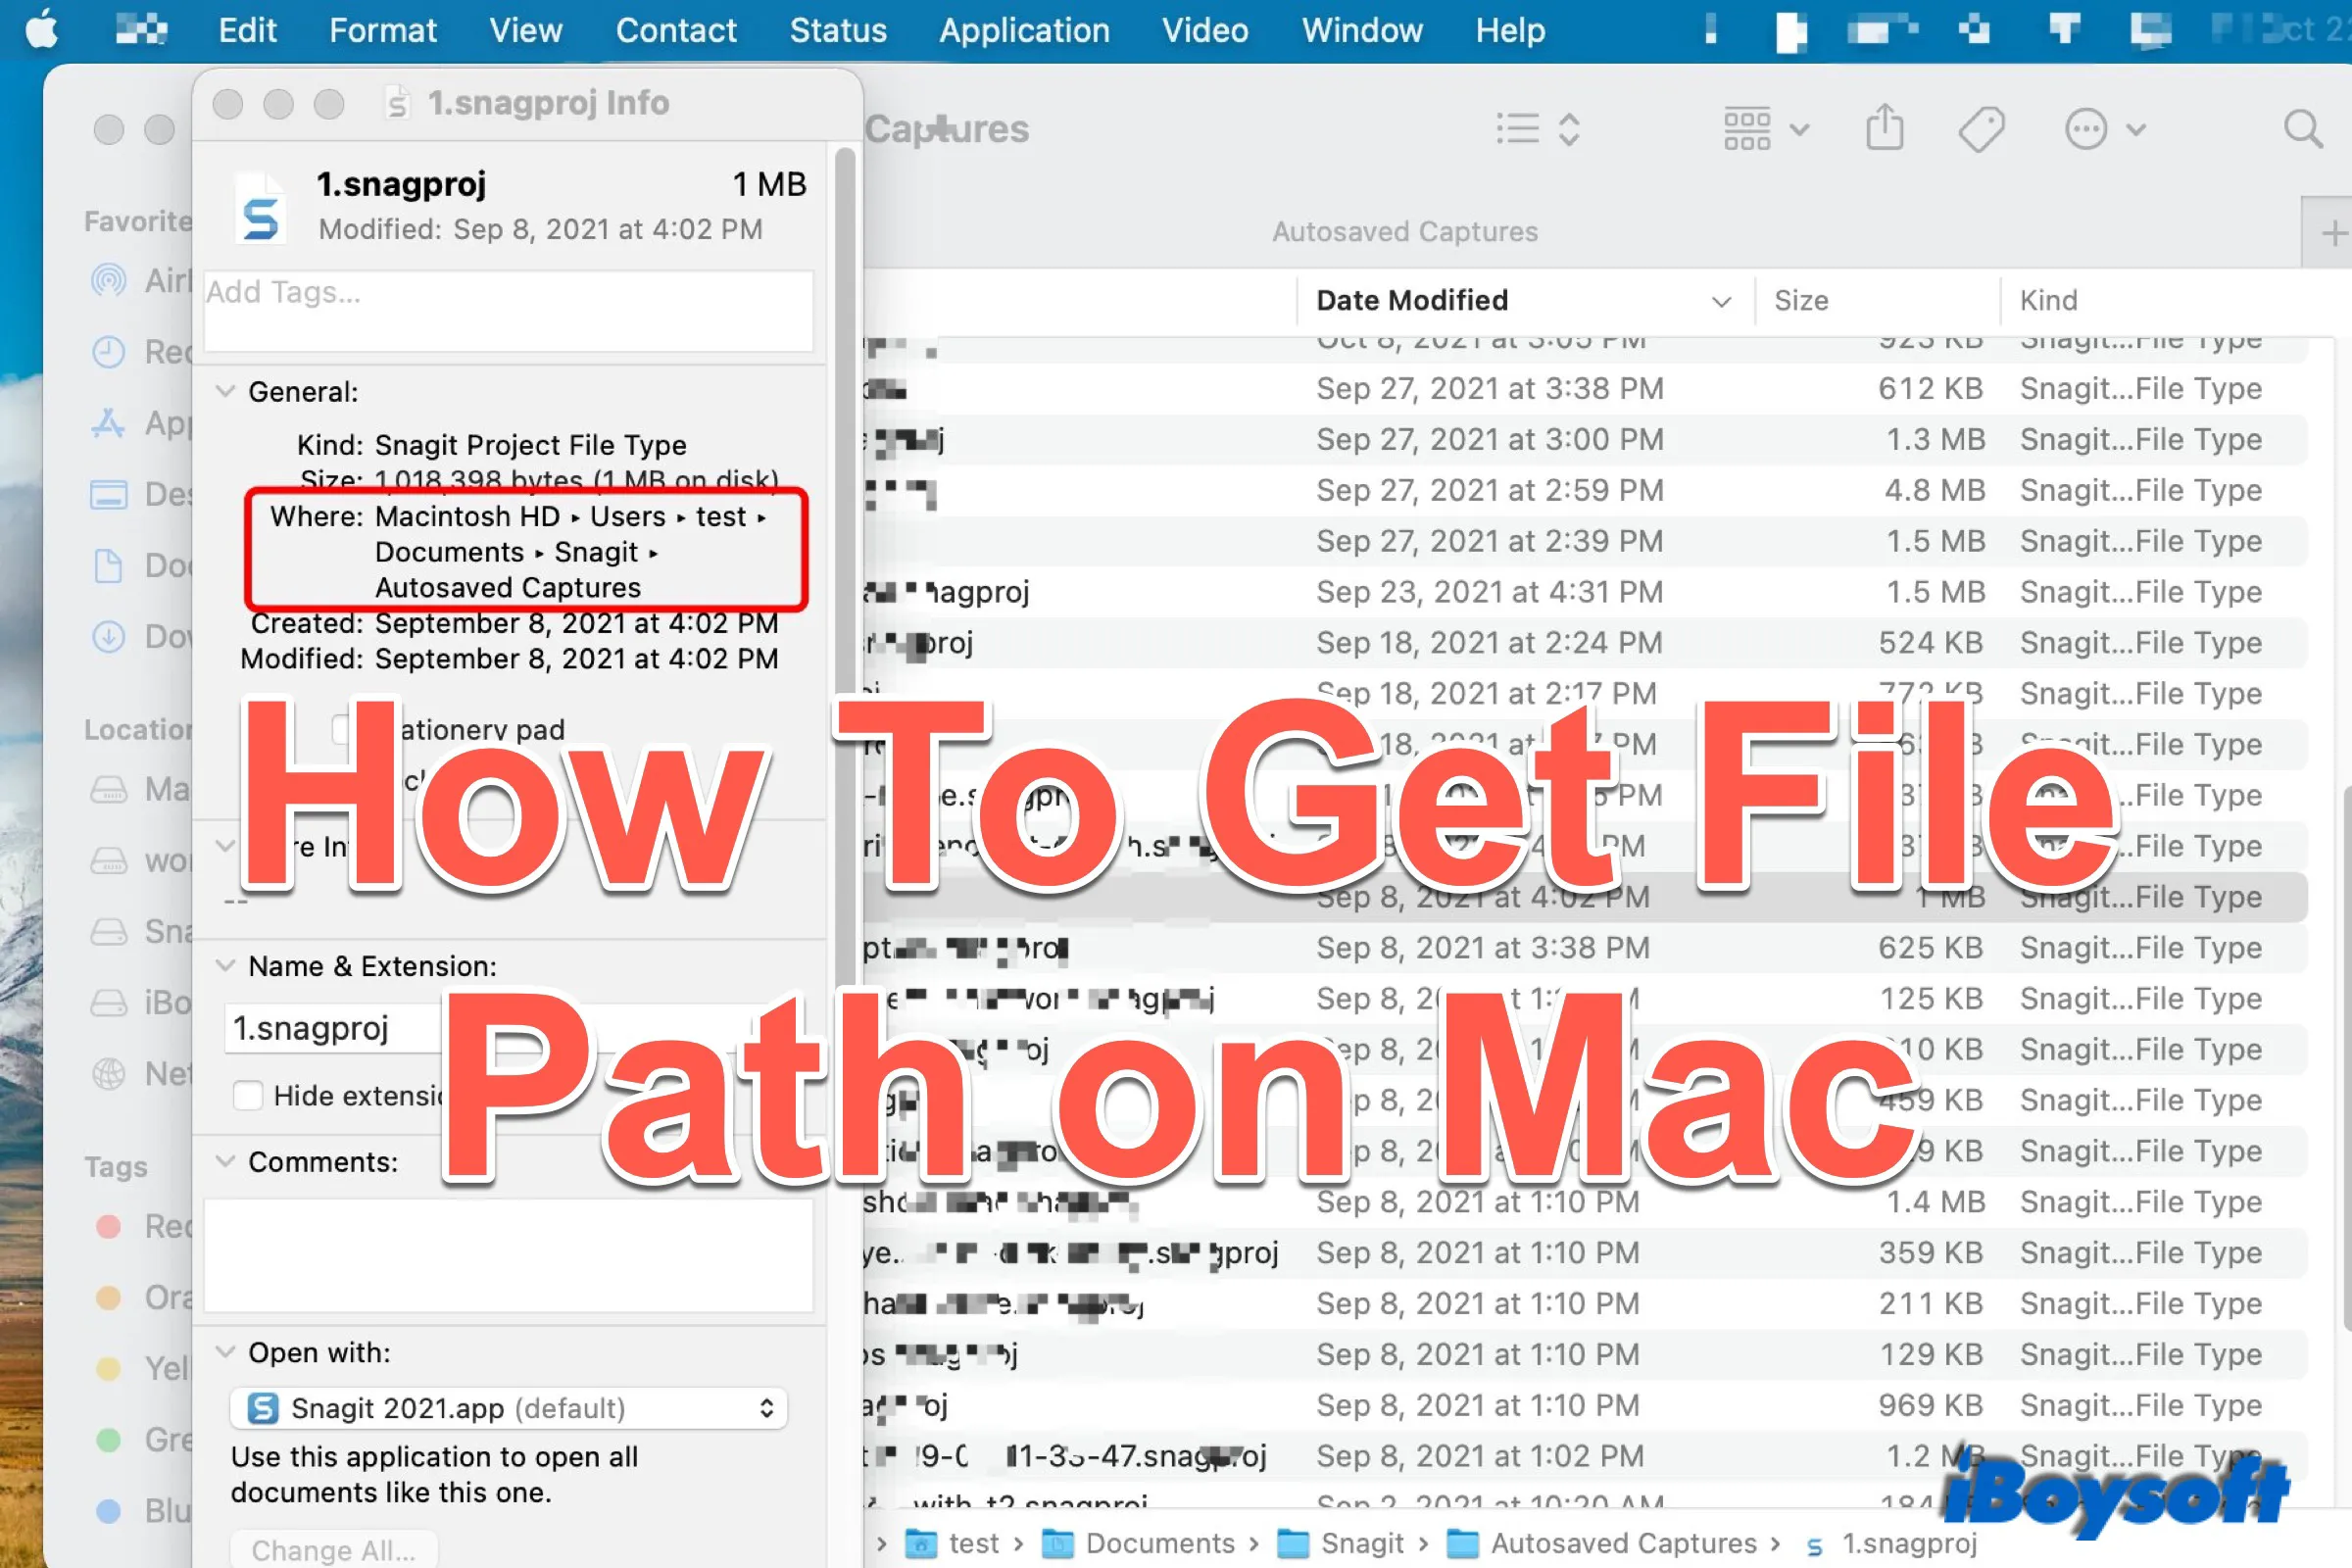
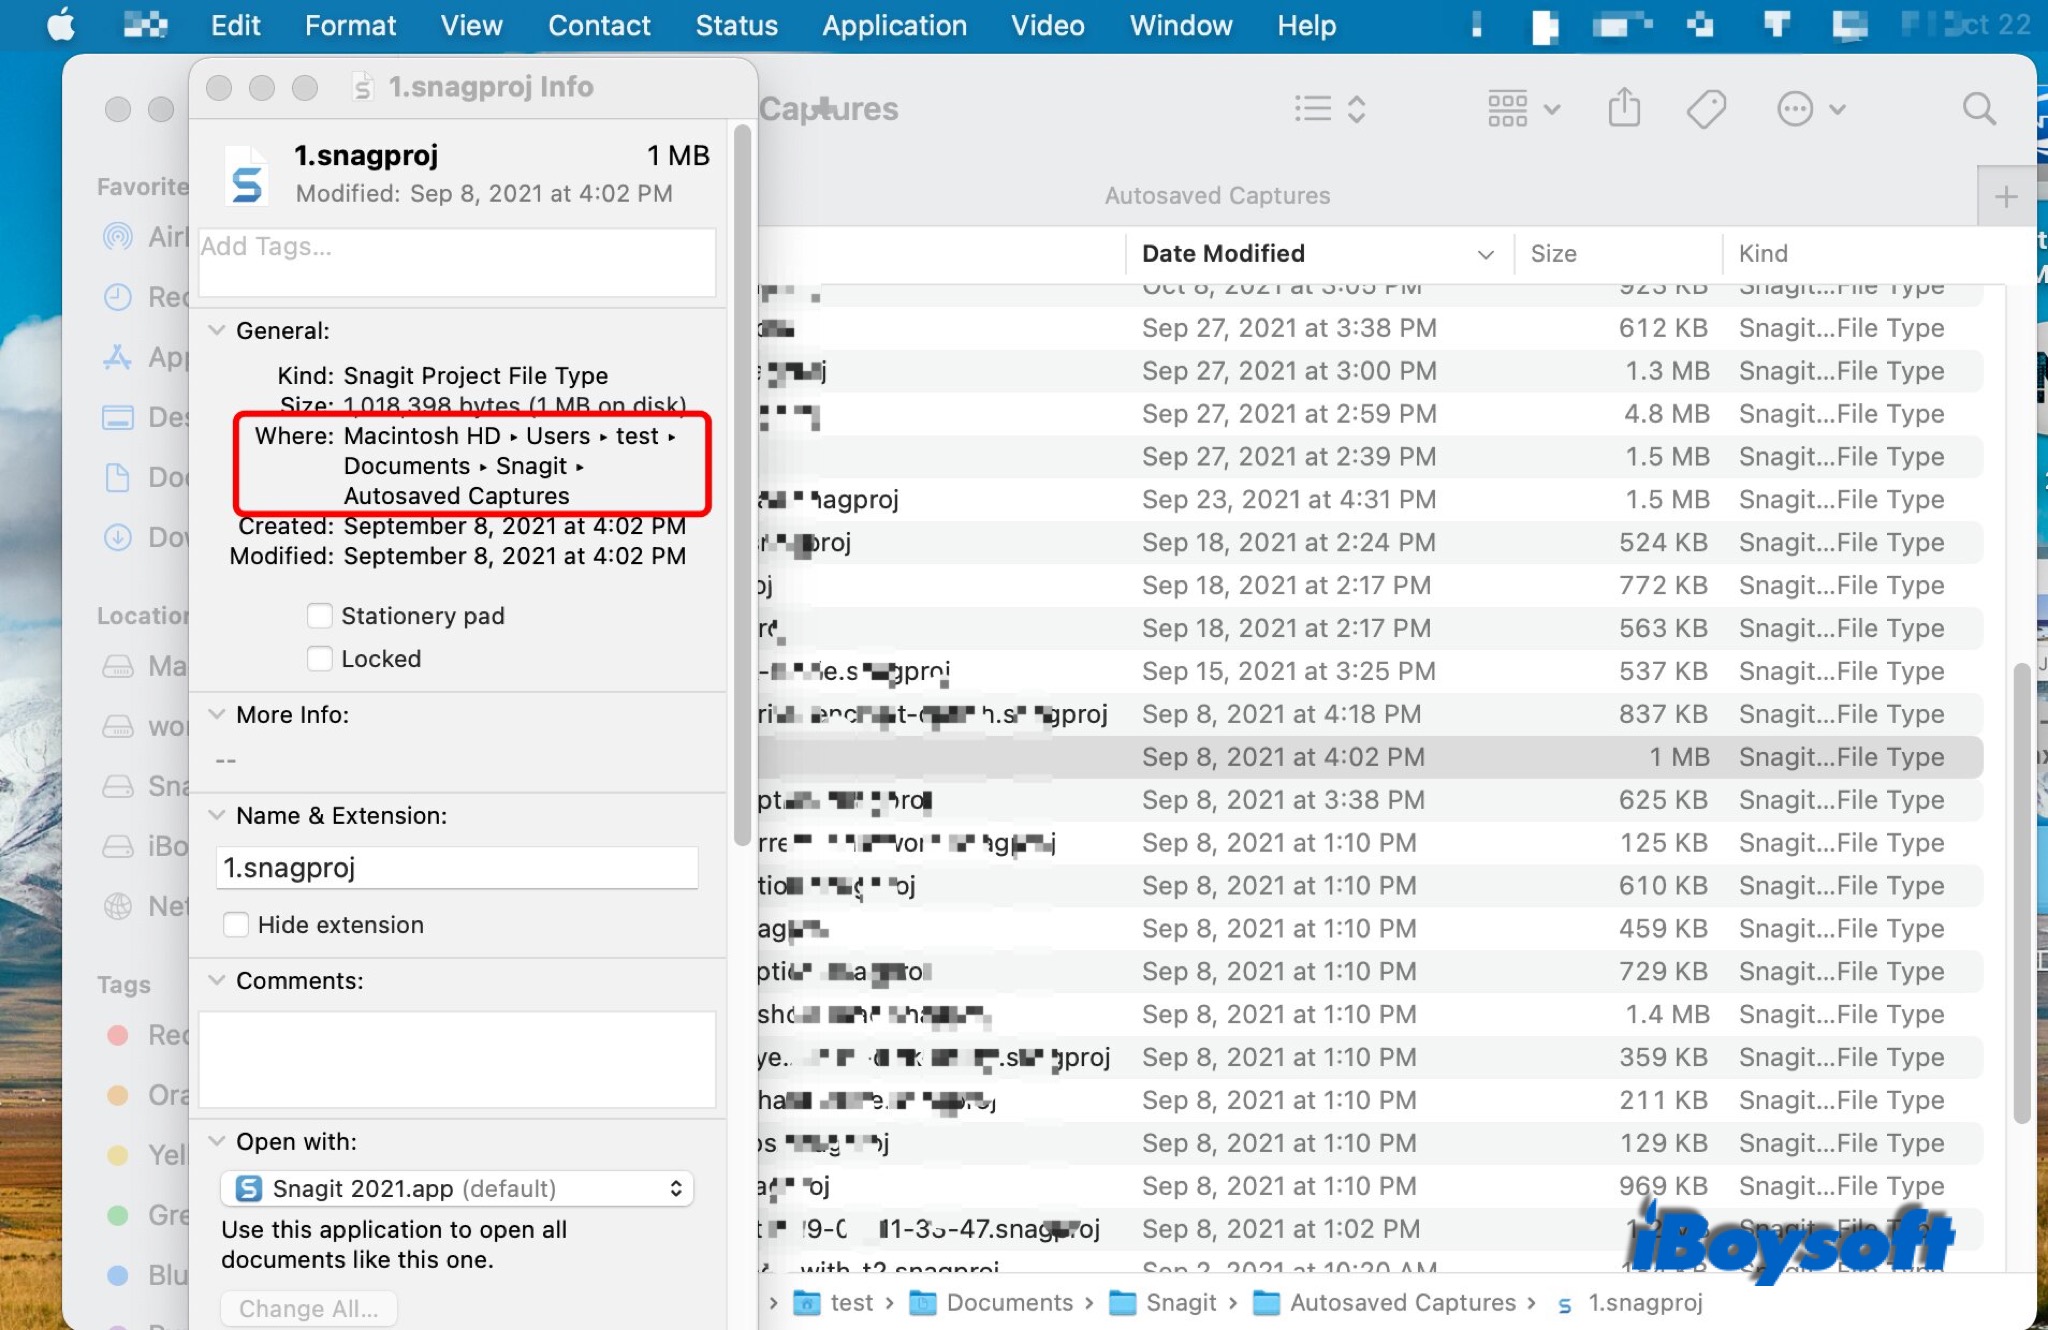
1. Control-click the file, and choose "Get Info" on the menu.
2. A new window prompts. Choose "General" under "Where," the full file path shows.
3. Other information is also displayed such as kind, size, created time, modified time, etc.
To copy the file path, you can control-click the file, and press and hold the Option key, choose Copy "" as pathname.
Get file path using Finder
With Finder, there are two ways to reveal the file path.
First, you can find the path of a file with the toolbar in Finder.
Open the finder, and click the desired file. From the top menu bar, choose "View" > "Show Path Bar," then the full address shows on the bottom.

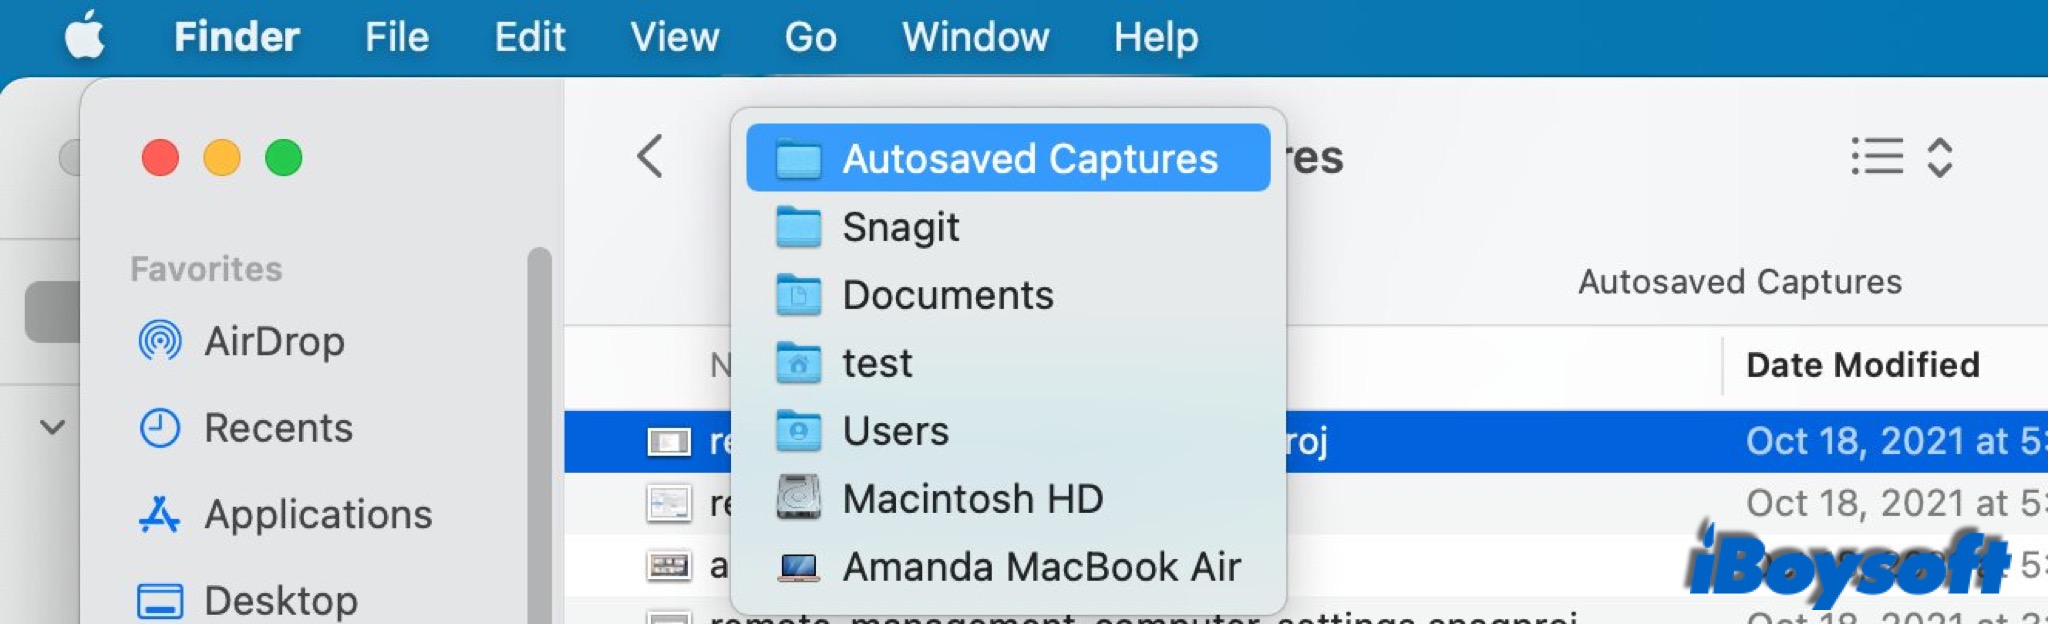
Besides, you can use the title bar in Finder to know the full path of a file.
With the Finder open, hold the Control or Command key and click the current location from the Finder title bar. Then you can see a drop-down with the path as it's structured.
Copy file path via Spotlight
Spotlight can help to display the path of a file. You can use the shortcuts Command + Space keys to quickly open the Spotlight window. Shortcuts on Mac are the best assistants such as Command-R, Ctrl Alt Delete, etc.
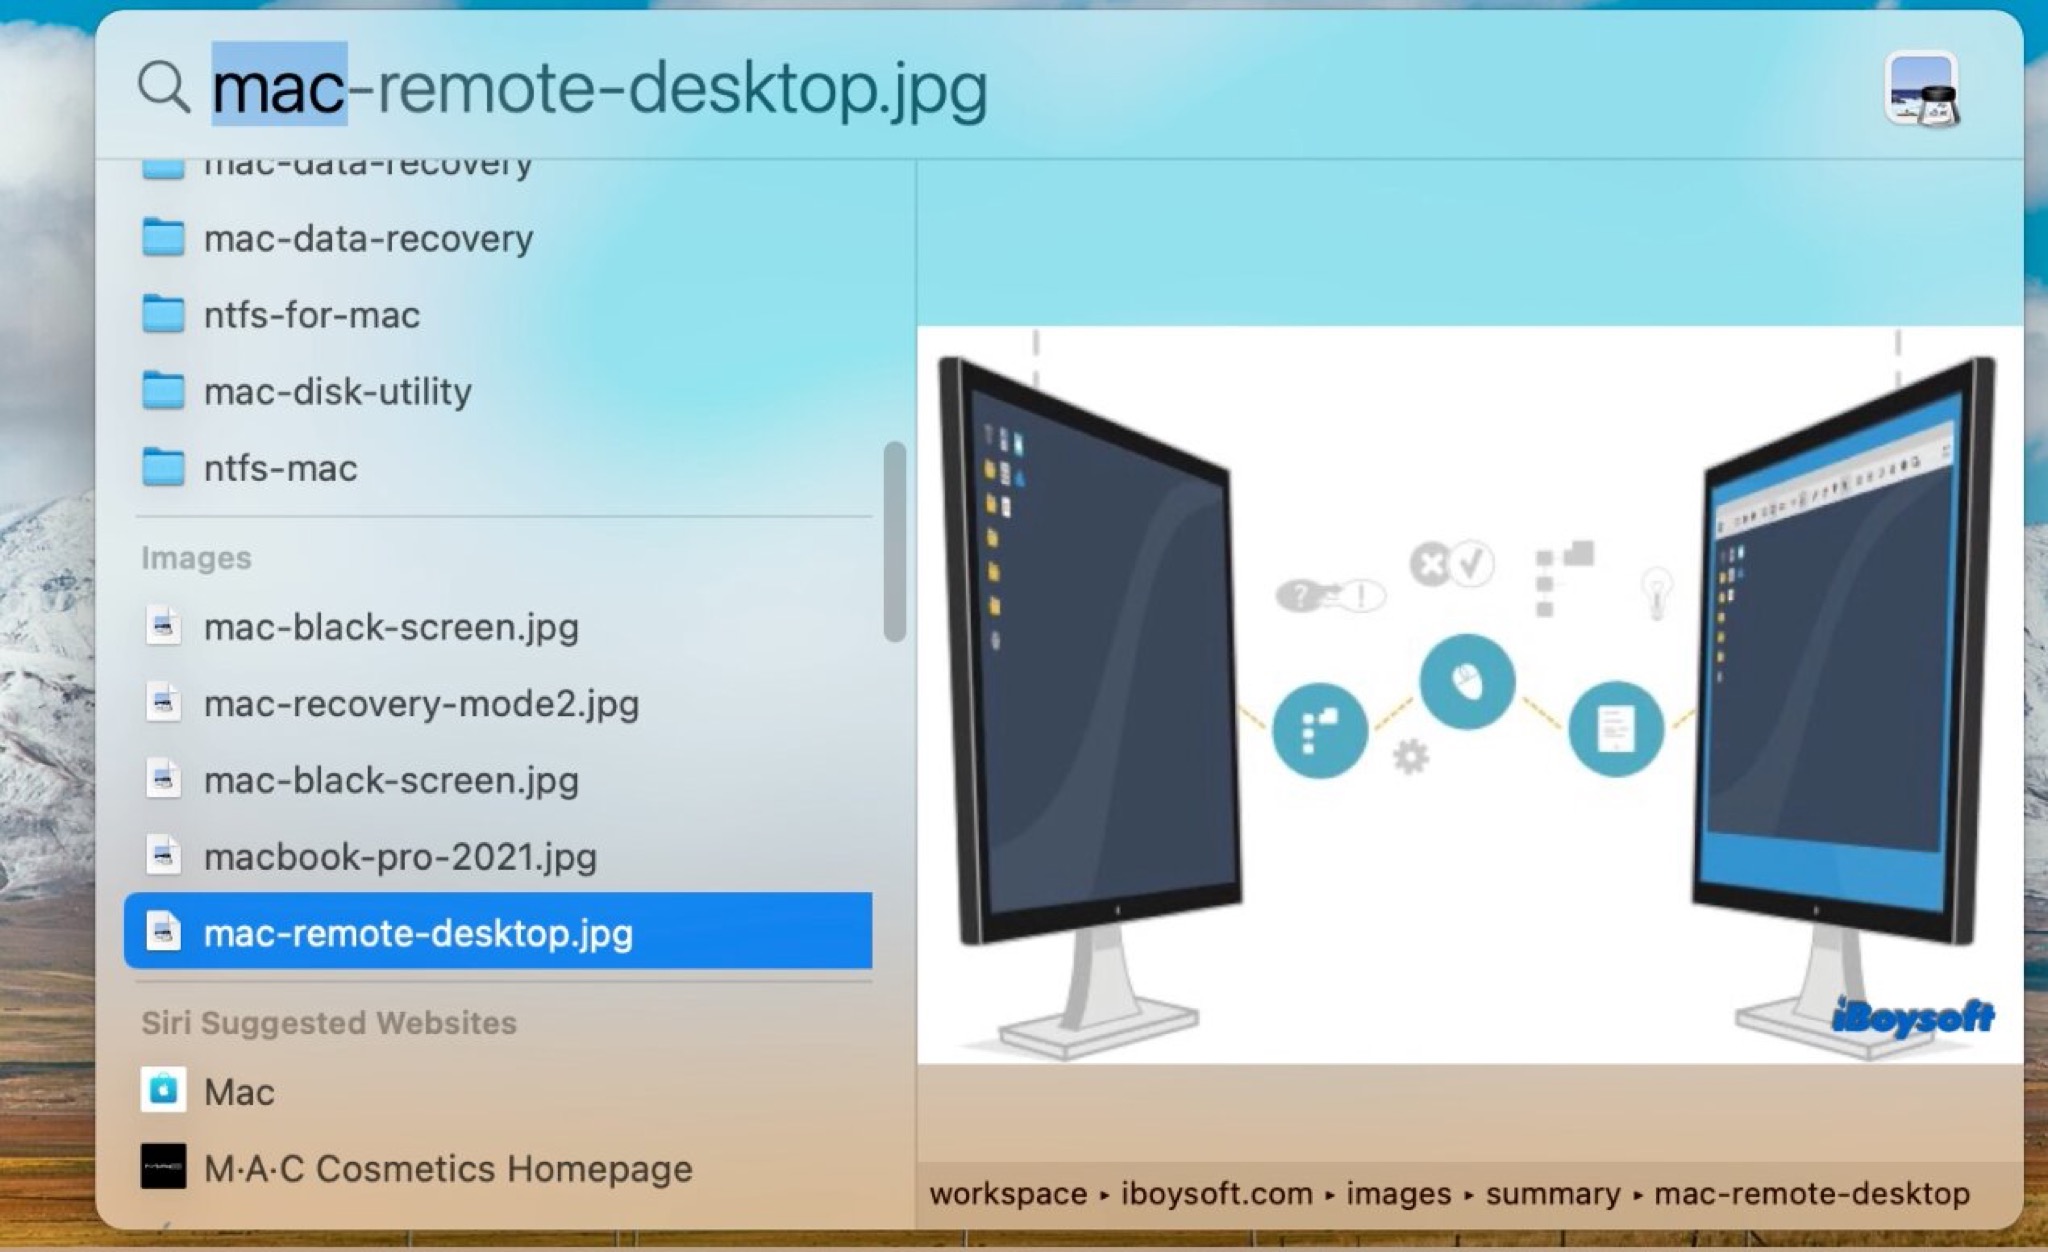
1. Type the name of the file in the search bar and find the file you want from the list.
2. Click the file, then press and hold the Command key, you will see the file path appear on the bottom until you release the key.
Searching in Spotlight can also help you quickly find a file on your Mac.
Search for file path in Terminal
The terminal allows you to interact with your Mac. You can control the operating system quickly and efficiently to perform tasks, including finding, moving, and deleting files. It's also a handy tool for seeing the path of a file.
First of all, launch the Terminal app on your Mac. You can find it in Applications > Utilities, or search in Spotlight. If you have the file available on your Mac, simply drag and drop it onto your Finder window, and the full file path will be displayed.
If you don't know where a file locates, follow the steps below to make the Terminal show the file path:
1. Type this command: sudo su, then press return.
2. Enter the password for your Mac, then press return again.
3. Enter the following command: find / -name [filename], substitute the right file name for [filename].
4. Press enter and wait for the Terminal to complete this task.
When completes, find the file path of the file you're searching for. Select the path and copy it to the clipboard.

Create shortcuts in Automater to get file path easily
With this built-in app, you can customize your workflows and create shortcuts to do tedious tasks automatically. Therefore, you can create a shortcut to get the file path of any file with ease.
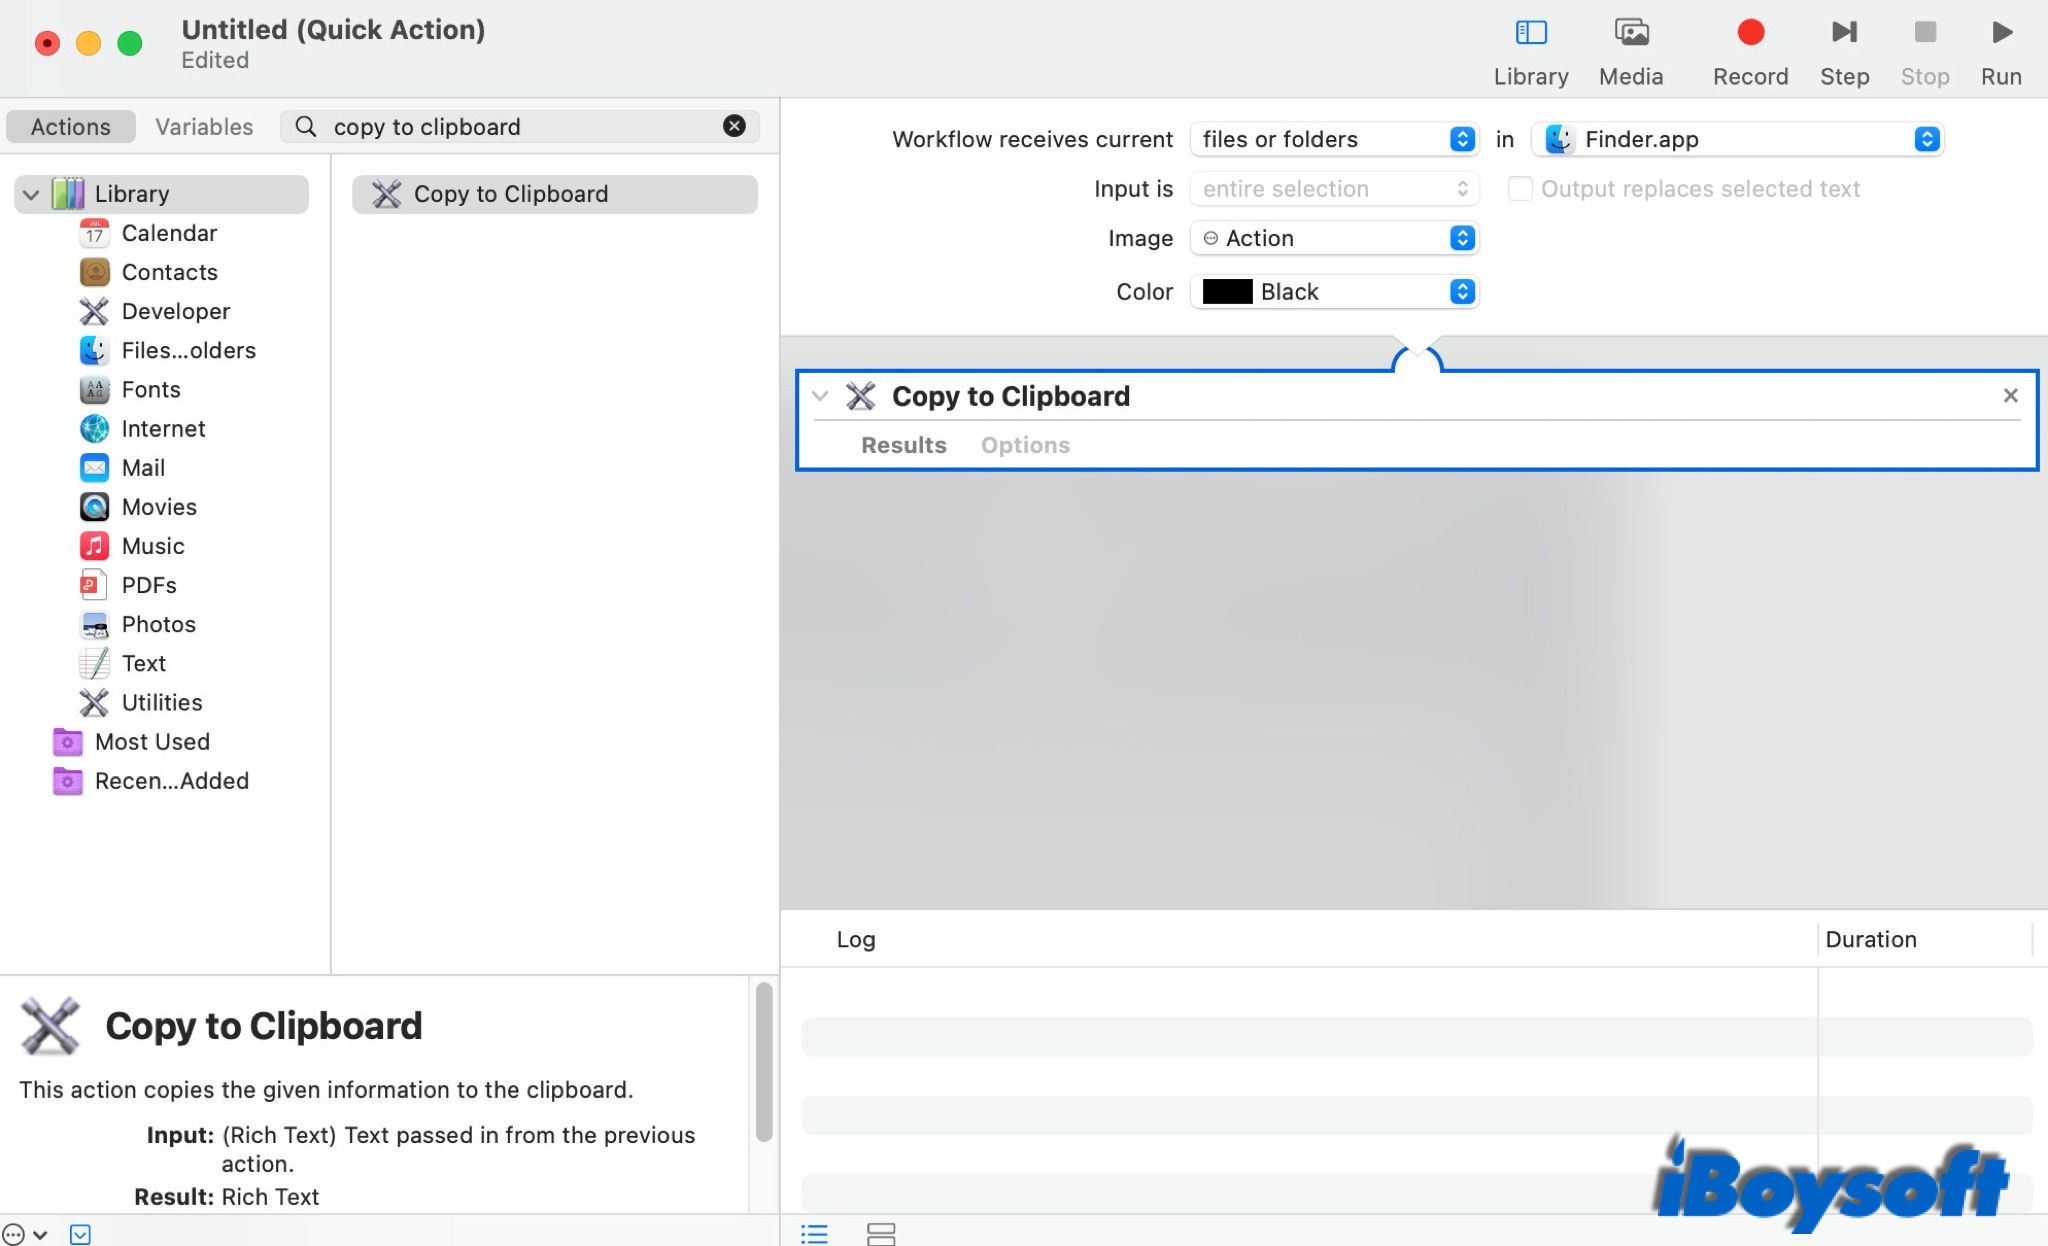
1. Open Automator on your Mac, and select "Quick Action."
2. Choose "Files or Folders" from the drop-down menu next to "Workflow receives current" and select "Finder" next to "in."
3. Type "copy to clipboard" into the text entry field, then drag and drop the "copy to clipboard" module into the section that says "Drag actions or files here to build your workflow."
4. Now, click File > Save to name this action and save it.
5. Open Finder, control-click any file or folder.
6. Find "Quick Actions" in the menu and select the Automator shortcut you just created.
Now, the file path has been copied. Paste the copied text anywhere you like.