Compressed files and archives are common in computing. You can use compressed files, usually bearing the .zip extension, to consolidate one or more files to save space. Archives can contain many files in a single file, making them easier to move around or send to others.
Apple's macOS uses Archive Utility to create and decompress .zip files and other compressed files. It provides several options for you to have more control over file compression and expansion on Mac. This article will introduce what Mac Archive Utility is and how to adjust the preconfigured defaults according to your needs.
What is Archive Utility Mac?
The Archive Utility is a small app built into the macOS operating system. It is used to perform compression (archiving) and expansion of files in the background without opening the window of the utility itself.

Where is the Mac Archive Utility?
Unlike other applications on Mac, the Archive Utility is hidden in a system folder. To access the Archive Utility on Mac, go to /System/Library/CoreServices/Applications, or go to /System/Library/CoreServices in pre-Yosemite versions. Here you will find other utilities you may occasionally use including About This Mac, Network Utility, Screen Sharing, and others.
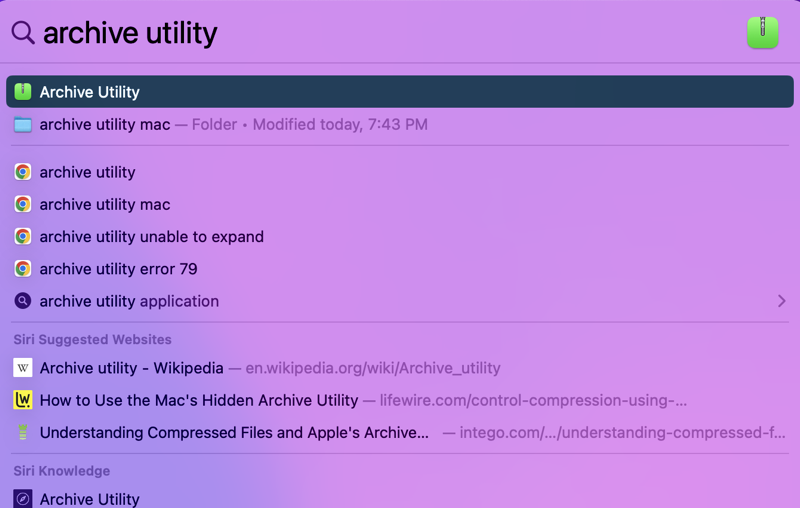
To find the Archive Utility on your Mac quickly, you can open Finder and use its search bar to look for the Archive Utility or open Mac Spotlight search.
If you like the information in this article, please share it.
How to use Apple's Archive Utility without opening it
In most cases, you use Apple's Archive Utility without launching it.
If you want to compress a file, a folder, or a group of items, select it/them, then right-click and select Compress [item name]. Archive Utility will automatically launch, compress the item(s), and then quit. If you want to expand an archive file, you still don't need to open the Archive Utility on Mac but double-click on the .zip file. The Mac Archive Utility automatically will launch, decompress the file, and then quit.
The Mac Finder always uses factory-default settings when compressing and decompressing files - it uses the ZIP format and always saves archives in the same folder as the original.
However, if you want to create a lot of archives or you want to change the default settings to compress and expand files on Mac, you need to open the Archive Utility Mac.
How to Unzip Files on Mac & How to Zip Files on Mac
This definitive guide will help you unzip files or folders for free to access the content. Also, it gives ways to create a ZIP file on Mac for faster transportation. Read more >>
Archive Utility Preferences
Double-click the Archive Utility to open it, but keep in mind that this utility opens without a user interface. Instead, you can only see a set of menus at the top of your screen. To manage the Archive Utility's preferences, click Archive Utility next to the Apple logo at the left corner of your screen, and select Preferences.
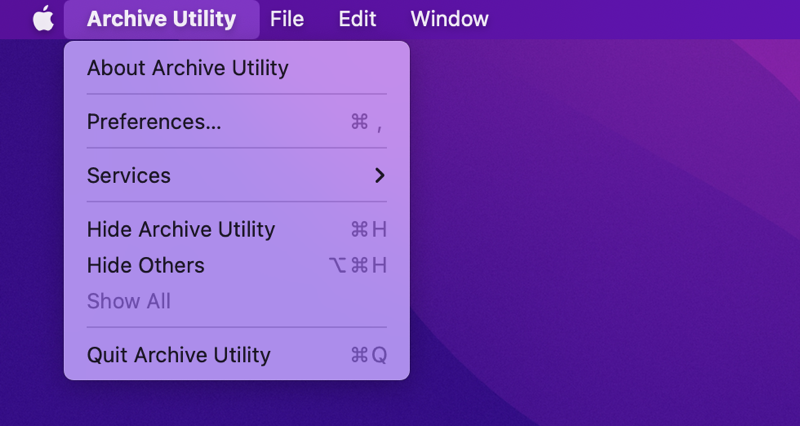
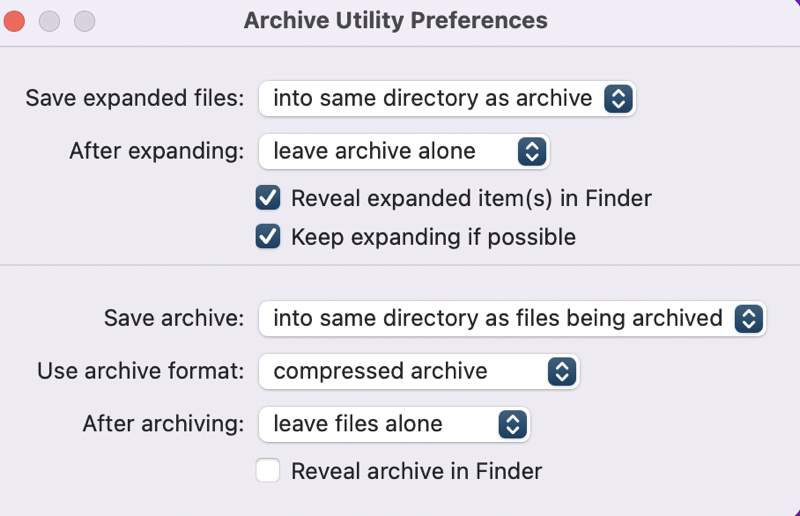
The screenshots described below apply to macOS 12 (Monterey), but they are similar in older versions of macOS and OS X.
Understanding file expansion options
Save expanded files: This allows you to select a location on your Mac to save the expanded files. The default location is the same directory or folder as the archive you are expanding. You can click the arrow and select another location.
After expanding: This specifies what happens to your original file after it has been expanded. The default option is to leave archive alone which means leaving the archive file in its current location. You can click the arrow and choose one option in the drop-down menu - move archive to Trash, delete archive, or move archive to. If you select the last option, you need to navigate and find a desired location for your expanded files.
Reveal expanded item(s) in Finder: It is checked by default. You will be directed to Finder after file expansion is complete and all expanded files will be highlighted.
Keep expanding if possible: It is checked by default. The Archive Utility will keep expanding items if an archive contains other archives.
Understanding file archiving options
Save archive: This controls where the archived files are stored on your Mac. By default, the compressed files are saved into the same directory or folder as the files you select to compress. You can click the arrow and choose a different destination.
Use archive format: The Archive Utility supports 5 compression formats:
A Compressed archive is a .cpgz archive that is used on Linux and Unix.
A Regular archive is a .cpio archive, which combines multiple files in a single file without compressing them.
A Zip archive is a standard compression format that has been used on Mac and Windows computers for years.
An Apple Archive is a .aar archive that performs multithreaded lossless compression of directories, files, and data and is available on macOS 11 or later.
An Apple Encrypted Archive is a .aer archive that compresses and encrypts the contents of a file or an entire directory with a password and is available on macOS 11 or later.
After archiving: This specifies what happens to your original file after it has been archived. The default option is to leave files alone which means leaving the unarchived file in its current location. You can click the arrow and choose one option in the drop-down menu - move files to Trash, delete files archived, or move files to. If you select the last option, you need to navigate and find a desired location for your archived files.
Reveal archive in Finder: When checked, you will be directed to Finder after file compression is complete and the archive file will be highlighted.
Note: The options you choose only work if you open the Mar Archive Utility and manually create or expand the archive on Mac. All file compression and expansion happening in the Finder app will always use the factory default settings.
Find this article useful? Please share it with more people.
How to use the Mac Archive Utility after opening it
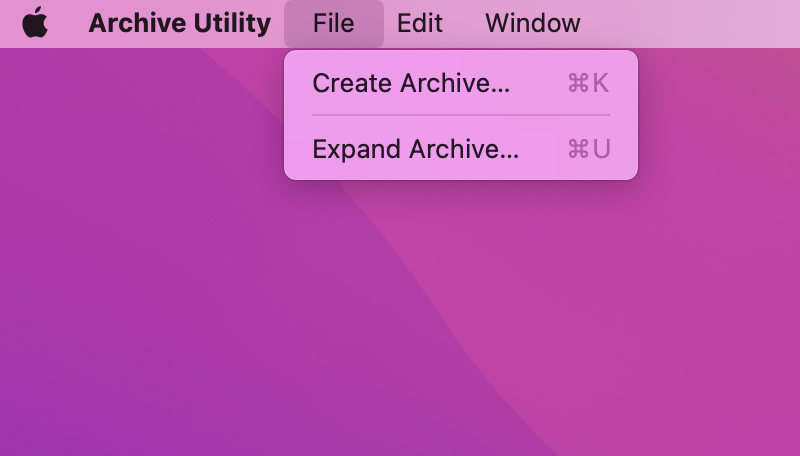
Use the Archive Utility to compress files:
- Launch Archive Utility and click File in the Archive Utility menu bar at the top of your screen.
- Select Create Archive.
- Navigate to the file or folder you want to compress and select it.
- Click the Archive button.
Use the Archive Utility to expand a compressed file:
- Launch Archive Utility and click File in the Archive Utility menu bar at the top of your screen.
- Select Expand Archive.
- Navigate to the file want to decompress.
- Click the Expand button.
Conclusion
Compressed files are often used to reduce file size, free up space, and improve system performance. Hopefully, this article helps you better understand Mac Archive Utility and it works to control compressing and expanding files on Mac.
Brag about your knowledge of Mac Archive Utility.
FAQ about Mac Archive Utility
- QCan you delete Archive Utility on Mac?
-
A
You can't delete Archive Utility from Mac because it is pre-installed in your macOS.
- QHow do I open a zip file in Archive Utility Mac?
-
A
The easiest way to open a ZIP file on Mac is to double-click on the file and then the Archive Utility Mac launches to expand the ZIP file for you.
- QWhy is Archive Utility not working on Mac?
-
A
The reasons for Mac Archive Utility unable to expand a file include:
1. The compressed ZIP file is damaged because of an incomplete download, improper compression, or corruption.
2. You don't have permission to read the compressed file.
3. The compressed file contains huge files that Mac Archive Utility is unable to expand.
