To tile windows on a Mac, users have depended on third-party programs like Rectangle for years. Despite the usefulness of these workarounds, windows tiling is now a built-in feature in macOS Sequoia. In this post, we'll look at a few simple methods for snapping windows in macOS Sequoia to different parts of the screen.
You can choose any of the following methods to tile windows on Mac running macOS Sequoia and later:
- Drag the window to the edge of the screen.
- Press the Option key while dragging the window to the highlighted area
- Use the green button in the top-left corner of the window
- Use menu options
- Use window tiling icons & keyboard shortcuts
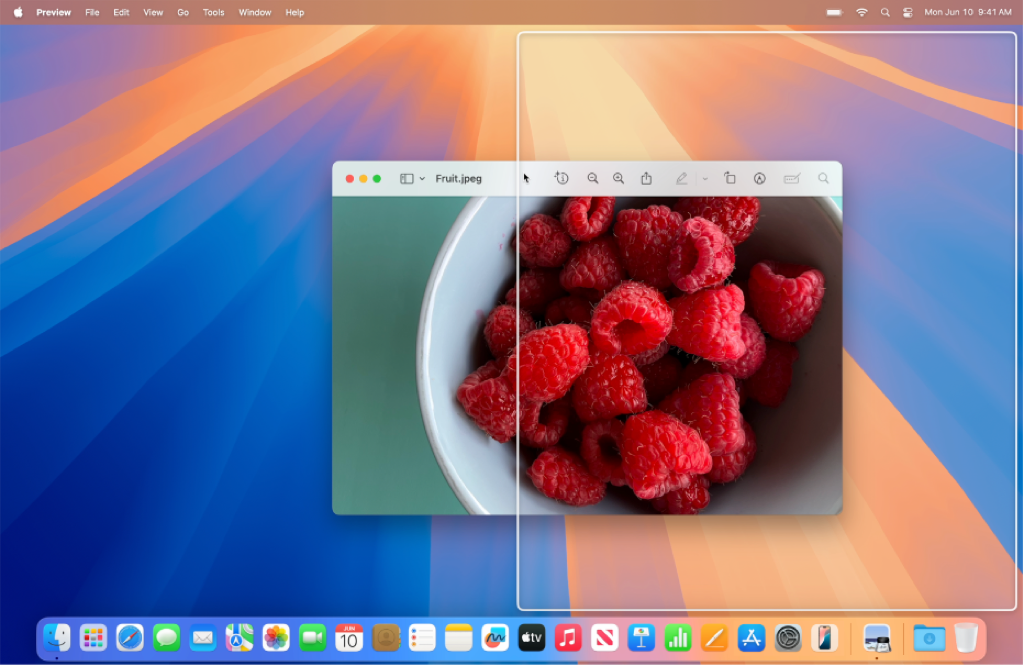
Method 1. Tile a window by dragging it to the edge of the screen
Window tiling is turned on in macOS Sequoia by default, after upgrading to macOS Sequoia on your Mac, you can directly drag the app/web window to the edge of the Mac screen to tile a window. Here's how:
- Drag a window to an edge of the screen, you can drag it to the left, right, or any corner, or to the menu bar at the top of the screen. When you drag a window to the menu bar, it fills the Mac desktop.
- Release the window when the highlighted area appears. The window snaps into position when the pointer reaches the edge of the screen.

Note: Mission Control opens when a window is dragged through the top edge of the screen. To prevent Mission Control from opening when you do that, disable the "Drag windows to top of screen to enter Mission Control" feature in the Desktop & Dock settings.
Method 2. Snap a window by pressing Option while dragging it
Alternatively, you can combine the Option key and dragging to snap the windows on your Mac. It enables you to put the window to the left half of the screen, to the right half, or to fill the desktop. Just follow the steps below:
- Press and hold the Option key.
- Drag the window toward the area you want to place it in.
- Release the window to put it in the highlighted area.
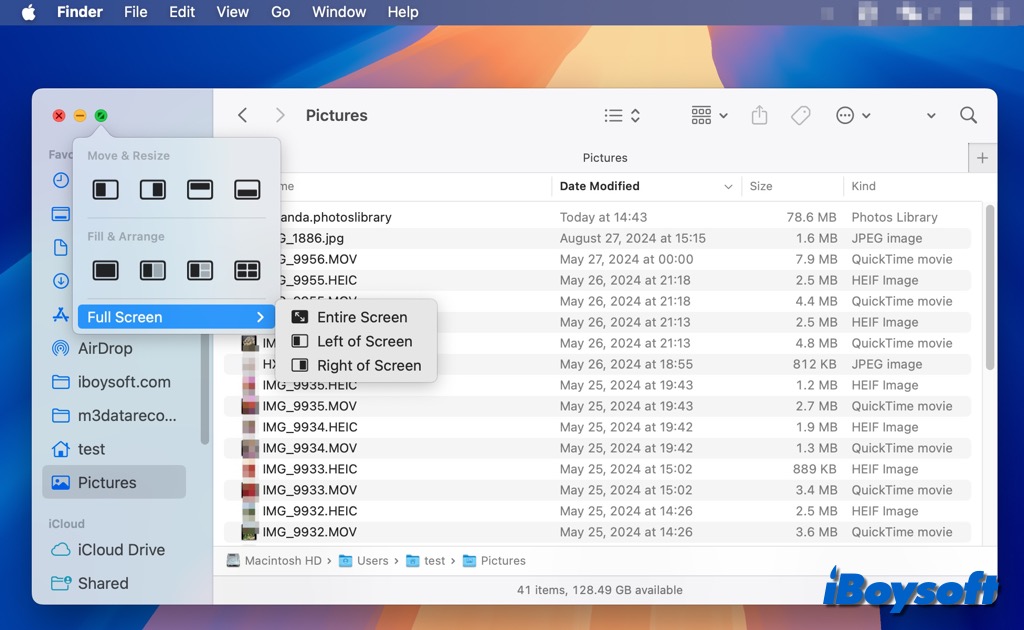
Method 3. Tile a window with the green button
You must have noticed the green button in the upper-left corner of each window. Most of the time, we use it to enter and exit the full-screen mode on Mac. Actually, it also helps to tile windows on Mac.
- Hove the pointer on the green button in the upper-left corner of the active window.
- Press the Option key to display more layouts.
- Select the specific layouts based on your needs:
- Tile the active window: Click a layout below Move & Resize.
- Tile multiple windows: Click a layout below Fill & Arrange.
- Tile full screen: Hold the pointer over Full Screen, then choose an option.
- Center the active window: Press the Option key, then click the centered tile icon below Fill & Arrange.
- Fill the desktop with the active window: Click the fill desktop icon below Fill & Arrange.
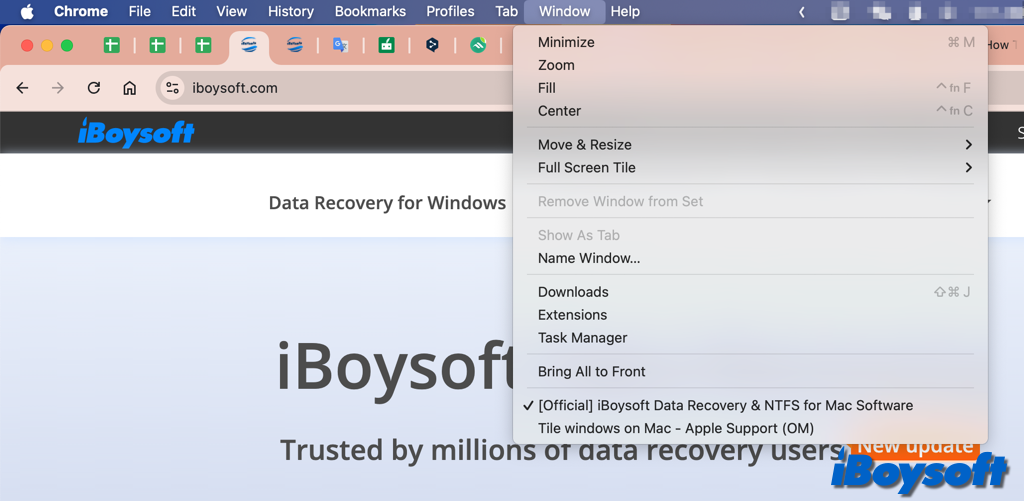
Method 4. Snap windows via the menu options
In whatever app you are using, you can see the Window option on the top menu bar, from its drop-down menu, you can snap windows on your Mac. Let's see how to make it:
- Ensure the window you want to tile is active.
- Choose Window in the menu bar, then pick one of the following:
- Tile the active window: Hover the pointer over Move & Resize, then choose a layout in the Halves or Quarters section.
- Tile multiple windows: Hover the pointer over Move & Resize, then choose a layout in the Arrange section. Press the Option key to show other layouts in Arrange.
- Center the active window on the desktop: Choose Center.
- Fill the desktop with the active window: Choose Fill.
- Tile full screen: Hover the pointer over Full Screen Tile, then choose an option.
Which method do you prefer? Share it to help other tile windows on Mac!