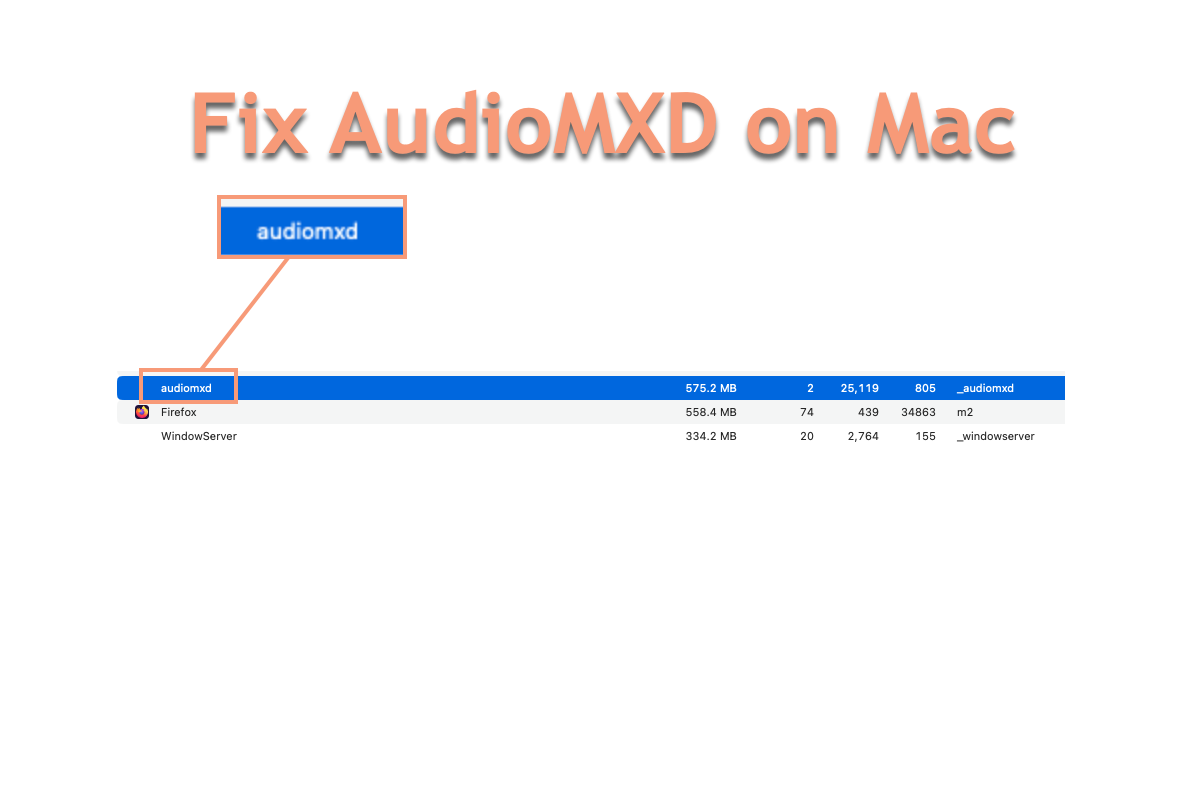
Hi, We took our labs to Sequoia over the Christmas break and have seen an issue whereby the `audiomxd` process sits using 100% CPU on the computers, preventing anyone from logging in and rendering the machines unusable. Has anyone else observed this or can offer any insight please? Thanks.
Indeed, just like in the scenario above, many users have complained about the AudioMXD process taking up too much RAM on Mac workstations, yet Apple has provided no professional solution until now. Take it easy. This post from iBoysoft guides you through exploring why the AudioMXD process hogs such a large amount of RAM and digging the ultimate way out!
Why does AudioMXD take up so much RAM on Mac?
Based on its name, AudioMXD is likely a part of Core Audio, which aims to deliver a high-quality, superior audio experience for Macintosh users. The second objective reflects a shift in emphasis from developers having to establish their own audio and MIDI protocols in their applications to Apple moving ahead to assume responsibility for these services on the Macintosh platform.
However, the AudioMXD runs the RAM even when the Mac machine is in sleep mode. Through various issue cases we studied, we found that the final culprit might be the Bluetooth speaker or audio device working while the Mac is sleeping. In addition, Mac keeps some hardware activated so that it can be ready when you launch the machine, while this detail is out of our users' reach.
Anyway, figuring out the final reason is not that significant sometimes since we should attach more importance to the final solutions. Read on and share this post if you find it informative!
How to fix AudioMXD process using so much RAM on Mac?
No matter how strange the process is, we can always troubleshoot with Mac built-in utility or other professional third-party software. Now let's see how to stop the AudioMXD process from eating up the RAM wildly on Mac:
Solution 1: Restart your Mac
Mac reboot is the simplest and most basic method to terminate any weird progress or app behaviour from Mac, and the crazy AudioMXD is not an exception here. Once the Mac finishes restarting, it refreshes all hardware and software ready for the following work routine. Now let's restart your Mac to eliminate the AudioMXD process:
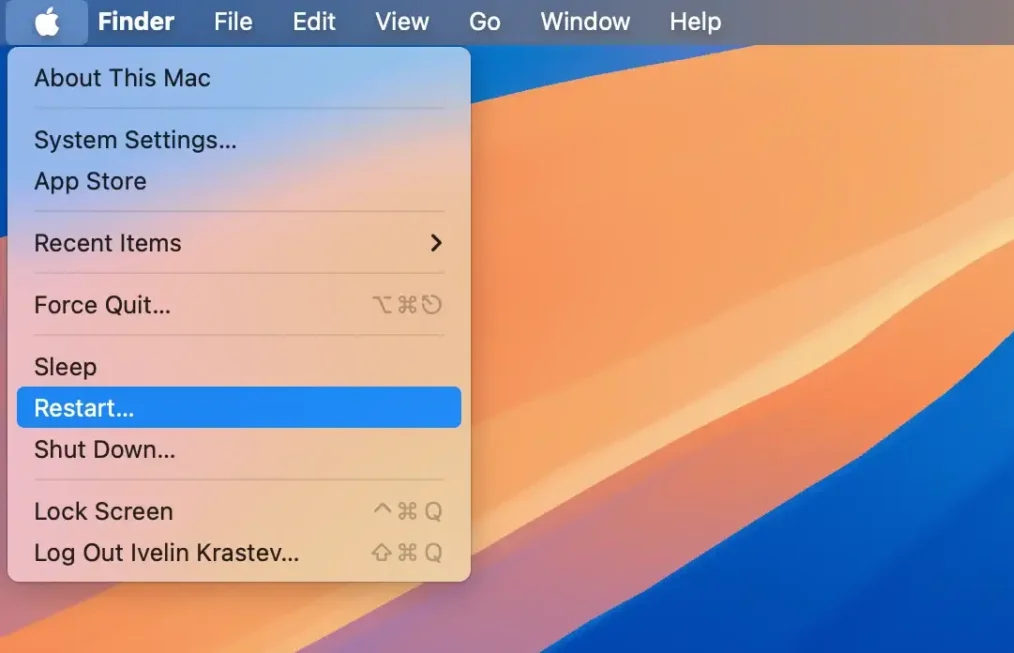
Click Apple menu in the upper left corner of the Mac desktop > Restart > wait for the Mac to end the restart. After that, use your Mac as usual and check if the AudioMXD process eats up the RAM excessively and heats your machine. If yes, move to the following solutions.
Solution 2: Kill AudioMXD in Activity Monitor
You can launch Activity Monitor to kill the AudioMXD program manually, although it only helps for a few hours or a day, it's still a good way to grab your machine from this overwhelming program.
- Launch Activity Monitor on your Mac with the help of Spotlight Search.
- Locate the AudioMXD process, which must be the top one since it swallows so much RAM.
- Select the AudioMXD section and click the X button on the top menu bar to kill it.
- When it is closed, quit Activity Monitor and check if it comes back again.
Solution 3: Turn off Bluetooth
Bluetooth being turned on, especially being connected to earphones or headset, the audio hardware soldered with Mac is working for sure, and the AudioMXD process jumps out consequently. To prevent this scenario, you can turn off Bluetooth directly:
- On your Mac, choose Apple menu > System Settings, then click Bluetooth in the sidebar. (You may need to scroll down.)
- Click to turn Bluetooth on or off.
Solution 4: Uninstall the app causing AudioMXD
Go to Activity Monitor, select the AudioMXD process in the menu window, then click the i button on the top one to see its detailed info. If it is related to certain software, and simultaneously you find it useless, you can uninstall it to terminate this process, which also helps free up Macintosh HD space on your Mac.
Having support files, launch helpers, install packages, or extensions left on your machine may trigger the AudioMXD conflict one more time, so, compared to the simple drag-and-move to trash, it's highly recommended to run a professional app uninstaller here.
iBoysoft MagicMenu outweighs other uninstallers and workarounds for its one-in-all uninstall feature. In particular, it collects all of an application's related files—user files, caches, preferences, install packages, extensions, root files, junk, etc.—before finally uninstalling it. After iBoysoft MagicMenu completes the file collection, you can select which files to remove and perform a permanent uninstall, which significantly reduces the time and effort required to find the files dispersed throughout many folders and directories.
Here is how to remove the app associated with the AudioMXD:
Step 1: Click the Free Download button below to install iBoysoft MagicMenu on your Mac.
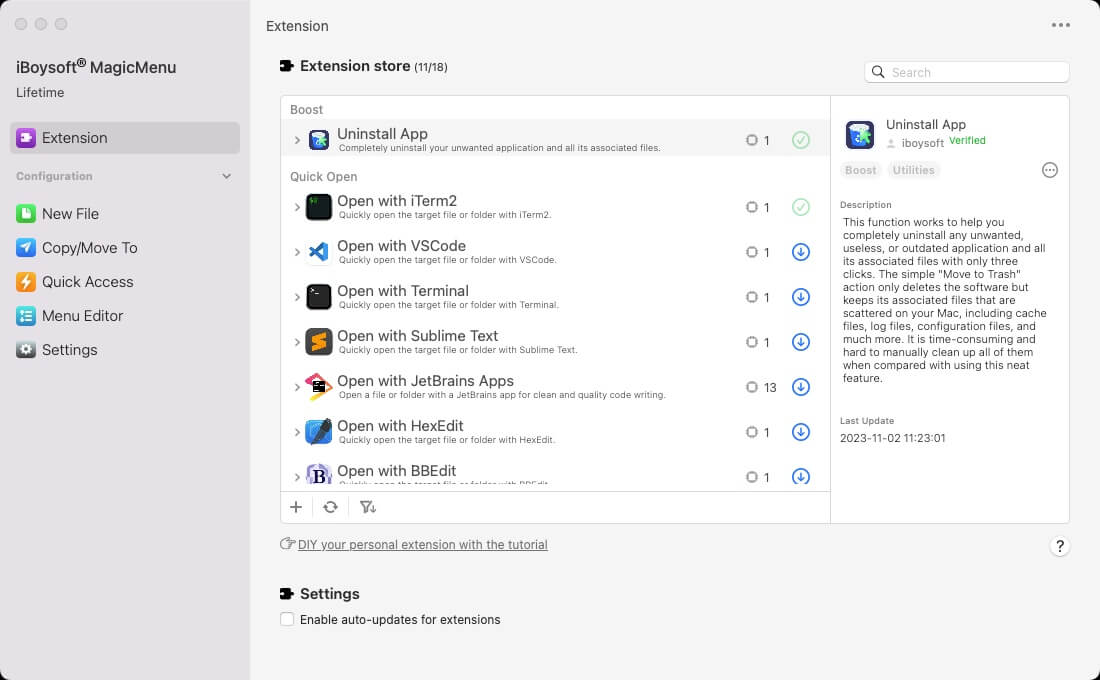
Step 2: Launch this handy app uninstaller and search the Uninstall extension in its main window to have a download. Note that iBoysoft MagicMenu only takes a little space and so does the Uninstall function, which nearly does not influence your Mac.
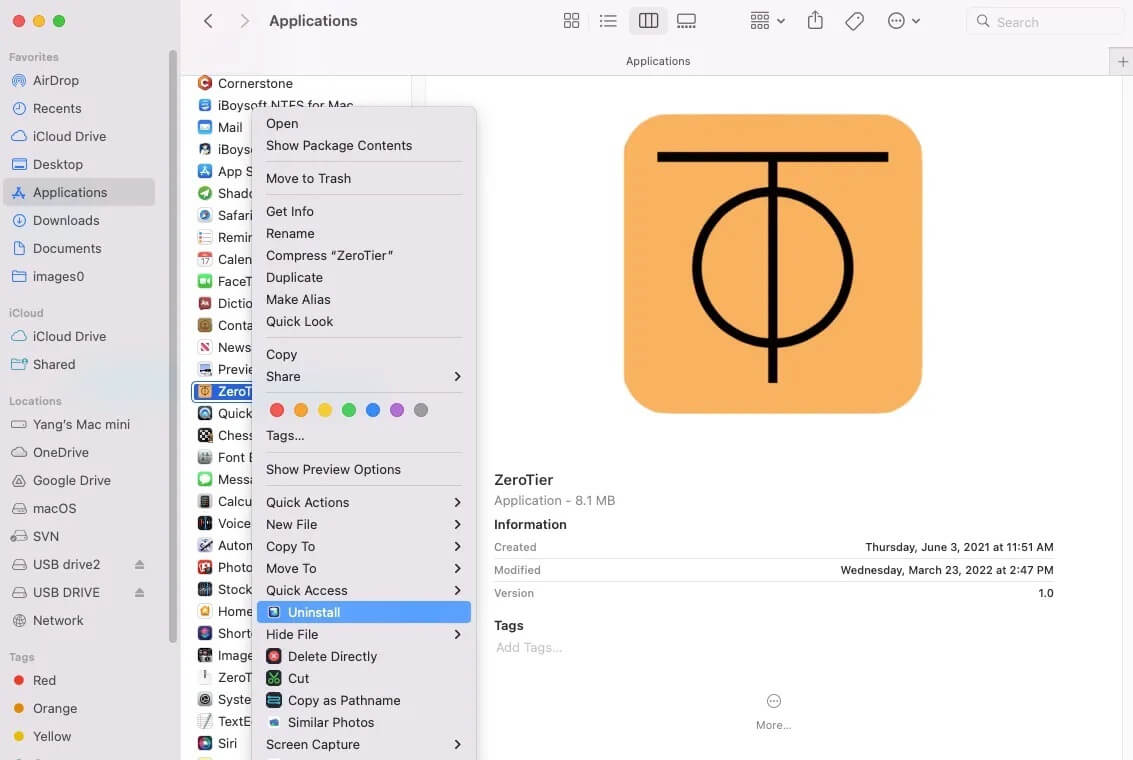
Step 3: Go to Finder > Applications, locate the unwanted app, then right-click it to select Uninstall from the dropdown menu. (This post takes ZeroTier as an example and the steps to remove your unwanted app are the same.)
Step 4: Wait for this professional app remover to gather all associated files of the will-be-uninstalled app. Once it finishes, check the useless files to let them be removed along with the app.
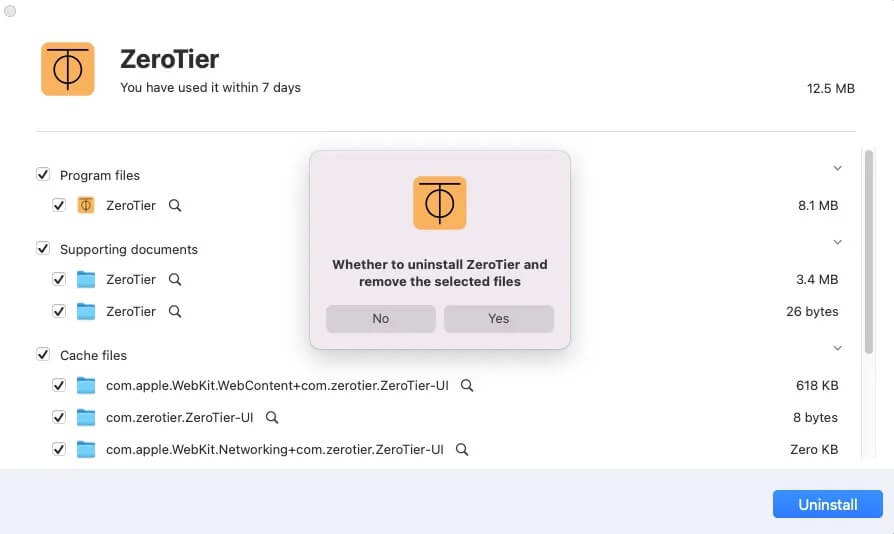
Step 5: Click Uninstall to confirm your actions and initiate the uninstall progress. This progress may take up to several seconds.
Final words
Do not worry about any strange process jumping out from Mac since it always can be resolved with pertinent solutions, including the AudioMXD issue on Mac. If you run into this issue, try the methods mentioned and fix it straightforwardly!