Today, I went to add files to my Toshiba external hard drive but it won't let me. Instead, it gives me the ⊘ symbol. There's no other changes on my Mac other than the update to macOS High Sierra 10.13.6. How to fix the read-only NTFS drives on macOS High Sierra?
I can only read documents that are already on the drive but am unable to edit the NTFS drive on macOS High Sierra. Is there any recommended NTFS for Mac High Sierra tool?
If you're having trouble working with an NTFS drive on macOS High Sierra, it's usually because you don't have write access to it or it has an incompatible NTFS for Mac driver. Some of the common issues you may encounter include:
- NTFS read-only on High Sierra
- Can't change permissions on NTFS external drive on High Sierra
- Can't open NTFS drives on High Sierra
- NTFS drives are not mounting on macOS High Sierra
- Unable to format USB sticks to NTFS on High Sierra
Nevertheless, the problem is easy to resolve; a free NTFS for Mac is a good assistant. Keep reading to learn how to enable NTFS write support in macOS High Sierra.
Can macOS High Sierra read and write to NTFS?
macOS High Sierra can read NTFS but can't write to it by default. That's because NTFS is a proprietary file system owned by Microsoft, and Apple has only read support for it.
In other words, you can read files already stored on the NTFS drive on High Sierra but cannot edit or delete them without enabling write access to it first, nor can you copy files to the NTFS drive or create a new folder on it.
Share the information about NTFS in macOS High Sierra.
How to Read and Write NTFS on macOS High Sierra?
There are typically three ways to enable NTFS write support in macOS High Sierra. Nevertheless, the safest way is to download the best NTFS for Mac High Sierra driver, as it allows you to read and write to NTFS on macOS High Sierra without losing data.
Click the button below to download the NTFS for Mac High Sierra driver.
| How to read and write NTFS on Mac High Sierra | Effectiveness | Difficulty Level |
| Download the best NTFS for Mac High Sierra driver | High - Enable NTFS write support in macOS High Sierra without data loss | Low - Automatically mount NTFS drives on High Sierra and later once installed |
| Format the NTFS drives with a different file system | High but will delete all data on the drive and use a different format | Mid - Need to back up data on the drive and perform a reformat, which may be time-consuming |
| Enable NTFS write support in Terminal | Low - May corrupt files on the NTFS drive | High - Require knowledge of command lines; need to repeat the steps for every NTFS drive |
Way 1: Use the Best NTFS for Mac High Sierra driver
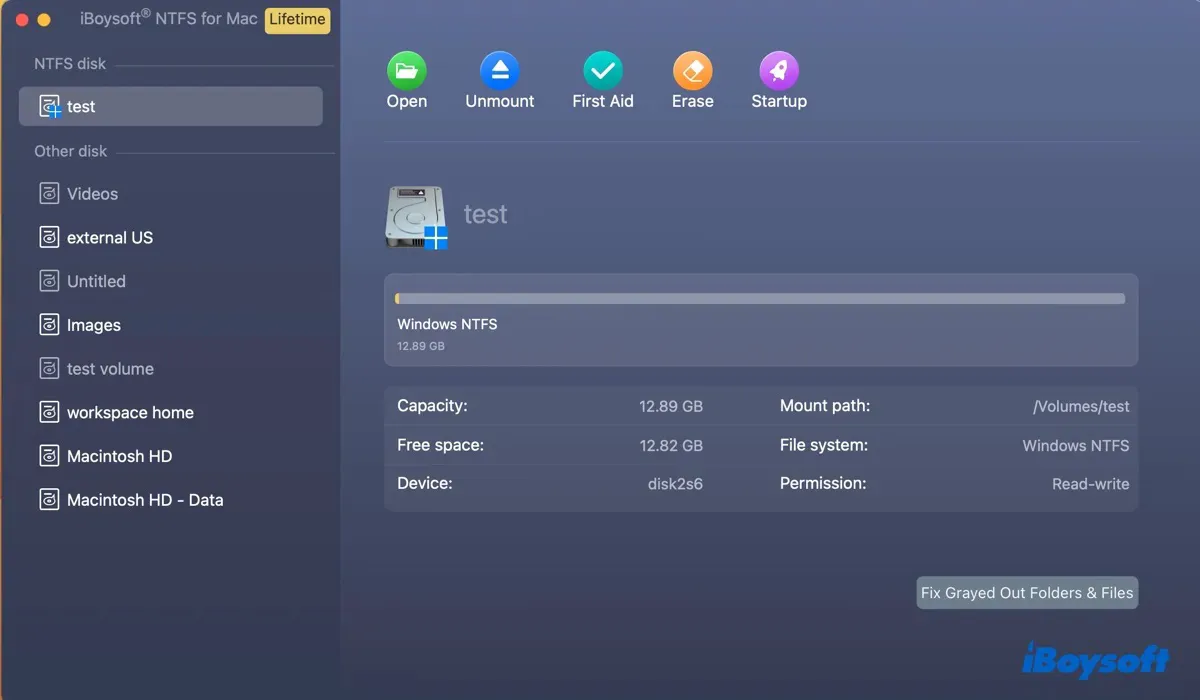
The most recommended way to use an NTFS drive on macOS High Sierra is by employing iBoysoft NTFS for Mac. It can automatically mount NTFS in read/write mode on High Sierra and later macOS versions. Just install it, and then you can write to NTFS drives on macOS High Sierra (10.13 ~ 10.13.6) freely, with all existing data intact.
This best NTFS for Mac High Sierra tool is compatible with Intel, T2, M1, M2, and M3 Macs. It also enables you to mount, unmount, format, and repair an NTFS drive on a Mac. Apart from granting full read and write access to NTFS drives on High Sierra, it enables read/write support for Boot Camp NTFS partitions as well.
Here's an overview of the NTFS for Mac driver:
Best NTFS for Mac by iBoysoft
- Enable read/write support for NTFS on macOS High Sierra and later
- Read and write access to Boot Camp NTFS partition
- Compatible with NTFS external hard drives, SD cards, USB flash drives, SSDs, and HDDs of any brand.
- Start up from Boot Camp partition without restarting
- Edit, copy, delete, and save files on NTFS drives on High Sierra
- Repair, mount, unmount, and open NTFS drives on High Sierra
- Format drives to NTFS on Mac
- Support Intel, T2, M1, M2, and M3 Macs
Read-only & risk-free
How to read/write to NTFS on Mac High Sierra:
Step 1: Download and install iBoysoft NTFS for Mac.
Step 2: Edit the NTFS drive on High Sierra as you wish.
Share this NTFS for macOS High Sierra driver if you find it helpful!
Way 2: Format NTFS on Mac High Sierra
Another option is to format the NTFS drive with a file system that has default read/write support on Mac, preferably a Mac file system like Mac OS Extended (Journaled) or APFS.
If you plan to use it on another Mac that runs older macOS, choose Mac OS Extended (Journaled) because APFS may not be compatible with older macOS.
If your NTFS drive is an SSD and you mainly work with Macs running High Sierra or later, choose APFS, as it's optimized for solid-state drives.
If you want to use it on both Windows and macOS, you can also choose FAT32 or exFAT.
But note that NTFS is the better option for drives on Windows. It's the default file system for Windows and an advanced file system that supports file and folder permissions, encryption, compression, and a built-in journaling feature that boosts faster file recovery in case of system crashes or power failures.
Though FAT32 and exFAT have better compatibility, neither of them has these features. FAT32 even has a 4GB individual file size limitation.
If you've decided to erase the NTFS drive on macOS High Sierra, follow the steps below:
- Open Disk Utility.
- Click View > Show All Devices.
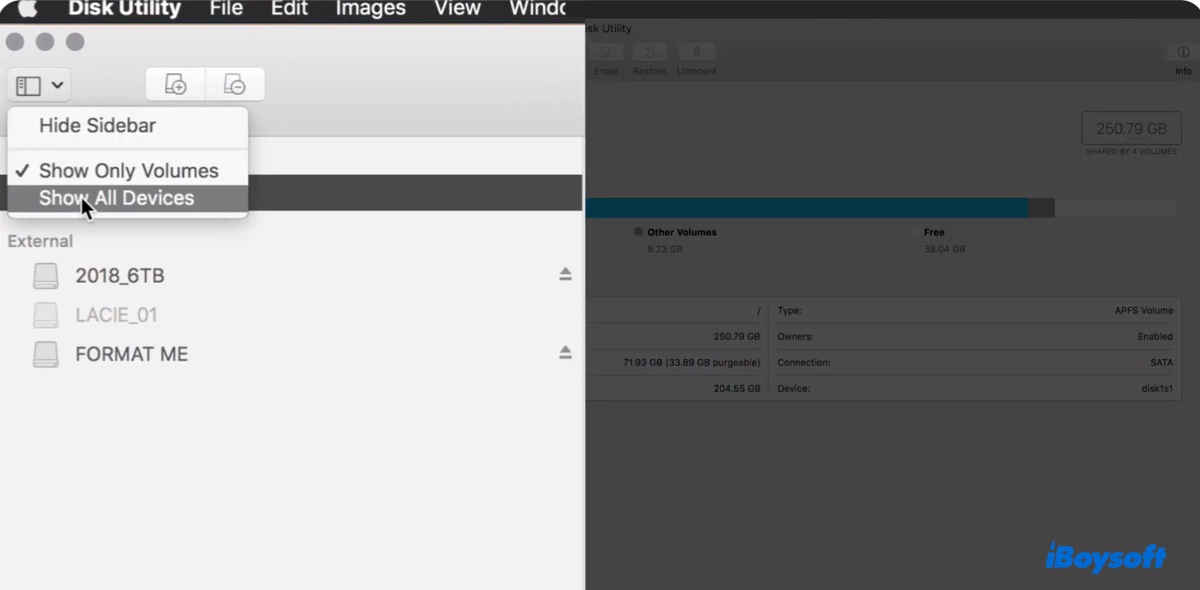
- Select the physical NTFS drive and click Erase.
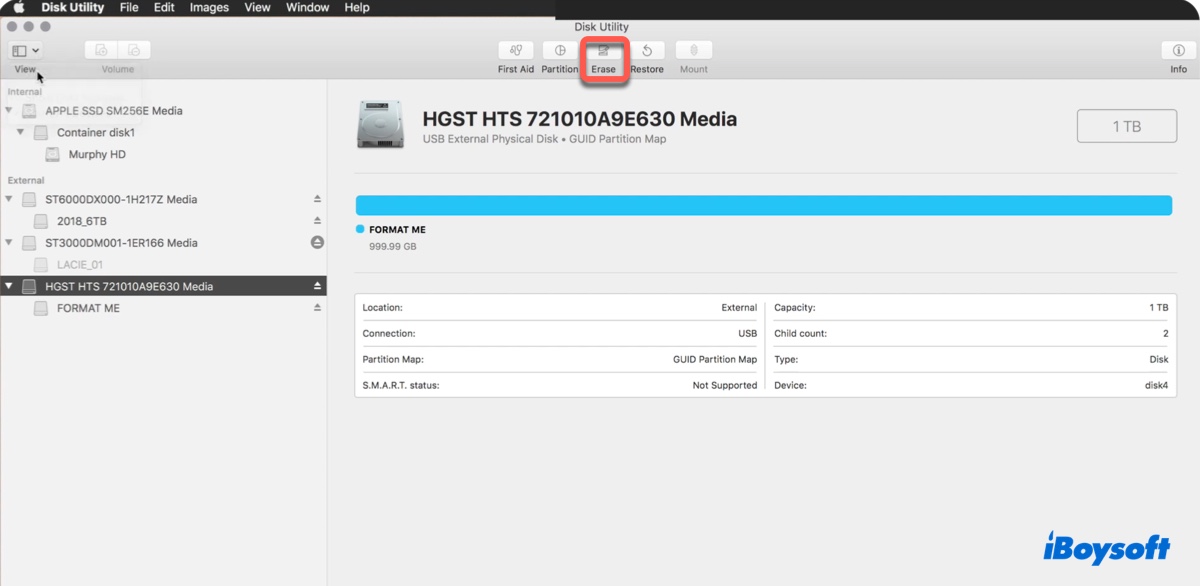
- Name the drive.
- Choose a proper file system based on your needs.
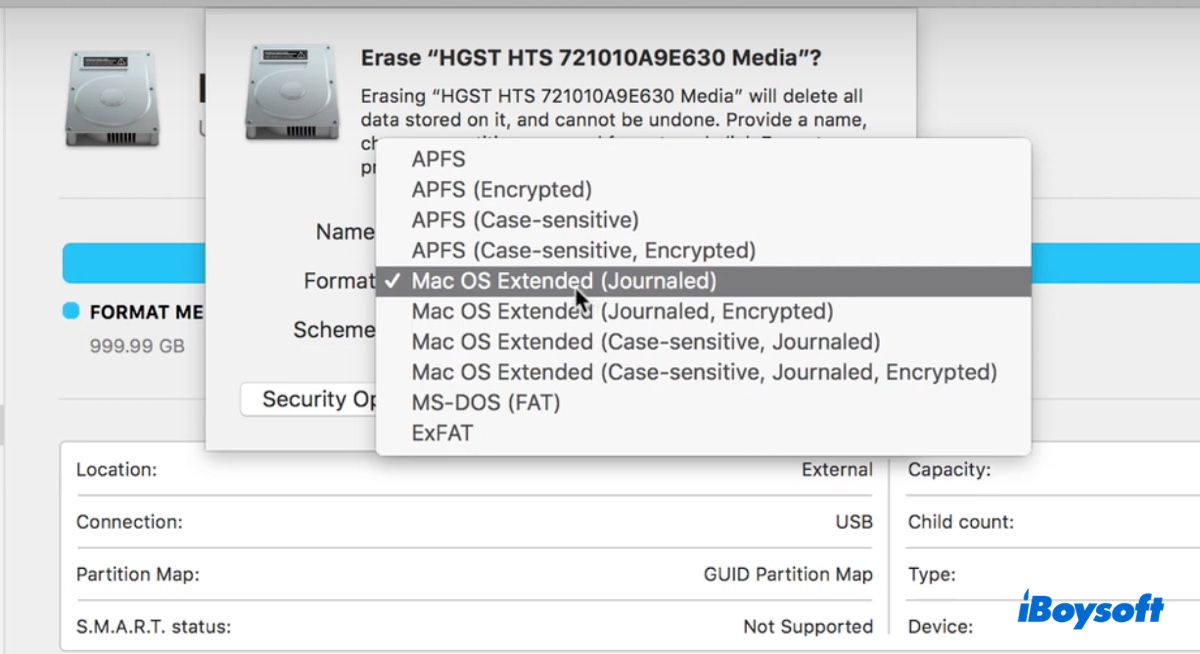
- Set the scheme to GUID Partition Map.
- Click Erase.
Way 3: Enable NTFS write support in Terminal
As an alternative, you can also activate the experimental NTFS write support on Mac by running commands in Terminal. Nevertheless, it's generally not recommended to do so if you have valuable data on the NTFS drive. This is because it may corrupt the drive and cause data loss. After all, the feature is not enabled by default for a reason.
Note: This feature has been canceled on macOS Ventura and later.
Besides, the next time you use a different NTFS drive, you must execute the commands again. If you decide to give it a go, do so at your own risk and take the following steps:
- Ensure you're logged in with an administrator account.
- Open Terminal from the Applications > Utilities folder.
- Input the following command and hit Enter.sudo nano /etc/fstab
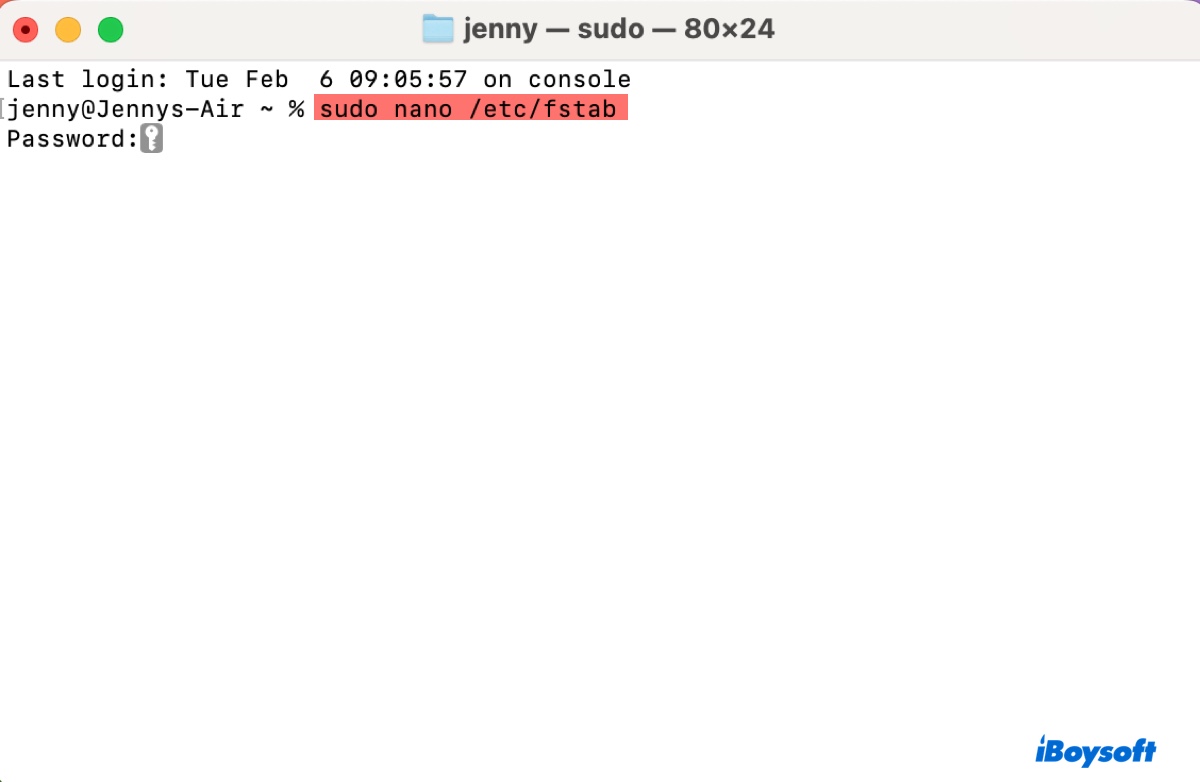
- Type in your password and press Enter. (The password won't appear on the screen.)
- When the /etc/fstab file opens in the nano text editor, use the arrow key to move the cursor to a new line.
- Type the command below after replacing "NAME" with your NTFS drive's name.LABEL=NAME none ntfs rw,auto,nobrowse
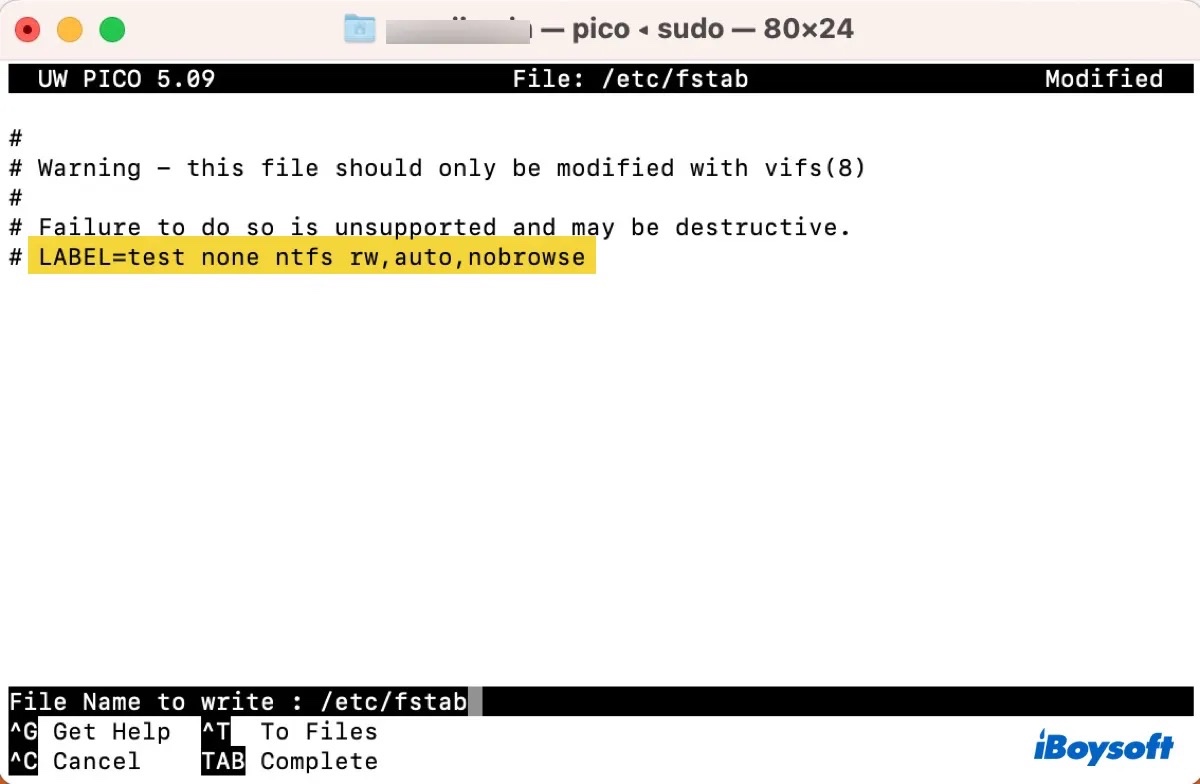
- Press Ctrl + O to save the changes to your NTFS drive.
- Press Enter and then hit Ctrl + X to close the editor.
- Safely eject the NTFS drive and reconnect it to your Mac.
Share this post to help others learn how to write to NTFS drives on macOS High Sierra.
How to format drives to NTFS on macOS High Sierra?
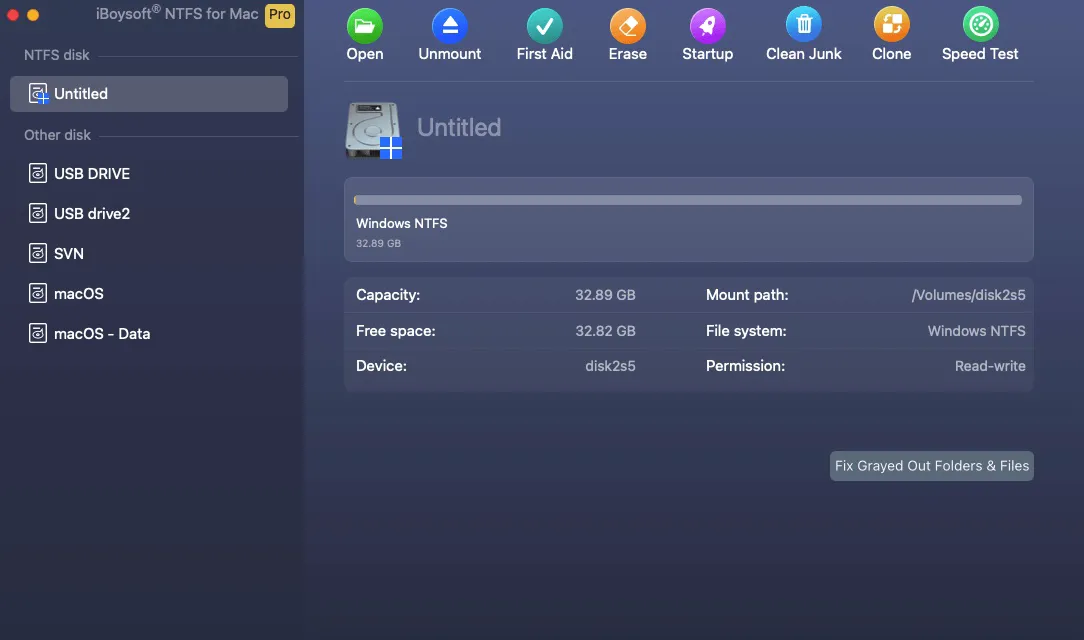
If you've attempted to format a drive to NTFS on macOS High Sierra, you've likely noticed that there's no such option. To format drives to NTFS on macOS High Sierra or another version, you can use iBoysoft NTFS for Mac. It has a dedicated feature to format drives in APFS, Mac OS Extended (Journaled), FAT32, exFAT, or NTFS to NTFS on Mac.
Format your USB stick or external drive to NTFS on High Sierra with the following steps:
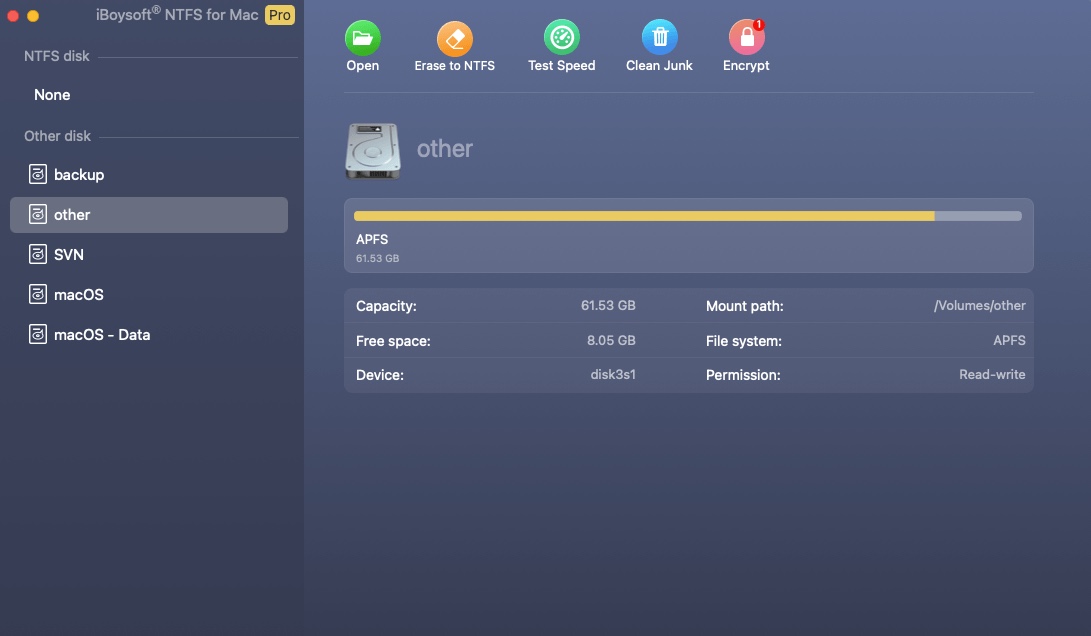
Step 1: Download and install iBoysoft NTFS for Mac.
Step 2: Open the software, select the disk, and click Erase to NTFS.
Spread the information to benefit others who want to format to NTFS on High Sierra.
FAQs about NTFS on High Sierra
- QCan High Sierra read NTFS?
-
A
Yes, macOS High Sierra can read NTFS. The problem is that High Sierra can't write to NTFS drives by default.
- QDoes macOS support NTFS?
-
A
macOS has read support for NTFS.
- QDo I still need NTFS for Mac?
-
A
Yes, you need NTFS for Mac to write to NTFS drives on Mac, espeically on macOS Ventura or later.
- QWhy is NTFS not supported on Mac?
-
A
NTFS is partially supported on Mac because it's a proprietary file system that belongs to Microsoft.