Though FileVault is highly recommended for protecting your Mac from prying eyes, you may need to disable it sometimes to troubleshoot an issue such as the error "You may not install to this volume because it is currently being encrypted" or perform certain tasks. This post will explain different ways to disable FileVault on Mac and solutions to try if you can't turn off FileVault on Mac.
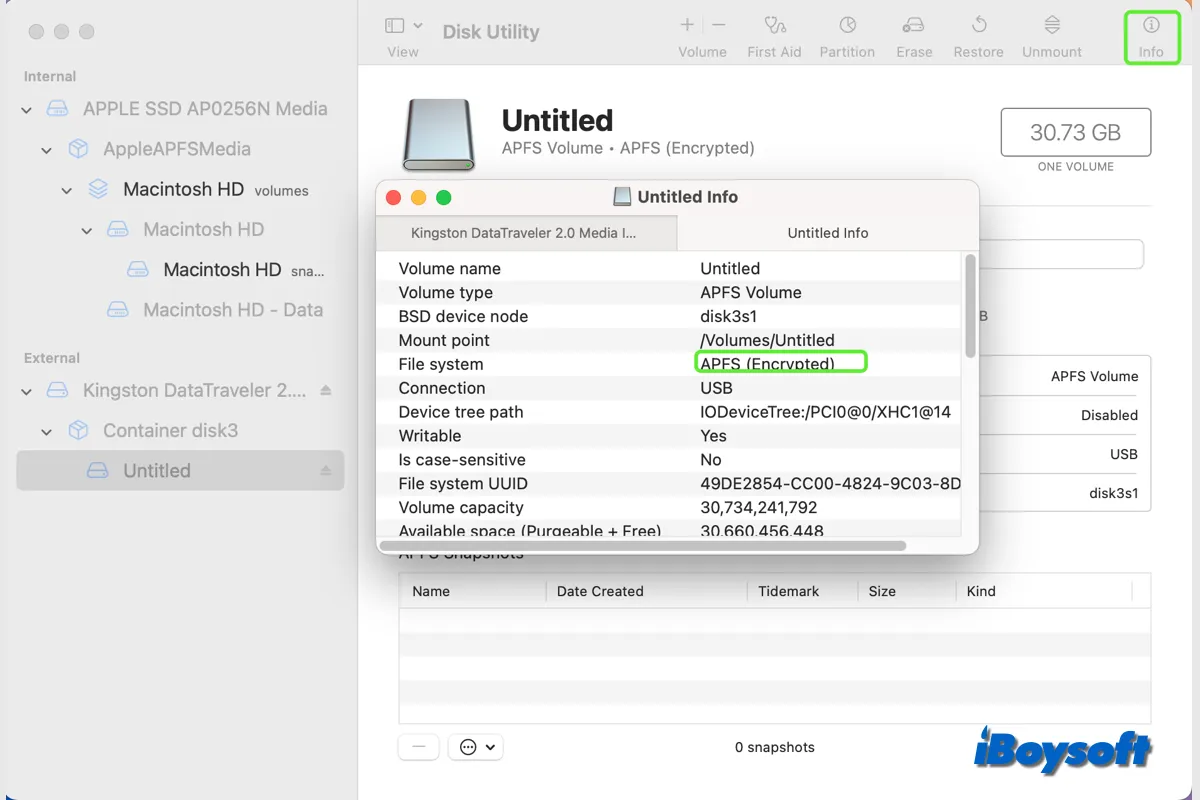
This post tells how to check the encryption status on your Mac, including the startup volume, non-startup volume, internal drive, and external drive.
How to disable FileVault on Mac in System Preference, Terminal & Recovery mode?
If you have decided to turn off FileVault on Mac, here are two ways to do it on a regular boot. You can either disable FileVault by modifying System Preferences/Settings or by running a command in Terminal. It's worth mentioning that you can still use your Mac while waiting for the disk to be decrypted.
How to turn off FileVault on Mac? (The usual way)
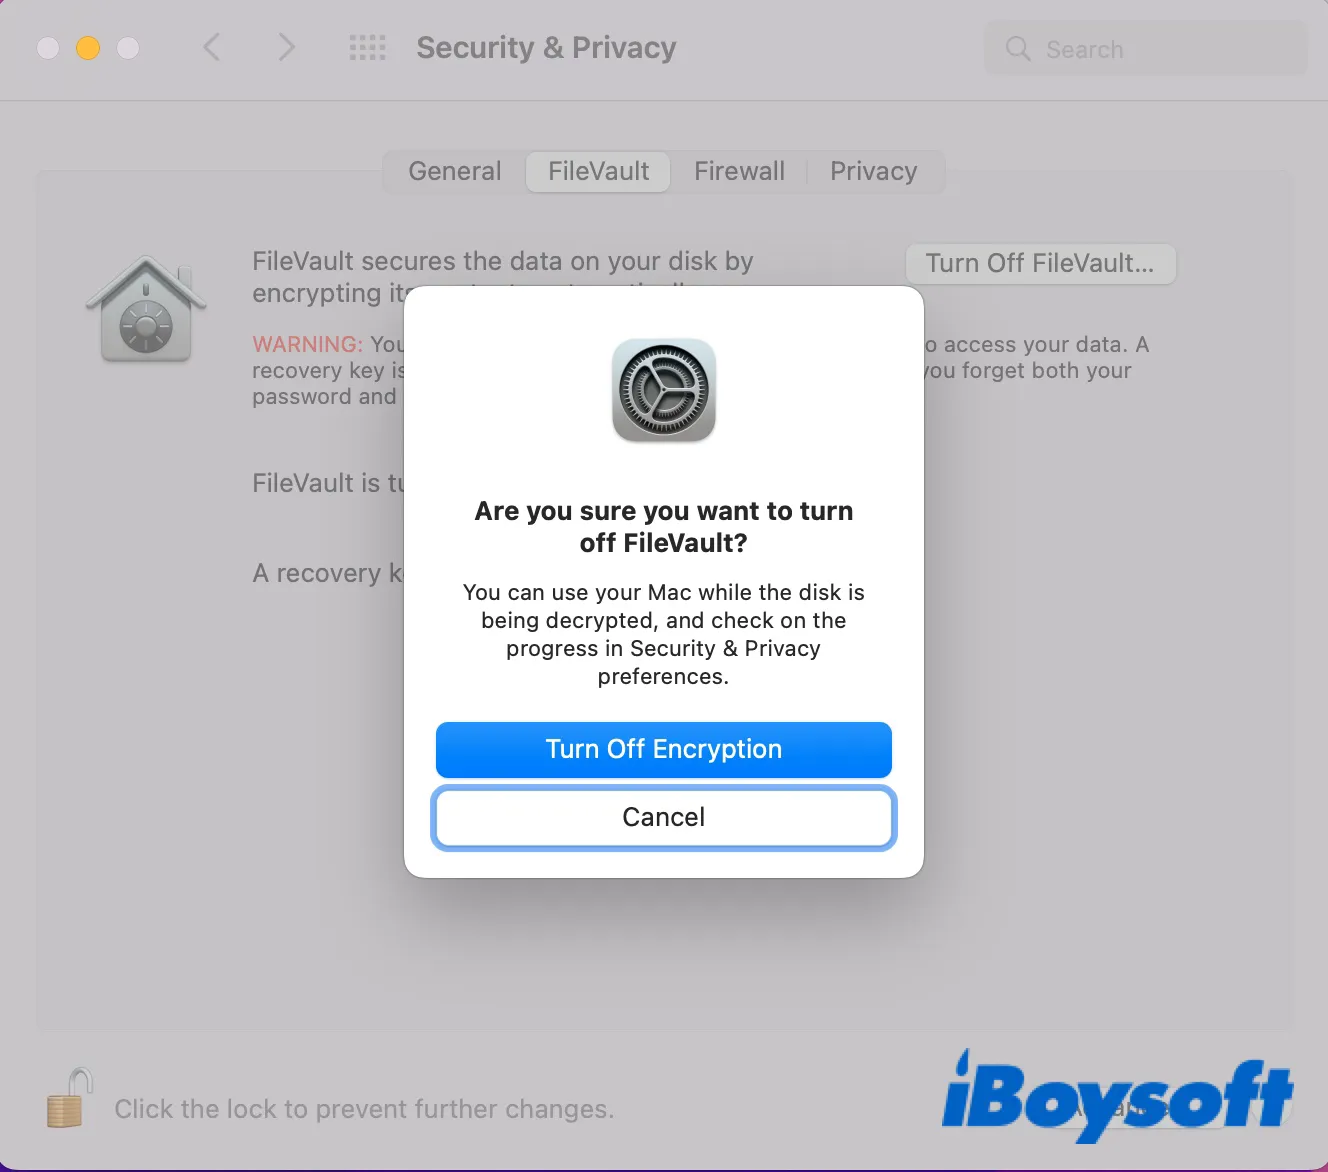
Disable FileVault on macOS Monterey or earlier:
- Open the Apple menu > System Preferences.
- Click the "Security & Privacy" pane.
- Select the "FileVault" tab.
- Tap the bottom-left lock, enter your admin name and password, then click "Unlock."
- Click "Turn Off FileVault."
- Click "Turn Off Encryption."
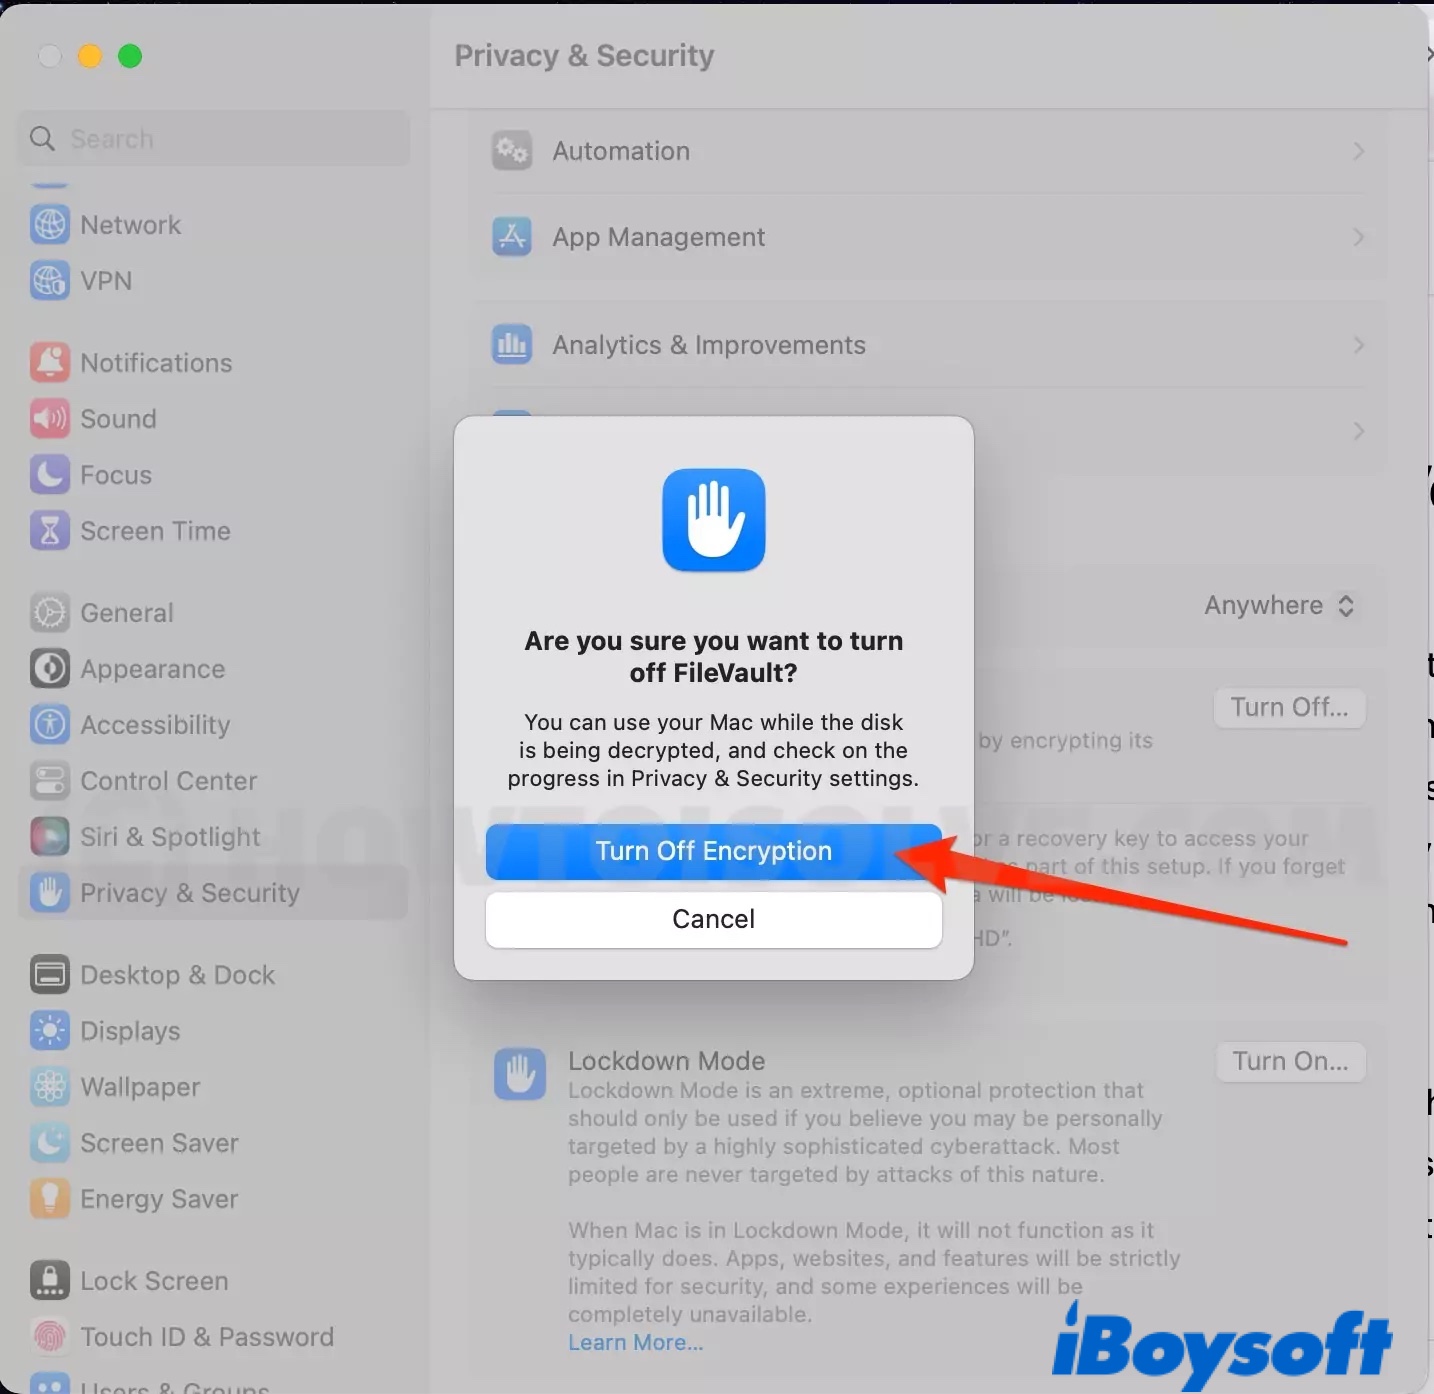
Disable FileVault on macOS Ventura:
- Open the Apple menu > System Settings.
- Select "Privacy & Security" from the left sidebar.
- Locate FileVault, then tap "Turn off" on its right side.
- Click "Turn off Encryption" when a popup asks, "Are you sure you want to turn off FileVault?"
- Enter your admin login details and click Restart.
How to disable FileVault on Mac using Terminal?
Here's how to turn off FileVault on Mac using Terminal:
- Launch Terminal from the Applications > Utilities folder.
- Copy and paste the following command into Terminal and press Enter.sudo fdesetup disable
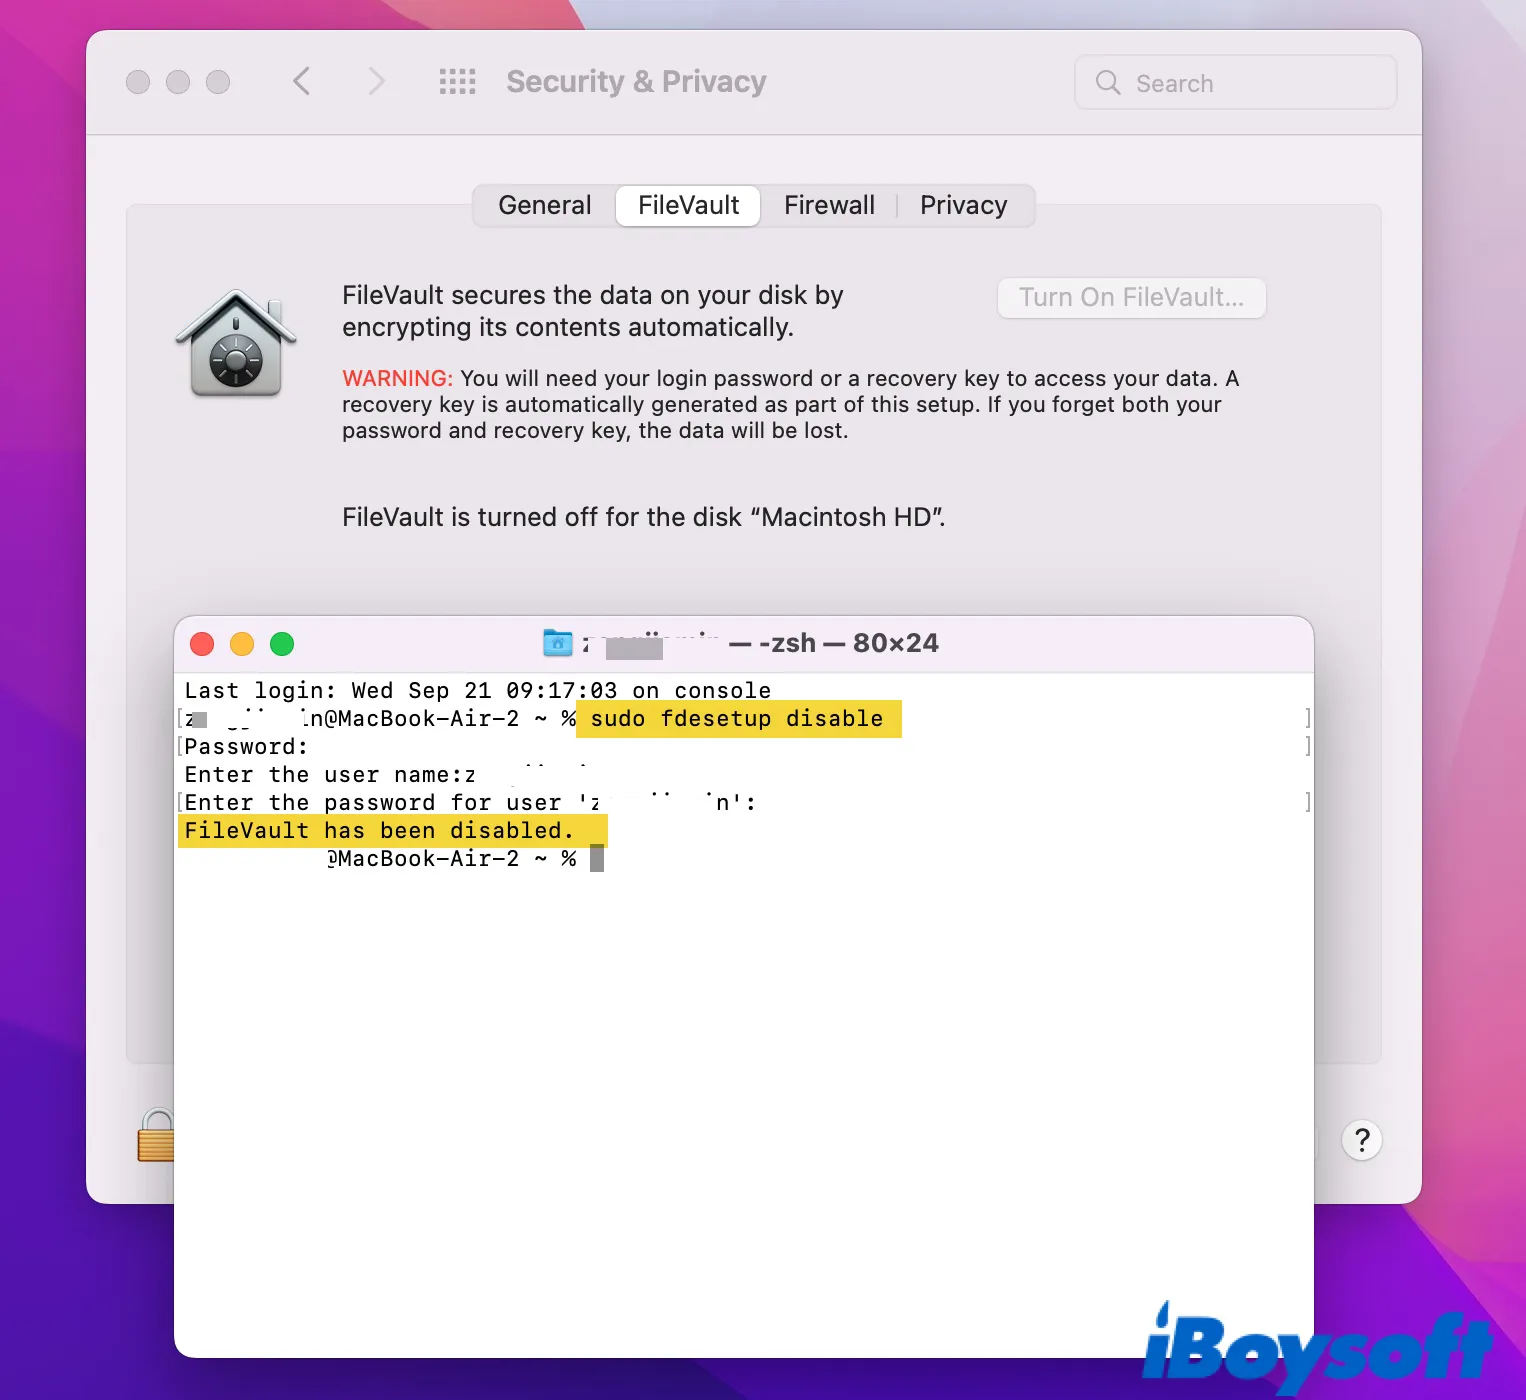
- Enter your admin login password and hit Enter. (You won't see the password when typing it in Terminal.)
- Type in your user name and press Enter.
- Input your password and hit Enter.
Tips: You can check the FileVault status on Mac by running this command in Terminal: sudo fdesetup status.
How to disable FileVault on Mac in recovery?
If your Mac can't boot up normally, you can disable FileVault from Recovery Mode. Unfortunately, it's not as easy as doing it on a regular boot.
On some old macOS versions, you can turn off FileVault from recovery with the following steps:
- Boot your Mac into macOS Recovery.
- Open Disk Utility and select your locked startup disk.
- Click File > Turn Off Encryption.
- Enter your password.
On macOS Mojave or later, you can try decrypting the encrypted APFS volume with the steps below:
- Restart your Mac in Recovery Mode.
- Click Utilities > Terminal from the top menu bar.
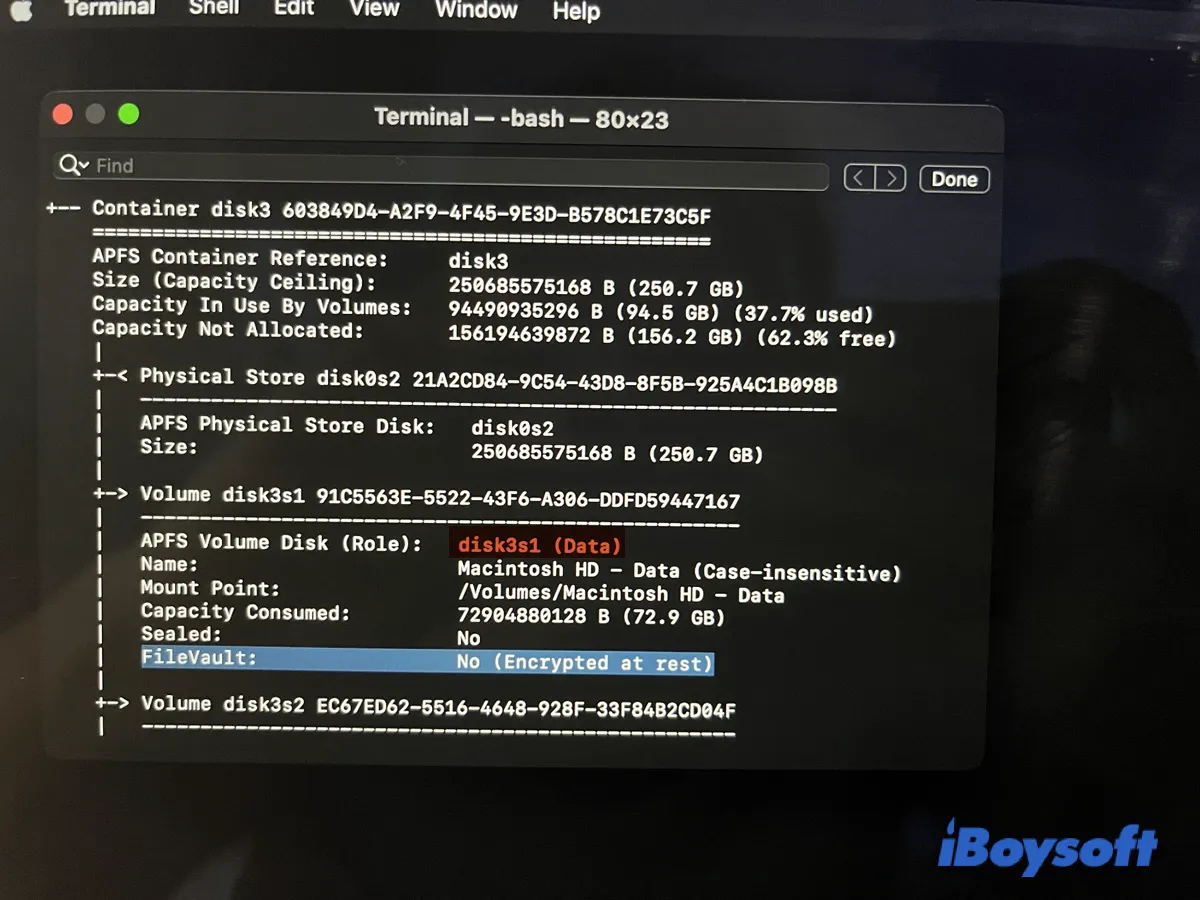
- Input the command below in Terminal and press Enter to list all APFS containers and volumes on your Mac.diskutil apfs list
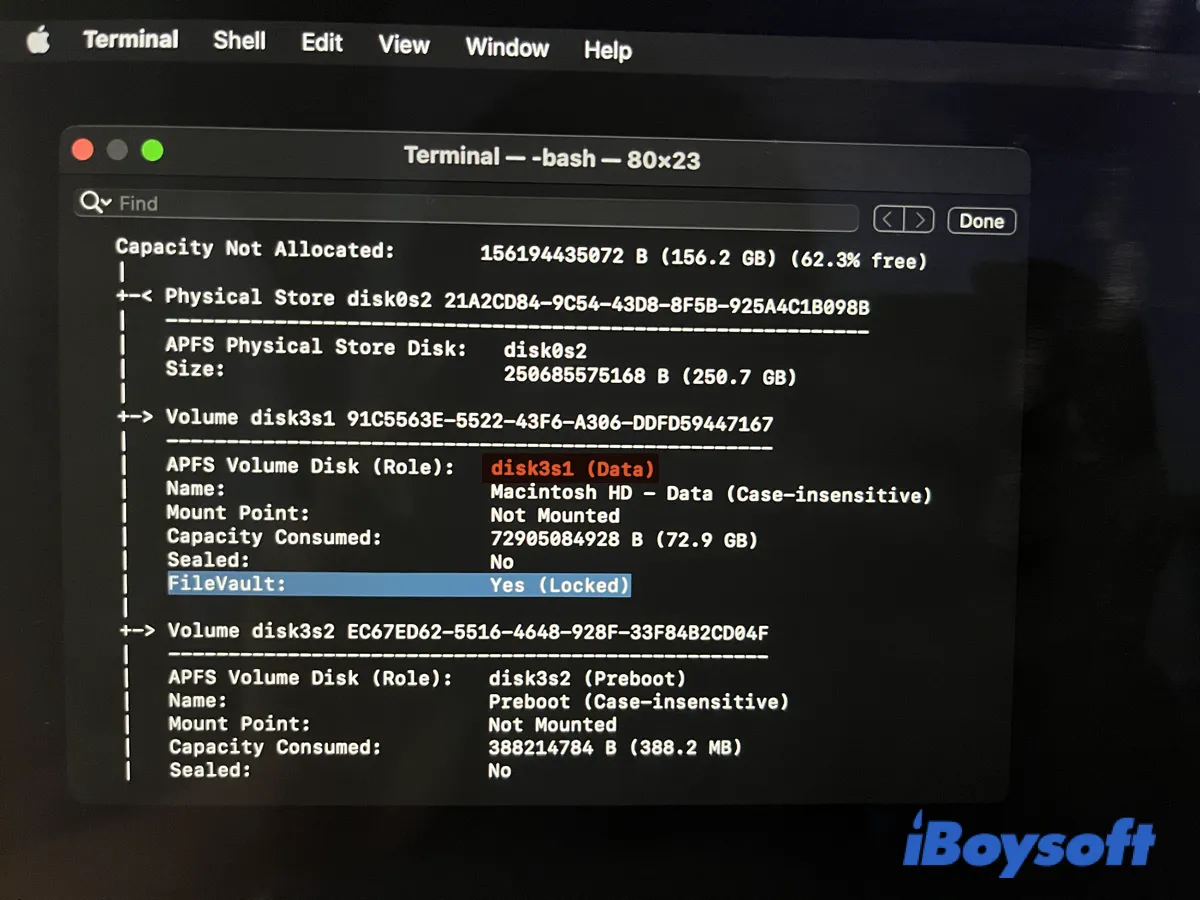
- Look for the volume with FileVault enabled and note down its identifier, such as disk3s1. (There may be more than one FileVault-enabled volume, aim for the Data volume.)
- Run the command below to unlock the FileVault-encrypted APFS volume. (Replace the identifier with the number you wrote down in step 4.)diskutil apfs unlockVolume /dev/identifier
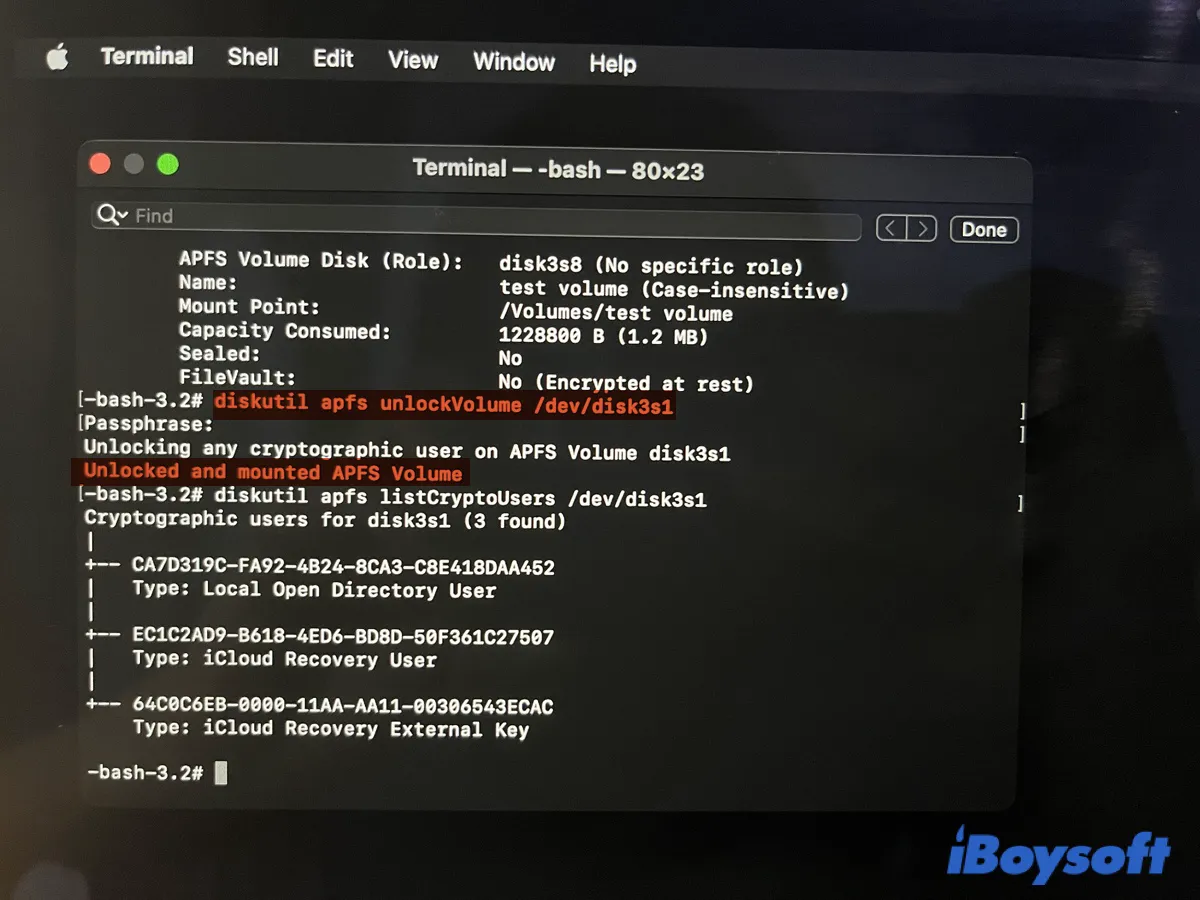
- Input your password and press Enter. Then you should see the notification, "Unlocked and mounted APFS volume."
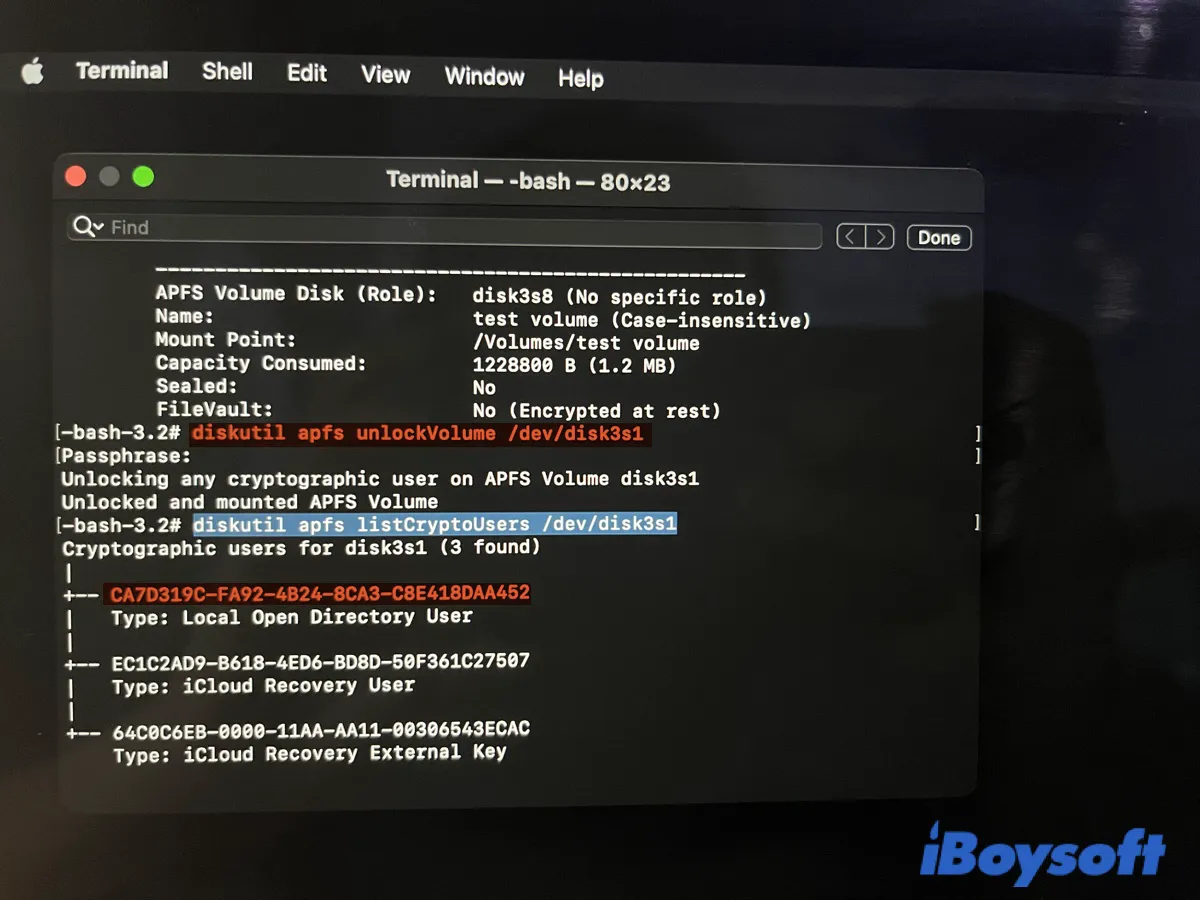
- Execute the following command to get the UUID (Universal Unique Identifier) of enabled accounts. (Replace identifier with yours.)diskutil apfs listcryptousers /dev/identifier
- Type in your password and press Enter.
- Note down the UUID associated with the Local Open Directory User entry.
- Execute the following command to decrypt the drive. (Replace identifier and uuid with your information.) diskutil apfs decryptVolume /dev/identifier -user uuid
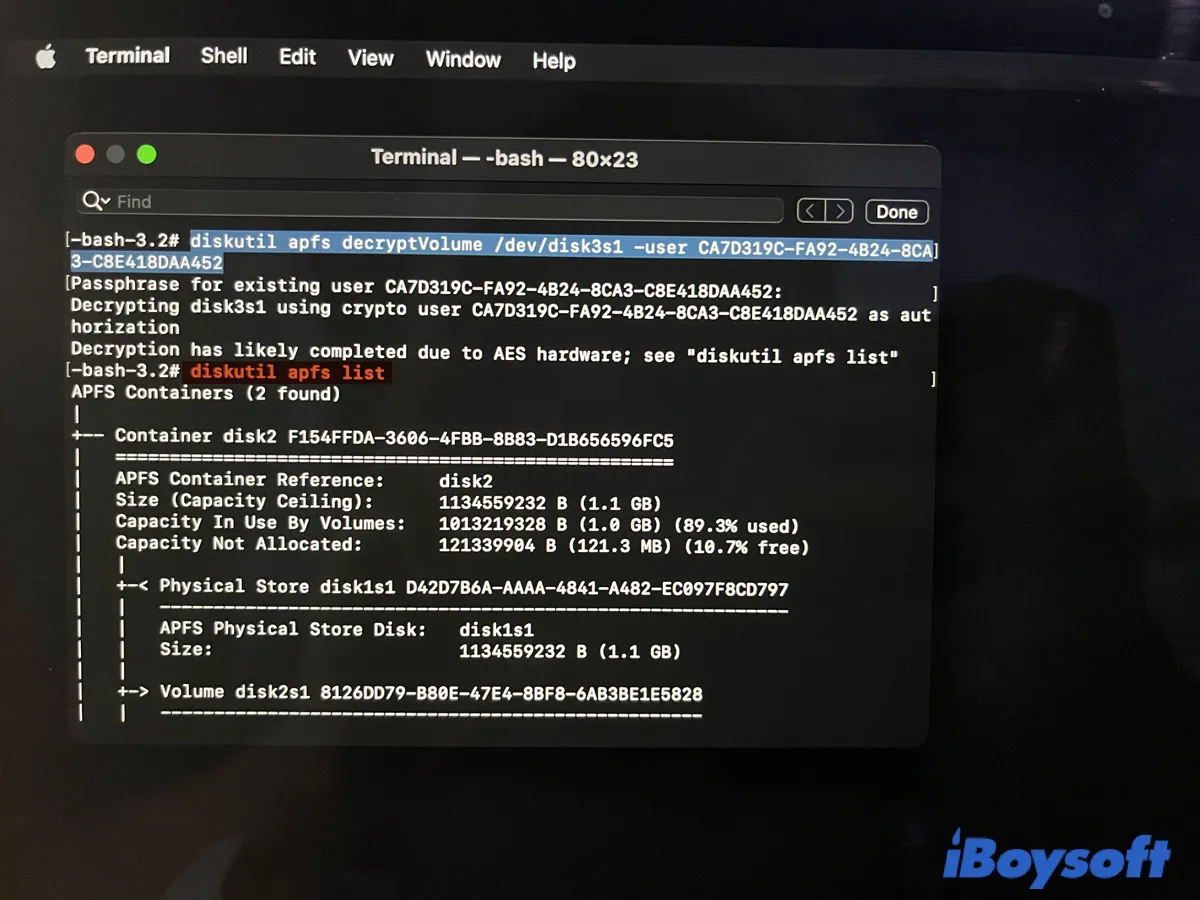
- Execute the command below to monitor the decryption of the APFS volume.diskutil apfs list
Note: Terminal may echo several UUIDs that belong to the " Local Open Directory User" type if you have more than one account enabled for FileVault. You can try one at a time until FileVault is disabled.
If you can't disable FileVault in recovery, the only option is to erase your startup disk and reinstall macOS, as it allows you to choose if you want to enable FileVault at setup. Note that erasing your Mac will delete all data on it. Therefore, you should back up your Mac before proceeding.
How to disable FileVault on Mac without keyboard?
Since entering your login password or recovery key is a must to disable FileVault on Mac, you can't do it without a keyboard. If you are trying to disable FileVault on Mac when your keyboard is not working, you need to either fix the keyboard or use another one.
Logitech points explicitly out that FileVault may prevent Bluetooth devices from reconnecting with your Mac after a restart and will only reconnect after logging in. The potential solutions for that are:
- Use the USB receiver if you have one.
- Use a USB keyboard to log in.
- Use your MacBook keyboard or trackpad to log in.
Once the keyboard works, you can follow the methods we mentioned above to disable FileVault on Mac.
Now that you know how to turn off FileVault on Mac. Don't forget to share it with your friends.
How to temporarily bypass FileVault on Mac?
One of the disadvantages of having FileVault enabled is that you'll need to enter the FileVault password on the remote Macs if you need to perform remote management or administration tasks like updating macOS on them.
If you don't want to disable FileVault on Mac, you can bypass entering a FileVault password on the next reboot. Nevertheless, not every Mac allows bypassing FileVault. So, you should check if your Mac is eligible for the Authenticated Restart first.
- Open Terminal from the Applications > Utilities folder.
- Copy and paste the following command and hit Enter.fdesetup supportsauthrestart
If Terminal says "false," your Mac can't bypass FileVault.
If Terminal returns "ture," follow the steps below to bypass FileVault for the next system restart.
- In Terminal, input the command below and press Enter.sudo fdesetup authrestart
- Type in your admin password and hit Enter.
What to do if you can't turn off FileVault on Mac?
If you can't turn off FileVault on Mac in System Preferences or Terminal, make sure your account is enabled to turn on/off FileVault on Mac. If it's a company computer, you can contact the IT administrator for help.
To check users who are allowed to log in at startup and unlock the encrypted information on the Mac, execute the command below in Terminal:
sudo fdesetup list
Alternatively, you can check if the FileVault pane in System Preferences shows a message saying, "Some users are not able to unlock the disk." If it does, you can click the "Enable Users" button next to the message to view accounts enabled to unlock the disk.
Note that the "Enable Users" button is only available when one or more users are not enabled to use FileVault.
If your account is enabled to unlock FileVault encryption, try the following solutions to fix common errors.
"Turn Off Filevault" greyed out
You need to click the bottom-left lock and enter your password to unlock the Security & Privacy preference pane for the "Turn Off FileVault" option to be enabled. If "Turn Off FileVault" is still grayed out after unlocking the preference pane, you can turn off Filevault with Mac Terminal.
FileVault was not disabled
When Terminal fails to disable FileVault on Mac, it often shows the following "FileVault was not disabled" errors:
- FileVault was not disabled (-69594)
- FileVault was not disabled (-69595)
- FileVault was not disabled (-69573)
- FileVault was not disabled 11
To fix them, use the solutions below.
Try another command in Terminal
If you are experiencing any "FileVault was not disabled" errors in Terminal, try running the command below in Terminal.
sudo /usr/bin/fdesetup disable
Decrypt the FileVault-encrypted boot drive
Since FileVault encrypts your Mac's boot disk, which is APFS formatted since macOS Mojave, you can unlock and decrypt the disk to disable FileVault on Mac. Follow the steps below carefully to disable FileVault on Mac.
- Open Terminal from the Applications > Utilities folder.
- Type in the command below and press Enter to list all APFS containers and volumes on your Mac.diskutil apfs list
- Look for the FileVault-encrypted volume and note its identifier, such as disk1s1.
- Run the following command to unlock the encrypted APFS volume. (Replace identifier with the number you wrote down in step 3.)diskutil apfs unlockVolume /dev/identifier
- Input your password and press Enter. Then you should see the notification, "Unlocked and mounted APFS volume."
- Execute the command below to get your user account's UUID (Universal Unique Identifier).sudo fdesetup list
- Type in your password and press Enter.
- Take note of the UUID of your user account.
- Run the following command to decrypt the drive. (Replace identifier and uuid with the information.) diskutil apfs decryptVolume /dev/identifier -user uuid
- Execute the command below to monitor the decryption of the APFS volume.diskutil apfs list
Erase your Mac and reinstall macOS
If the issue persists, the last resort is to erase your startup disk and reinstall macOS. This way, you can set up your Mac from the beginning and get the chance to choose whether you want to enable FileVault.
How to stop FileVault encryption in progress?
It's not recommended to pause FileVault encryption midway unless it has been stuck for days and has seriously slowed down your Mac. To stop FileVault encryption in progress, you can run the same command (sudo fdesetup disable) for disabling it in the Terminal app and then restart your Mac to complete the decryption.
Note that your Mac needs to finish the decryption process before it can reinstall macOS or make Time Machine backups.
How long does FileVault decryption take?
Initiating a FileVault decryption on a T2 or M1 Mac usually won't take longer than 5 minutes, but it depends on your Mac's speed and capacity, your hard drive, and the used space on the disk. Noticeably, decrypting a drive takes longer on old Macs with spinning hard disk drives.
Please share this post if you find it helpful.
Also read: