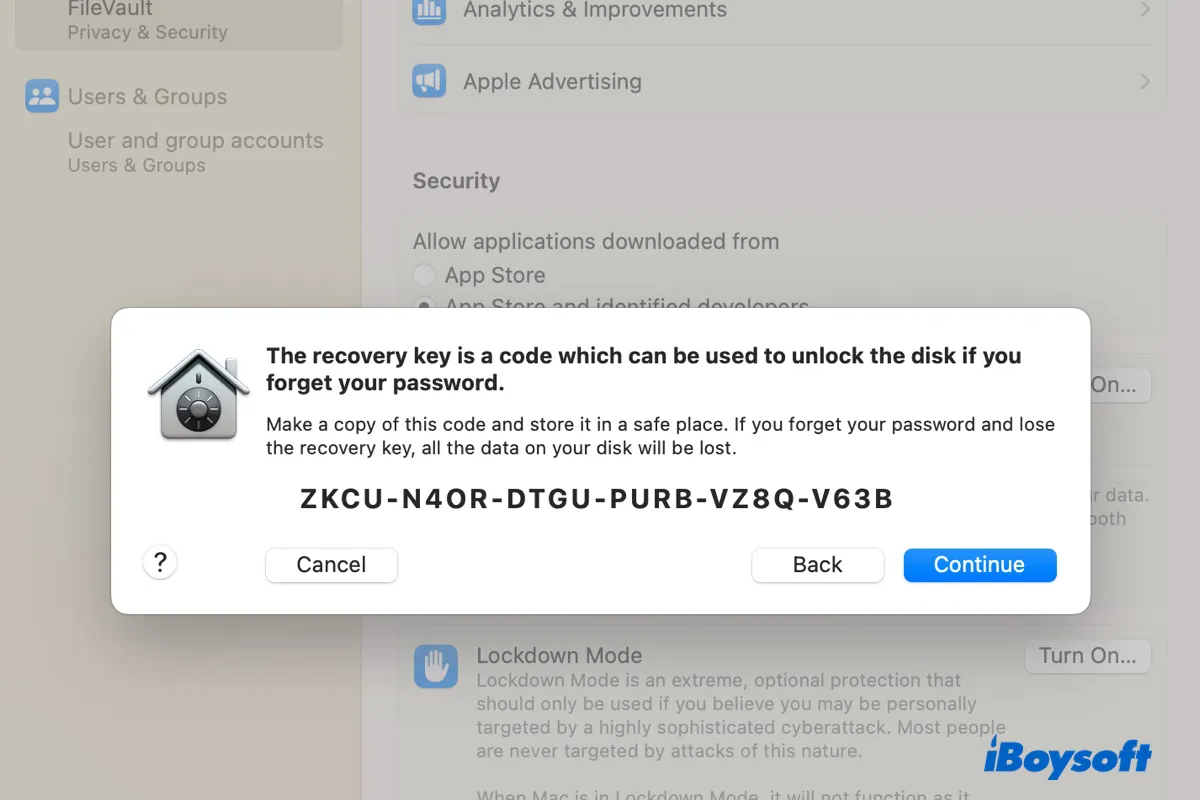
When FileVault is enabled, you're required to enter your account password to unlock the encrypted startup disk to log into your Mac. While this is great for preventing unauthorized access to the data on your Mac, you'll need your FileVault recovery key to use your Mac if you forget the password or the password somehow doesn't work.
Nevertheless, many FileVault users have no idea where the FileVault recovery key is and how to use them when it's needed. Here, we'll elaborate on these issues.
What does a FileVault recovery key look like?
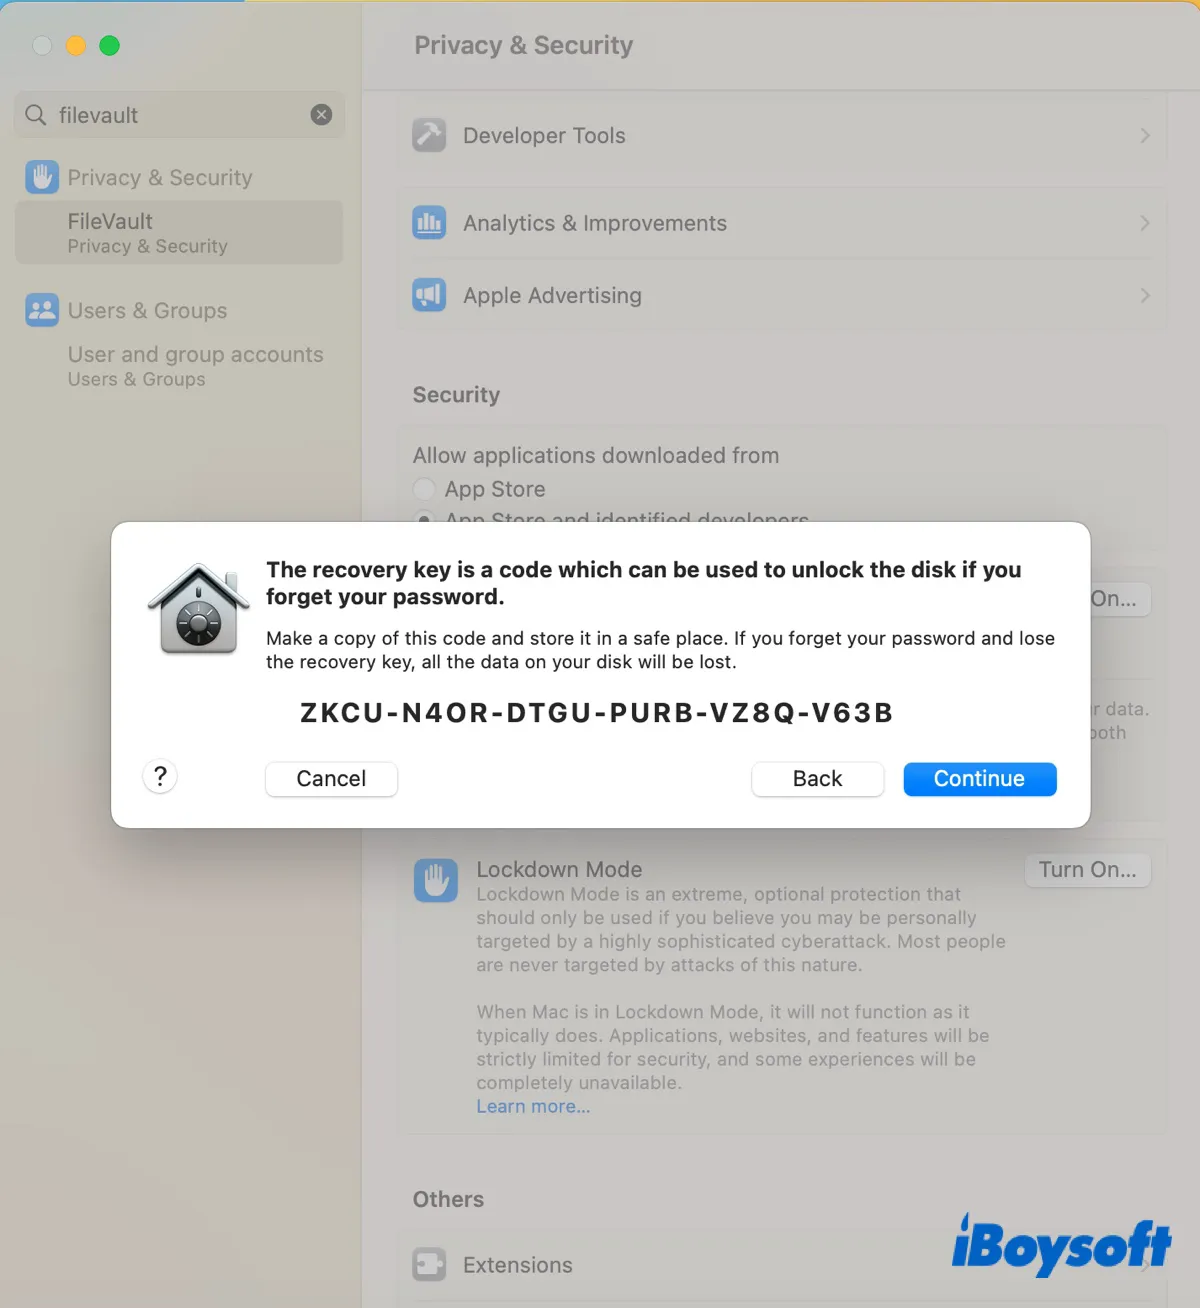
The FileVault recovery key is a string of 24-character numbers and letters in the form xxxx-xxxx-xxxx-xxxx-xxxx-xxxx, specifically generated for your Mac. It's worth noting that the FileVault recovery key is different from a Mac recovery key, which is a 28-character code used to reset your password or regain access to your Apple ID.
How to find FileVault recovery key?
The FileVault recovery key is automatically generated when you set up FileVault encryption on your Mac, indicated by the message "A recovery key has been set." However, whether you can see the recovery key depends on the option you choose when asked how you want to unlock your startup disk if you forget your login password.
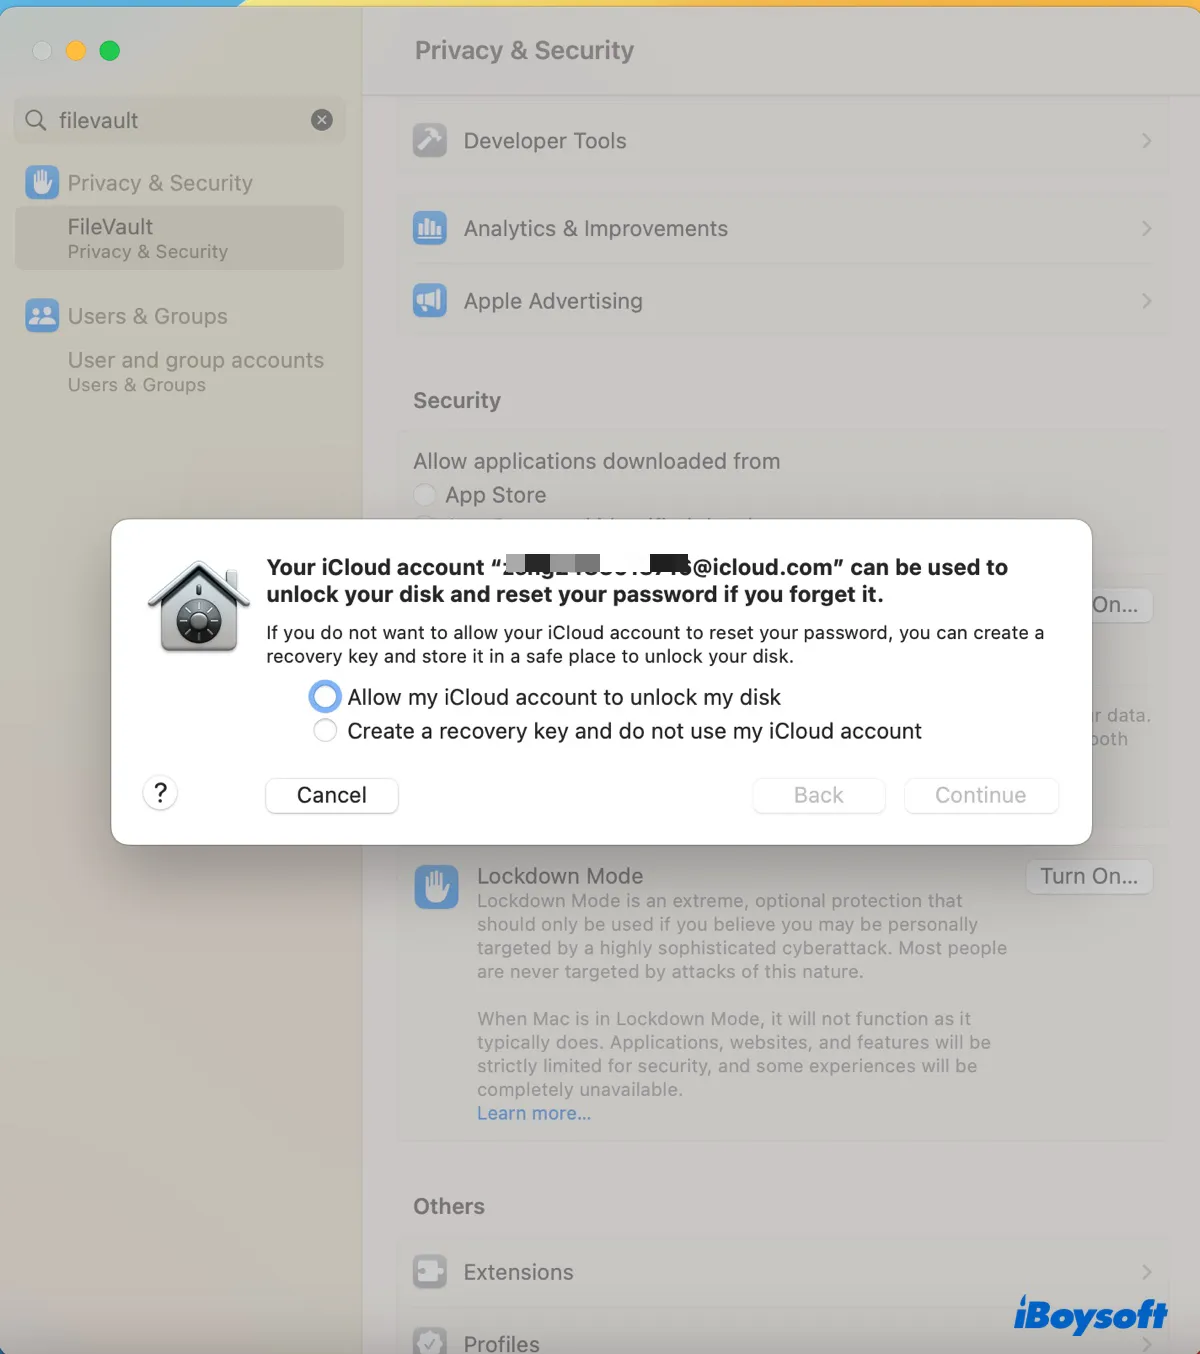
If you choose to allow your iCloud account to unlock your disk, the recovery key is tied to your iCloud. But that doesn't mean it's stored in it like a file and you can log into your iCloud to view the FileVault recovery key. In fact, there's no way to see it in your iCloud interface.
In such cases, you'll be prompted to enter your iCloud credentials rather than the recovery key when your password is forgotten or not accepted.
If you choose to create a recovery key and not use the iCloud account, macOS will generate a 24-character key and suggest you back it up in a safe place. Therefore, to find the FileVault recovery key, you must recall where you have kept it. For instance, you may have stored the key in a file on your Mac or external drive or some notes app on your phone.
Suppose you can't locate the FileVault recovery key; here are the ways you can get one if your password still works.
Create a new FileVault recovery key through Terminal
If you forgot the FileVault recovery key, there's no other way to access it except to generate a new key. The best way to do it is by running Terminal commands, as described below.
How to recover FileVault recovery key on M1 & Intel Macs:
- Launch Terminal from the Applications > Utilities folder.
- Type the following command and press Enter.sudo fdesetup changerecovery -personal
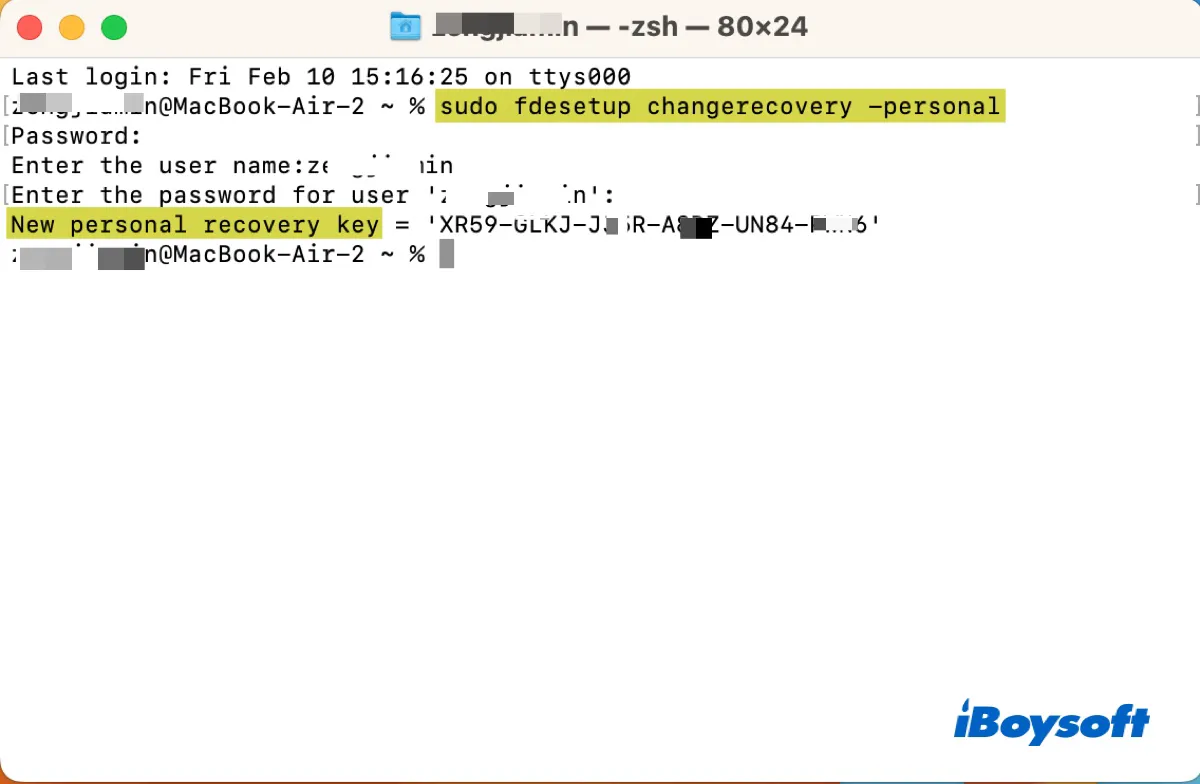
- Input your admin password and hit Enter.
- Enter your user name. (Ensure it's the same format as the beginning of the Terminal prompt.)
- Enter your account password.
You should now be able to view the new FileVault recovery key in Terminal. You can print it out, send one copy to a family member, or save it to a cloud service, etc, to keep it safe.
Disable and reenable FileVault
Alternatively, you can turn off FileVault and turn it back on to create a new recovery key. There are two ways to disable and reenable FileVault on your Mac, either through the Privacy & Security setting or the Terminal app. Since using the Terminal app is more efficient and the same steps are used in different macOS versions, we'll demonstrate how to do it in Terminal.
How to recover FileVault key on Mac:
- Open Terminal from the Applications > Utilities folder.
- Input the following command and hit Enter to disable FileVault.sudo fdesetup disable
- Type your admin password and hit Enter.
- Wait for the decryption to complete.
- Input the following command and hit Enter to reenable FileVault.sudo fdesetup enable

- Enter the admin password and press Enter.
- Enter the name of the account you want to enable FileVault for.
- Input your account password.
Terminal will return the FileVault recovery key when the FileVault disk encryption is enabled.
Ask the IT admin for help
If your Mac is managed by an IT admin, he or she may be able to retrieve the FileVault recovery key for you. For instance, if your Mac is enrolled in Profile Manager, the admin can open the app, obtain the encrypted recovery key for your device and decrypt it in Terminal.
What to do if you forgot your FileVault password and recovery key?
If you have forgotten your FileVault password (account login password), you can reset your password to enter your Mac. Suppose you chose to use your iCloud account to unlock your Mac when setting up FileVault; then you just need your iCloud credentials to get a new password.
If you chose to unlock your Mac with a recovery key, you must enter the correct key to reset the password. In this case, if you have neither the login password nor the FileVault recovery key, the only way to access your Mac is to erase it using the Recovery Assistant. You can't even erase your Mac with the usual Disk Utility tool in Recovery Mode, as it's unavailable unless you enter the admin password or recovery key.
Inevitably, you'll lose all data on your Mac because the startup disk is encrypted and inaccessible. Here's how to enter your Mac if you forgot the FileVault password and recovery key:
On an Intel-based Mac:
- Shut down your Mac.
- Press the power button and immediately press and hold the Command + R keys.
- Release the keys when you see the Apple logo.
- Click "Recovery Assistant" at the top-left menu bar.
- Select "Erase Mac."
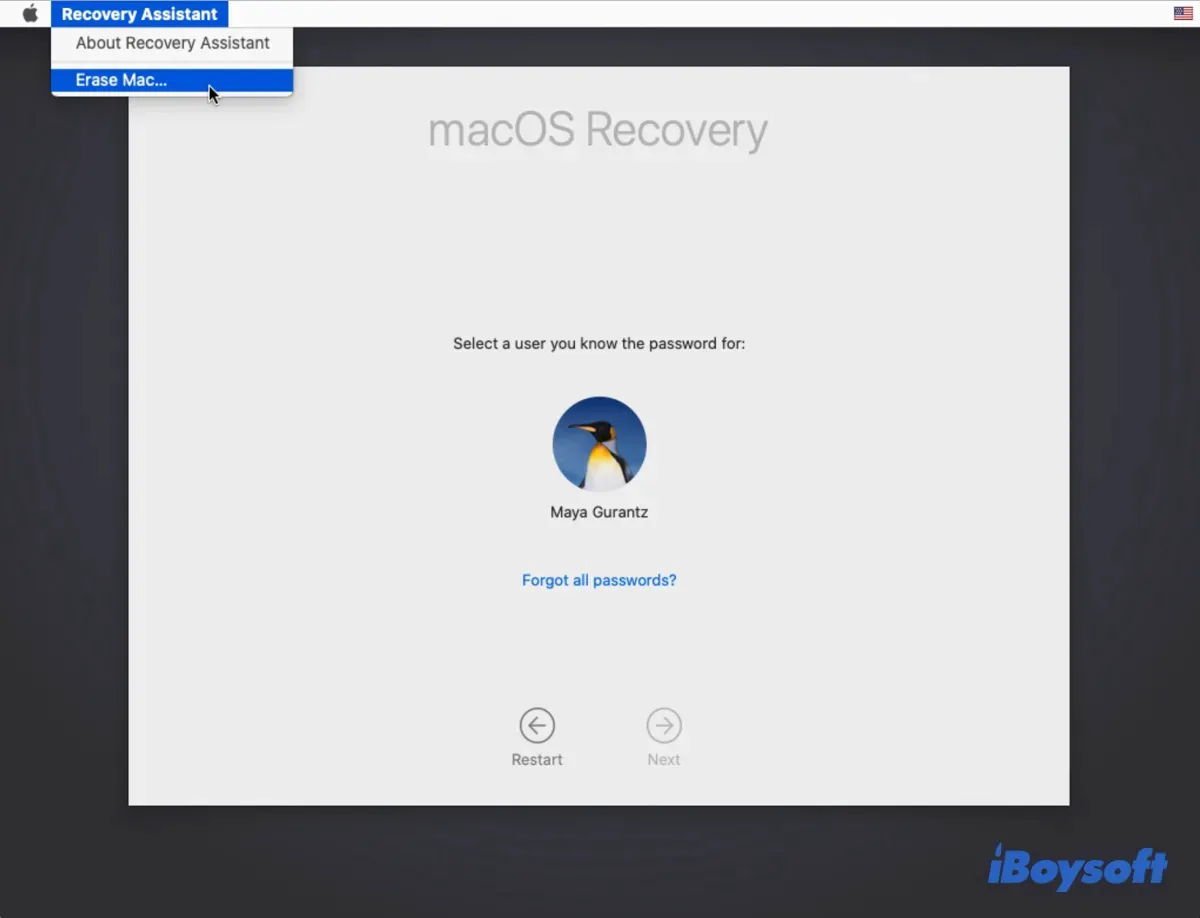
- Click "Erase Mac" again on the pop-up window and confirm your action.
- Once your Mac is erased, you can boot into macOS Recovery again and reinstall macOS.
On an M1 Mac:
- Shut down your Mac.
- Press and hold the power button until the "Loading startup options" shows up.
- Click Options > Continue.
- Tap "Recovery Assistant" at the top-left menu bar.
- Select "Erase Mac."
- Click Erase Mac > Erase.
- After your Mac is erased, you can boot into macOS Recovery again and reinstall macOS.
Share these steps to help more users access their Macs after they forgot FileVault recovery key.
How to use FileVault recovery key?
You'll only be asked to enter the FileVault recovery key when resetting your account password for login. When it happens, make sure you put in the whole key with the hyphens. If you find the FileVault recovery key not working, try restarting your Mac and repeat the password resetting process.
How to check if your FileVault recovery key is still valid?
You'll get a different FileVault recovery key each time you disable and reenable FileVault disk encryption. If you have migrated to a new Mac, the new Mac if encrypted with FileVault will have a different recovery key. So, you might want to know which one is accurate for your current Mac if you have more than one of the recovery keys stored.
Here's an easy way to check:
- Open Terminal from the Applications > Utilities folder.
- Copy and paste the command below into Terminal and press Enter.sudo fdesetup validaterecovery
- Enter your admin password and press the Enter key.
- Type or paste your FileVault recovery key and press Enter.
- You'll see true if the recovery key is for your Mac; otherwise false.
Note that you may make mistakes as you won't be able to see the recovery key as you type or paste it. So, try a few more times.
Share this post if you find it useful.
FAQ about FileVault recovery Key
- QWhat's the FileVault recovery key length?
-
A
The FileVault recovery key is 24 charaters long.
- QWhere is FileVault recovery key stored?
-
A
Although a FileVault recovery key is automatically generated when FileVault encryption is turned on for your startup disk. The recovery key is only displayed when you select the second option and is not stored until you copy and paste it somewhere or take a picture of it. So, only you'll know where it's saved.
- QHow to get FileVault recovery key from iCloud?
-
A
You can't get the FileVault recovery key from iCloud. If you'd like to see the recovery key and save it somewhere safe, try the solutions in this post.
- QHow do I unlock my Mac with its recovery key and FileVault active?
-
A
You don't unlock your Mac with the FileVault recovery key. Usually, you can put in your login password to unlock your Mac. If the password doesn't work, you use the recovery key to reset it.
- QWhat you can do if you forgot your password on a FileVault-protected Mac?
-
A
If you forget your password and can't log into your FileVault-protected Mac, you can reset the password.
- QWhy does FileVault say a recovery key has been set but I haven't gotten one?
-
A
If you see the message "A recovery key has been set" but haven't seen the actual key, you likely have chosen to use iCloud to unlock your disk, which will not display the recovery key but bind it with your Apple ID.
