If Spotlight or Finder can't search external hard drives on Mac, you'll have a hard time finding the files you want, especially if the drive keeps a lot of data. In this post, we'll discuss the reasons behind the issue and how to resolve it.
Why cannot I search my external hard drive on Mac
There could be various reasons why you can't search your external hard drive on Mac. Here are some common ones:
- The drive isn't indexed by Spotlight.
- The drive is NTFS-formatted.
- The drive has permission issues.
What to do if you cannot search external hard drive on Mac
If notice the Finder search not working on your external drive, follow the solutions below to fix it.
- Fix 1: Reindex the external hard drive
- Fix 2: Force Spotlight to reindex your drive
- Fix 3: Change the drive's permission
- Fix 4: Use iBoysoft NTFS for Mac
Kindly share these solutions to benefit more Mac users.
Fix 1: Reindex the external hard drive
If Finder doesn't search your external hard drive when looking for files, the drive is likely not correctly indexed by Spotlight. You should set Spotlight to reindex the drive. To do it, keep the external drive connected, and go through these steps:
On macOS Ventura:
- Open System Settings.
- Select "Siri & Spotlight."
- Click "Spotlight Privacy."
- Drag and drop the disk icon of the external hard drive from your desktop to the privacy list.
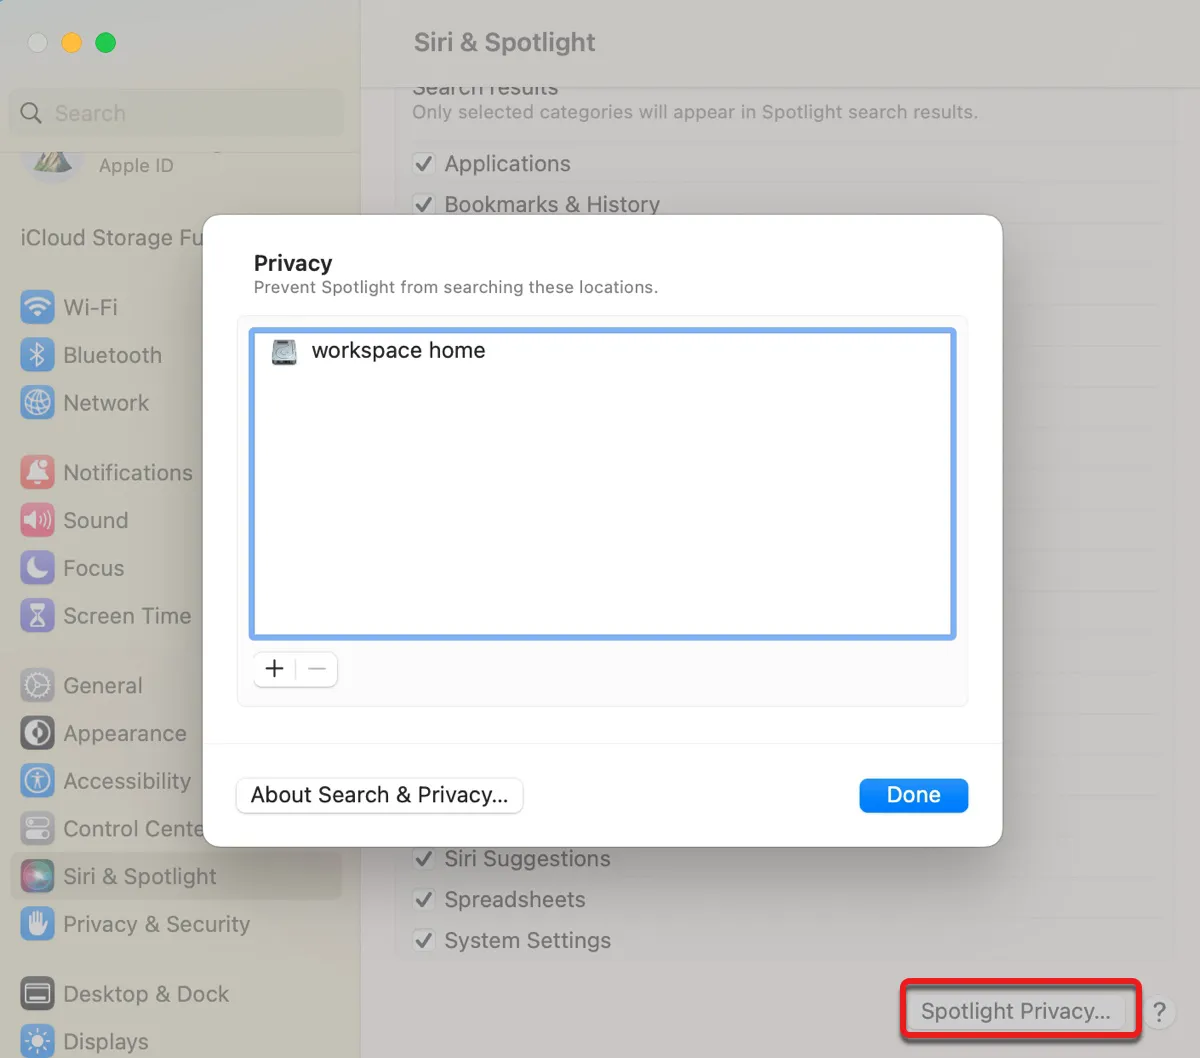
- Click Done.
- Select "Spotlight Privacy" again.
- Highlight the external drive and click the ( - ) icon to remove it.
- Click Done.
On macOS Monterey or earlier:
- Open System Preferences.
- Click Spotlight.
- Select the Privacy tab.
- Drag and drop the external drive's disk icon from your desktop to the privacy list.
- Highlight the disk icon in the list and click the ( - ) button.
After going through these steps, Spotlight will reindex the content of your external drive, allowing Finder to search its files. The indexing process may need some time, depending on the amount of data you have on the drive.
You can press Command + Space bar to call out Spotlight and type a random thing to reveal the status bar. If you see the status bar, the process is still ongoing. Wait until the indexing is complete, then retry searching files from the drive.
Fix 2: Force Spotlight to reindex your drive
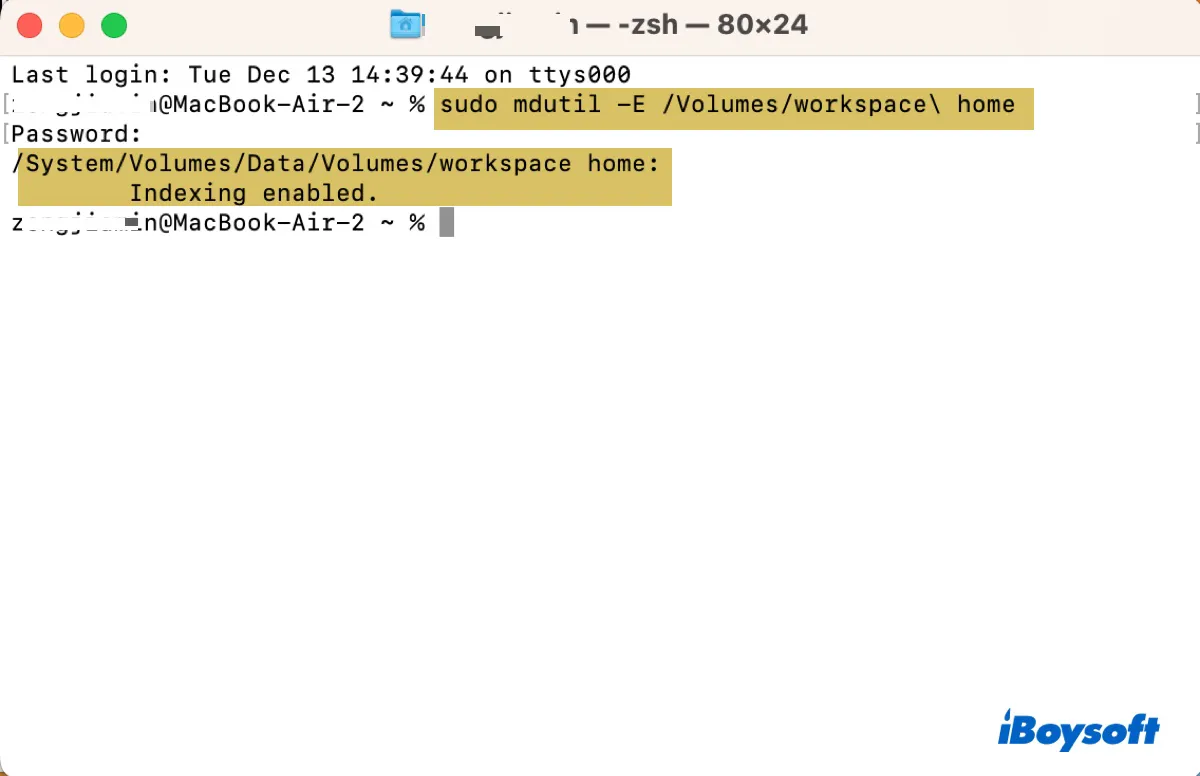
Alternatively, you can execute Terminal commands to force Spotlight to reindex your drive.
- Open Terminal from the Applications > Utiltiies folder.
- Type the command below into the Terminal window.sudo mdutil -E
- Drag and drop the drive's icon from your desktop to the Terminal window to get its path.
- Press Enter.
- Type in your administrator password and hit Enter.
Fix 3: Change the drive's permission
Suppose the drive is indexed by Spotlight but still can't be searched; then it may have permission issues. You can follow the steps below to change the drive's permission.
- Right-click the drive's icon on the desktop.
- Select "Get Info."
- Tap the yellow lock and enter your password.
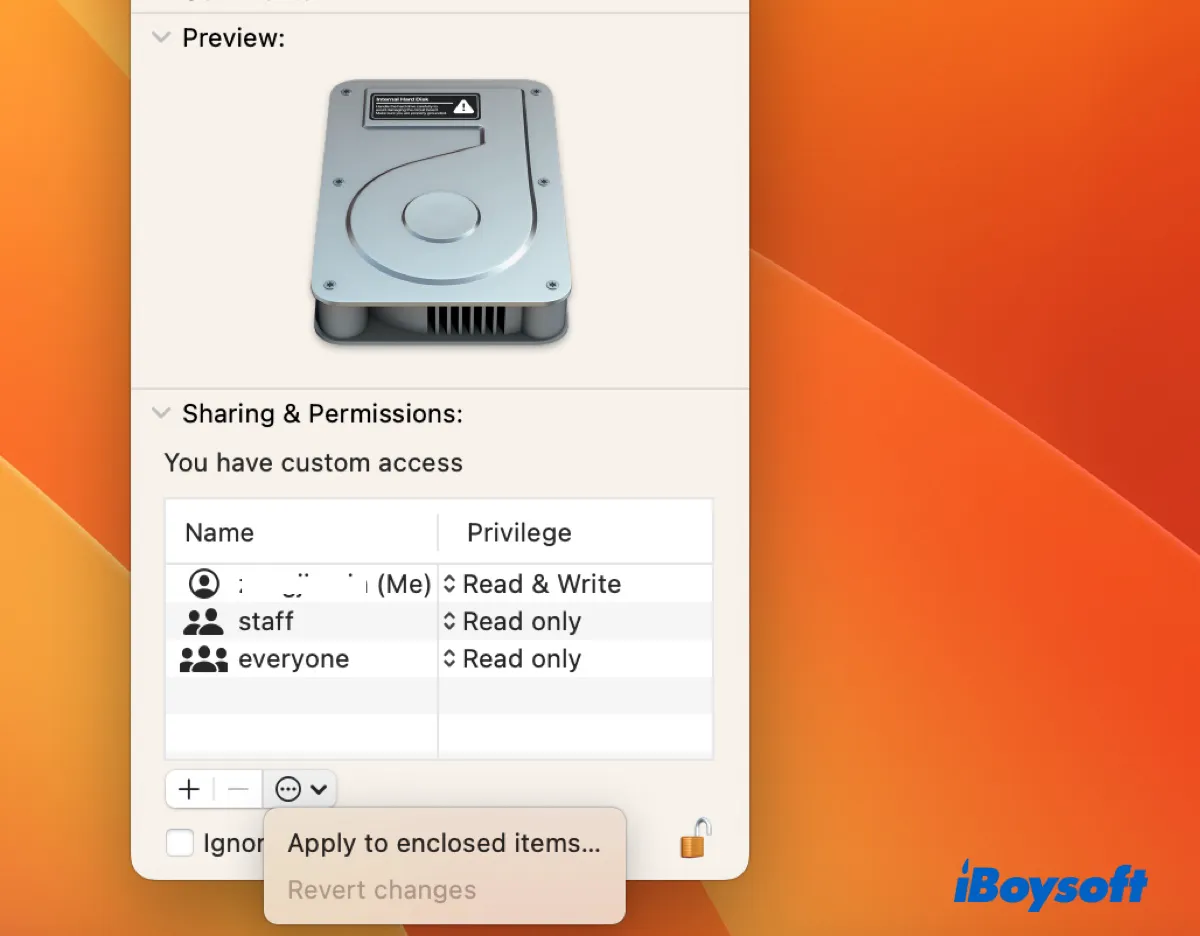
- Locate "Sharing & Permissions."
- Set your user account with the "Read & Write" privilege.
- Set Staff and Everyone to "Read only."
- Click the Action pop-up and choose "Apply to enclosed items."
- Click OK.
Fix 4: Use iBoysoft NTFS for Mac
It's possible that the external hard drive Finder can't search on Mac is NTFS-formatted. You can open Disk Utility to confirm the affected drive's file system. If it is formatted with NTFS, which is read-only on Mac, you need to employ an NTFS reader to make the external hard drive searchable again.
From the perspective of usability and performance, we recommended you try iBoysoft NTFS for Mac. It's a professional NTFS reader that enables you to read and write to NTFS drives on Mac like it was formatted with a native macOS file system. You can trust it to work with all types of external drives, such as HDDs, SSDs, USB flash drives, SD cards, etc, running on all major macOS versions, from the latest macOS Ventura to macOS 10.13.
Using iBoysoft NTFS for Mac is rather simple. Just free download the app below and install the app. Then the NTFS reader will automatically detect your NTFS drive and grant it read and write access.
After that, you should be able to search files on the external drive.
How to search external hard drive on Mac
Knowing the correct process to search content on an external hard drive is also important to the search result. Here's how to search content on an external hard drive on Mac:
- Connect your external hard drive to your Mac.
- Open Finder.
- Select the external drive from the list on the left.
- Type the keyword or extension of the files you want to search and press Enter.
- Select your external drive from the Search field.
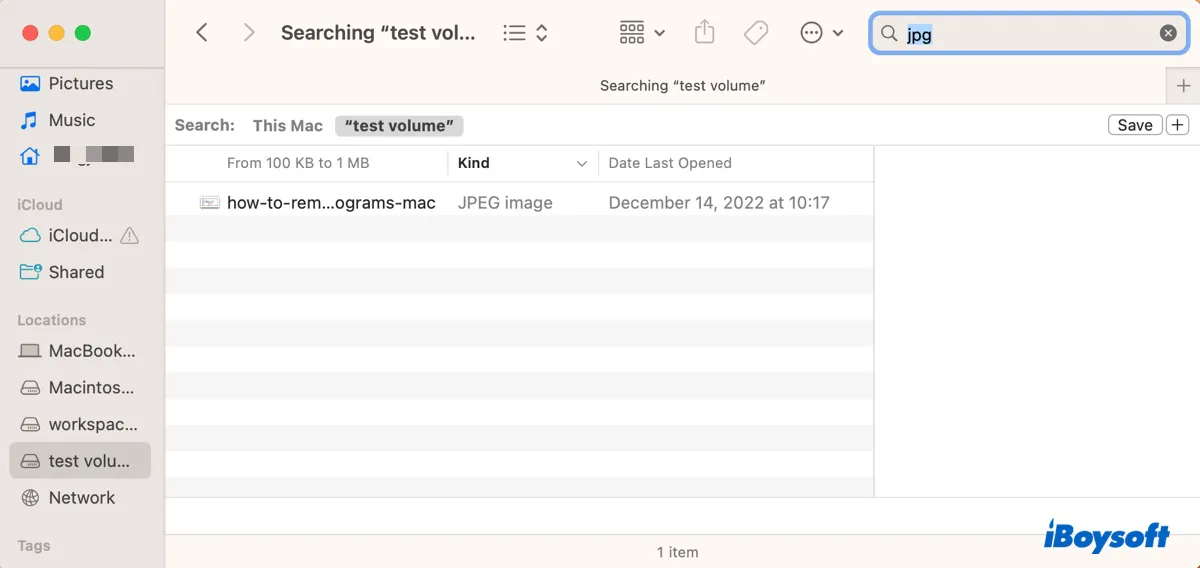
Note that when Finder performs a search, it searches "This Mac" by default. That's why you need to reselect your external drive in step 5. If you have set Finder to search the current folder, step 5 is not necessary.
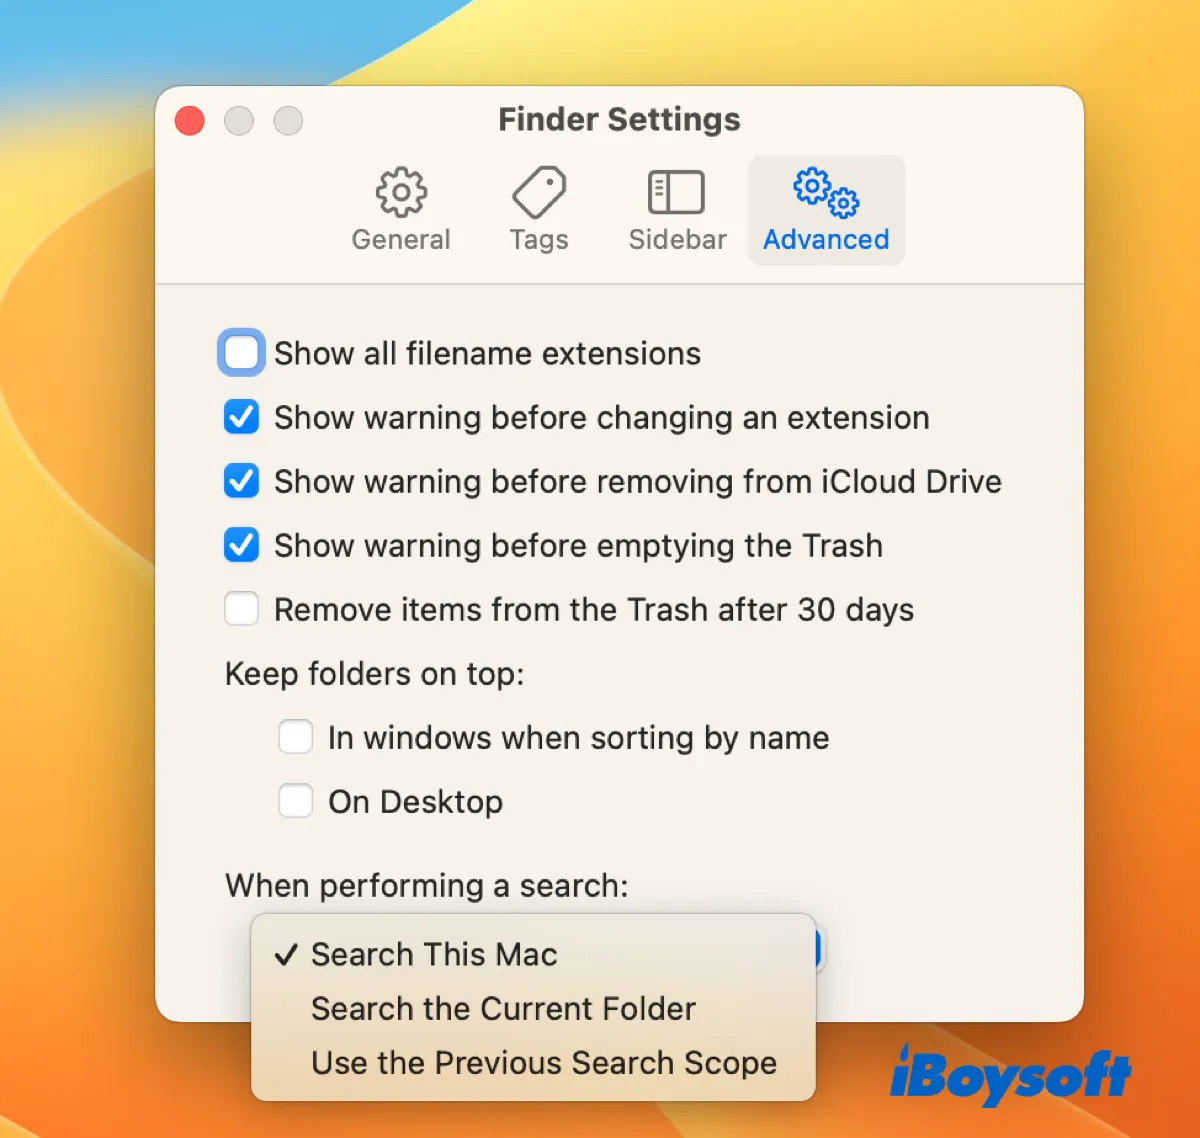
To change what folder Finder searches, open Finder, click its name at the menu bar and choose Preference or Settings, select the Advanced tab, then click the drop-down menu next to "When performing a search."
At last, don't forget to share this post.