If you are looking for a seamless way to transfer your photos from iPhone to Mac, then you've come to the right place. No matter you want to free up the valuable space on your iPhone, or just use your Mac to edit photos, here we provide 6 easy ways to transfer photos from iPhone to Mac.
How to transfer photos from iPhone to Mac using Finder?
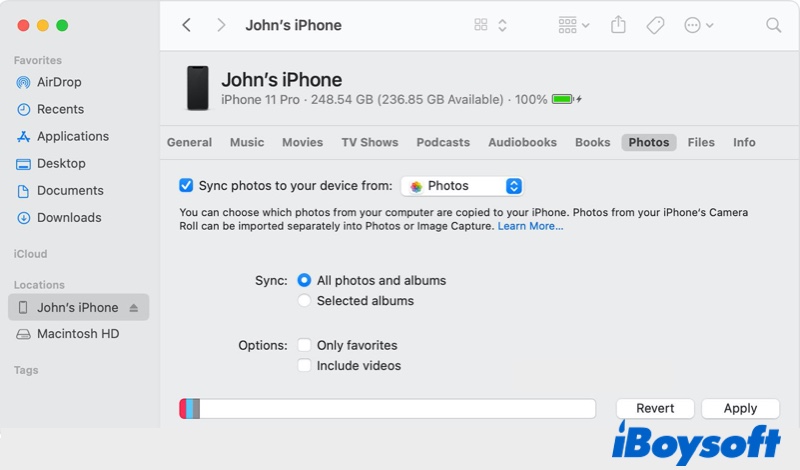
If you're using macOS 10.15 Catalina or later, you can easily sync your iPhone with a Mac using Finder. Follow these steps to sync photos from your iPhone to your Mac:
- Connect your iPhone to your Mac with a USB cable.
- Open Finder on your Mac or MacBook.
- On the left sidebar, click on the name of your iPhone under Locations.
- At the top of the window, click Photos.
- Then check the 'Sync Photos' box.
- Choose the folder or app on your iPhone that you want to sync photos from.
- Choose to sync all photos and albums or just the selected albums and click Apply.
Source from: Apple.com
How to import photos from an iPhone to a Mac using Photos?
Your photos can be easily synced using the Photos app on both iOS and macOS. All you have to do is to connect your iPhone to your Mac. When your iPhone is connected, the macOS will open Photos automatically. You can also use Photos to import photos from the camera to the Mac.
Here's how to transfer photos from iPhone to Mac using the Photos app:
- Connect your iPhone to the Mac using a Lightning-to-USB cable.
- If needed, unlock your iPhone and confirm it trusts the device.
- Open the Photos app on your Mac and choose your iPhone from the menu on the left sidebar.
- Now you'll see all of the images in your iPhone's Camera Roll.
- Click Import All in the top right-hand corner, or if you don't want to import all of your photos, you can select the photos that you want to import and click Import Selected.
If you want to delete iPhone photos after transferring to Mac, then you can check the box labeled "Delete items after import". Once the import is complete, the photos on your iPhone will be automatically deleted to free up more space. If you want to recover deleted photos on your iPhone one day, just download them from your Mac.
How to get photos from iPhone to Mac with Image Capture?
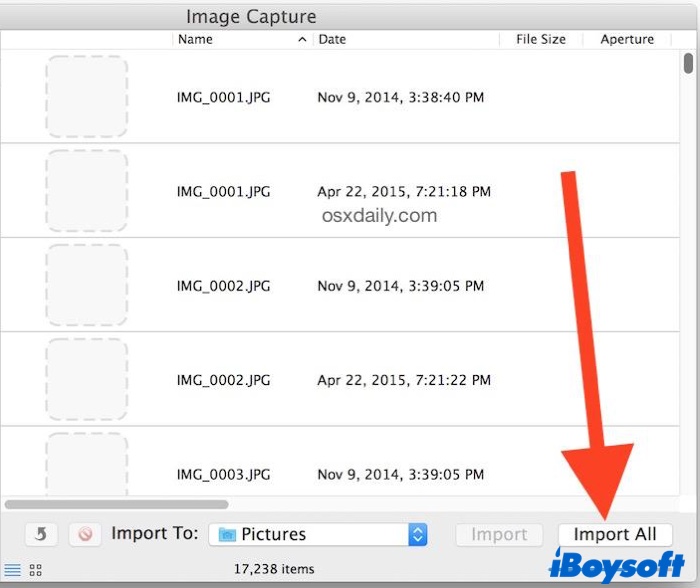
The Image Capture app is a built-in app on your Mac. With the help of this macOS utility, you can quickly and easily import your photos from iPhone to Mac. Here's how to do:
- Connect your iPhone to your Mac with a USB cable.
- On your Mac, open Launchpad > Image Capture.
- In the left sidebar, select your iPhone under the Devices category. Your photos will appear on the screen.
- At the bottom of the window, click the Import To menu to choose where to save your pictures.
- Select the pictures you want to import and click the Import button or click Import All.
How to move photos from iPhone to Mac by AirDrop?
You may notice that all the above-mentioned ways to transfer photos from iPhone to Mac all require a USB cable. What if you don't have a USB cable nearby? Is it possible to import photos from iPhone to Mac wirelessly? Yes, normally there're 3 ways to transfer pictures wirelessly. First, let's see how to use AirDrop to send photos from iPhone to Mac.
First, make sure AirDrop is enabled on your iPhone:
- Open the Settings app on your iPhone.
- Tap General, then scroll down and tap AirDrop.
- Choose Everyone or Contacts Only, which will determine who you can receive files from.
Then, turn on AirDrop on your Mac:
- Open Finder on your Mac.
- Select AirDrop from the sidebar.
- A window will open, showing your AirDrop contacts.
- Below the AirDrop icon, click on the dropdown menu and select Everyone or Contacts Only. Give both devices a few moments to find each other.

Now, here's how to import photos from your iPhone to your Mac with AirDrop:
- Open Photos on your iPhone.
- Select the pictures you want to transfer.
- Tap the sharing button in the bottom left-hand corner.
- Wait till AirDrop finds your Mac and tap on it.
- On your Mac, you'll see a pop-up window asking you to accept the photos, click Accept. And you may be asked where you want to save the photos, which is depending on your Mac's settings.
How to transfer photos from iPhone to Mac with iCloud Photos?
Another way to import photos from an iPhone to a Mac is using iCloud. iCloud Photo Library or iCloud Photos automatically keeps all of your photos and videos in sync across all of your Apple devices. Apple offers 5 GB of storage for free, but you can upgrade to 50 GB, 200 GB, or 2 TB for a monthly fee.
To set up iCloud Photo Library on your iPhone, follow these steps:
- Go to Settings and tap your name at the top of the screen.
- Go to iCloud to see all the apps that are using iCloud.
- Tap on Photos and switch on iCloud Photos.

Now, to set it up on your Mac:
- Launch the Photos app.
- Click on Photos in the menu bar.
- Select Preferences and switch to the iCloud tab.
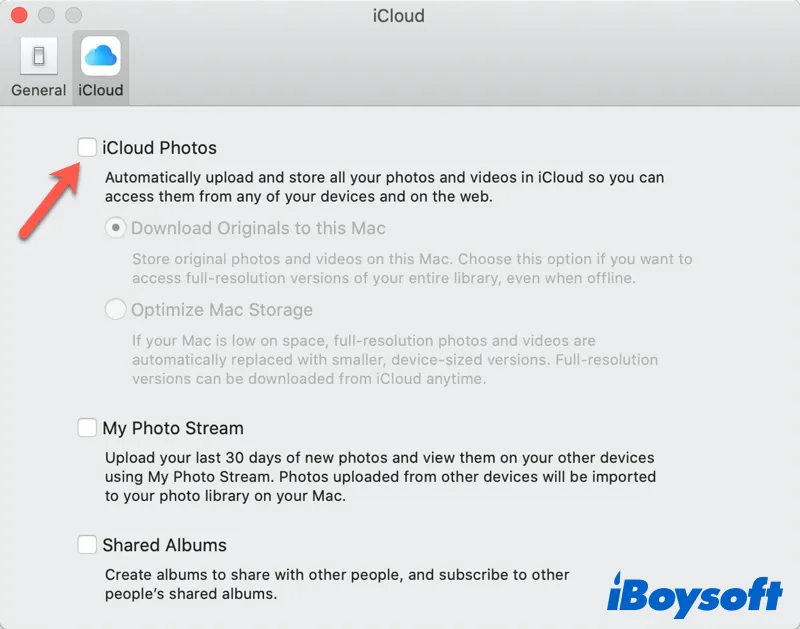
- Check the box next to iCloud Photos or iCloud Photo Library.
Make sure both your devices are using the same Apple ID and you follow the above tutorial step by step, now your photos and videos will automatically sync between iPhone and Mac. You don't need to do extra work to import iPhone photos to Mac.
But there's one thing to remember: while you keep iCloud Photos on, any changes you make to photos on one device will automatically sync to the other. It means if you delete photos on iPhone, the photos on your Mac will disappear, too. So if you want to delete photos on your iPhone but keep them on your Mac, turn off the iCloud Photos sync after you've transferred everything.
How to move photos from iPhone to Mac using iCloud Photo Stream?
The last resort to importing pictures from iPhone to Mac wirelessly is using iCloud My Photo Stream. Most of you may be confused between iCloud Photos and iCloud My Photo Stream. Actually, iCloud Photos allows you to store all your photos and videos on the cloud. iCloud My Photo Stream uploads only new photos (and not videos and Live Photos) on devices where iCloud My Photo Stream is turned on.
It stores only the recent 30 days' worth of photos and up to 1000 photos. If you want to see only your most recent photos and transfer them to the Mac, use iCloud My Photo Stream and turn it on. Otherwise, use iCloud Photos to back up all your photos and videos as explained in the previous section. However, Apple will shut down My Photos Stream on July 26, 2023, if you haven't enabled iCloud Photos, it's time to set up.
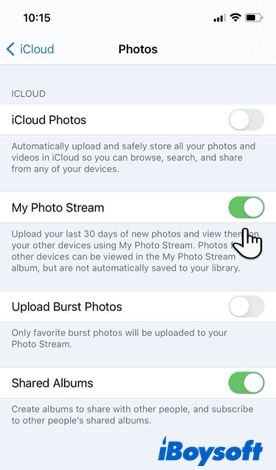
Now, try the following steps to turn iCloud Photo Stream on:
- Open the Settings on the iPhone and tap your name on top.
- Go to iCloud > Photos.
- Switch My Photo Stream on.
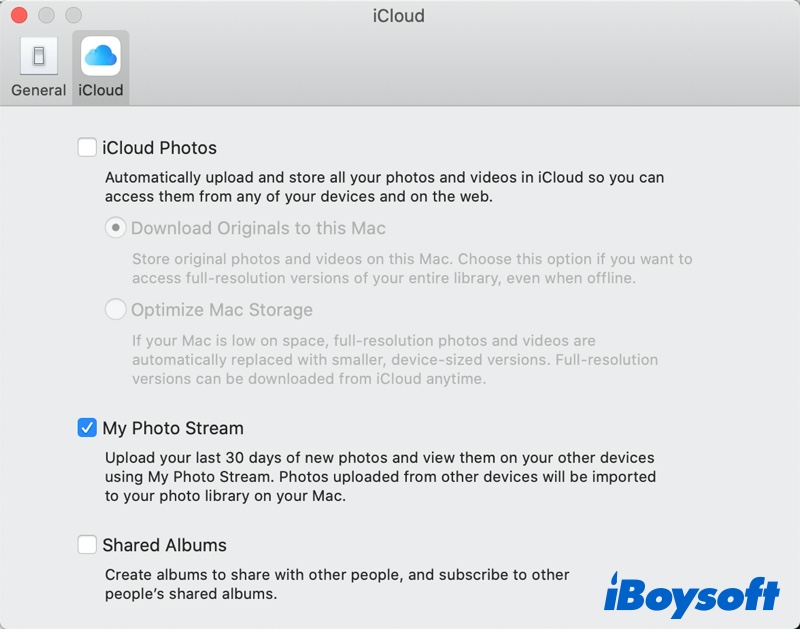
- Go to your Mac and open the Photos app.
- Choose Photos > Preferences from the menu bar.
- Select iCloud and check the box for My Photo Stream to enable it. Then photos will automatically sync to the Photo Stream from your iPhone.

iPhone Not Showing Up in Finder, How to Fix?
This article provides 7 feasible solutions to help you fix the iPhone not showing up in Finder problem, and helps you make your Mac recognize the iPhone again. Read more >>
FAQs about transferring photos from iPhone to Mac
- QWhy can't I transfer photos from iPhone to Mac?
-
A
When you have difficulty in moving a photo from an iPhone to a Mac, try the following:
If you're using a cable for photo transfer, check that it is properly connected and functioning normally.
If you're using a wireless connection, check that you're connected to Wi-Fi and have internet access.
Ensure that you use the same Apple ID on both of the devices you're attempting to sync.
- QHow do I transfer photos from iPhone to Mac without USB?
-
A
Without a USB cable, you can still import pictures from iPhone to Mac wirelessly. For example, using AirDrop is a good option. Besides, you can use iCloud Photos or iCloud Photo Stream.
- QCan I drag and drop photos from iPhone to Mac?
-
A
No. Instead of dragging and dropping, try to use the Image Capture app or Photos app to transfer photos from iPhone to Mac.