iCloud Photos enables you to save your photos taken on one Apple device to iCloud and then access them on your other devices with the same Apple ID logged in. Furthermore, if you edit any of the photos or videos on one of your devices, the updates also appear in those files on other devices.
However, you may also want to move iCloud Photos to external hard drive for the following reasons:
- iCloud only provides 5GB storage for free, and you need to upgrade to iCloud+ to get more space. You need to pay $0.99 for 50GB, the basic iCloud+ plan, and pay more for larger storage.
- Some dangers come with storing data in a single location because iCloud deleted photo issues occasionally occur.
- iCloud Photos requires the network to access, upload, edit, and download images, while, storing photos on an external hard drive is not limited by this, you can use it offline.
Now, let's dive into how to download/transfer/back up iCloud photos to the external hard drive regardless of using a MacBook Air/Pro/iMac or a Windows PC.
How to move iCloud photos to external hard drive using the Photos app?
You can use the Mac Photos app to export iCloud photos to an external hard drive as long as you have enabled iCloud Photos on your Mac. For Windows users, you can install the iCloud for Windows app on your device and similarly turn on iCloud Photos.
To move iCloud photos to an external hard drive via the Photos app, you need first to download target iCloud photos to your computer, and then you can move those local photos to the external hard drive as normal.
Steps to move iCloud photos to the external hard drive on Mac:
- Launch the Photos app on your Mac from the Dock/Launchpad/Finder.
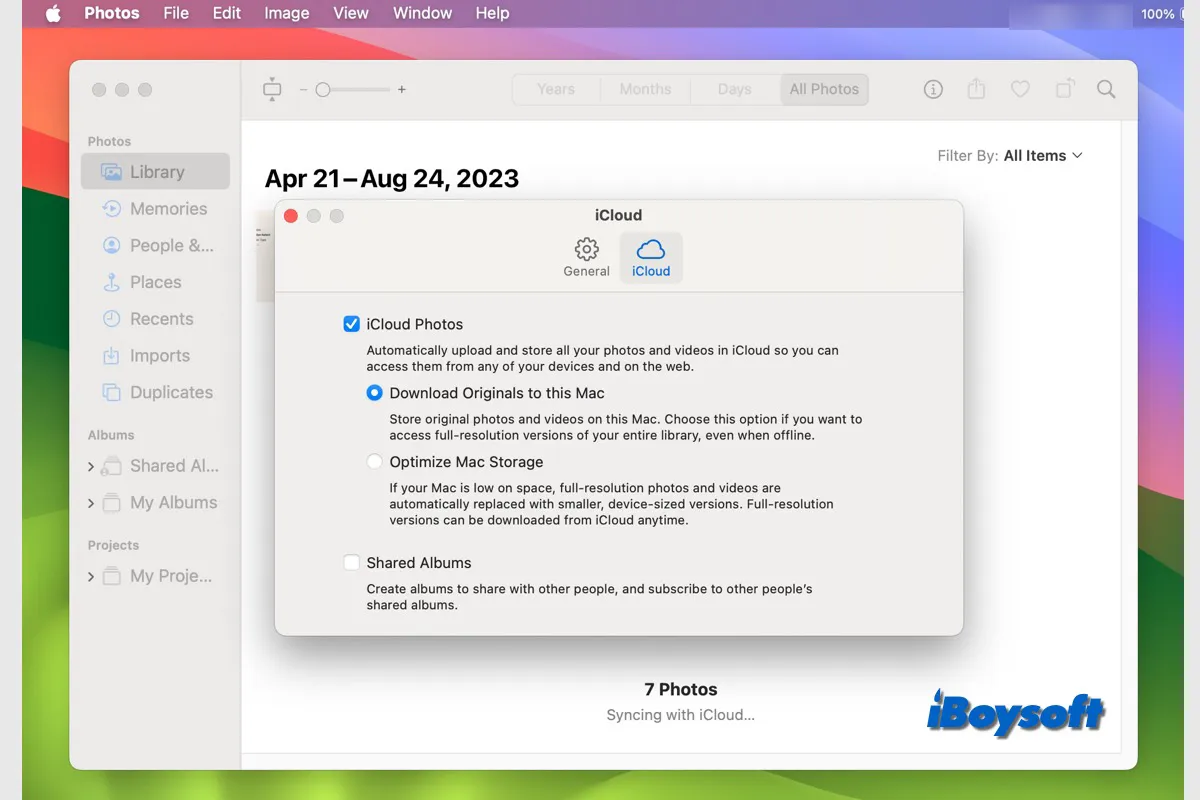
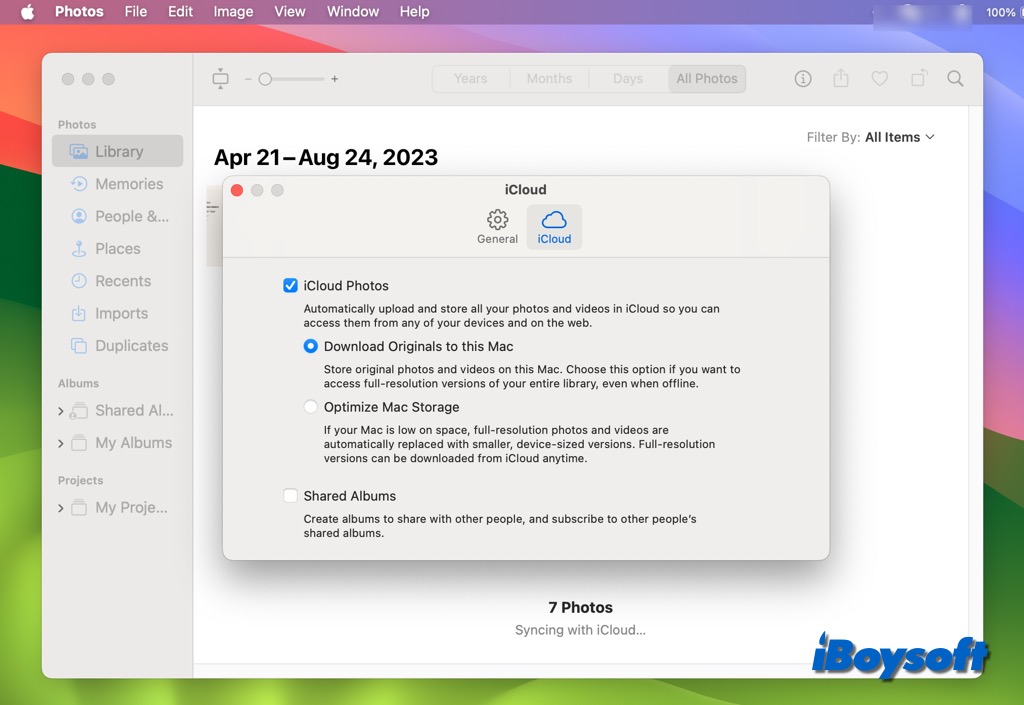
- Click Photos on the app menu bar and choose Settings.
- Choose the iCloud tab, and check the iCloud Photos box.
- Tap Download Originals to this Mac and wait for the process to complete.
- Connect the external hard drive to your Mac and create a new folder for iCloud photos.
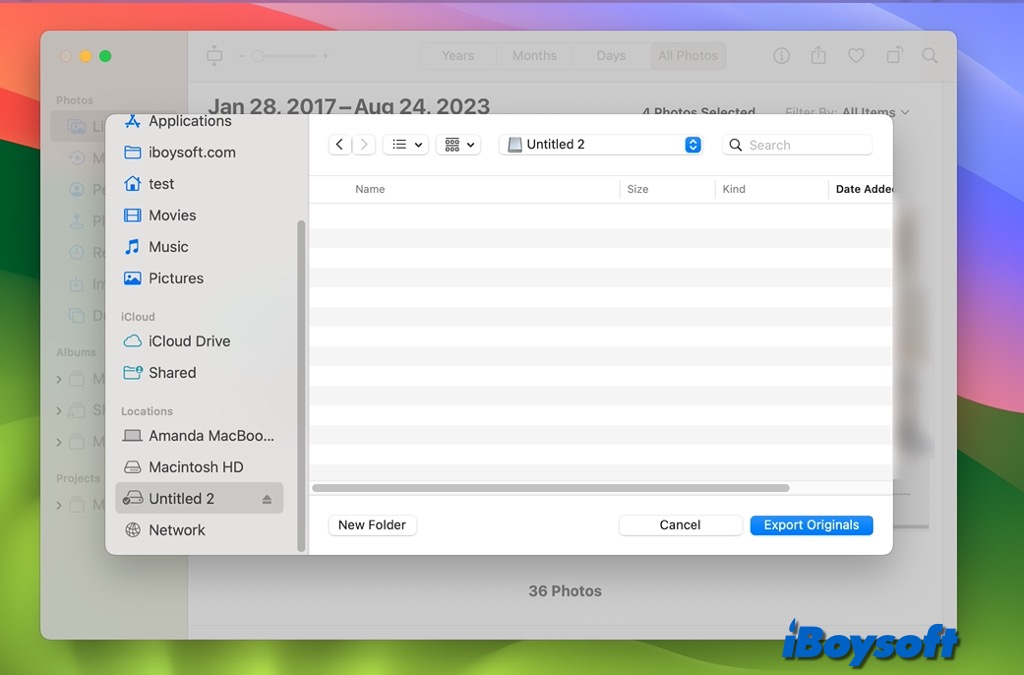
- Back to the Photos Library, multi-select the photos you want to move.
- Click File on the app menu bar and choose Export.
- Choose to export "Edited" (default) or "Unmodified Original" (recommended) versions of your images.
- Select the newly created folder in your external hard drive as the destination one, and click Export.
Alternatively, you can move the whole Photos Library to your external drive after you download the iCloud photos, just tap the General tab, and click Show in Finder to locate the Photos Library.
If you fail to move photos from Mac to the external hard drive, check whether the drive is NTFS-formatted, a read-only file system on macOS. If so, you will need an NTFS for Mac driver such as iBoysoft NTFS for Mac to read and write to NTFS on Mac without reformatting, thus, you can continue to move iCloud photos to the external drive.
Steps to move iCloud photos to the external hard drive on Windows:
- Download iCloud for Windows, then sign in your Apple ID.
- Click Photos and tap the Options button next to it.
- Switch on iCloud Photo Library and tick the box Download New Photos And Videos To My PC.
- Click on Change to customize the location where to put the downloads.
- Change the path to the external drive connected to your PC and click on Done.
- Now open the iCloud Photos folder, and click the Download icon.
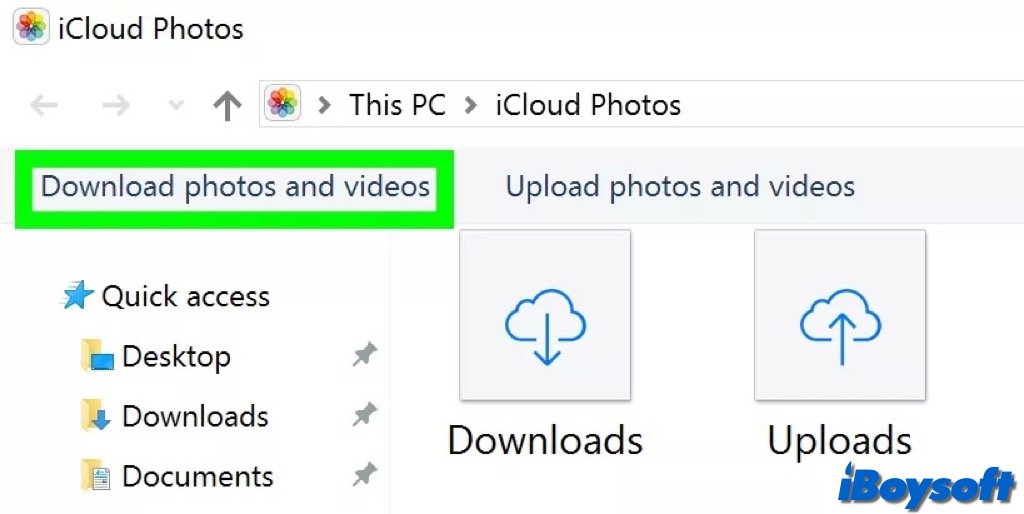
- Choose all the photos you want to back up from iCloud to the external drive.
In case you don't want to change the location on your PC used to hold the downloaded new photos and videos, you can also first download them on your Windows PC, and manually transfer them to the external drive.
Have moved iCloud photos to external hard drive with the above steps? Share to help more people!
How to transfer iCloud photos to external hard drive with iCloud.com?
In addition to the Photos app, you can also download iCloud photos via iCloud.com to your Mac or PC. Perhaps, you don't want to sync the photos on your current computer and haven't enabled iCloud Photos using the Photos app, this method is more suitable. You can access the iCloud photos uploaded from other devices by visiting iCloud.com and downloading them to your local computer hard drive.
- Open a browser on your PC or Mac, and navigate to www.icloud.com.
- Log into your Apple ID account and see the main interface.
- Click on Photos and choose All Photos album.
- Choose multiple or total photos in iCloud.
- Go to the right upper corner, click the Download button in a cloud shape, and click Download.
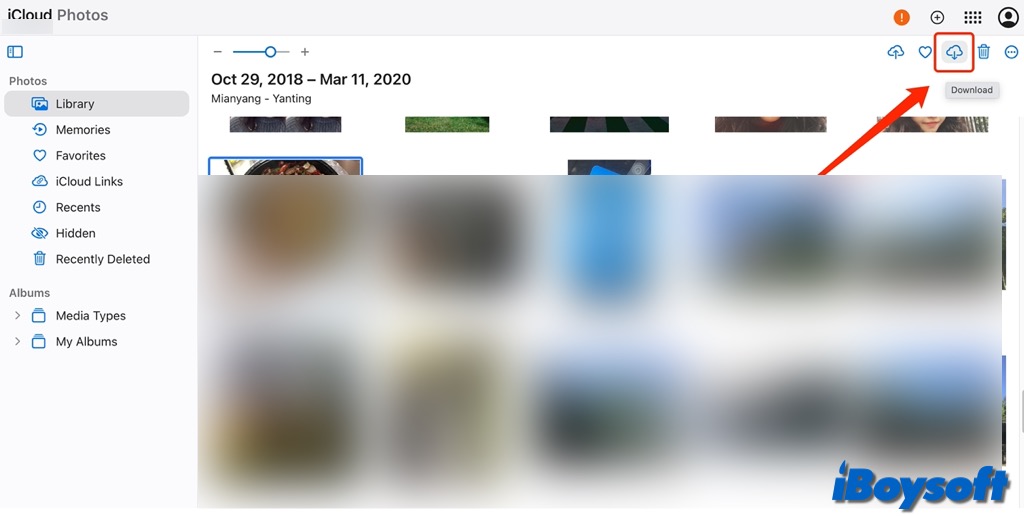
- The downloaded photos are in zip format, you can unzip them first, and then move the photos from your computer to the plugged external drive.
How to back up all iCloud photos to external disk via Apple privacy website?
You can ask Apple for a copy of your iCloud data if you'd like to download your iCloud images to a hard drive once and for all. Apple will notify your email address linked to your Apple account via email when your photos are prepared for download. But, it may take Apple a few days to handle your request. Here's how:
- Visit the Apple Privacy website and log in to your iCloud account.
- Locate Manage your data, click Request a copy of your data under the Get a copy of your data section.
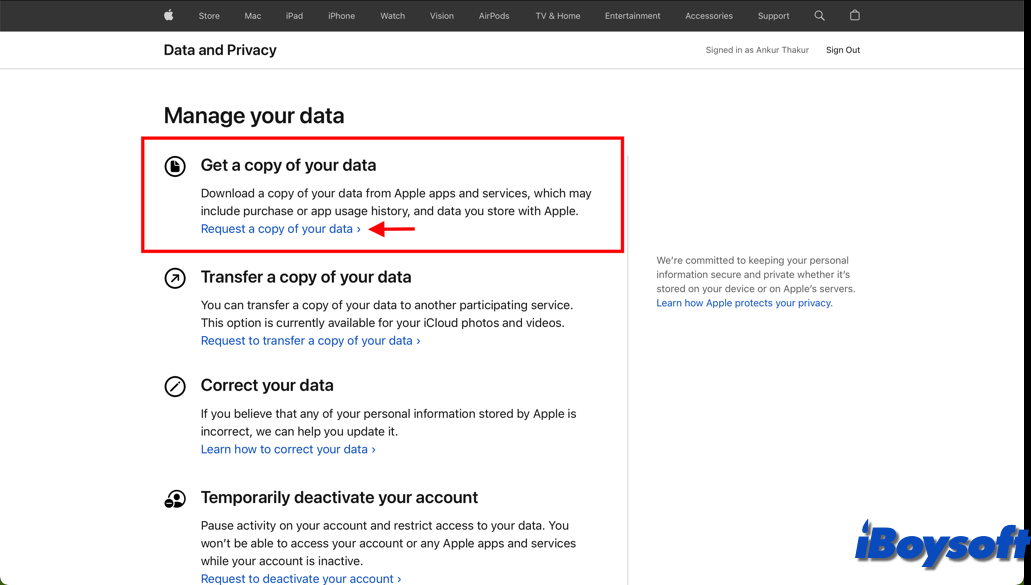
- Tick the box beside the Photos category.
- Click Continue and choose the maximum file size you want to download.
- Tap Complete Request to send your request to Apple immediately.
- Once you receive the email, click Get your data within the time frame mentioned at the top of the email.
- Sign in with your Apple ID and access the Download your data screen. Click the download icon next to Photos to download them locally to your computer.
- Open the ZIP file and dive in to see your data.
Share this informative post about moving iCloud Photos to external hard drive!
FAQs about how to move iCloud photos to external drive on Mac/PC
- QHow do I download all my photos from iCloud to Windows?
-
A
Open File Explorer.
In the Navigation pane, click iCloud Photos.
Select the images you want to keep on your PC.
Right-click the selection and choose "Always keep on this device."
- QHow do I sync photos from external hard drive to iCloud?
-
A
If you want to upload photos from an external hard drive to iCloud, you should first transfer them to your Mac or PC, then use the Photos app, iCloud for Windows, or visit iCloud.com to upload those photos to iCloud.
- QAre photos permanently stored in iCloud?
-
A
A picture or video that you remove from Photos on iCloud.com likewise disappears from all of your devices that have iCloud Photos enabled. You have 30 days to retrieve it if you decide to change your mind before it gets permanently erased.