Speaking of Homebrew, the equivalent of apt-get on Mac, some of you might not be familiar with it. By putting it simply, Homebrew is a package manager for developers, sysadmins, and power users on macOS. This tool is a little bit tricky because it works based on command lines.
But don't worry, with the step-by-step instruction in this article, we will show you how to install Homebrew on Mac. Thus, you can free download and use some open-source software or applications as developers do. Read on for more!
What is Homebrew?
Homebrew is a free and open-source package manager for macOS, which lets you install, update, and manage tons of command-line-based tools like Python, Ruby, and Node.js using Mac Terminal. "Homebrew installs the stuff you need that Apple didn't", this is how Homebrew creators describe it.
For example, If you want to download and use some free NTFS for Mac programs, like FUSE for macOS, you need to install Homebrew first. But for iBoysoft NTFS for Mac, you can download and use it without any additional third-party tool. So, if by chance you are looking for an NTFS for Mac software, feel free to try it.
Know what is Homebrew now? Share this content with more people!
Requirements for installing Homebrew on Mac
Before installing Homebrew on Mac, please make sure your Mac meets the following requirements, otherwise, you may fail to install it on your device.
- A 64-bit Intel CPU or Apple Silicon CPU.
- macOS Catalina 10.15 or higher version (Older versions may work, but they are not officially supported).
- Administrator privileges (Homebrew needs the password you used to log in to your Mac to complete its installation).
- Command line tools for Xcode.
If your Mac meets the requirements of installing Homebrew, move on to the next part!
How to install Homebrew on Mac?
After knowing what is Homebrew and its prerequisites, it's time to dive into how to install Homebrew on Mac. Since installing Homebrew on Mac needs to be done with several command lines in Terminal, please follow the instructions step by step! Without further ado, let's get started!
Install command line tools for Xcode on Mac
As we mentioned before, installing Homebrew on Mac needs command line tools for Xcode. For those who are not familiar with Xcode, it is Apple's native integrated development environment, which contains all the tools for software development on Mac, and with it, Homebrew can function properly. Follow these steps to install Xcode:
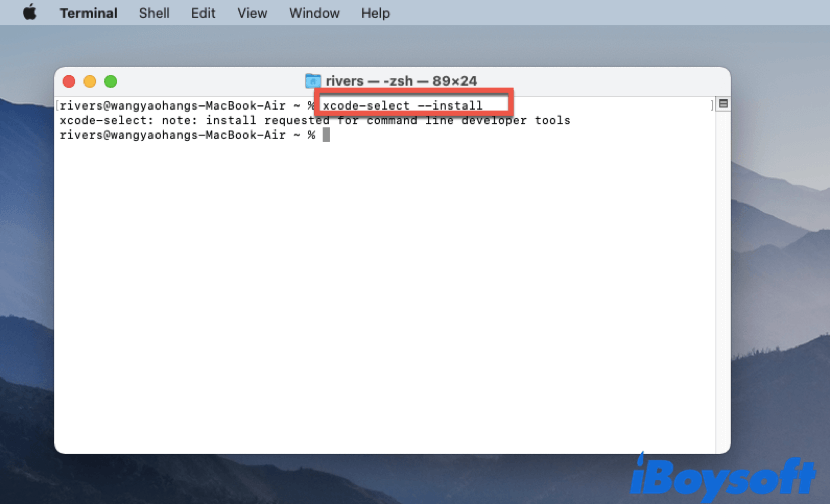
- Go to Mac Launchpad > Others, and click on Terminal to open it.
- Type the following command line in the Terminal window, then hit Return.xcode-select --install
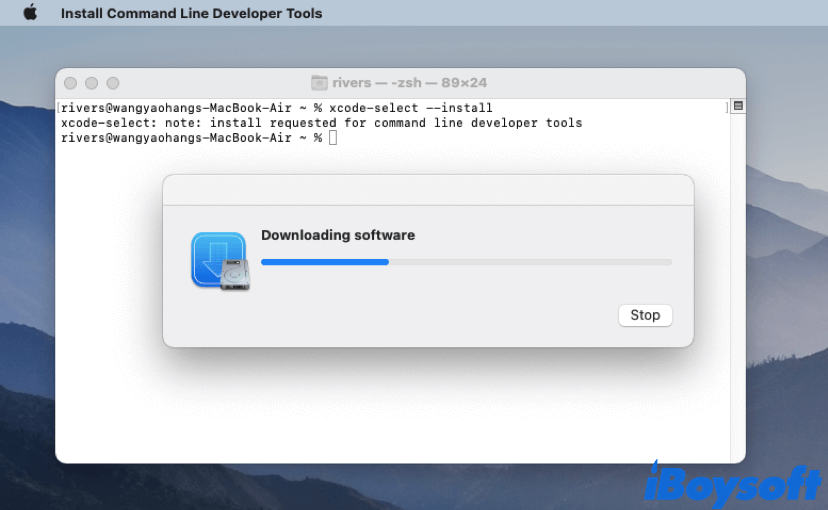
- In the new dialog window, select Install to confirm the installation.

- A License Agreement window appears, click Agree.
- Wait for the installation process to complete, it might take a few minutes.
Install Homebrew on your Mac
After installing Xcode, your Mac is ready for Homebrew now. Here's how to install Homebrew on Mac:
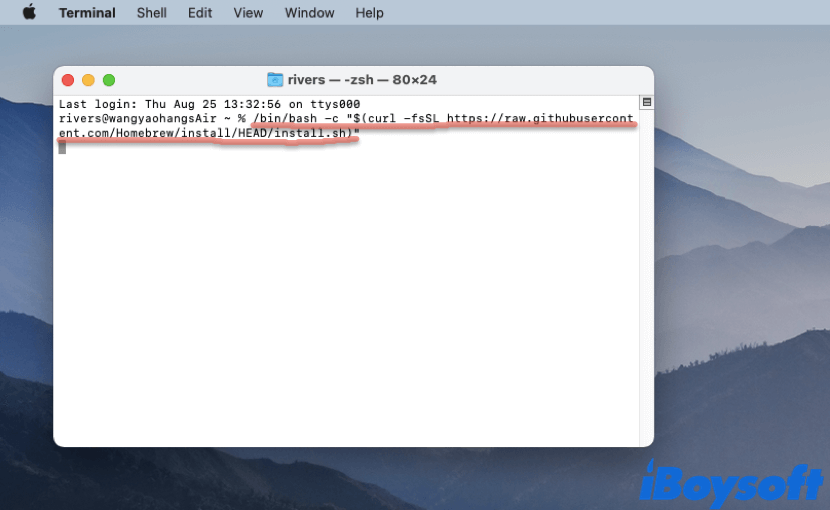
- Launch Terminal on your Mac again.
- Paste the following command line into the Terminal window, then hit Return./bin/bash -c "$(curl -fsSL https://raw.githubusercontent.com/Homebrew/install/HEAD/install.sh)"
- Enter your admin password in the Terminal window (For security, you can't see your password in the window, make sure you type it right), and press Return.
- Press Return again to install Homebrew on your Mac, and the installation will start.
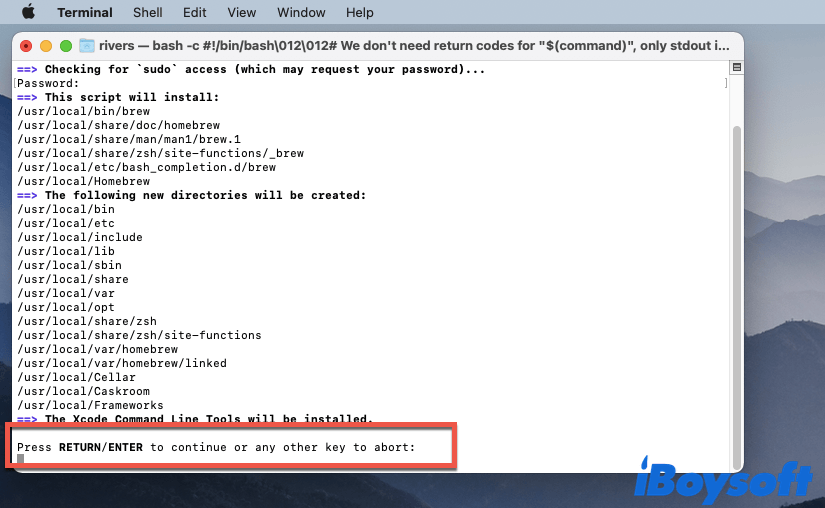
- The process may last for a couple of minutes, please wait patiently.
- Wait until the "Installation successful" message appears in the Terminal window.

For Intel-based Mac, the whole installation is completed now. If you are using an Apple Silicon Mac, there's one more step.
Add Homebrew shell configuration
Different from Intel-based Macs, Homebrew files are installed into the /opt/homebrew folder on Apple Silicon Macs. So, if you followed the above instructions to install Homebrew on your Mac, after the installation is complete, you'll see a message below.
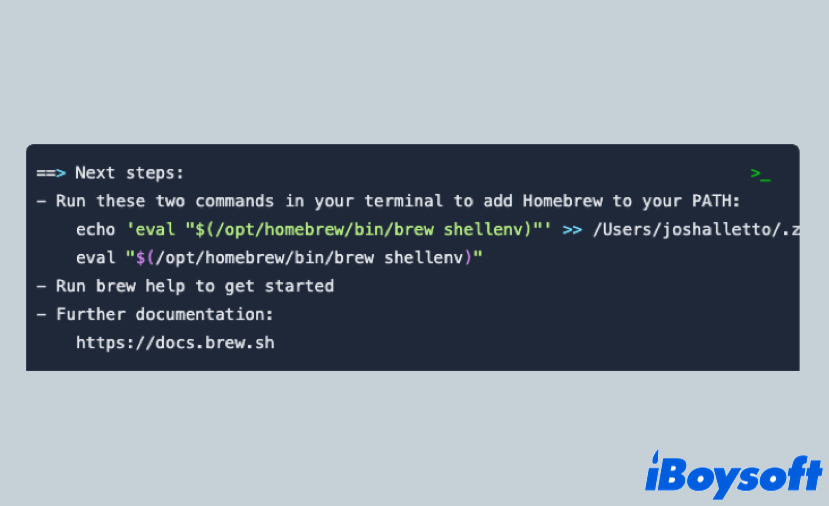
On Intel Macs, Homebrew installs to the /usr/local/bin directory, so you don't need to take any extra steps to set it up. On Apple Silicon Macs, Homebrew needs to be installed in the /opt/homebrew folder. Since it's not a part of the default PATH, you'll need to create a ~/.zprofile file that has a command for setting up Homebrew.
Put it more simply, to install Homebrew on your Apple Silicon Mac, you'll need two extra command lines than installing it on an Intel-based Mac. Follow the instructions shown in the Terminal, and run these two commands one by one:
echo 'eval "$(/opt/homebrew/bin/brew shellenv)"' >> /Users/xxx/.zprofile
Replace the 'xxx' with your user name, if you don't know what it is, that's fine. You can copy the whole command that is automatically given by the Homebrew in Terminal. Then, run the next command:
eval "$(/opt/homebrew/bin/brew shellenv)"
By running the above two command lines, the Homebrew will be installed on your Apple Silicon Mac.
Disable analytics
Though you've installed Homebrew on your Mac, there are a few things you should know, that is, Homebrew collects some of your data and sends it back to developers, such as the Homebrew user agent, Google Analytics version, and Homebrew analytics user ID.
In this situation, if you do not want any of your data to be collected and shared with Homebrew developers, you can follow these steps:
- Launch Terminal on your Mac.
- Type the following command line into the Terminal window, then press Return. brew analytics offThis command will turn off analytics, so your data will not be shared with Homebrew developers.
- Run the following command into Terminal, it will help you check the analytic data collection status. If the output says "Analytics are disabled", then you are all set!brew analytics
Set up Homebrew on your Mac
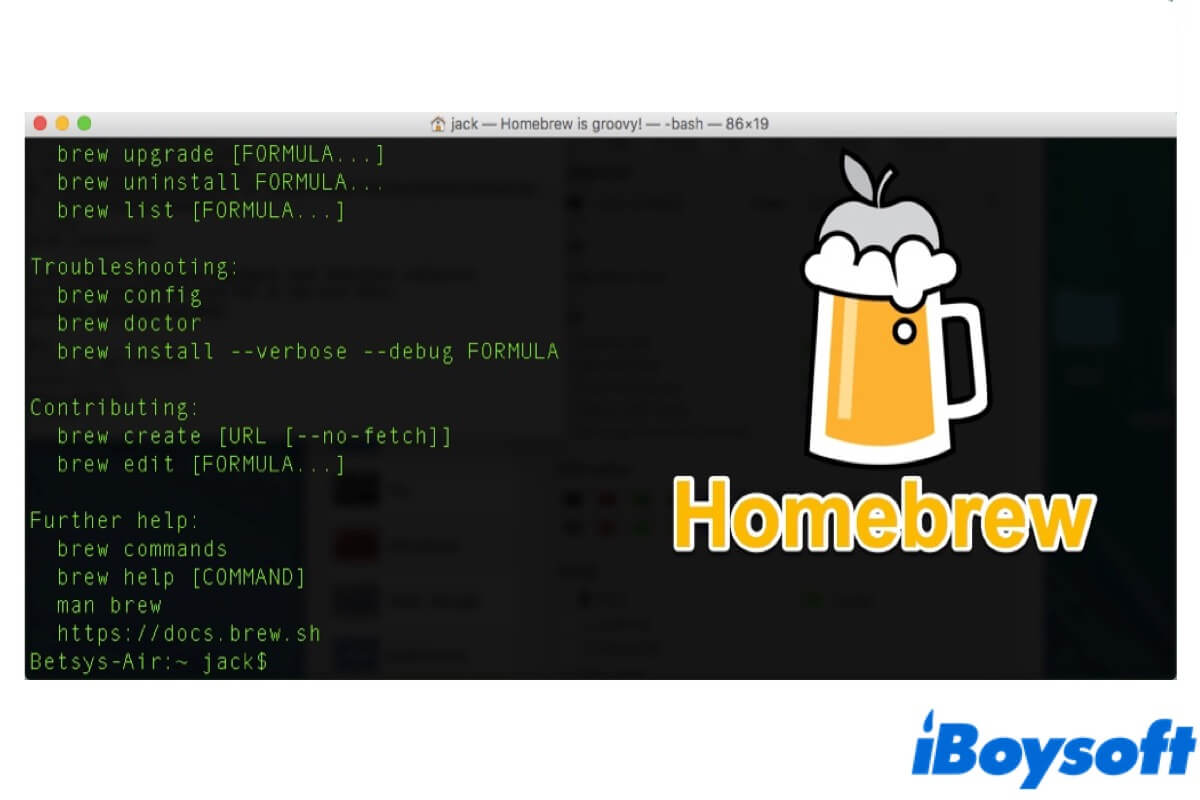
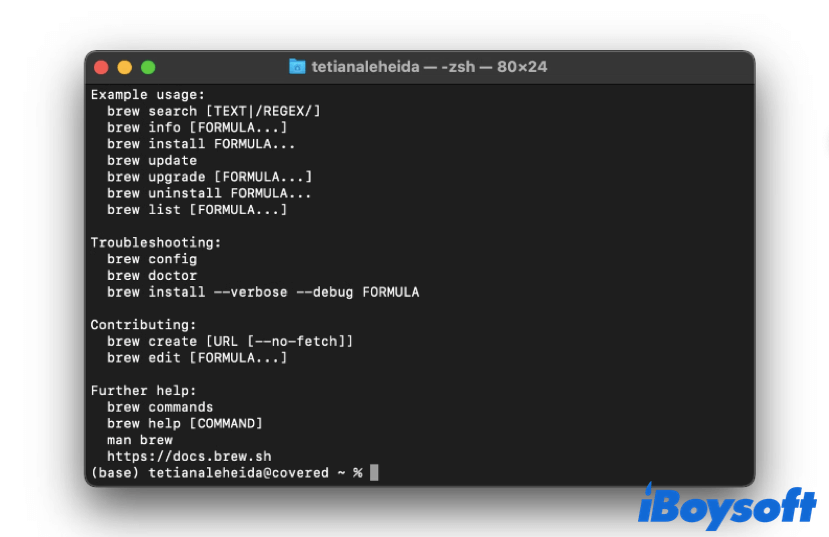
To get started using Homebrew, you can type "brew help" in Terminal, and hit Return. After doing that, you will see a list of commands that helps you install, update, and remove software through Homebrew. Also, there are a few troubleshooting commands you can take note of to fix some issues you may encounter when using Homebrew in the future, like "brew doctor".
Install, update, and remove packages using Homebrew
After the Homebrew installation on Mac, we will show you some easy ways to use this amazing package manager such as changing zsh to bash on Mac.
To Install packages through Homebrew on your Mac, you can run the following syntax in Terminal, remember to replace the [package name] with the name of the wanted package.
brew install [package name]
To update packages, you can run the following command to see a list of packages that need updating:
brew outdated
Then, use the following syntax to update the outdated package:
brew update [package name]
Apart from outdated packages, the package manager itself needs to be updated regularly to make sure it functions properly. To check if there's a latest Homebrew version, run this syntax in Terminal:
brew update
If you want to uninstall or remove some packages, you can make it by running either of the following command lines, both of them achieve the same goal:
brew uninstall [package name]
brew remove [package name]
Do not forget to replace the [package name] with the specific name of the package that you want to remove from your device.
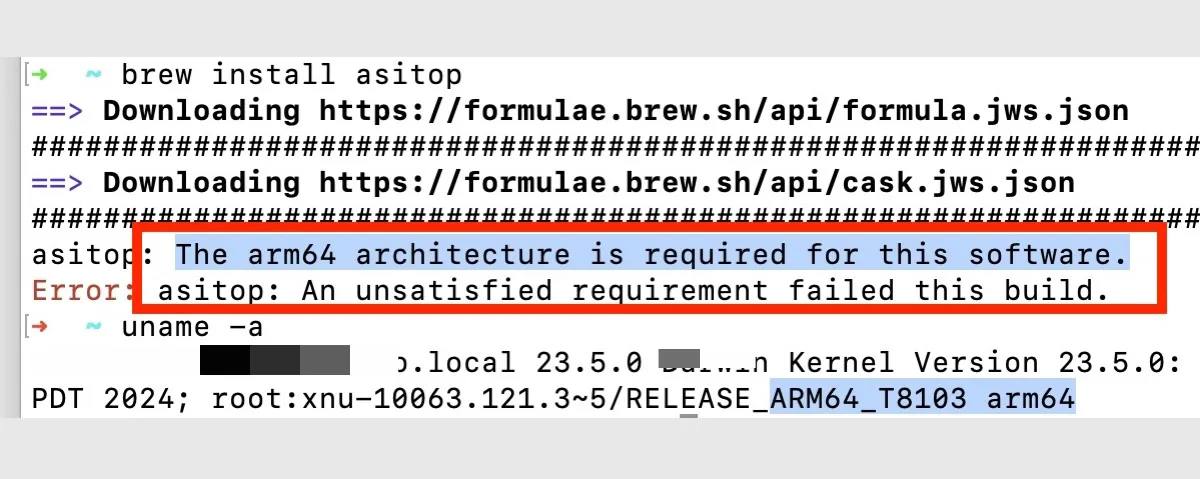
If you encounter the error message that the arm64 architecture is required for this software while installing Homebrew on Apple Silicon Macs, you can find the solutions in this post.
Know how to install Homebrew on Mac now? If you've installed it successfully, share this guide with more people who need it!
How to uninstall Homebrew on Mac?
For whatever reason, you may want to uninstall Homebrew on your Mac computer one day. Fortunately, you can do that easily! Follow these steps to uninstall Homebrew:
- Launch Terminal on your Mac, you can find it in Mac Finder > Applications.
- Run the following syntax in Terminal to uninstall Homebrew on Mac, then hit Return. Here are the commands for macOS Catalina, Big Sur, Mojave, or later:/bin/bash -c "$(curl -fsSL https://raw.githubusercontent.com/Homebrew/install/HEAD/uninstall.sh)"Commands for macOS High Sierra, Sierra, El Captain, or earlier:ruby -e "$(curl -fsSL https://raw.githubusercontent.com/Homebrew/install/master/uninstall)"
- Type y and hit Return to confirm the uninstallation.
Like this post? Share it with more people now!
Conclusion
In this article, we tell you what is Homebrew and how to install Homebrew on Mac. Also, it teaches you how to uninstall Homebrew as well. Hope you can install it successfully on your devices, and enjoy this remarkable package manager!

How to Install Python on Mac [Two Ways Covered]
This article provides two ways to install Python on Mac, you can either install it from the official installer or install it through Homebrew. Read more >>
FAQ about how to install Homebrew on Mac
- QWhere is Homebrew installed on Mac M1?
-
A
If you install Homebrew on an M1 Mac, or other Apple Silicon Macs, then Homebrew will be installed in /opt/homebrew/bin. Since /opt/homebrew/bin is not included in your PATH by default, you should add it manually. You can follow the guide above to add it, or, you can visit Homebrew's documentation on the official website for detailed information.
- QHow do I know if Homebrew is installed on my Mac?
-
A
To check if Homebrew is installed on your Mac computer, you can run the $ brew command in Terminal. If it is not installed on your Mac, you will see zsh: command not found: brew appears in the Terminal window.
- QIs Homebrew necessary for Mac?
-
A
Generally speaking, Homebrew is not necessary for most Mac users. Homebrew is a package manager for macOS, some free and open-source programs can function properly because of its help. Also, most of the said programs can't run without the Homebrew installed on Mac. If you are a developer or people who are excited about software that is not available on App Store, then Homebrew is perfect for you.