In addition to the mobile app for iOS and Android, CapCut has released a desktop version for both Windows and Mac. The desktop app offers many of the same features as the mobile version, allowing users to edit videos with a more spacious interface and better control when working with more complex projects.
If CapCut is not working properly, frequently crashing, or showing errors, uninstalling and reinstalling it may resolve these issues by fixing any corrupted files or settings. In addition, you may want to uninstall CapCut on Mac to free up space, solve performance issues, or switch to another app, then, you can follow the methods in this post.
Will uninstalling CapCut delete your videos?
When you uninstall CapCut on your Mac, it is important to consider how your drafts and projects are stored. Typically, CapCut saves your projects locally or in the cloud, depending on whether you've logged in and synced your data with an account.
If your projects are stored locally on your Mac, they will likely be deleted along with the app when uninstalled. To avoid losing your data, you'll need to back up your projects. If you're logged into CapCut and your projects are synced with a cloud account, your data should be safe even after you uninstall the app. Simply log back into the app after reinstalling, and your projects should be restored.
Before uninstalling, it's a good idea to export any drafts or projects to a video file. This ensures you have a final version of your work saved, even if you lose access to your project files. For additional security, you can manually copy project files from the CapCut folder (if applicable) and store them on an external drive or cloud service.
How to uninstall CapCut on Mac thoroughly?
When you use CapCut on a Mac, several types of files are generated, both for your projects and for the app's functionality. These files can include project files, containing the drafts, edits, and video timelines that you are working on in CapCut, exported video files, temporary files like cache files and rendering files, preferences and settings files, application support files, logs, crash reports, etc.
After you back up/move the projects that you want to keep, you can proceed to delete CapCut from your Mac, dragging the app to the Trash doesn't always remove all associated files, to thoroughly uninstall the app, you will need a third-party uninstaller or manually find and delete from the Mac system.
Uninstall CapCut on Mac with CleanMyApp
When you delete an app on macOS, it is recommended to pick up a third-party uninstaller for Mac, which can thoroughly remove the app and all of its associated files such as support files, caches, preferences, and other data in various system locations, ensuring a clean uninstall.
CleanMyApp is a good choice, it automatically finds the app leftovers and deletes them with the app together. It's easy to follow and only a few steps are needed to uninstall unwanted apps from Mac. CleanMyApp fully supports Intel Macs and Apple Silicon Macs and is compatible with macOS Sequoia.
Besides, CleanMyApp features batch uninstallation. If you need to remove several apps at once, it can make this process quicker and more efficient by handling all of them together and cleaning up related files automatically.
Steps to uninstall CapCut with CleanMyApp:
- Free download and install CleanMyApp from the Mac App Store.
- Close Capcut.
- Launch CleanMyApp and select CapCut from the list.
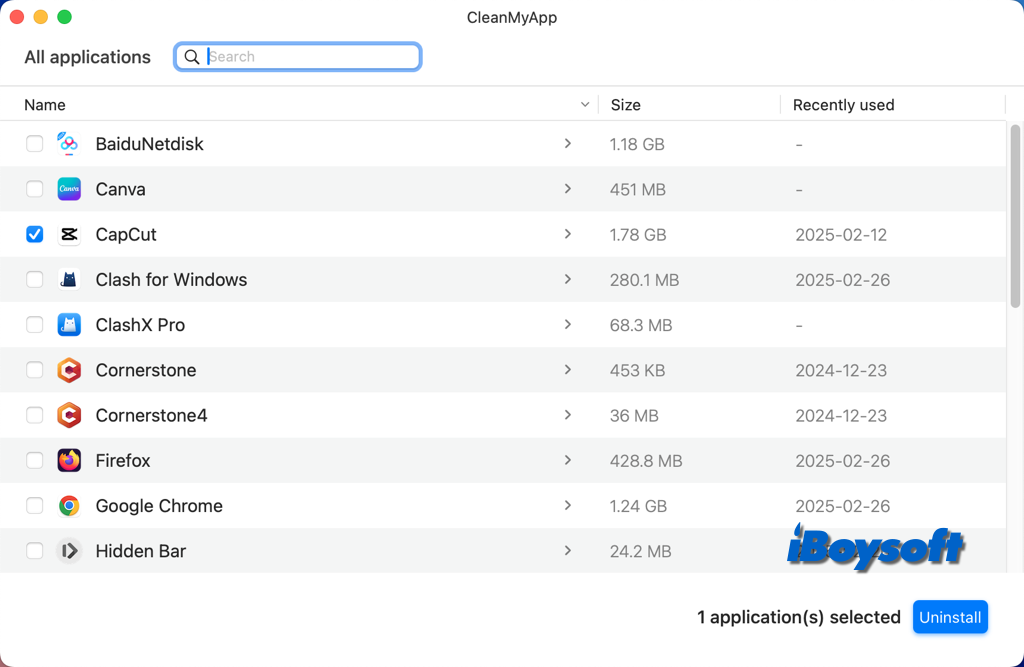
- Tap the Uninstall button to uninstall the selected app.
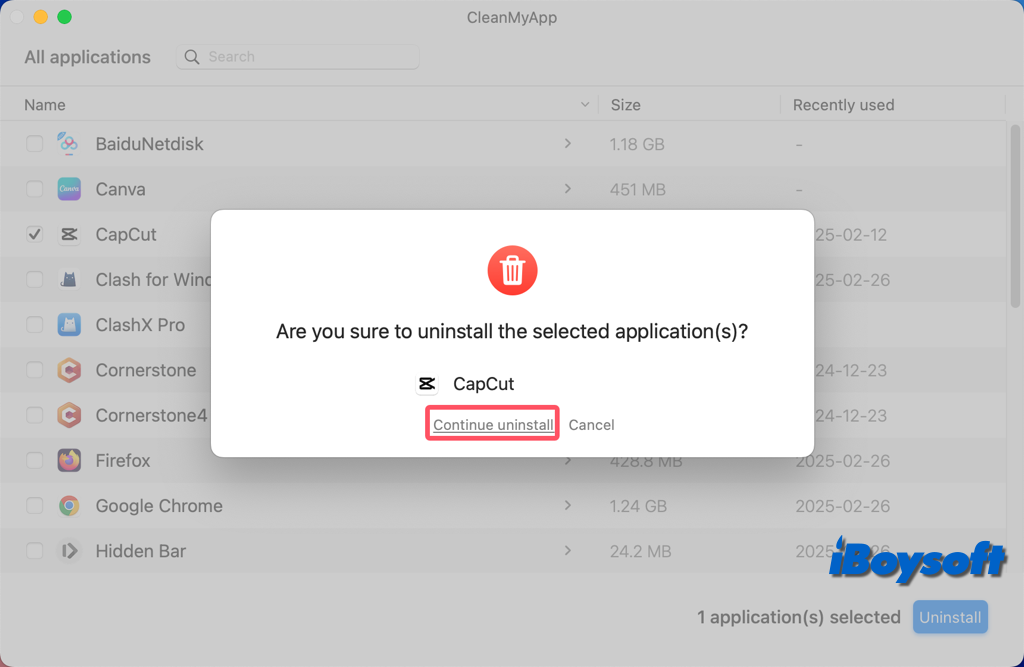
- Choose Continue uninstall to confirm the operation.
- Enter your admin password to allow the uninstallation.
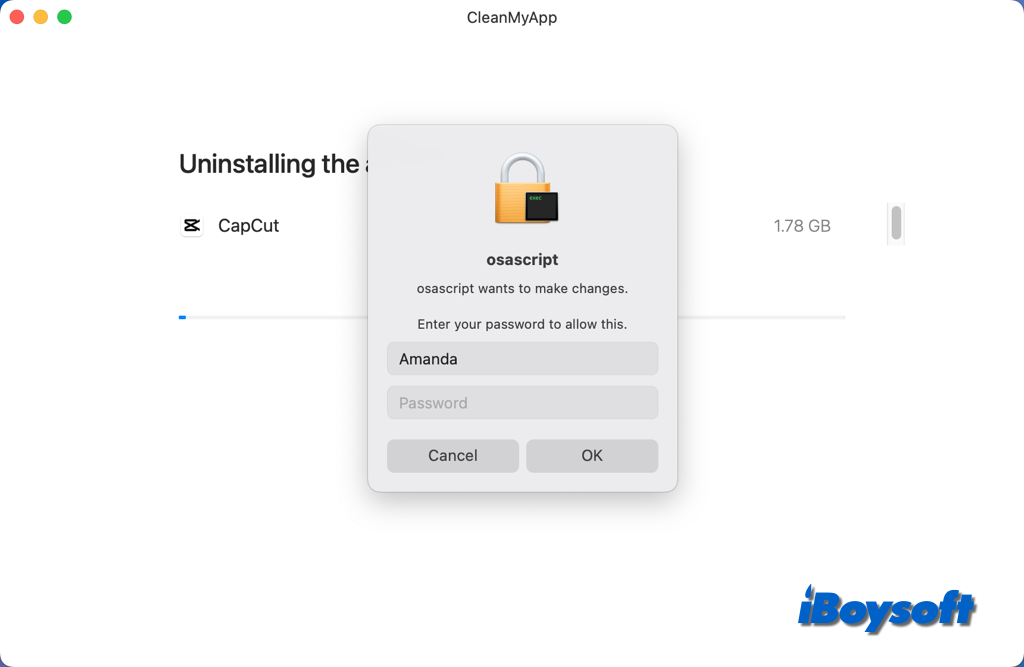
- Click OK to start the process.
- Click Finish and quit CleanMyApp.
Recommend CleanMyApp to helps others delete apps and leftovers automatically!
Uninstall CapCut on Mac Manually
Without a third-party uninstaller for Mac, you can also uninstall CapCut and delete its associated files. It is a little complicated to locate the related files on your Mac, just follow the steps below carefully to completely uninstall CapCut on your Mac.
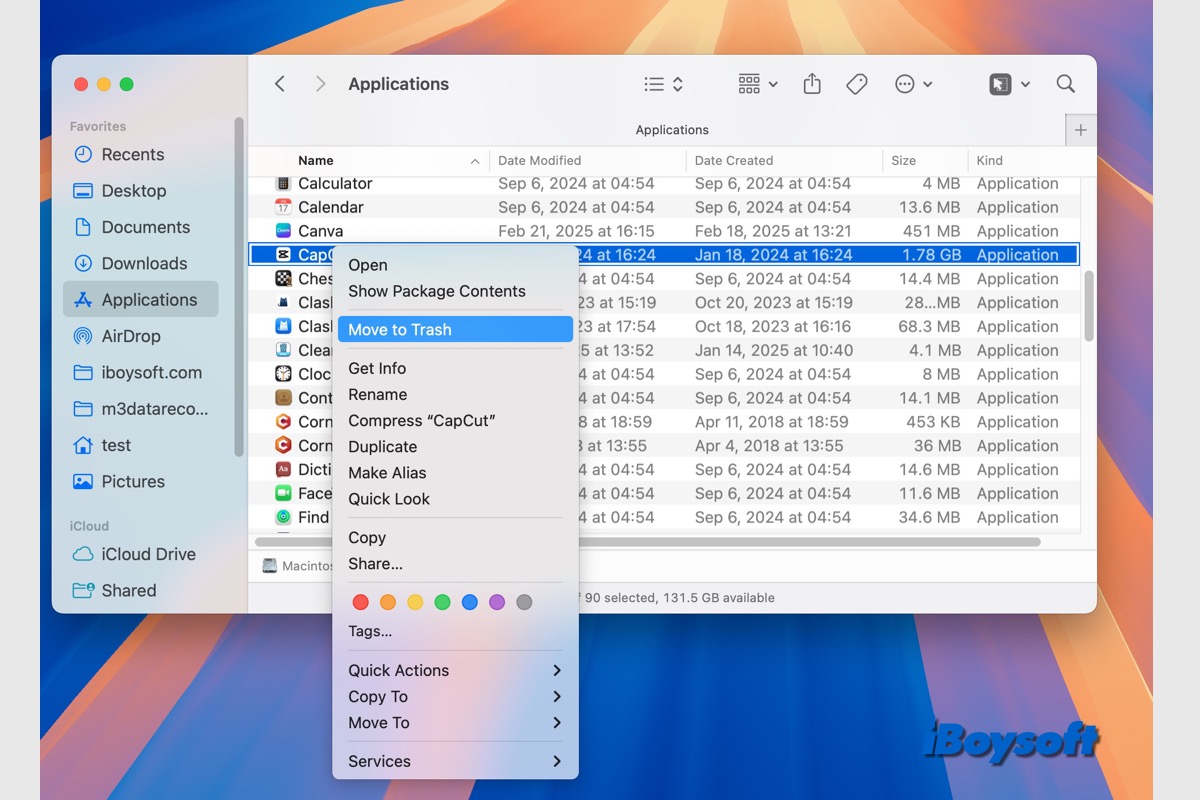
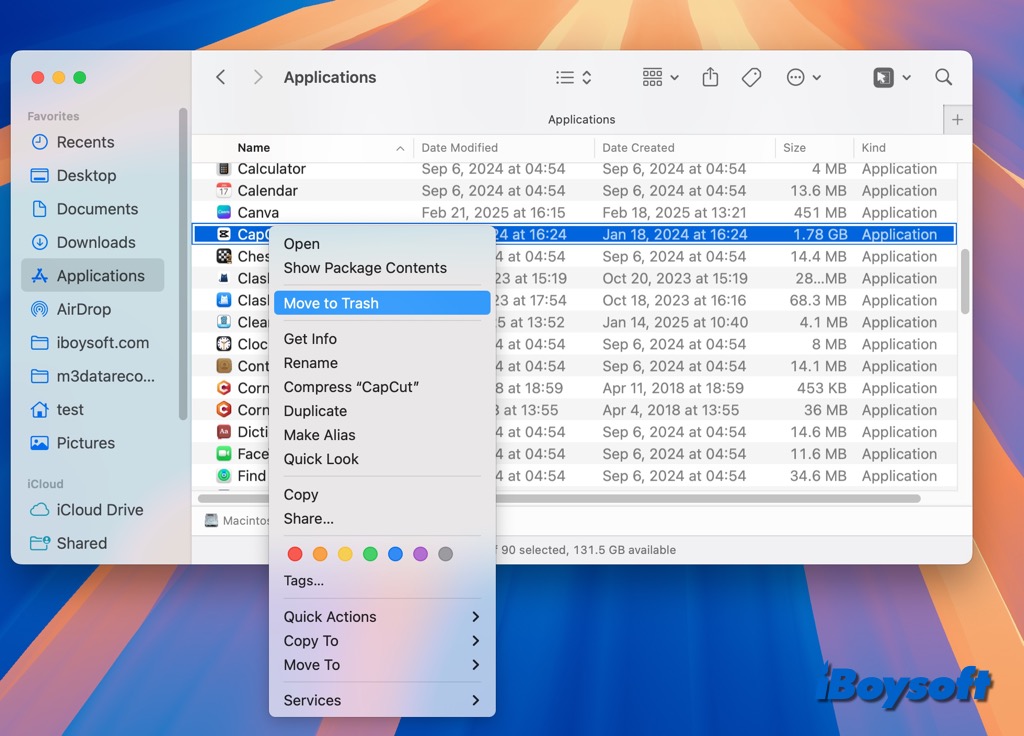
- Open the Applications folder from the sidebar of Finder.
- Locate CapCut, right-click (or Control-click) on CapCut, and choose Move to Trash. Alternatively, you can drag the CapCut app icon to the Trash.
- Open the Finder and click Go in the top menu.
- Hold down the Option key and select Library (this will show hidden library folders).
- Once inside the Library folder, look for the following directories and delete any CapCut-related files:
~/Library/Application Support: Look for any CapCut-related folders and delete them.
~/Library/Preferences: Look for files that contain CapCut in the name and remove them (e.g., com.capcut.app.plist).
~/Library/Caches: Delete any cache files related to CapCut.
~/Library/Logs: Check for any logs related to CapCut and remove them. - Check for any leftover files in the system folder: click Go > Go to Folder (or press Command + Shift + G), and enter /Library/ and click Go.
- Check for any CapCut-related files in the following directories and delete them:
/Library/Application Support
/Library/Preferences
/Library/Caches
/Library/Logs - Right-click on the Trash icon in the Dock and select Empty Trash.
Have you successfully uninstalled CapCut on Mac with the above methods? If so, click the button below to share this post with others who need it!