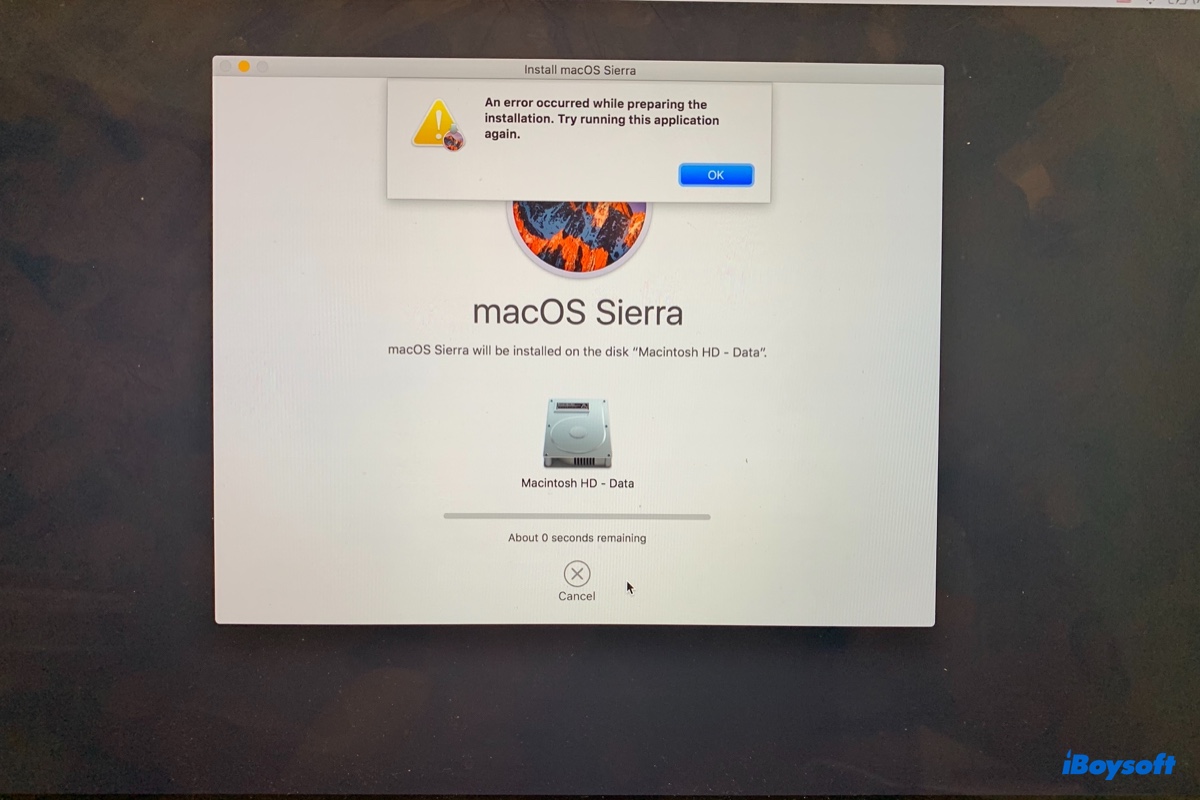
I wiped my MacBook Pro and is trying to reinstall macOS in Recovery Mode. However, I keep getting the error message saying "An error occurred while preparing the installation. Try running this application again." How can I fix it?
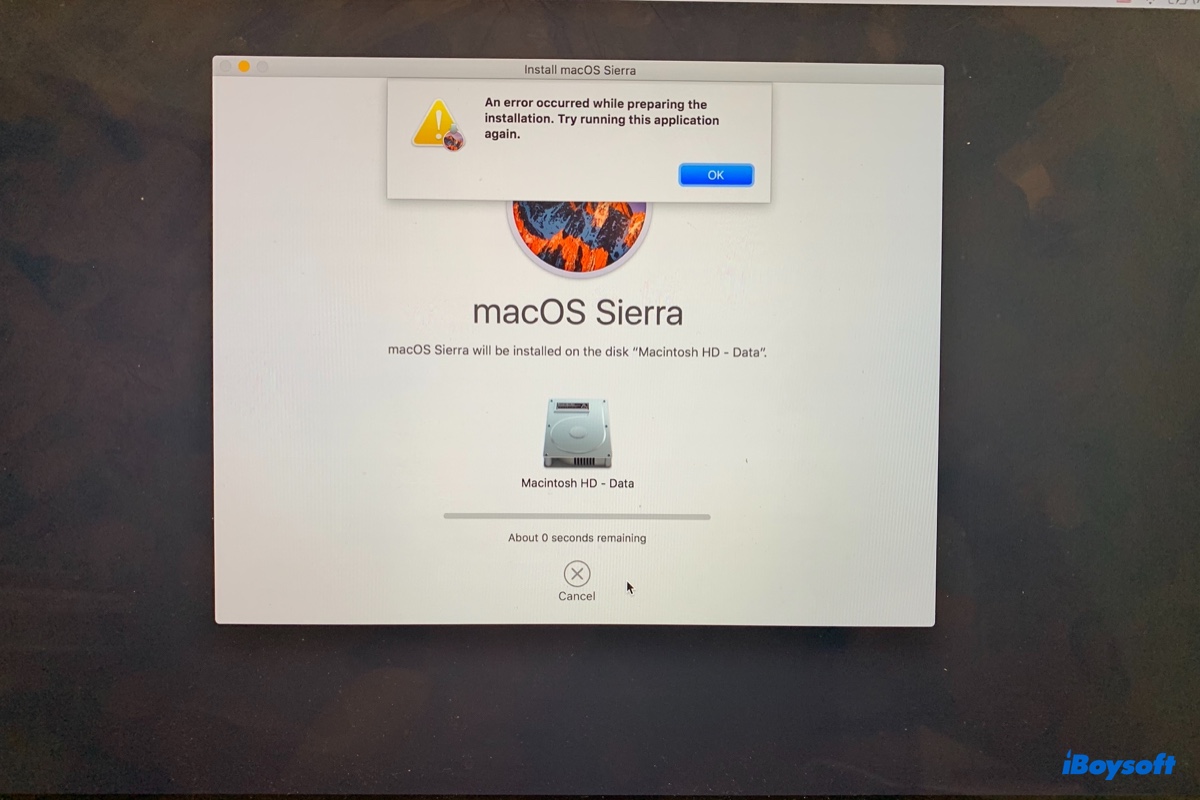
When updating or reinstalling macOS, you may receive the installation error that says "An error occurred while preparing the installation. Try running this application again." It usually happens when the macOS installation is about to finish. Even if you try running the application again, as suggested by the message, you'll likely still encounter the same error.
This error has been reported to occur when installing different macOS versions, including macOS Sonoma, macOS Ventura, macOS Monterey, macOS Big Sur, macOS Catalina, macOS Mojave, macOS High Sierra, macOS Sierra, and older OS X versions like El Capitan or Mountain Lion.
In this article, we'll explain why the installation failed and offer you several feasible solutions to the issue.
| 7 Fixes to "An error occurred while preparing the installation" | Quick steps |
| Fix 1: Check the internet connection | Switch to an ethernet connection |
| Fix 2: Use Internet Recovery Mode | 1. Press Option + Command + R at startup until seeing the spinning globe. 2. Connect to the internet. 3. Click Reinstall macOS/OS X > Continue. |
| Fix 3: Change your Mac's date | 1. Open Utilities > Terminal in Recovery Mode. 2. Run the command: date {month}{day}{hour}{minute}{year} |
| Fix 4: Run some smaller updates first | 1. Go to Software Update. 2. Click "More info...." 3. Select updates and click "Install Now." |
| Fix 5: Install from a bootable macOS installer | 1. Create a bootable macOS installer. 2. Boot from it. 3. Click "Install macOS/OS X. |
| Fix 6: Reset the NVRAM | 1. Shut down your Mac. 2. Press the power button, then immediately hold down Command + Option + P + R until your Mac restarts for the second time. |
| Fix 7: Erase your internal hard drive correctly | 1. Boot into Internet Recovery Mode. 2. Open Disk Utility. 3. Select the physical disk of your Mac and click Erase. |
Why is there an error occurred while preparing the installation?
If you fail to install macOS with the error saying "An error occurred while preparing the installation. Try running this application again," it may be caused by one of the following issues:
- The certificate of the macOS version you want to install has expired.
- Your internet is having issues.
- The installer is corrupted.
- The Apple server isn't available.
- Your Mac is having temporary glitches.
- The NVRAM is corrupted.
- Your Mac hard drive isn't formatted with the correct file system.
How to fix an error occurred while preparing the installation?
We'll cover all the possible solutions to the error "An error occurred while preparing the installation. Try running this application again." in this section.
Since it can occur in Recovery Mode when reinstalling macOS or in regular mode when updating or upgrading macOS, some solutions may only be applicable to one scenario but not the other. Try those available to your case.
Fix 1: Check the internet connection
A strong and stable internet connection is essential to a successful macOS installation. If you're using WiFi to install macOS, make sure it's working correctly. Or the better option is to switch to a wired ethernet connection, as it provides more reliable speeds than WiFi.
Fix 2: Use Internet Recovery Mode
If you get the error "An error occurred while preparing the installation" in Recovery Mode through Command + R, you should try accessing the Internet Recovery Mode with Option + Command + R. It will also allow you to reinstall macOS but instead of the version that was lastly installed on your Mac, Internet Recovery lets you install the latest macOS version compatible with your Mac.
That being said, reinstalling macOS from Internet Recovery can update your Mac to its latest operating system. It's worth mentioning that Internet Recovery is only available on Intel-based Macs. Apple Silicon (M1 & M2) Macs have only one Recovery Mode, which you can enter by pressing and holding the power button after it's completely shut down.
Note: It's recommended to use a wired keyboard to boot into Internet Recovery. If you have a Windows keyboard, you can treat the Windows key as Command, and the Alt key as Option. (Some users have resolved the error by simply using a Windows keyboard to boot into Internet Recovery and reinstall macOS.)
Here are the details on installing macOS from Internet Recovery Mode:
- Turn off your Mac.
- Press the power button, then immediately press and hold Option + Command + R.
- Release the three keys when the spinning globe shows up.
- Choose a network if you're using WiFi and enter its password.
- Wait while your Mac is booting into Internet Recovery.
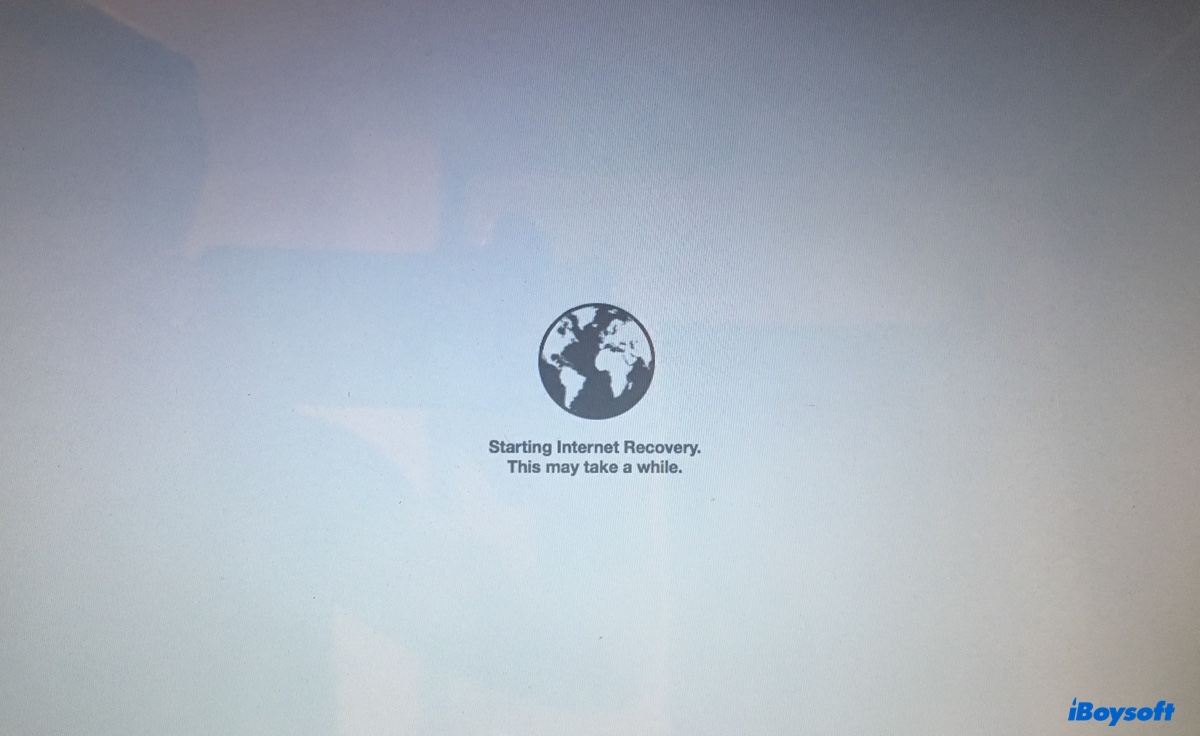
- When the macOS Utilities window appears, click "Reinstall macOS."
- Follow the instructions to complete the installation.
If that doesn't work, try using Shift + Option + Command + R at step 2 to reinstall the macOS shifted with your Mac or the closest that's still available.
Fix 3: Change your Mac's date
If you're attempting to reinstall an obsolete macOS version like macOS Sierra, the issue possibly lies in the outdated certificate embedded in the macOS installer. To complete the installation, you need to change your Mac's date back to a time when the installer is still validated.
Note that this is best done with a cable connection because WiFi has the habit of changing the date back to today.
- In Recovery Mode, click Utilities > Terminal.
- Execute the following command to change your Mac's date.date {month}{day}{hour}{minute}{year}Replace {month}{day}{hour}{minute}{year} with a date the macOS version is still supported. For example, if you're installing macOS Sierra, you can change the date to January 1 2017 at 12:00 with this command: date 010112002017
After the date is reset, you can retry the installation.
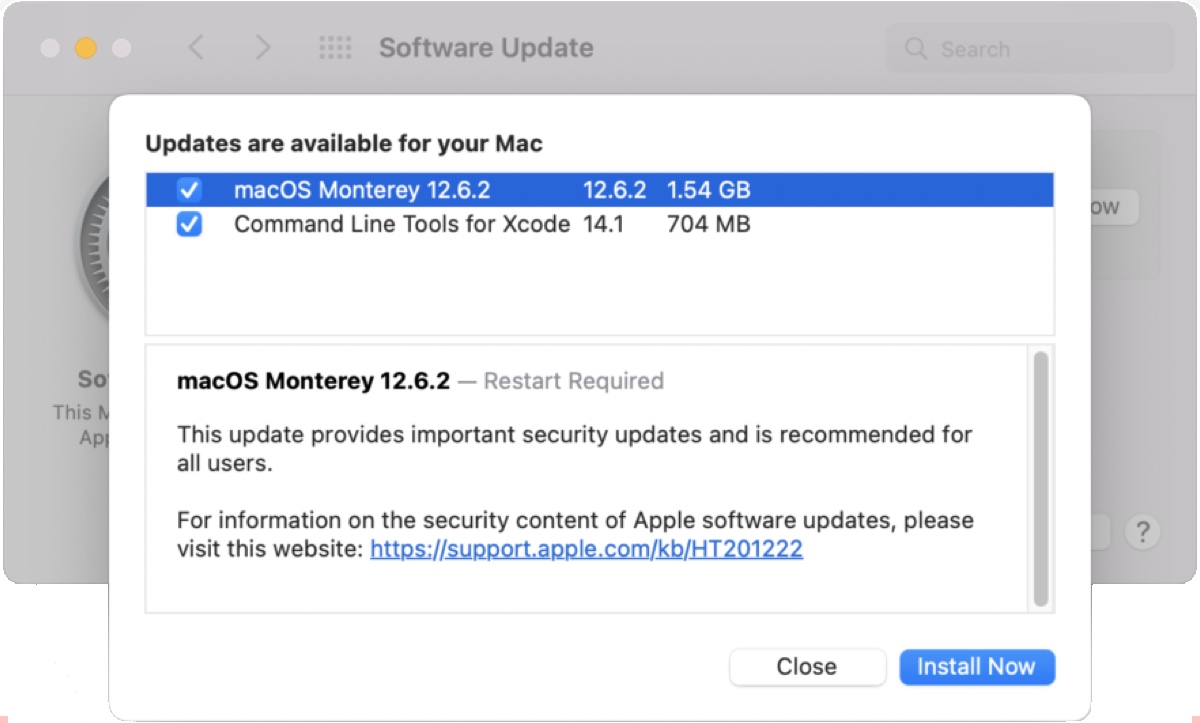
Fix 4: Run some smaller updates first
Suppose the error message "An error occurred while preparing the installation. Try running this application again." pops up when you're upgrading to macOS Ventura or other versions. Then consider make some small updates first. For instance, you can update your current macOS to its latest version, then upgrade to the desired macOS from there.
- On macOS Monterey or earlier, click the Apple menu > System Preferences > Software Update. On macOS Ventura or later, go to the Apple menu > System Settings > General > Software Update.
- Click "More info…."
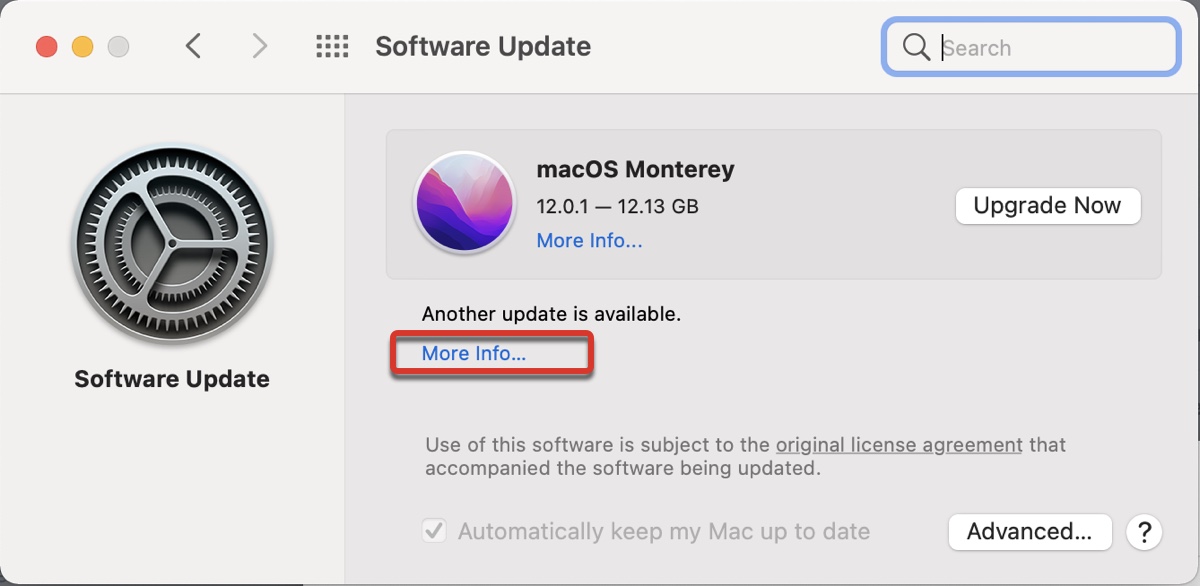
- Choose the software update you wish to install and click "Install Now."
Fix 5: Install from a bootable macOS installer
Alternatively, you can create a bootable macOS installer and boot from it to install the desired macOS. If your Mac can't boot up normally, you'll need to find another Mac that's compatible with the macOS version you wish to install but isn't preinstalled with a newer OS than it.
Prepare a USB flash drive or other type of storage device with at least 14 GB of available space and format it with Mac OS Extended (Journaled). Then follow this guide to create a bootable macOS installer.
After the bootable installer is made, use the steps below to install macOS from it:
On an Intel-based Mac:
- Connect the bootable installer with your Mac.
- (Optional) Set Startup Security Utility to allow booting from external media on T2 Macs.
- Ensure your Mac is connected to the internet.
- Turn on your Mac and immediately hold down the Option key.
- Release the key when the bootable volumes appear.
- Select the bootable installer and lick the on-screen arrow.
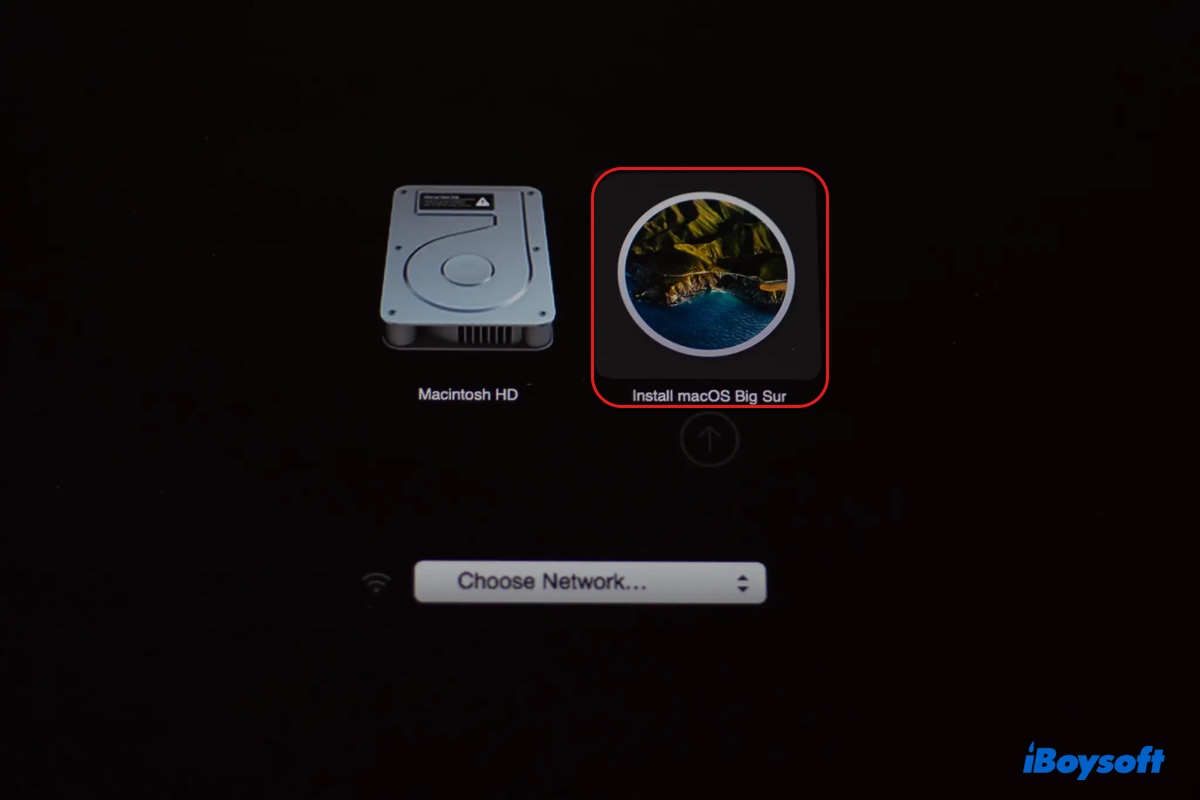
- Click "Install macOS (or Install OS X)" and click Continue.
On an M1 or M2 Mac:
- Connect the bootable installer with your Mac.
- Ensure it is connected to the internet.
- Press and hold the power button until seeing the startup options.
- Select the bootable installer and click Continue.
- Click "Install macOS (or Install OS X)" and click Continue.
Fix 6: Reset the NVRAM
NVRAM (non-volatile random-access memory) is the computer memory that holds settings needed to boot your Mac, such as startup disk selection, volume control, Bluetooth information, display resolution, brightness, etc. Resetting it can also help fix "An error occurred while preparing the installation."
The NVRAM on M1 or M2 Mac is tested at startup. If you're using an Apple Silicon Mac, simply shut down your Mac and power it up after a few seconds.
To reset the NVRAM on Intel-based Mac:
- Turn off your Mac.
- Hit the power button, then immediately hold down Command + Option + P + R.
- Keep holding the four keys until your Mac restarts for the second time.
Fix 7: Erase your internal hard drive correctly
Before installing macOS, you need to ensure your Mac is properly formatted. This will erase all data on your Mac, so you need to back up your Mac beforehand.
There're two key points regarding formatting your Mac hard drive. First, you should format the physical disk rather than the volume. Second, you need to choose the correct format that's compatible with the macOS version you're going to install. If you want to install macOS High Sierra or later, the Mac hard drive should be APFS-formatted. If you want to install macOS Sierra or earlier, the format should be Mac OS Extended (Journaled).
Now, take the following steps to fix "An error occurred while preparing the installation" in Recovery Mode:
- Boot into Internet Recovery Mode with the instructions in step 2.
- Select Disk Utility > Continue.
- Click View > Show All Devices.
- Select the top-level physical disk and click Erase.
- Name the drive.
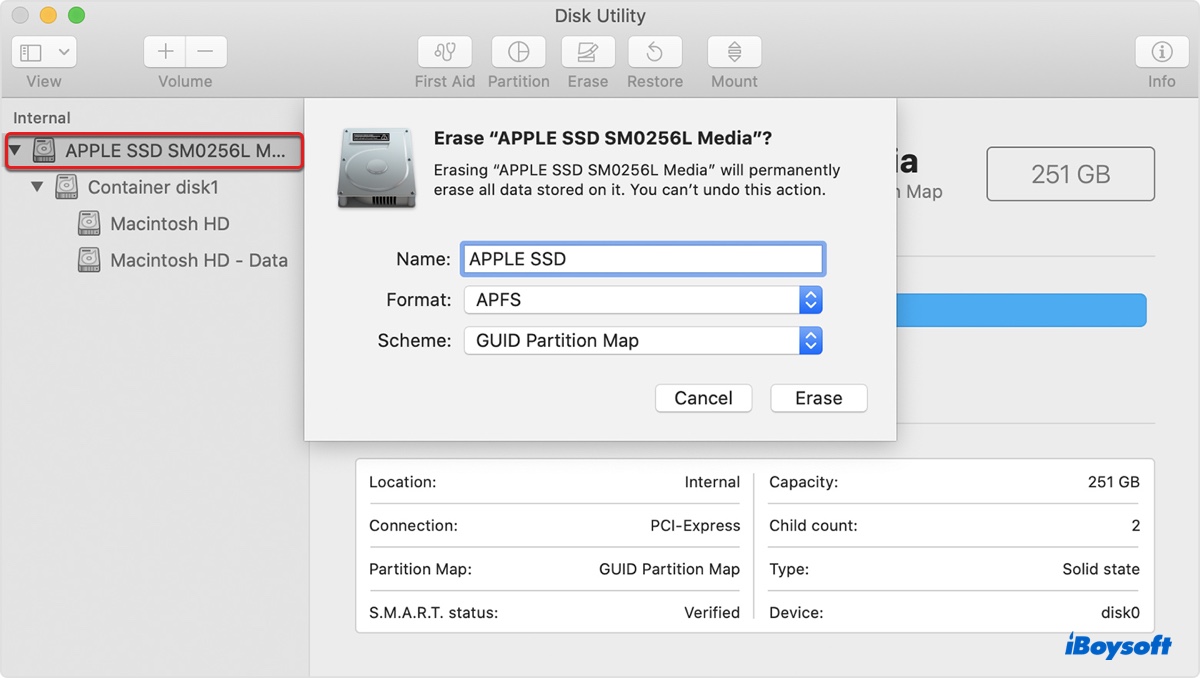
- Choose a proper format.
- Keep the scheme GUID Partition Map.
- Click Erase.
- Close Disk Utility and reinstall macOS.
If you find this post helpful, please share it to help others fix "An error occurred while preparing the installation" when installing Ventura or other macOS releases.
