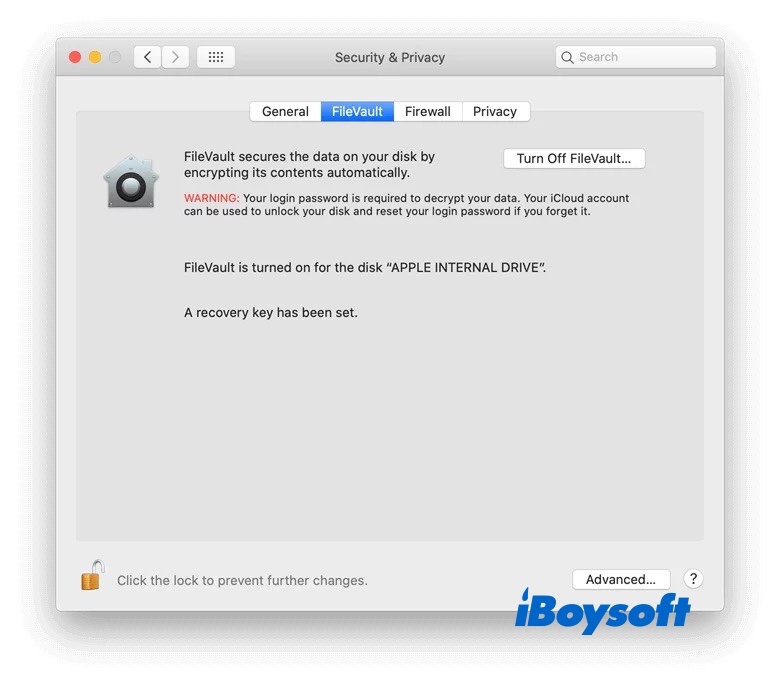
Nowadays, people becomes more and more concerned about data security. If you're a Mac user, you must have heard of Mac FileVault. With FileVault enabled on your Mac, anyone couldn't steal information from your Mac without a recovery key or FileVault password.
Sometimes, you may suffer a data loss on your FileVault-protected startup disk or external disk due to a virus attack, unconscious deletion, or unsafe ejection. Recovering data from FileVault hard drive is a little different from recovering data from an unencrypted one. But it's also easy to do, if you need to recover data from FileVault hard drive, just keep reading.
What is FileVault
FileVault is a data security feature that was first introduced in Mac OS X Panther (10.3) and FileVault 2 was released with Mac OS X 10.7 Lion. Since then, this feature is available in all the later versions of macOS till the latest Catalina.
When you turn on the FileVault feature, it encrypts data on your Mac startup disk. It encodes the data by using an algorithm known as a cipher, which prevents unauthorized access to the data to ensure the safety and privacy of your data.

Please share this helpful post with more people, thanks!
How to recover files from Mac FileVault hard drive
If your goal is to recover files from a Mac startup disk that is protected by FileVault and luckily you've backed up the Mac hard drive with TimeMachine, then you can easily restore files with TimeMachine. If unfortunately, you don't have any backups in hand, only data recovery software can help you retrieve data from Mac FileVault hard drive.
iBoysoft Data Recovery for Mac is capable of FileVault data recovery, APFS data recovery, and corrupted/damaged file recovery. And this powerful FileVault recovery software is compatible with T2, M2, M1, M1 Pro, and M1 Max Mac.
If your Mac can boot up, to perform FileVault recovery on Mac hard drive with the iBoysoft Data Recovery for Mac program, do the following:
Step 1: Free download, install, and launch iBoysoft Data Recovery for Mac on your Mac.
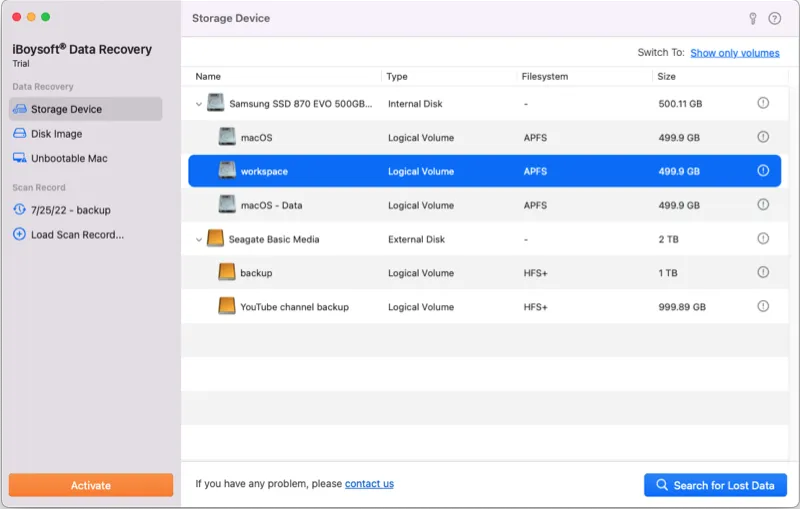
Step 2: Select Storage Device or Disk Image under Data Recovery.

Step 3: Select the FileVault encrypted disk (macOS internal disk) and click Search for Lost Data to start scanning. iBoysoft Data Recovery software will ask you to enter a password to unlock it.
Here the password is the one you created when you encrypted the disk with FileVault. So just input the correct password or recovery key to unlock the drive. The recovery key is a string of letters and numbers and is hard to remember, you must have kept it somewhere safe.
Note: If you put in an incorrect password, the disk can't be unlocked and the data can't be retrieved. You can try the Mac login password to unlock the FileVault-encrypted disk because the login password is by default the password for FileVault if you have never changed it.
Step 4: Once the scanning process is finished, you can filter these recoverable files by different categories and then preview the scanning results. Select all the files you want to recover and click "Recover" to retrieve them from the FileVault encrypted disk. Rember to not store these recovered files in the same encrypted volume to avoid data loss.
However, if your Mac won't turn on or if your Mac was protected by T2 or Apple Silicon Ship, you can't recover data from FileVault hard drive using the above method. You need to boot into macOS Recovery Mode to perform FileVault data recovery, here's how to do it:
- Start your Mac in macOS Recovery Mode.
For Intel Macs before 2018: Turn on your Mac and immediately press down the Command + Option + R keyboard keys together (not regular Command + R). Hold them until you see a spinning globe on your screen.
For Intel Macs after 2018 with T2 Security Chip: Turn on your Mac and immediately press down the Command + Option + Shift + R keyboard keys together. Hold them until you see a spinning globe on your screen.
For Apple Silicon Macs: Turn on your M1 Mac and immediately press the Touch ID button. Hold it until you see Loading startup options. Click Options to enter macOS Recovery Mode. - Choose a network for your Mac and make your Mac connected to the Internet all the time.
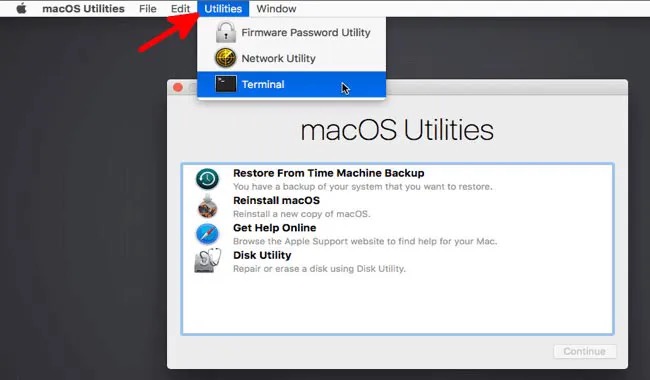
- Open Terminal from Utilities drop-down menu.

- Type the following command in Terminal and press Return to launch iBoysoft Data Recovery.sh <(curl http://boot.iboysoft.com/boot.sh)
- After launching iBoysoft Data Recovery, follow the wizard to scan data from Mac hard drive and recover data as the aforementioned. You'll still be prompted to type in the FileVault password during the recovery process, make sure you input the correct one.
If you think this post is helpful, please share it with more people.
How to recover data from an external FileVault hard drive
Usually, FileVault can only encrypt the Mac startup disk. If you're sure your external disk is encrypted by FileVault, you must have encrypted the external hard drive with iBoysoft DiskGeeker or other third-party software with the FileVault feature. To recover data from an external FileVault hard drive, you need to unlock the disk in the third-party software first.
Typically, you have 2 options to unlock the external disk.
- Use the self-designed password when you encrypted the disk with FileVault.
- Use the generated recovery key you either backed up in a file or printed out.
When the external disk is unlocked, you can use iBoysoft Data Recovery for Mac to get your lost data back.
We'd be appreciated it if you post this informative post on your social media.
FAQs about recovering data from FileVault hard drive
- QIs it possible to recover data if FileVault disk can't be unlocked?
-
A
If the disk can't be unlocked, then the data can't be retrieved. You can try the Mac login password to unlock the FileVault-encrypted disk because the login password is by default the password for FileVault if you have never changed it.
- QHow do I remove FileVault from my Mac?
-
A
To remove or turn off FileVault from your Mac, go to System Preference, and find Security & Privacy. Select the FileVault tab. Click the lock at the left bottom and enter your password when asked. Finally, click Turn Off FileVault.
