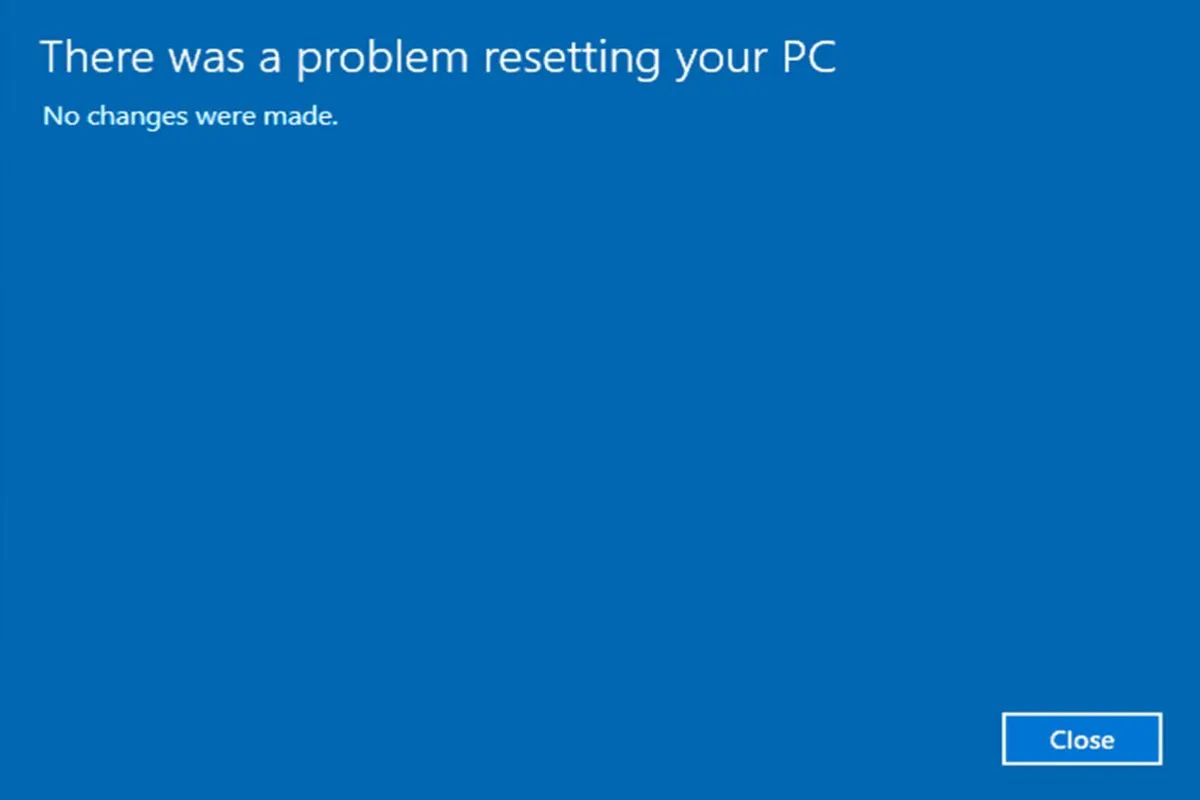
There are many reasons that you want to reset your PC. However, the blue-screen warning "There was a problem resetting your PC. No changes were made." may pop up on your screen even if resetting requires troubleshooting.
As the error shows, your PC will stay in the same state and won't be set automatically. Under the worse circumstance, your PC may get stuck in a reset loop, making it impossible to boot your Windows without errors.
So when you cannot reset your Windows 10, how to fix it? This article is the best answer for you.
Tips: Thinking about reinstalling Windows 10? Download the Windows 10 ISO without the Media Creation Tool and then create a bootable USB to reinstall it. You could also download Windows 10 Pro, Enterprise, Home, or Education to make a boot drive.
If you think this post is useful, click the below button to share it on your social media!
Why reset this PC not working?
Resetting refers to the process of restoring the computer to its original state. During the process, it will erase all the data and files to restore your Windows to the factory state and settings.
The reason why you cannot reset this PC is the following:
- Deletion of important files due to an abrupt shutdown.
- A corrupt file prevents Windows 10 from resetting.
- Compression was enabled by your PC manufacturer.
- Windows 10 came pre-installed in your system.
So that you may see the below prompts on the blue screen:
- Refresh your PC. There was a problem refreshing your PC. No changes were made.
- There was a problem resetting your laptop or computer.
- Can't reset your PC.
These variations of the same error come up when trying to refresh the Windows 10 system instead of the reset. If you see any of these messages at the end of your resetting process, you must troubleshoot in order to properly reset your operating system.
How to fix "There was a problem resetting your PC"?
Depending on the state of your device, you can take different ways to fix this problem or save your computer from getting stuck in an infinite reset loop. Below are the different methods to restore your device and get rid of the frustrating error.
Use the Startup Repair
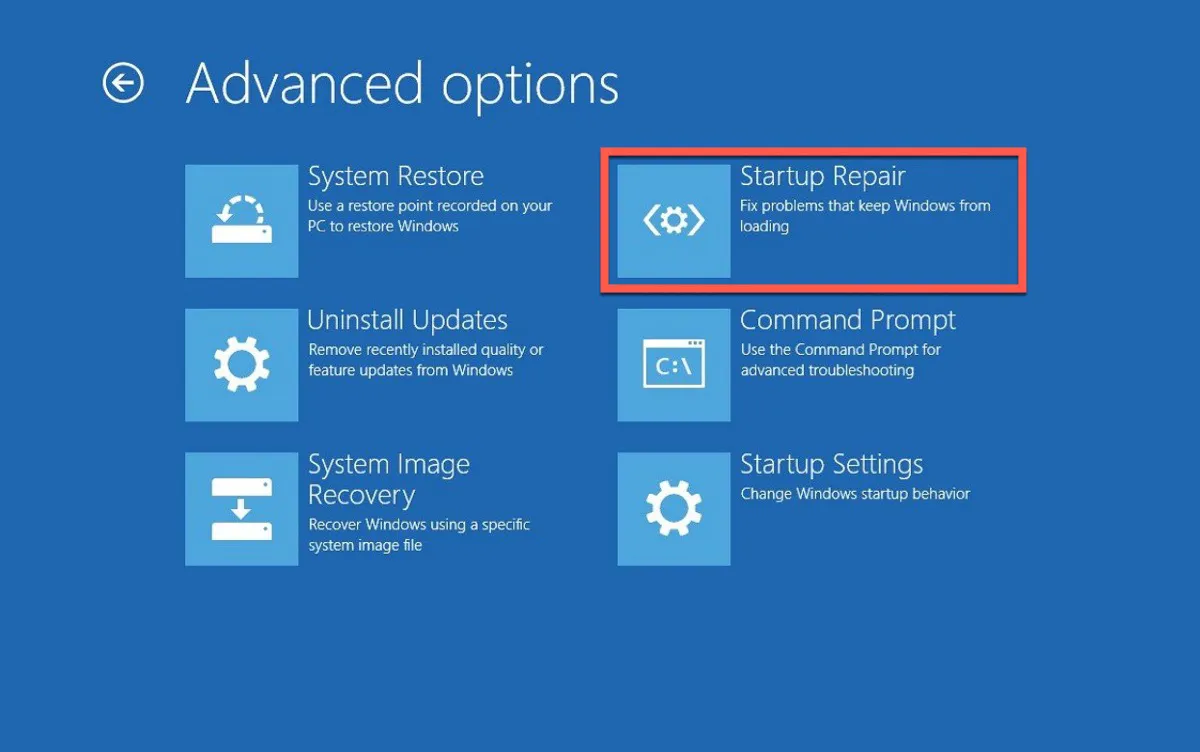
Startup Repair can help you to fix common problems that prevent Windows from booting. What you need to do first is to enter Windows Recovery Environment (WinRE). In order to do this, you will repeatedly restart your PC.
- Hold on to the power button for 10 seconds to turn off your Windows and then turn it back.
- Hold on to the power button for 10 seconds to turn off your Windows when you see the Windows logo.
- Turn your Windows off, repeat the above operations again, and your Windows will fully start up.
- Select Advanced options > Choose an option and you're in WinRE.
- Select Troubleshoot > Advanced options > Startup Repair > Restart.
Or you can create a bootable USB drive or DVD with the Windows 10 installer, and then insert the bootable USB drive or DVD into your PC to boot it.
Here are the ISO files you may need for creating a bootable USB installer:
Download Windows 10 Home ISO
Download Windows 10 Pro ISO
Now, you can boot your Windows normally.
Run the SFC scan
One of the most common reasons for this error is corrupted system files. If the key file in your Windows 10 system is corrupted or deleted, it can prevent the operation from resetting your PC. So you can run the System File Checker(SFC scan) to repair the file.
Here's how to run the SFC scan:
- Open Command Prompt and then choose Run as administrator.
- Type in the following command in the command window and then press Enter.
sfc/scannow
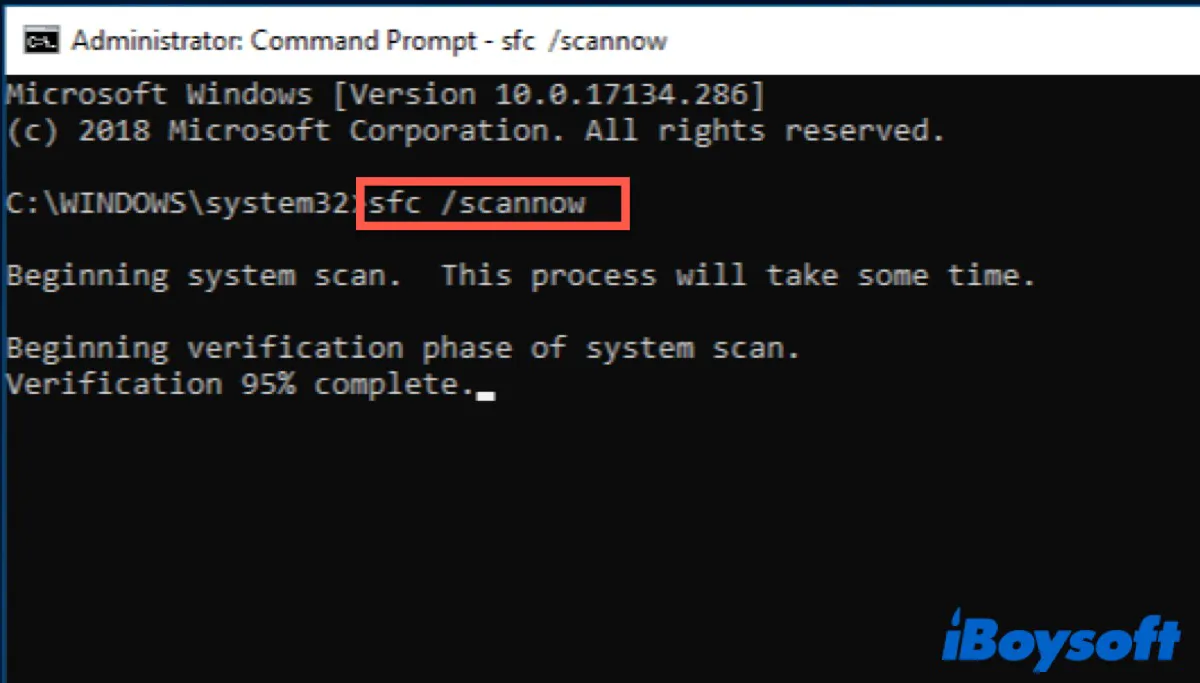
Wait for the scanning process to finish and make sure you don't close the command prompt or shut down your computer during the process. All the system errors detected will automatically get repaired.
After that, restart your computer and try to reset your PC again.
Problem solved? Share your happiness with your friends!
Restore from a system restore point
If you take the above operations but the error still pops up, then you can try to resolve it with a System Restore.
System Restore is a Windows tool designed to repair damaged software and files. It works by taking a snapshot of your Windows files and system files.
It takes your PC back to an earlier point in time, called a system restore point. Restore points are generated when you install a new app or driver, and when you create a restore point manually. It won't affect your personal files, but it will remove apps, drivers, and updates installed after the restore point was made.
But this way only works if your point was set when this error didn't exist on your PC.
- Type System Restore in the search bar and then choose Create a restore point.
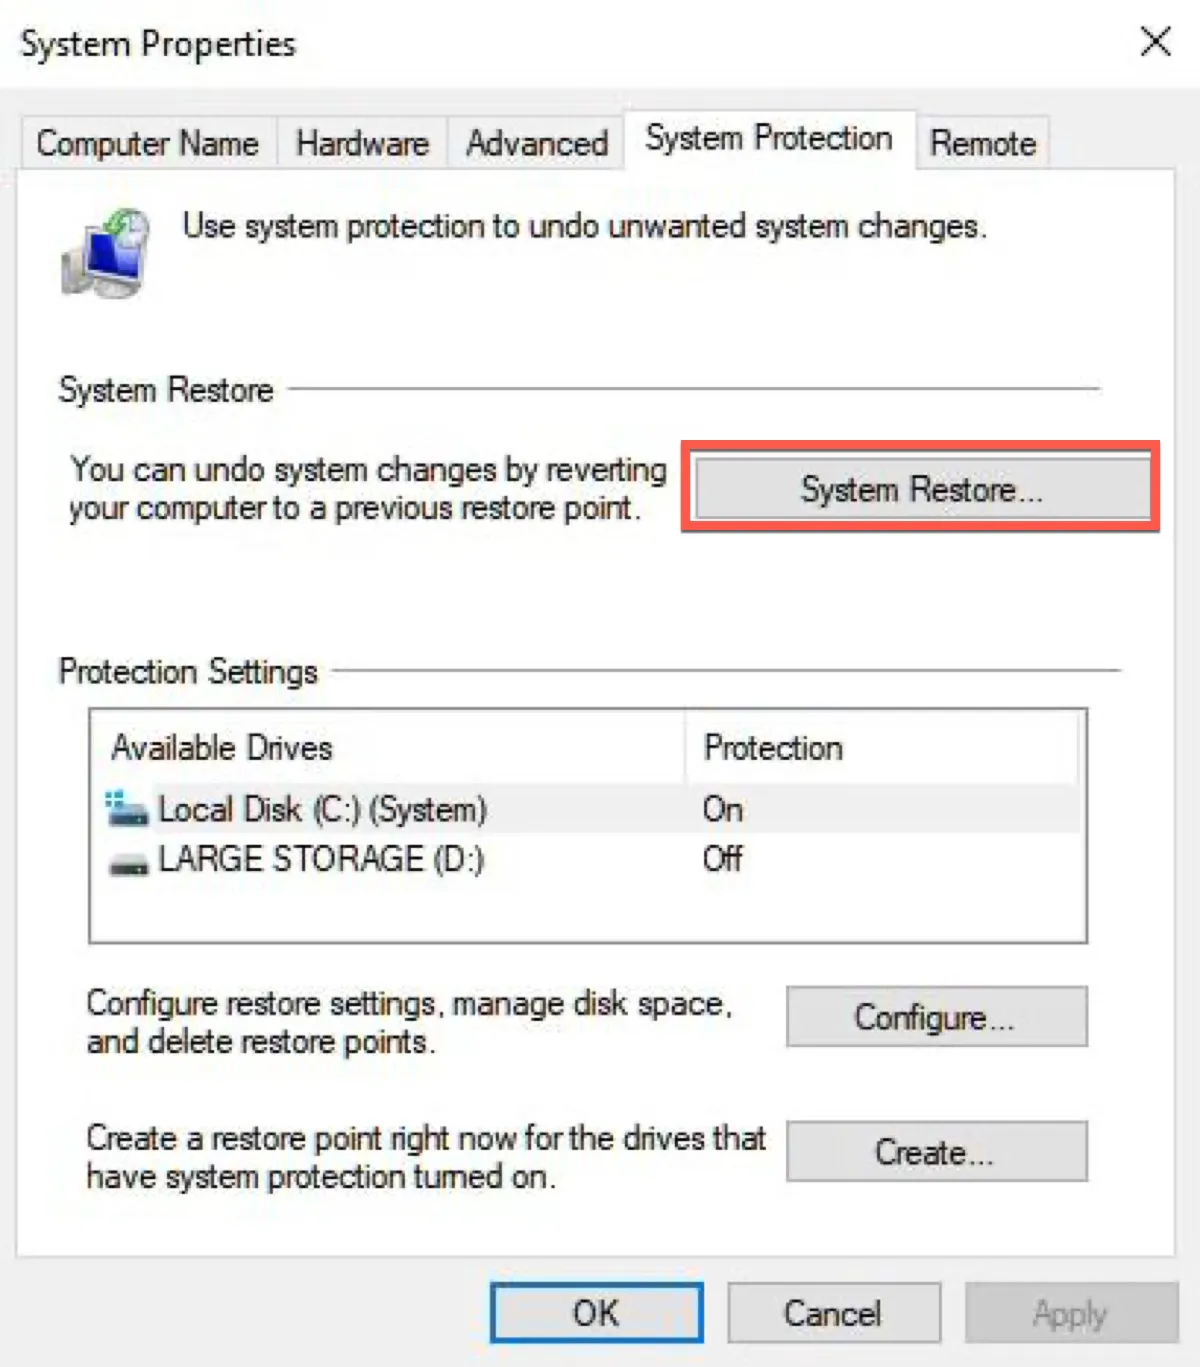
- Click System Protection in the System Properties launched window.
- Click System Restore and then click Next in the next pop-up window.
- Choose the restore point you want to return to and then click Next.
After that, you can restart your PC to check if the error has been fixed.
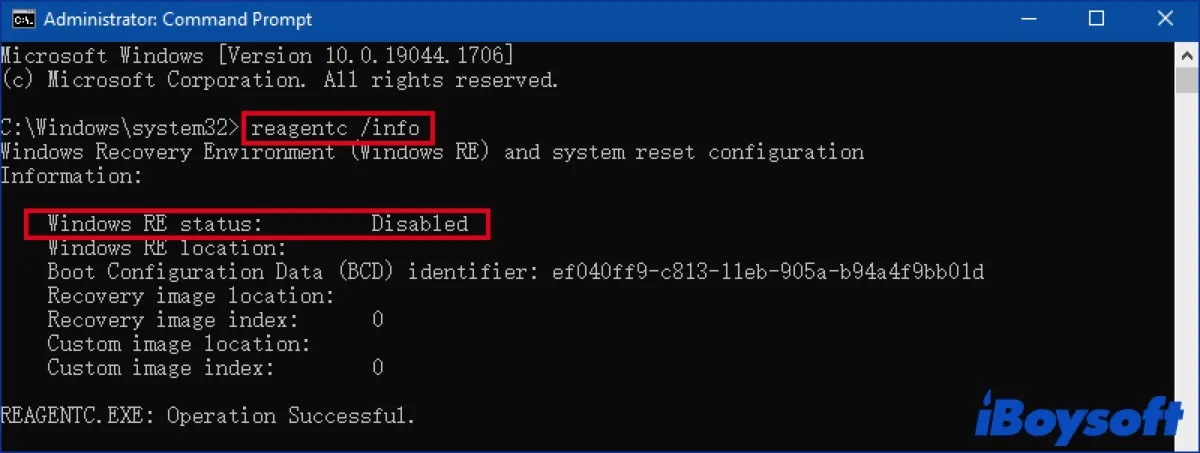
Disable ReAgentc.exe
ReAgentc.exe is an executable file in Windows that can be used to configure WinRE. When your system fails during normal boot-up, it will try to turn WinRE. Temporarily disabling it may help your computer reset.
- Open Command Prompt and then choose Run as administrator.
- Type in the following command.
reagentc/disablereagentc/enable
Rename the System and Software Registry Hive
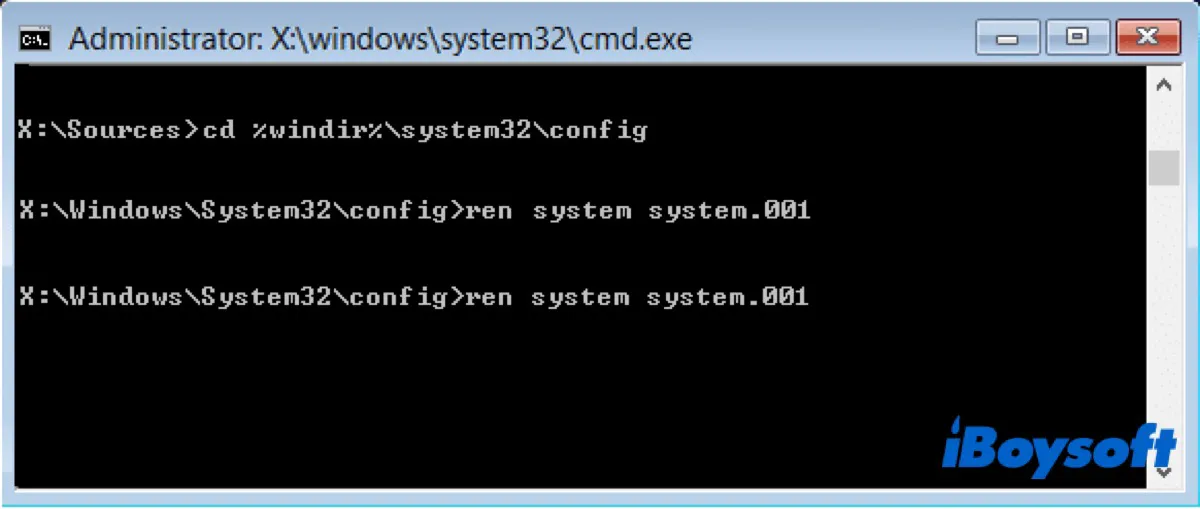
Renaming the System and Software Registry Hive can help to fix various causes, including corruption and malware. And you need to run the Command Prompt as administrator once again.
Even if your PC is currently stuck in a reset loop, you can access the Command Prompt, and what you need to do is to use the Startup Repair tool.
- Open Command Prompt and then choose Run as administrator.
- Type in the following command and then press Enter after every command to continue.
cd%windir%\system32\configren system system.001ren software software.001 - Type in exit and press Enter to close the Command Prompt.
Once you're done, you can try to restart your PC and give resetting another try.
Use Windows Defender to refresh Windows
Windows Defender is an integrated built-in tool to help you with issues related to your computer, whose main purpose is to deal with malware, viruses, and other security issues, but it's still useful for other things.
Before you refresh your PC, make sure you have backed up any important files on it, because when refreshing your PC, most of your files located on the system drive will be deleted.
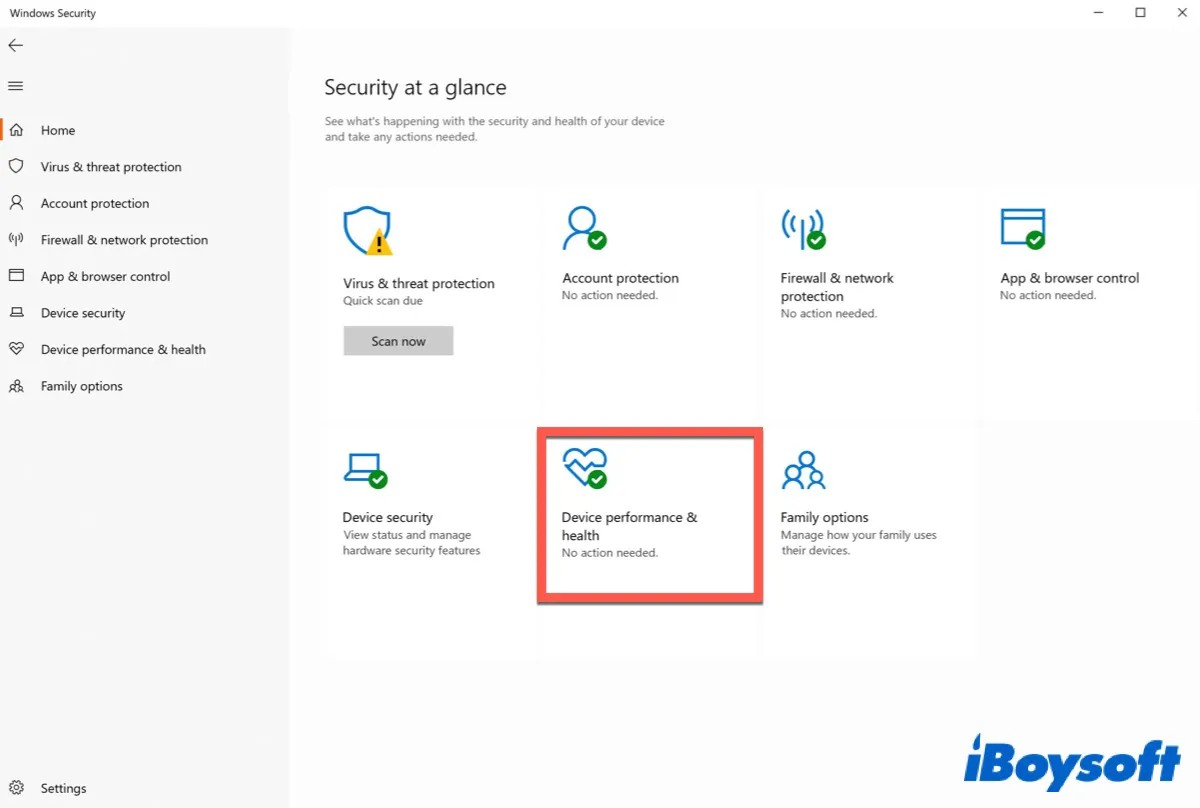
- Open the settings.
- Click Update & Security.
- Click Windows Security to open.
- Scroll down and choose Device performance & health.
- Click on the Additional Information link under the Fresh start section.
- Click on Get Started and follow the on-screen instructions to refresh Windows.
Reinstall Windows 10
If all the above solutions can't solve your problem, the last way is to reinstall Windows 10. Sometimes, some Windows issues don't go away until you uninstall the Windows version and install it afresh.
If these ways solve your problem, don't forget to share them with more people.
FAQ about Windows 10 reset this PC not working
- QWhy is Reset this PC not doing anything?
-
A
One of the most common causes for the reset error is corrupted system files.
- QHow do I Reset Windows 10 if it wont Reset?
-
A
You can try the ways in the article to reset your Windows 10 again.
