Having a bootable macOS Sierra USB installer is helpful in various ways. Whether you're looking to clean install macOS Sierra, set up multiple Macs without redownloading the installer, boot up a Mac that won't boot, install macOS on unsupported Macs, or troubleshoot issues, the macOS Sierra USB installer provides you with flexibility.
This article will walk you through the steps to create a bootable macOS Sierra USB and help you install Sierra from it.
How to create bootable USB for macOS Sierra on Mac?
Before proceeding, you must prepare a USB drive with at least 8GB of storage space to accommodate the macOS Sierra installer, which is about 5 GB. Besides, you need to back up data on the USB drive as it will be reformatted during the process.
Tips: If you value time and efficiency, use iBoysoft DiskGeeker to create the bootable macOS Sierra USB installer.
This macOS bootable USB software enables you to create bootable USB installers from DMG files on any Mac, whether it's compatible with macOS Sierra or not. With a few clicks, you can create a working macOS Sierra boot USB drive, which would take you three times more effort if using Terminal.
To create a bootable USB for macOS Sierra, follow these steps:
Step 1: Download the macOS Sierra DMG file.
Step 2: Free download the macOS bootable USB software and open it.
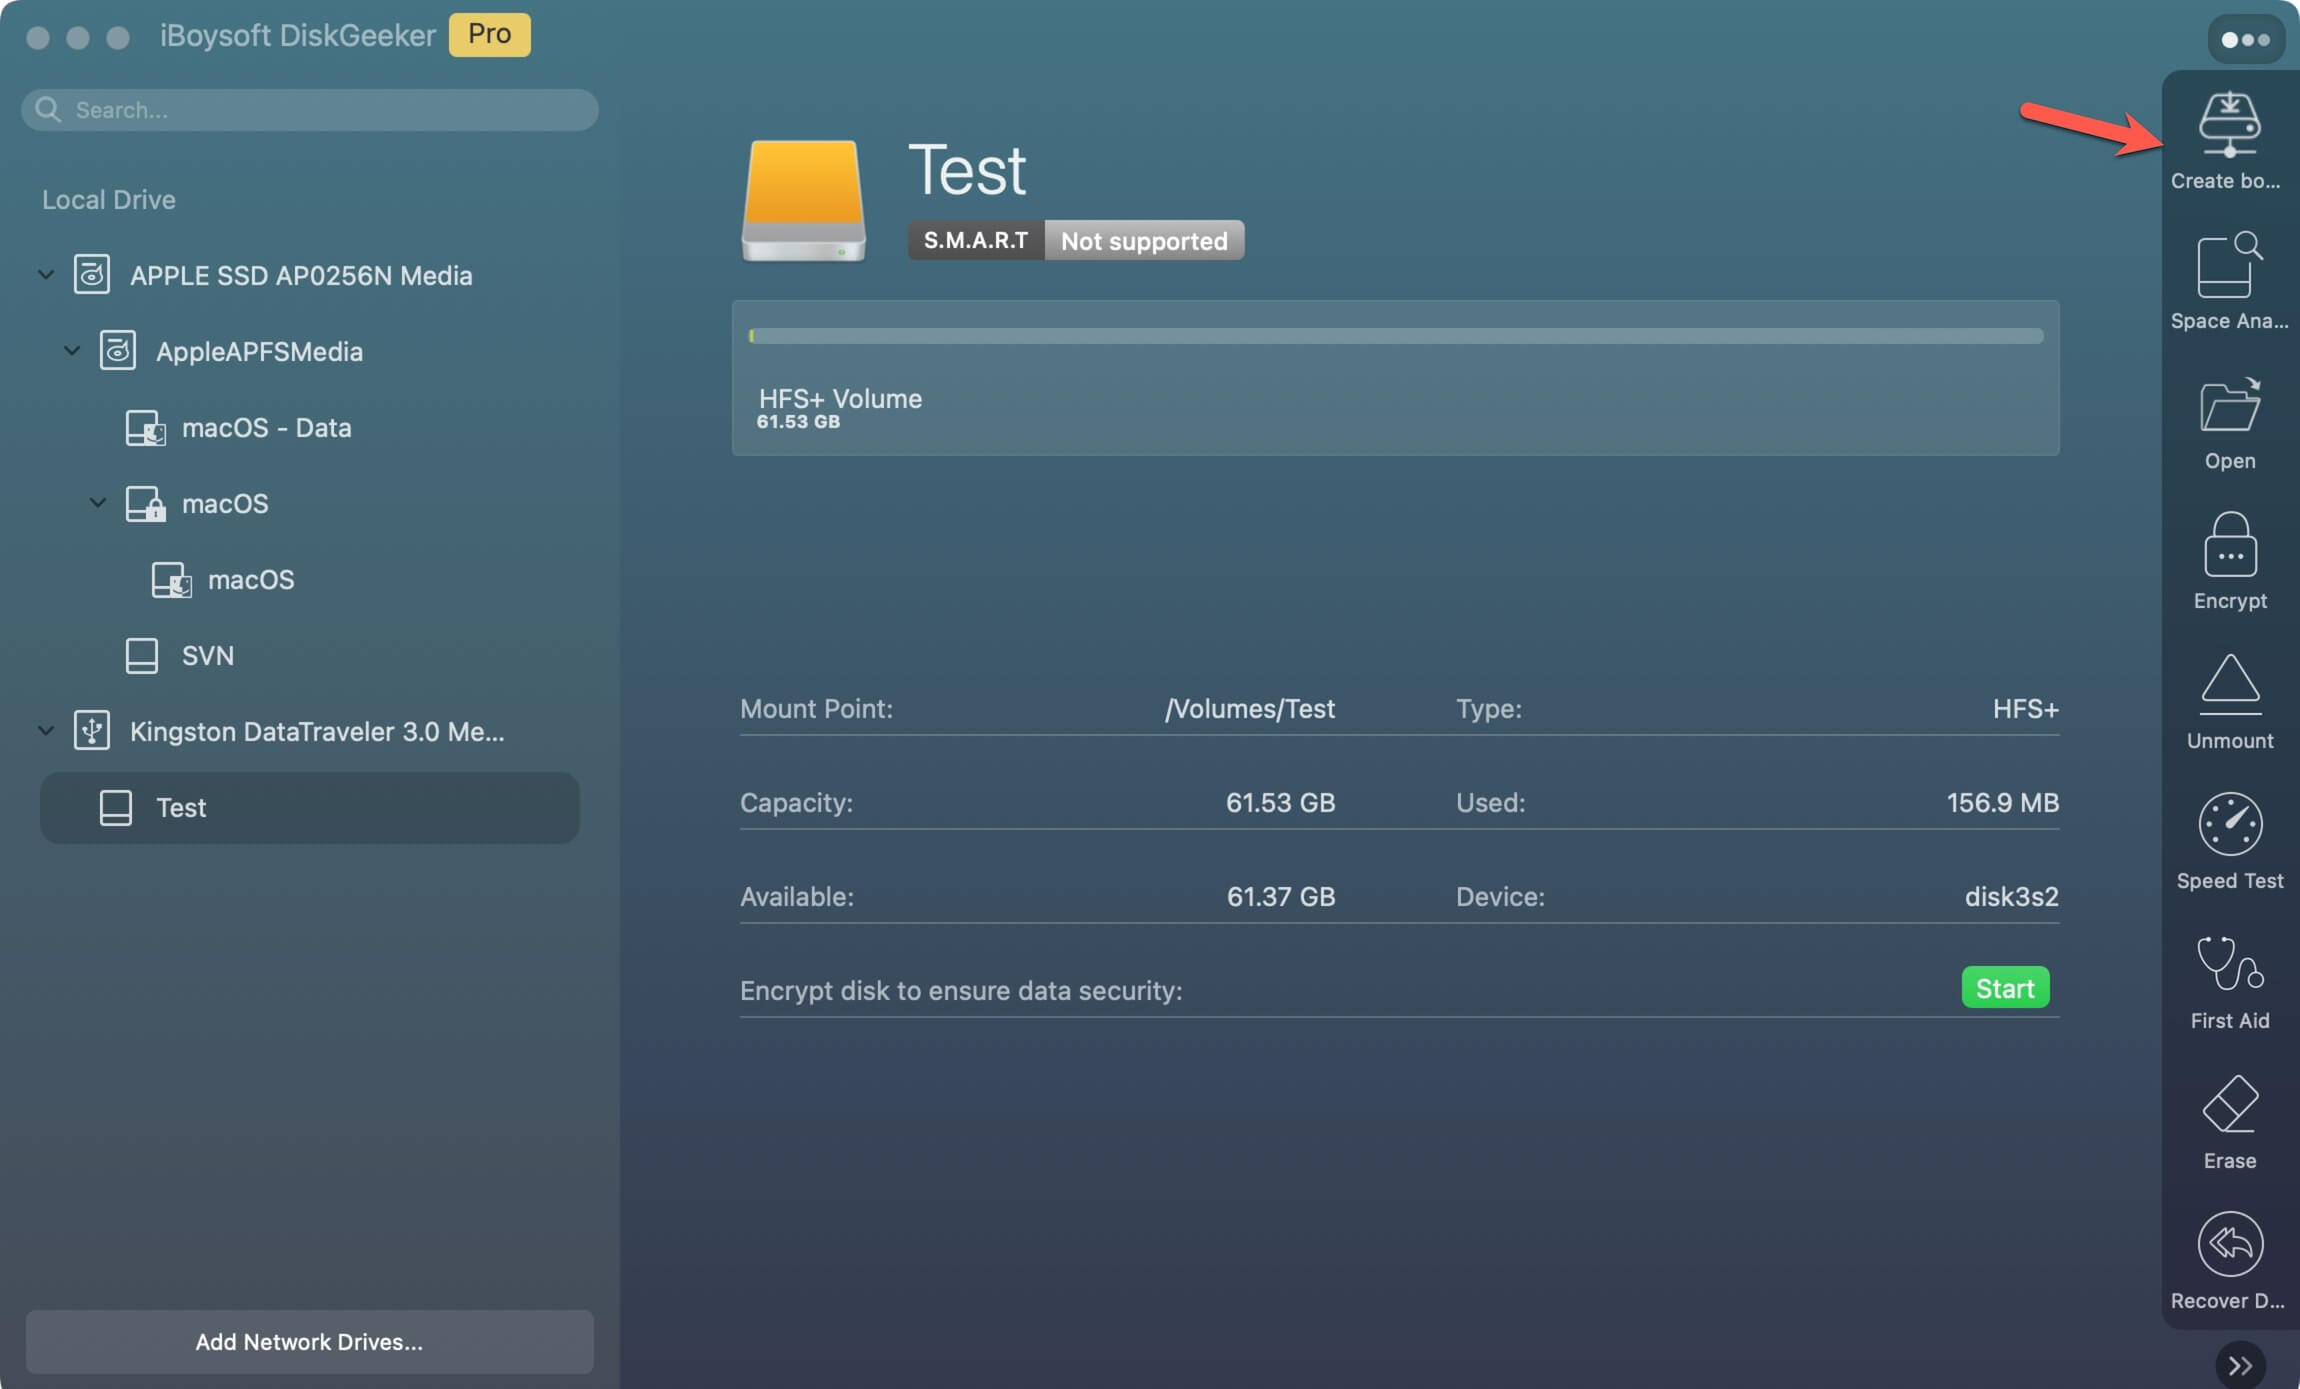
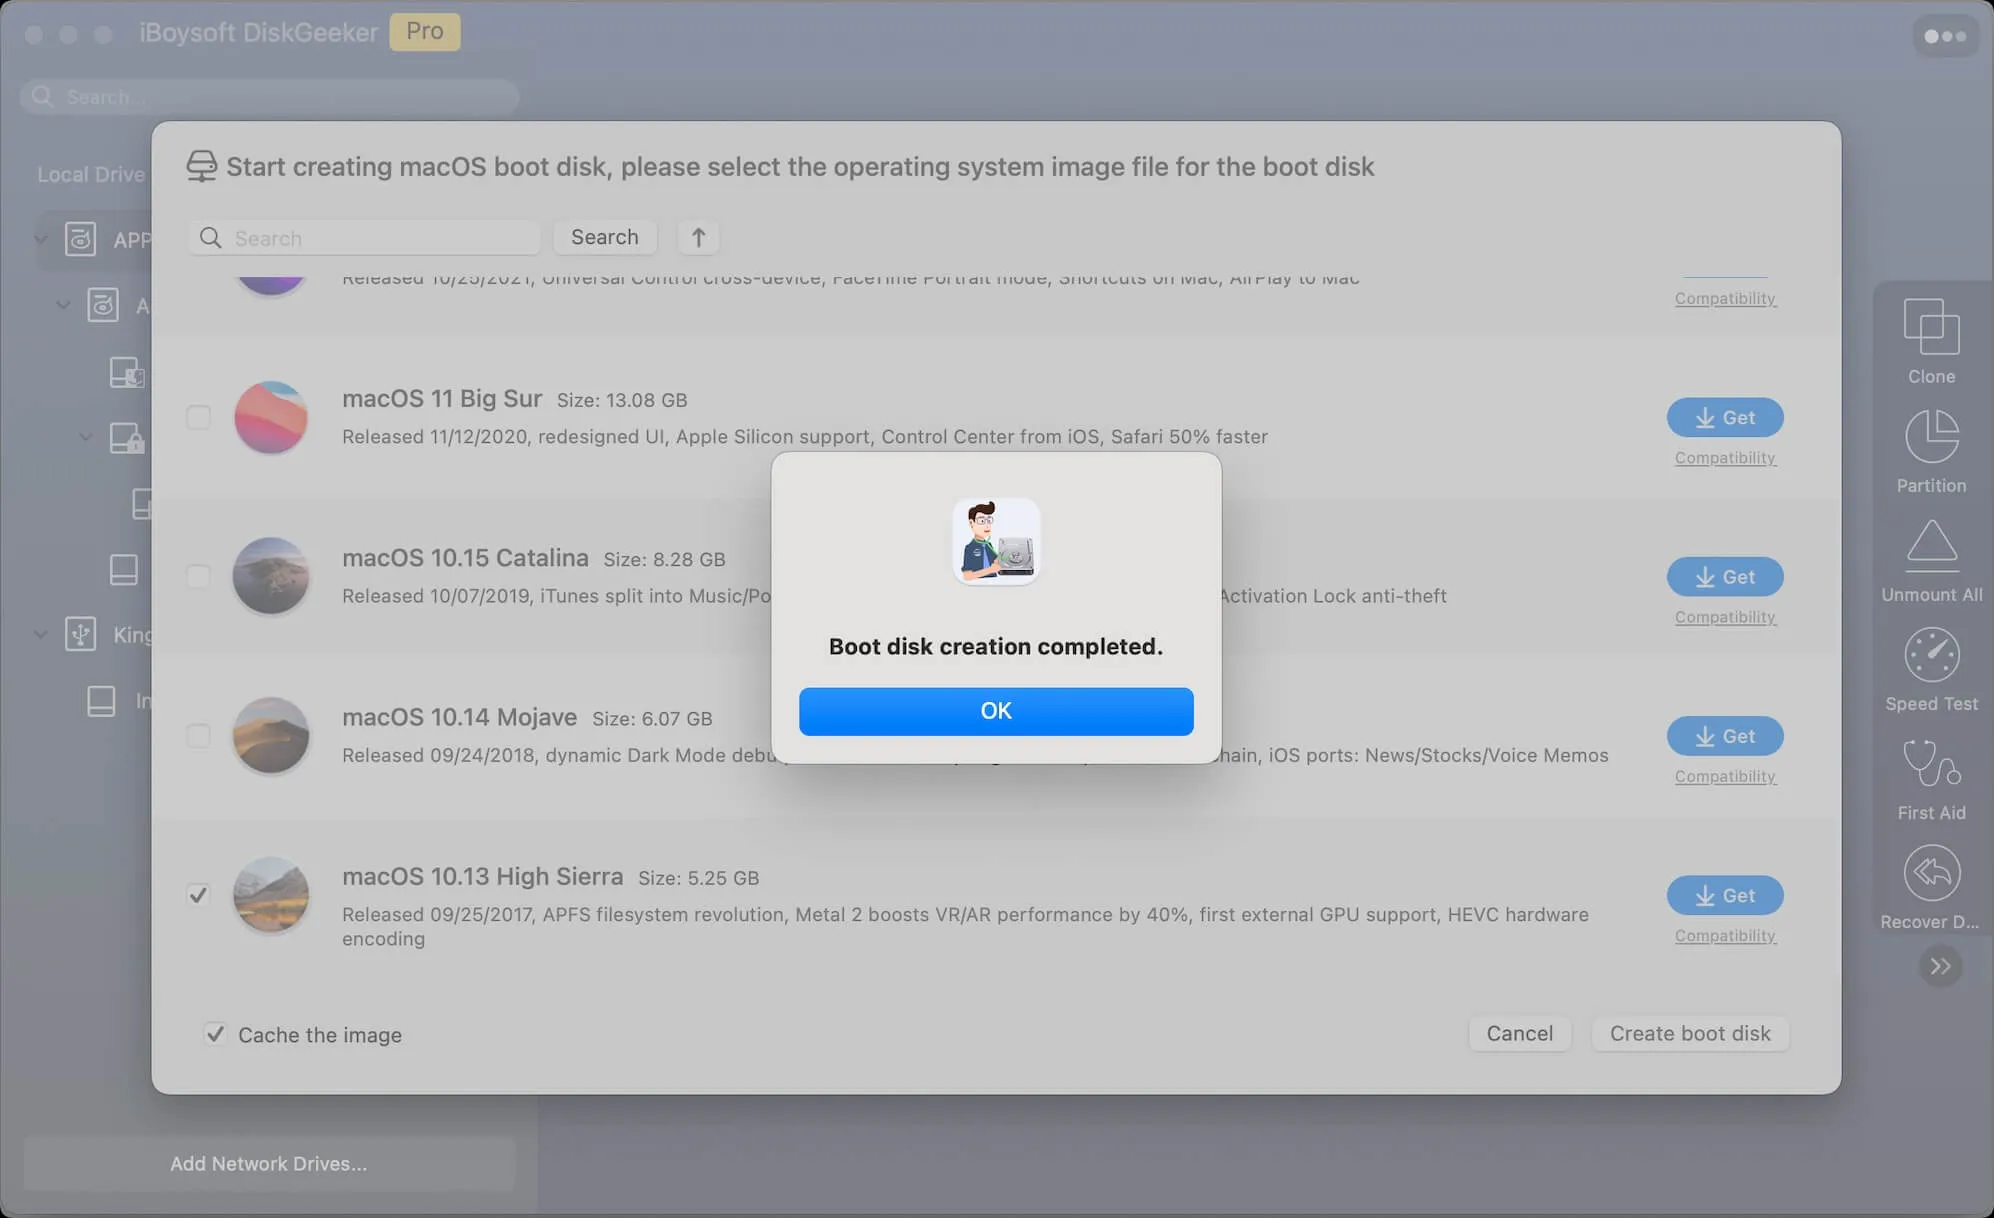
Step 3: Select the USB intended to hold the macOS Sierra installer and click Create boot disk.
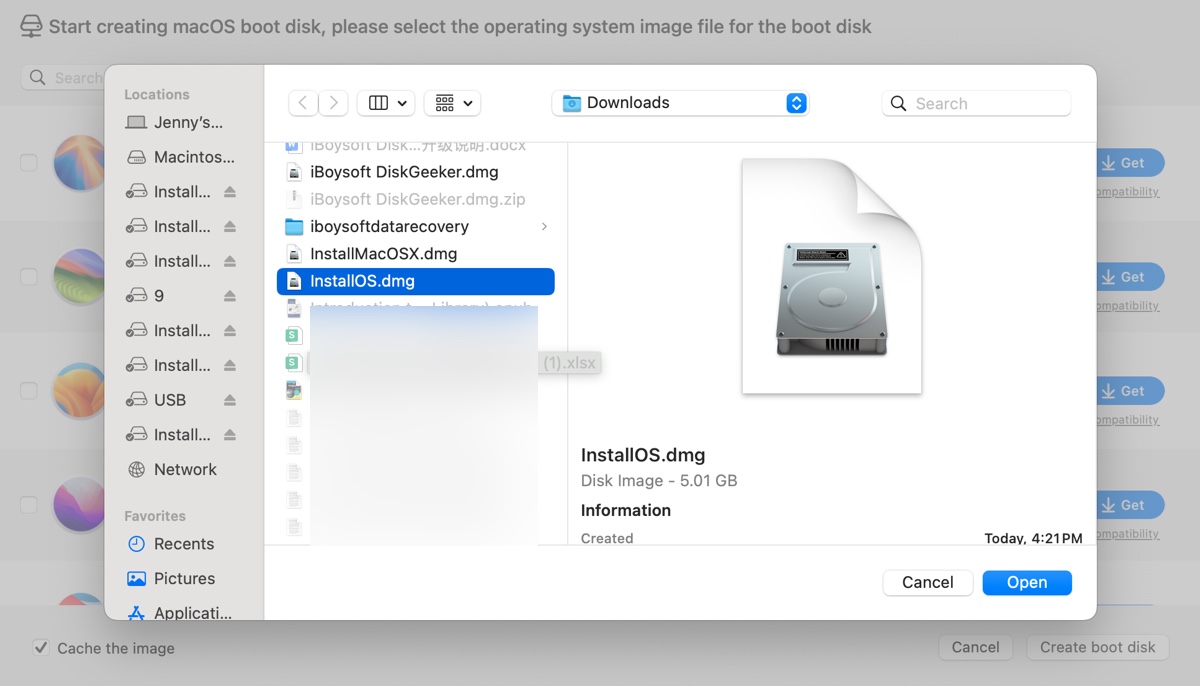
Step 4: Click Create boot disk > Browse Images, then browse to find the downloaded macOS Sierra DMG file.
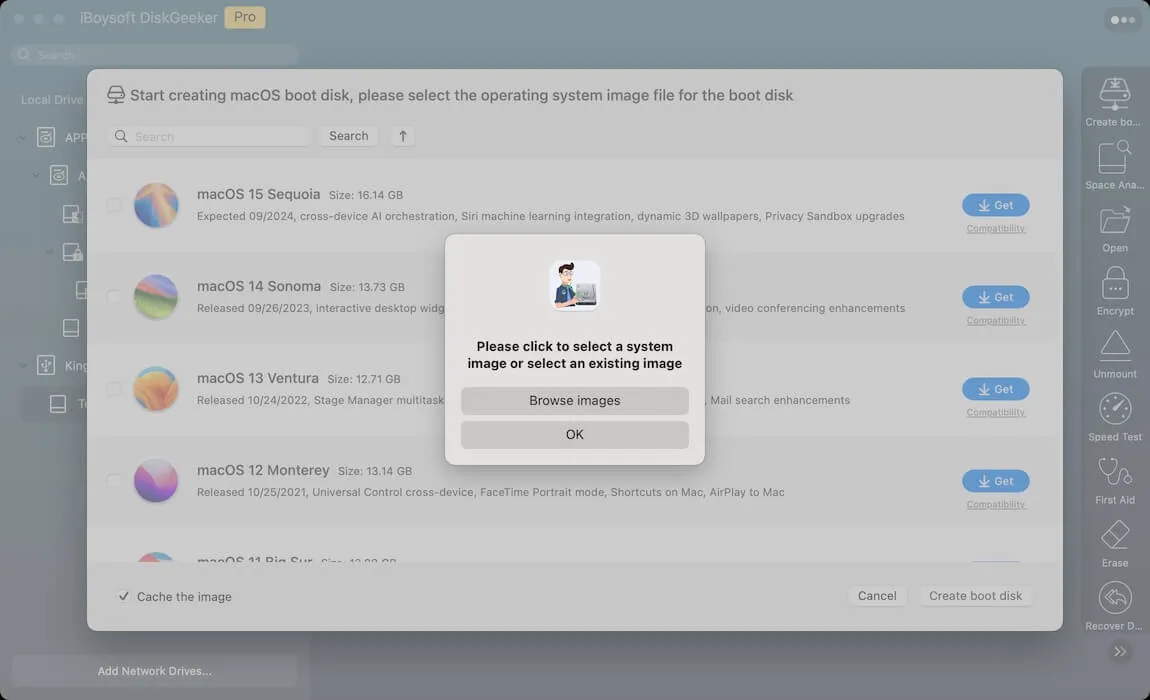
Step 5: Tap OK to confirm erasing the disk. Then the bootable macOS Sierra installer will be created automatically.
If you insist on making the boot drive manually, prepare a compatible Mac that supports macOS Sierra and go through the steps below:
- Step 1: Download the macOS Sierra installer
- Step 2: Erase the external USB
- Step 3: Create the macOS Sierra 10.12 bootable USB in Terminal
- Step 4: Install Sierra from USB
Step 1: Download the macOS Sierra installer
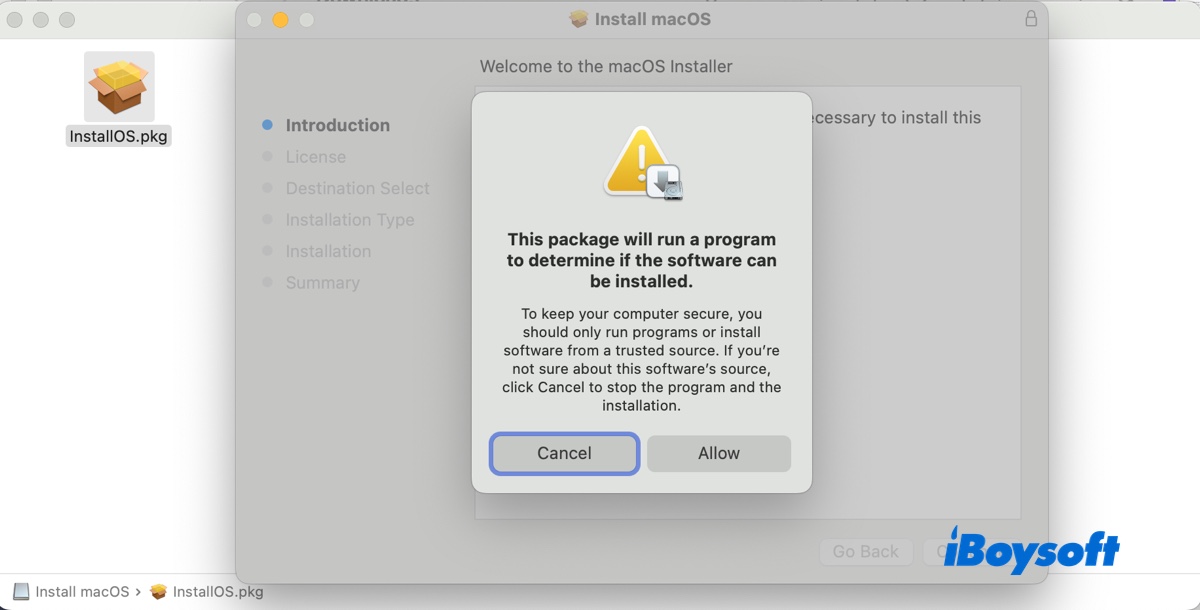
Apple still provides the macOS Sierra DMG file for users who need to install it. You can click this link to download the macOS Sierra installer. After downloading, double-click the DMG file named Install macOS, then double-click the PKG file inside, and follow the onscreen instructions to install the macOS Sierra installer to your Applications folder.
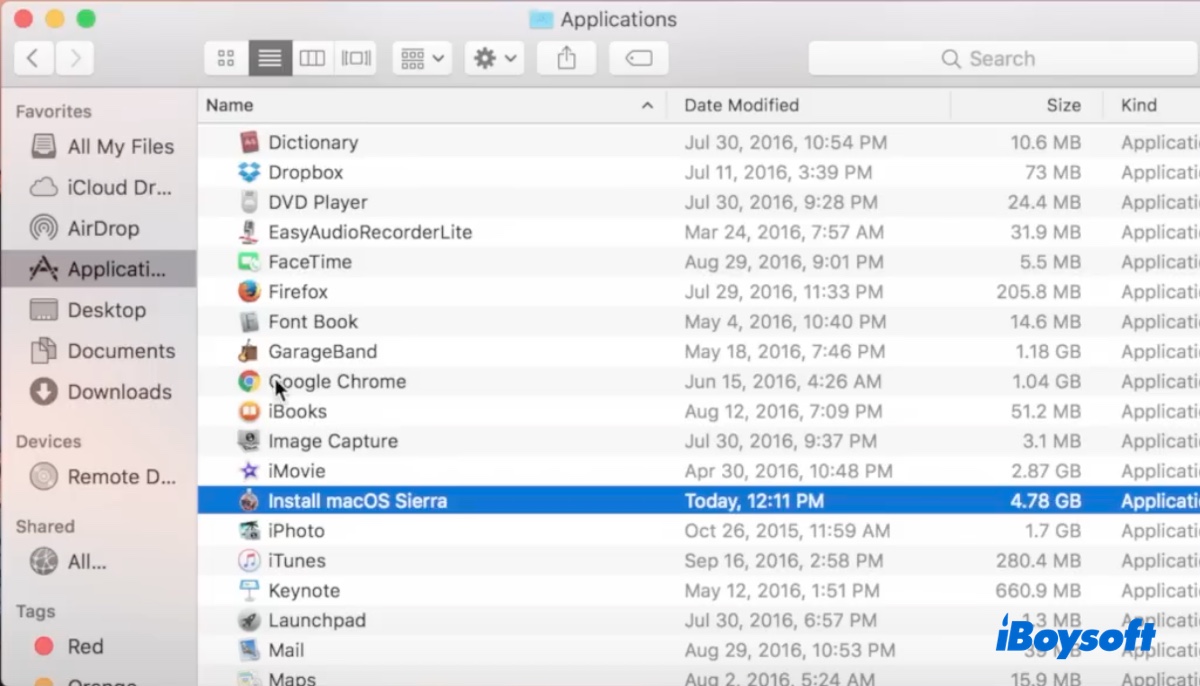
Go to the Applications folder and ensure the Install macOS Sierra.app is listed.
Step 2: Erase the external USB
With the installer ready, the next step is to prepare the USB drive. Be reminded that this step will erase all data on the selected USB drive.
- Open Disk Utility.
- Click View > Show All Devices.
- Select the USB drive and click Erase.
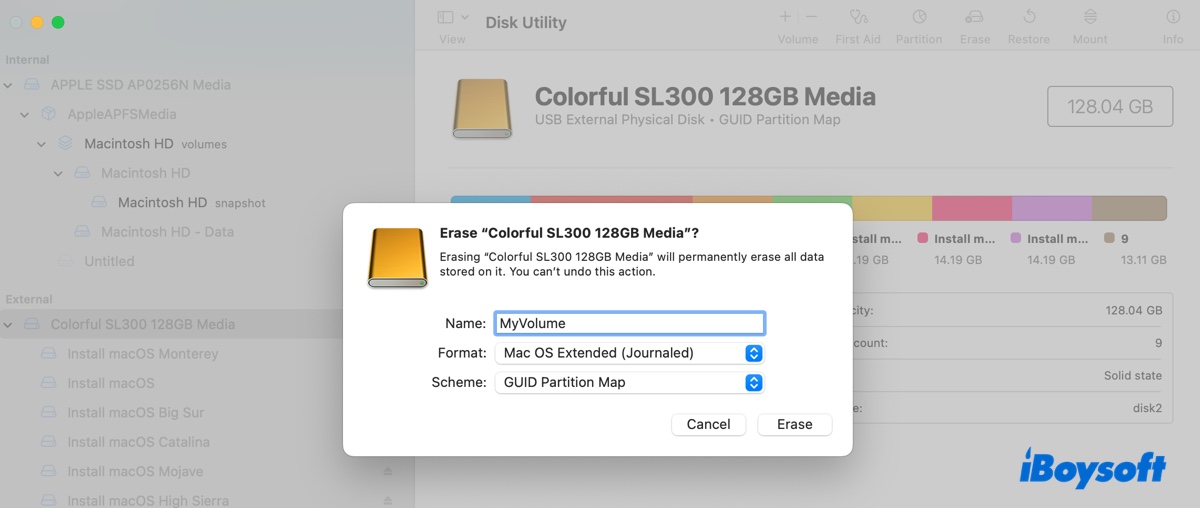
- Name the drive MyVolume.
- Choose Mac OS Extended (Journaled) as the format.
- Choose GUID Partition Map as the scheme.
- Click Erase.
Step 3: Create the macOS Sierra 10.12 bootable USB in Terminal
Now, you're ready to create a macOS Sierra boot USB from Terminal. Please copy the exact command instead of typing to prevent syntax errors.
- Launch Terminal.
- Copy and paste the command below into Terminal and hit Enter. (Pay attention to the name of the installer. If it's not Install macOS Sierra.app, revise the command with the actual installer name displayed in the Applications folder.)
sudo /Applications/Install\ macOS\ Sierra.app/Contents/Resources/createinstallmedia --volume /Volumes/MyVolume --applicationpath /Applications/Install\ macOS\ Sierra.app --nointeraction(The picture below appends the &&say command, which isn't essential for creating the boot drive.)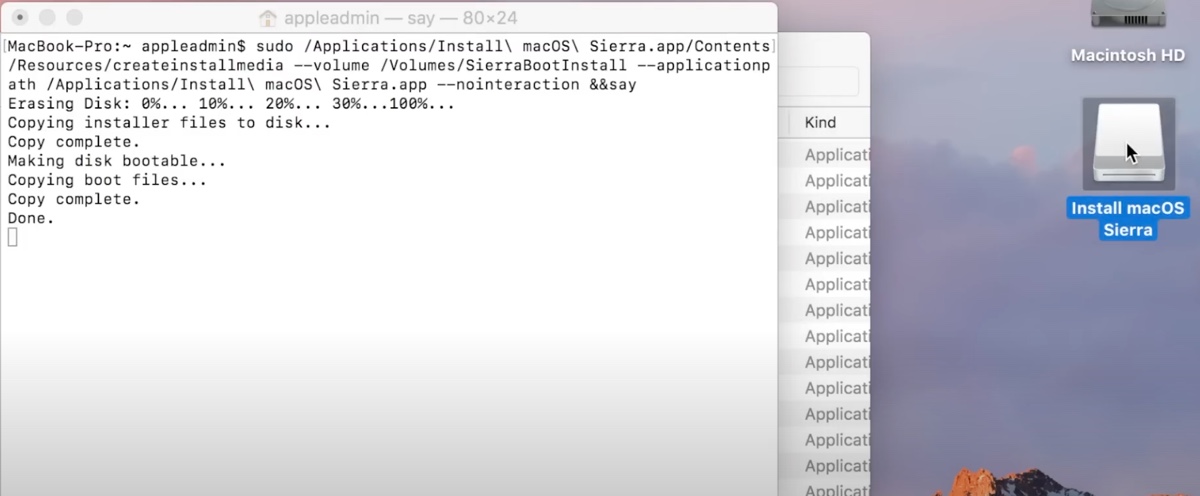
- Type your administrator password and hit Enter. (The password won't echo to the screen.)
- When prompted, type Y to confirm that you want to format the drive and press Enter.
- When Terminal says "Install media now available at "Volumes/Install macOS," your USB drive is ready.
If you can't create the bootable macOS Sierra USB drive, fix it with this guide: Can't Create Bootable USB Installer on Mac
Step 4: Install Sierra from USB
The final step is to boot from the macOS Sierra USB and install it on your Mac or an external drive, depending on your purpose.
Follow the proper steps below to boot your Mac from the bootable macOS Sierra USB installer.
How to boot from macOS Sierra USB installer:
On an Intel-based Mac: (If you have a T2 Mac, make sure Startup Security Utility is set to allow booting from external or removable media.)
- Turn off your Mac.
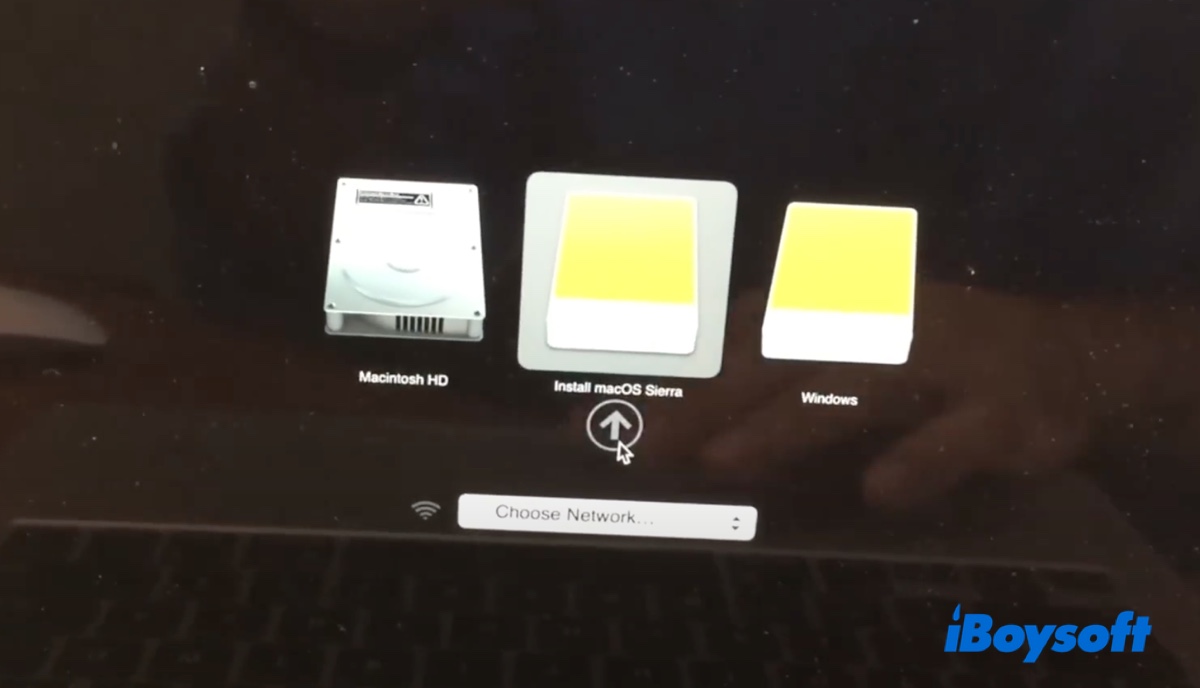
- Press the power button, then immediately press and hold the Option key.
- Release the key when you see a dark screen showing bootable volumes.
- Choose the bootable macOS Sierra installer and click the onscreen arrow.
On an Apple Silicon Mac:
- Shut down your Mac.
- Press and hold the power button until your Mac boots up and loads startup options.
- Choose the macOS Sierra 10.12 bootable USB and click Continue.
Then you can install macOS Sierra with the following steps.
How to install Sierra from USB:
- In the Utilities window, choose your language if asked.
- Select Install macOS Sierra from the Utilities window and click Continue.
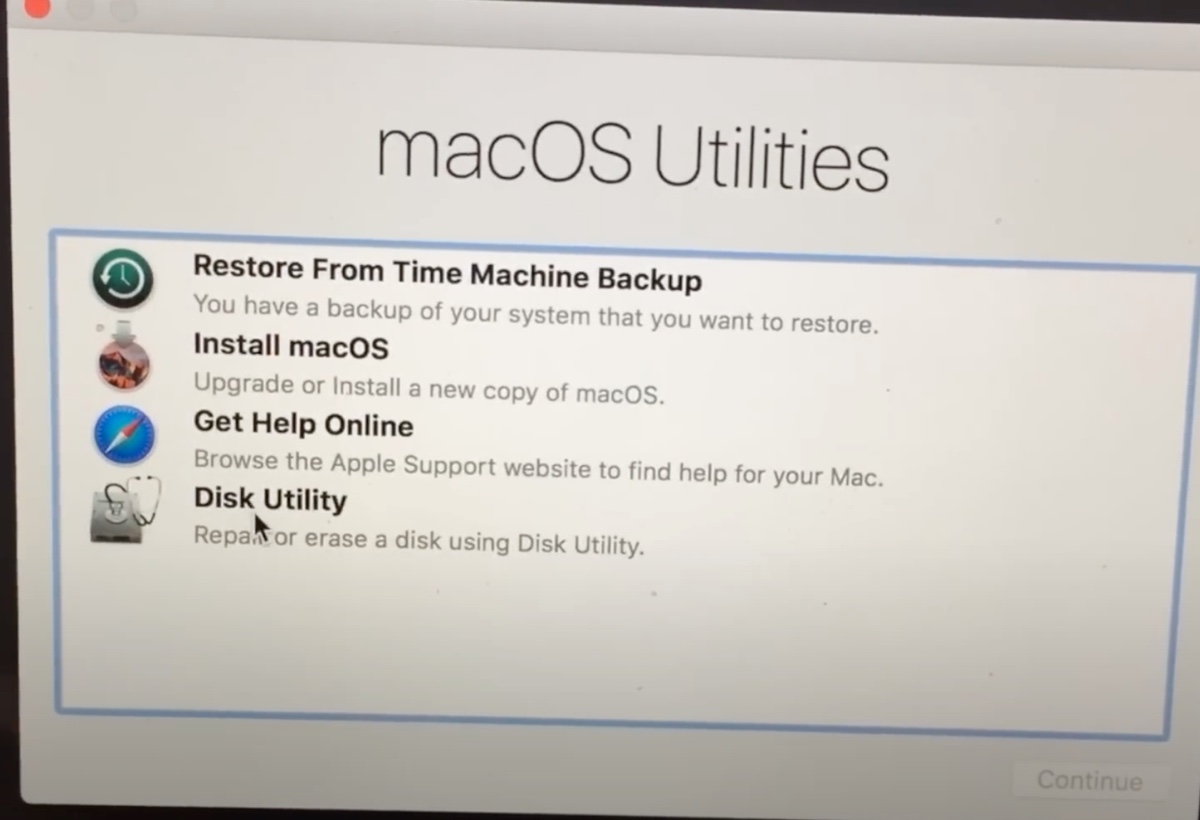
- Follow the instructions on the screen.
- When selecting the disk where you want to install macOS Sierra, choose your internal hard drive (Macintosh HD).
- If you want to install Sierra on the USB drive, choose it instead.

This is how to create a macOS Sierra 10.12 bootable USB from DMG. Share it with others!
How to create macOS Sierra boot USB in Windows 11/10/8/7?
If you don't have a Mac to create the macOS Sierra bootable USB installer, you can use your Windows PC with a tool like TransMac. With it, you can restore the macOS Sierra DMG file to the external USB drive to make it bootable.
Continue reading this guide for more details: How to Create macOS Bootable USB from Windows 10/11/8/7