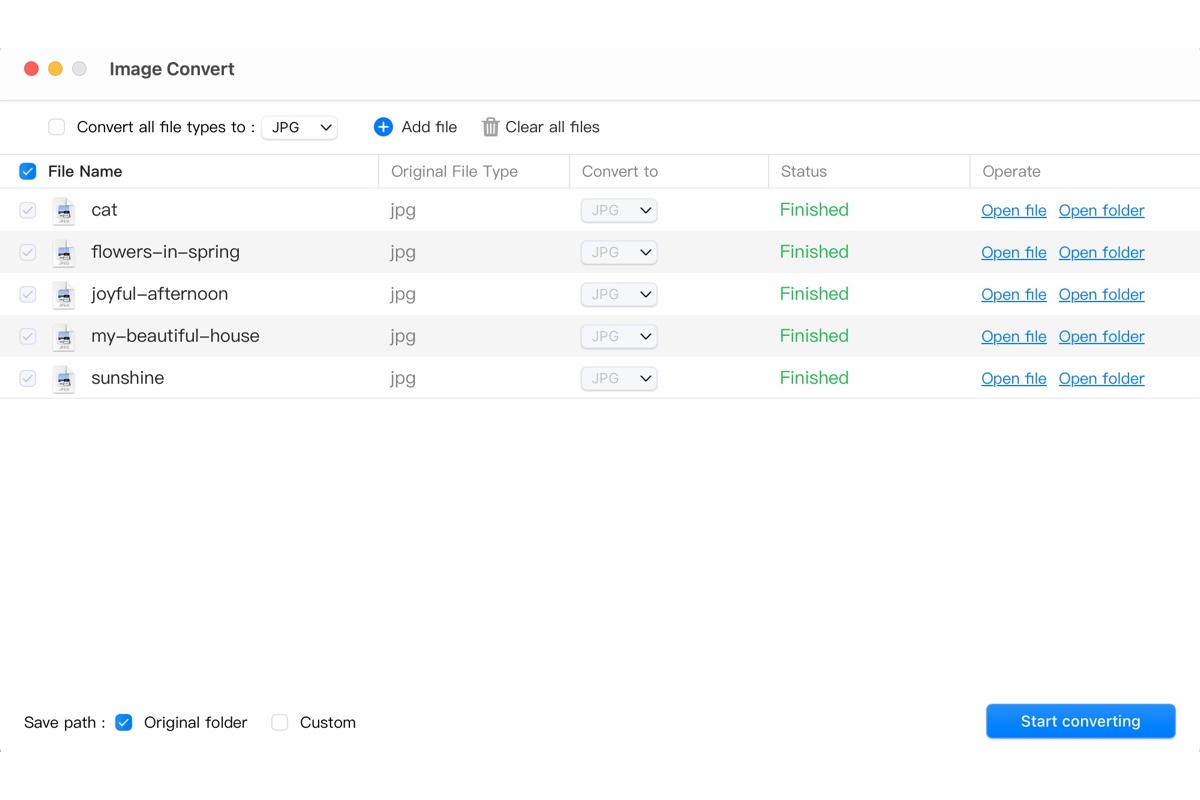
Although JPEG and JPG are often used interchangeably, there are situations where you may need to convert JPEG to JPG on Mac. Perhaps you're trying to upload an image to a website that only accepts JPG files, or maybe you just prefer the JPG format.
Regardless of the reason, converting JPEG to JPG on a Mac can be a straightforward process. In this post, we'll guide you through the steps to change JPEG to JPG on Mac.
| How to convert image to JPG on Mac | Efficiency |
| Turn a JPEG into a JPG via iBoysoft MagicMenu | High - Right-click to batch convert images to JPG/PNG/WEBP quickly; no need for uploading and downloading images |
| Change from JPEG to JPG by renaming the extension | Medium - Slightly more complex to batch change images from JPEG to JPG; may fail |
| Convert JPEG to JPG with online converters | Medium - Need to upload images and download converted files |
How to convert JPEG to JPG on Mac?
The maximum 3-letter limit for file extension was never applied to Unix systems, so Mac operating systems continued using the .jpeg extension to save images. That's why you may need a bit of tweak to change images to .jpg on Mac. Typically, there are three ways to convert JPEG files to JPG files on Mac.
Way 1: Convert JPEG to JPG on Mac using iBoysoft MagicMenu
The easiest and most efficient way to convert from JPEG to JPG on Mac is by using iBoysoft MagicMenu. It's a Finder context menu extension utility that allows you to convert image files to different formats, including JPEG to JPG. With it, you can right-click to batch convert JPEG images to JPG on Mac, without the need to launch an app or upload and download files.
Here's how to batch convert JPEG to JPG on Mac:
Step 1: Download and install the JPEG to JPG converter for free.
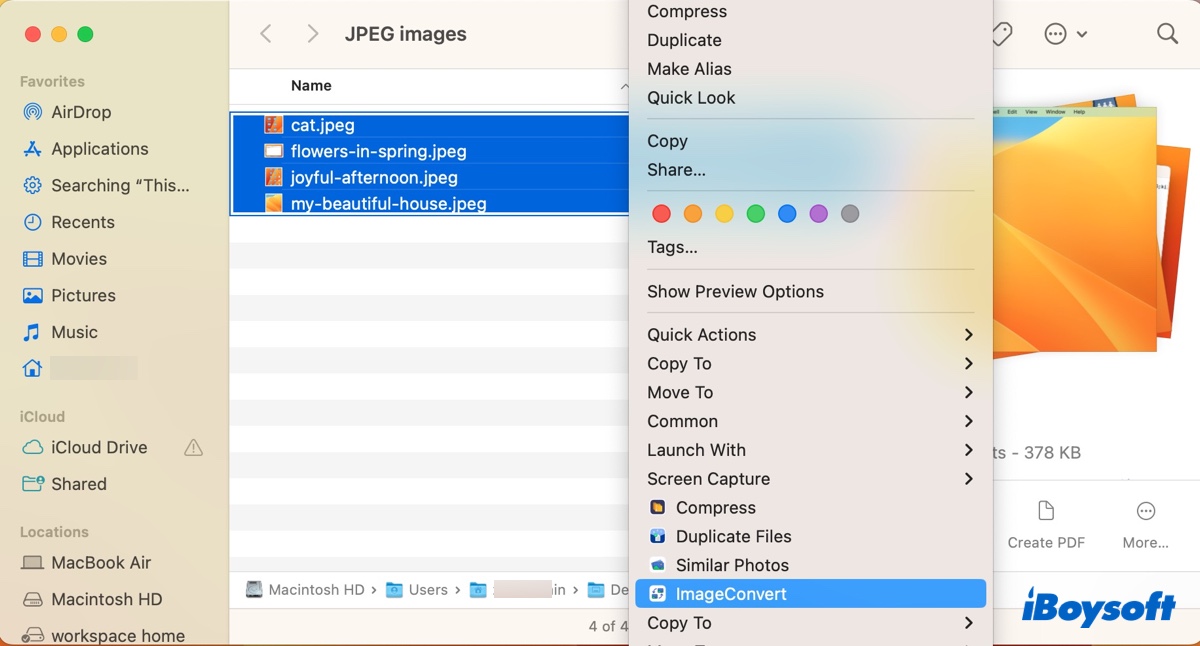
Step 2: Select the JPEG images you want to change to JPG formats, then right-click on them and select "ImageConvert."
A window will open with all your JPEG images selected.
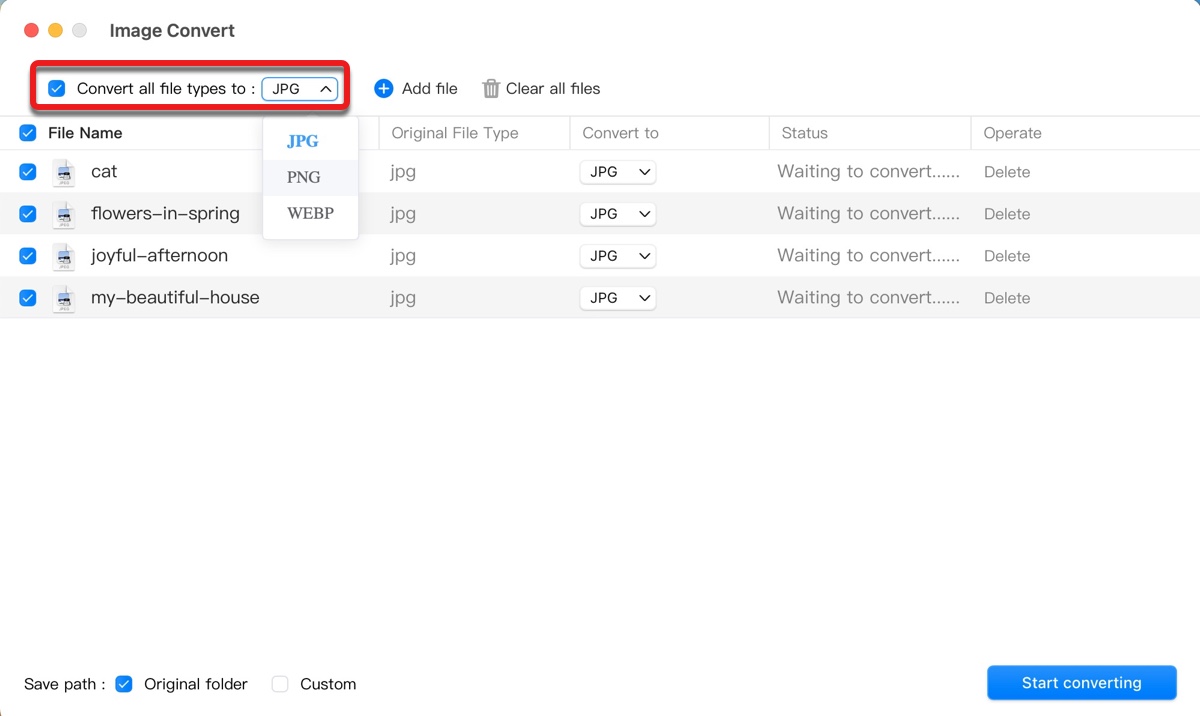
Step 3: Check the box next to "Convert all file types to" and select "JPG."
If you notice the "Original file type" column lists your JPEG files as jpg, don't be surprised. As we mentioned earlier, .jpeg and .jpg are two extensions for the same format.
Step 4: Choose whether to save the converted JPG files to the original folder.
If you'd like to store the JPG images in a different folder, check the box next to "Custom" and select the desired location. If you choose to keep using the original folder, the converted files will have an extra word (1) added to their name to avoid conflicts with the original JPEG images.
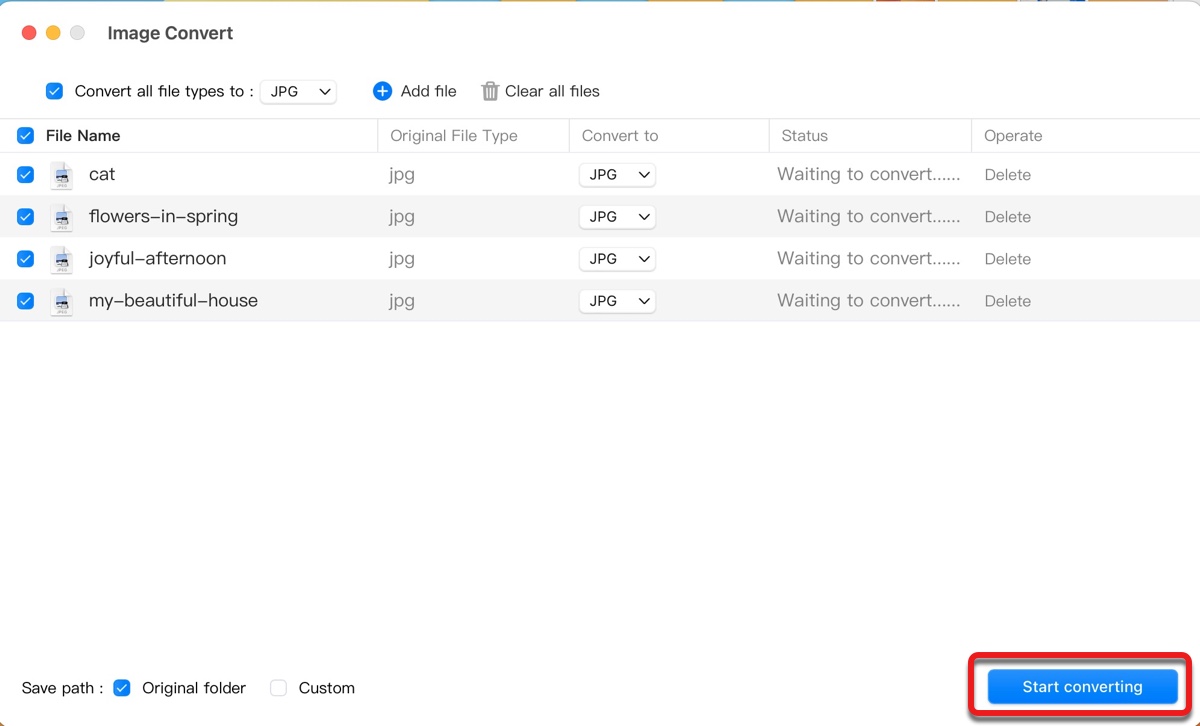
Step 5: Click "Start converting."
The speed of the conversion depends on the number and size of files being processed. After the images are converted successfully, you can check them in the directory you chose to save them. It's worth mentioning that both .jpg and .jpeg extensions are categorized as JPEG images on Mac.
Share this JPEG to JPG converter to help more users convert images on Mac!
Way 2: Change JPEG to JPG on Mac by renaming the extension
Another way to change JPEG to JPG on Mac is by renaming the extension. It's different from converting images, as the extension name is the only thing being modified. Therefore, it won't affect the file size or image quality of the JPEG files. However, this method may not work for some sites that require .jpg files. If this is the case, try iBoysoft MagicMenu instead.
How to change JPEG to JPG on Mac:
- Right-click on the JPEG file and select Rename.
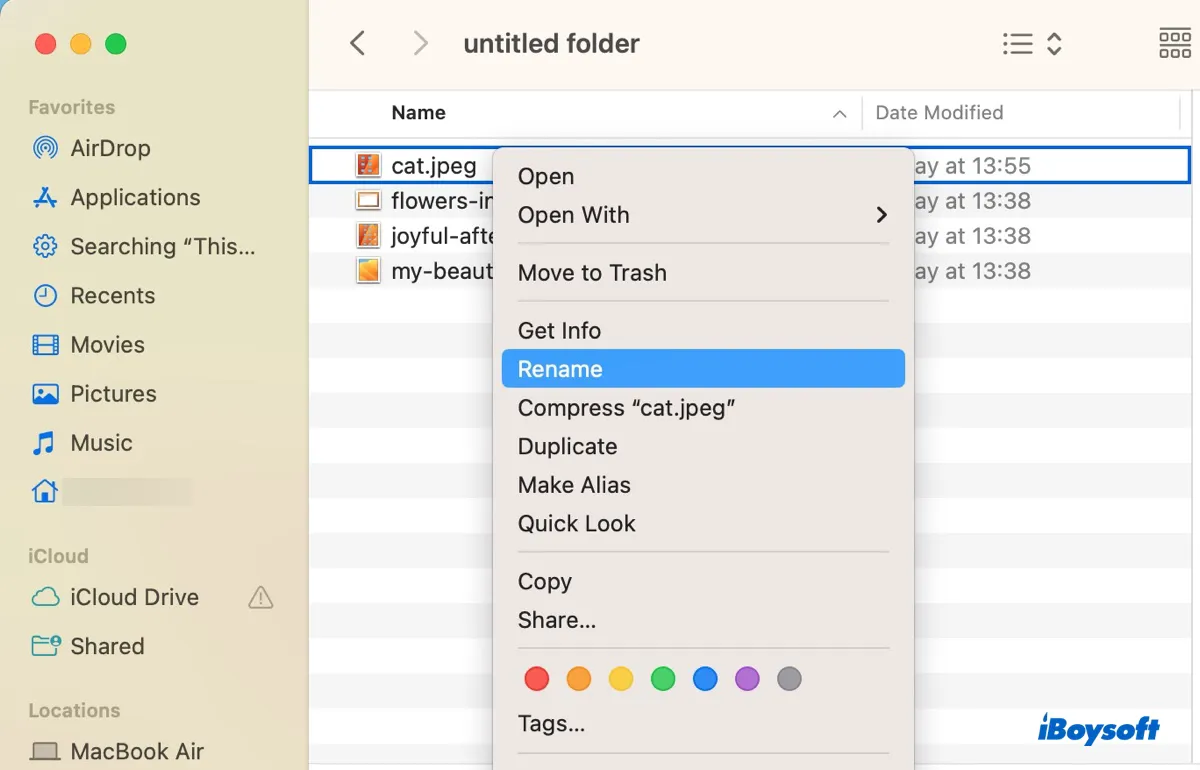
- Move the pointer to the extension and delete the letter e.
- Press the Enter key.
If you want to batch change JPEG images to JPG on Mac, try the following steps instead:
- Select all the files you want to change the file extension for.
- Right-click them and choose "Rename…."
- In the "Rename Finder Items" pop-up window, ensure "Replace Text" is selected.
- Enter jpeg in the "Find:" section and jpg in the "Replace with:" field.
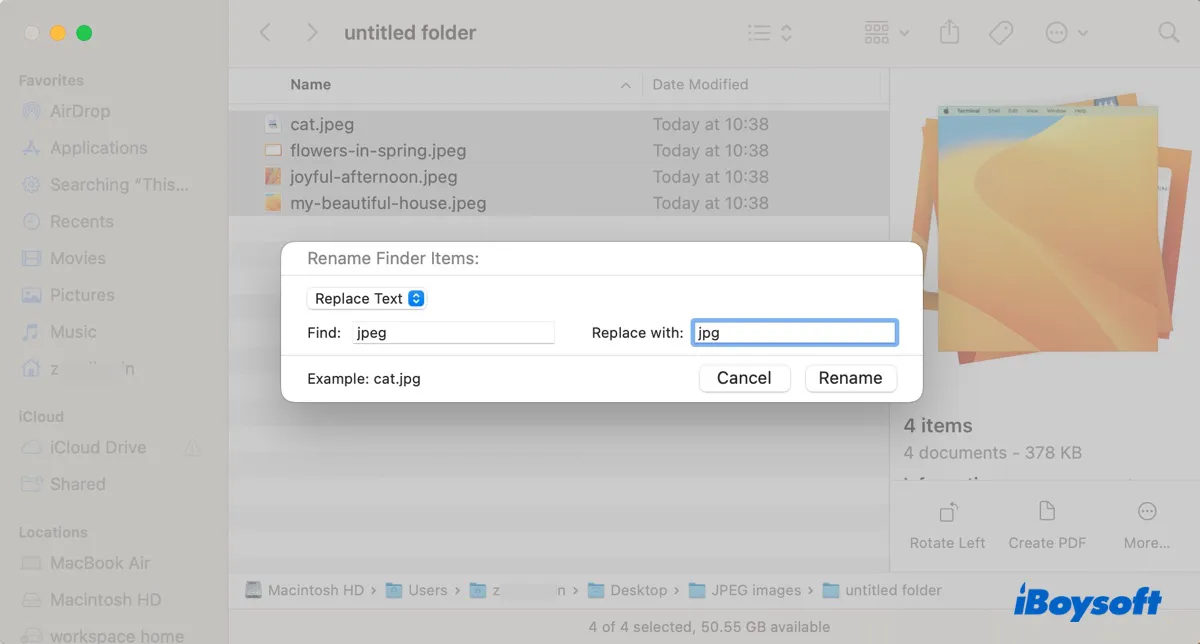
- Press the Rename button to batch rename all the selected files with the .jpg extension.
Way 3: Convert JPEG to JPG on Mac using online converters
Alternatively, you can use an online converter to convert JPEG to JPG on Mac. If you search for free JPEG to JPG converter in a search engine, you should get a bunch of results. Select one, then you can upload the JPEG images you want to convert, click Convert, then download the JPG files to your Mac.
Now that you know how to convert from JPEG to JPG on Mac, don't forget to share it with more people!
JPEG vs. JPG: Are they the same?
JPEG, which stands for Joint Photographic Experts Group, is a widely used format for storing and sharing digital images. Meanwhile, JPG is a shortened version of JPEG that only exists because earlier versions of Windows operating systems (MS-DOS 8.3 and FAT-16) don't support extensions with more than 3 letters.
Therefore, JPEG and JPG are essentially the same file formats with the only difference being the number of characters used in the file extension. Still, some applications or websites may only accept files with the JPG extension.
Will converting JPEG to JPG on Mac reduce the image quality?
Generally speaking, converting from JPEG to JPG won't reduce the image quality, as they are fundamentally identical formats. But sometimes, you may notice that the converted JPG file has a larger file size. One likely reason for the file size increase is that your image converter uses a different color profile.
To verify this, right-click on both the original JPEG image and the converted JPG image and select "Get Info" to compare their color profiles.
A color profile is used to ensure that colors in an image appear consistent and accurate on different devices. The default color profile for Mac displays is color LCD, which is ideal for general use such as web browsing, document editing, email, etc.
However, the color profile used by most digital images is sRGB IEC61966-2.1 because it's compatible for most devices and applications. Your image converter may use the more popular sRGB as color profile when converting from JPEG to JPG and cause the file size to be larger.
Tips for saving screenshots to JPG on a Mac
If you prefer using the .jpg extension on Mac, here's a simple tip to change the default screenshot formats to JPG on Mac.
- Open Finder, then launch Terminal from the Applications/Utilities folder.
- Copy and paste the following command into Terminal and press Enter.defaults write com.apple.screencapture type JPG;killall SystemUIServer
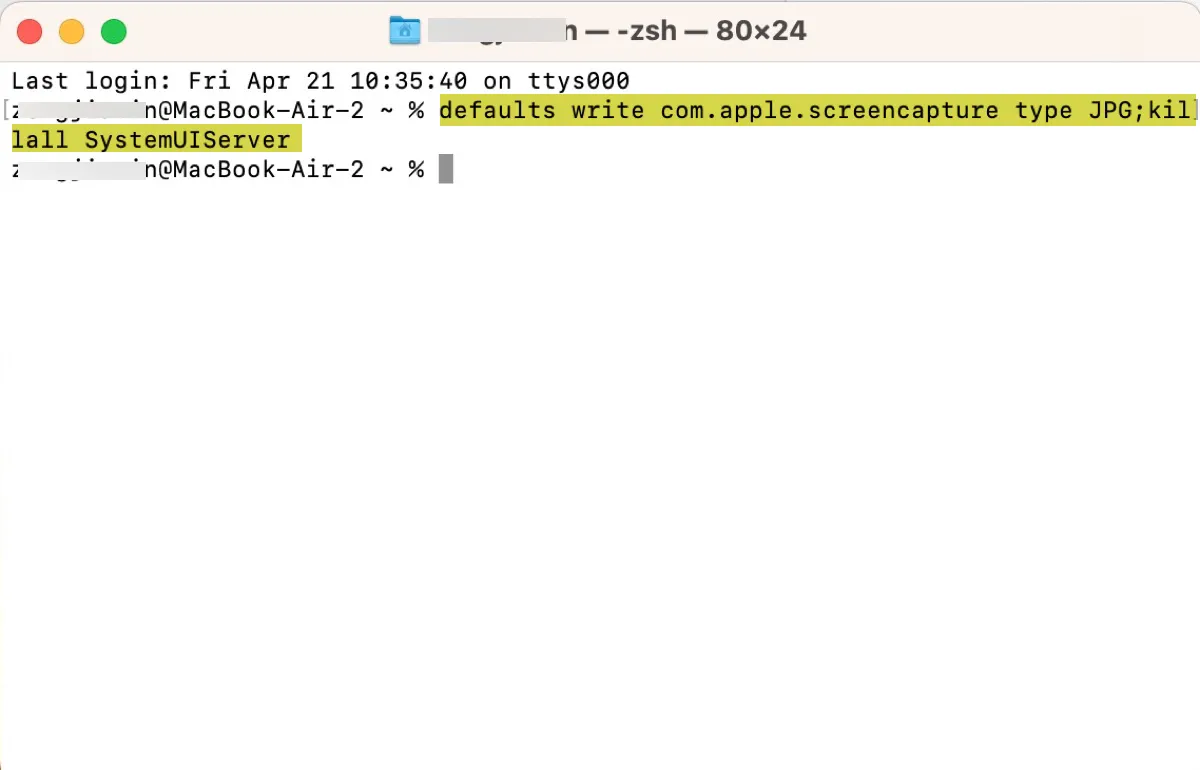
From now on, every screenshot you take will automatically be saved as a JPG file.
FAQs about converting JPEG to JPG on Mac
- QHow to change the format of a picture on Mac?
-
A
You can change the format of a picture on Mac using Preview, the built-in image viewer and editor on your Mac. Preview is sufficient for most basic image conversion needs, such as converting to JPEG, JPEG 2000, PD, PNG, PSD, TIFF.
However, if you need to convert images to JPG, or WEBP, consider a third-party app like iBoysoft MagicMenu.
Follow the steps below to convert images on Mac using Preview:
1. Open the file you want to convert in the Preview app.
2. Choose File > Export from the top-left menu bar.
3. Choose a file type and click Save.
- QCan you save as JPG on Mac?
-
A
Yes, you can save as JPG on Mac by converting images with a third-party app, renaming the extension, or using an online converter.
- QWhere is the JPG to PDF tool on Mac?
-
A
You can use the Preview app to export JPG files to PDF on Mac. Simply open the JPG file with Preview, then choose File > "Export as PDF" and select the destination folder where you want to save the converted PDF file.
- QWhat is the best way to convert photo to JPG?
-
A
The best way to convert a photo to JPG is by employing an image converter like iBoysoft MagicMenu. It's an extension that you can use to convert images to JPG on Mac in bulk with a simple right-click.
